3D Laser Scanning in Construction: A Guide
3D Laser Scanning in Construction: How LiDAR Is Saving Contractors Millions in Rework
Rework is one of the biggest profit killers in construction. Industry studies consistently show that rework accounts for 5 to 12 percent of total project costs, and most of it traces back to one root cause: bad information about existing conditions.
A framing crew shows up to a renovation and discovers the existing steel is 3 inches off from what the drawings show. A mechanical contractor hangs ductwork based on design documents, only to find that the structural beams are lower than expected. A facade installer orders curtain wall panels based on as-built drawings that do not match the actual building.
Every one of these scenarios burns money, eats schedule, and frustrates your team. And every one of them is preventable with 3D laser scanning.
This guide covers what 3D laser scanning is, how it works on construction projects, when to use it, what it costs, and how to get started whether you are a GC, specialty contractor, or owner’s rep.
What Is 3D Laser Scanning?
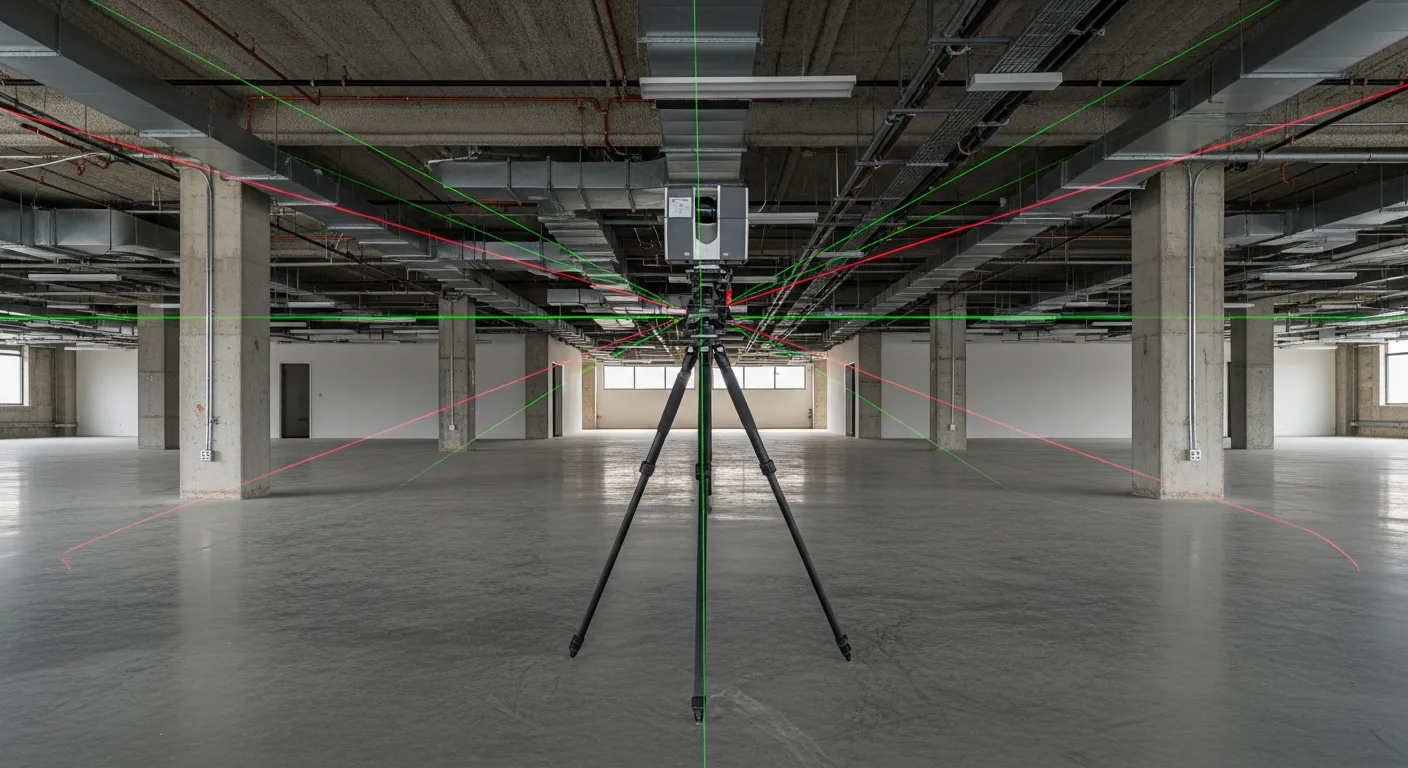
3D laser scanning, also called LiDAR scanning or reality capture, uses a device that emits laser pulses and measures the time it takes for each pulse to bounce back from surrounding surfaces. By firing millions of pulses per second while rotating 360 degrees, the scanner captures the geometry of everything around it with millimeter-level accuracy.
The result is a “point cloud,” a dataset containing millions or billions of individual XYZ coordinate points that together form a precise three-dimensional representation of the scanned environment. Think of it like a photograph, but instead of capturing light and color, it captures exact measurements of every visible surface.
The Hardware
The most common scanners on construction sites today include:
- Leica RTC360: A popular choice for its speed (2 million points per second) and automated registration, which stitches multiple scans together automatically
- Faro Focus Premium: Known for accuracy and reliability, widely used in MEP coordination and quality control
- Trimble X7: Self-leveling and auto-calibrating, designed for ease of use on busy jobsites
- Matterport Pro3: More accessible price point, popular for interior documentation and virtual tours, though less precise than survey-grade units
Prices range from $10,000 for entry-level devices to $100,000 or more for high-end survey-grade scanners. Most construction applications require something in the $30,000 to $60,000 range.
The Software
Raw point cloud data is not useful on its own. You need software to process, view, and extract value from scans. Common platforms include:
- Autodesk ReCap: Processes and visualizes point clouds, integrates with Revit and AutoCAD
- Leica Cyclone: Full-featured registration and analysis software
- CloudCompare: Open-source point cloud processing (free, surprisingly capable)
- Verity by ClearEdge3D: Automatically compares point clouds to BIM models for QA/QC
- Faro Scene: Processes data from Faro scanners with registration and visualization tools
The software side is where the real value gets created. A point cloud sitting on a hard drive is just data. Processed and compared against design models, it becomes actionable intelligence.
Where Laser Scanning Saves Contractors Money
Let’s get specific about where scanning delivers ROI on actual projects.
1. Existing Conditions Documentation
This is the most common use case and often the highest-value one. Before any renovation, addition, or tenant improvement project, you need accurate information about what already exists. Traditional methods involve a crew with tape measures, laser distance meters, and a lot of time. They capture hundreds of measurements and inevitably miss some.
A laser scan captures everything. Every beam, column, pipe, duct, conduit, wall offset, and floor elevation in the space. The scan does not forget to measure something because it captures all visible surfaces automatically.
One mechanical contractor told us that switching to laser scanning for existing conditions reduced his field measurement time by 80 percent and virtually eliminated rework from dimensional errors. On a $2 million tenant improvement, that translated to roughly $60,000 in avoided rework.
2. MEP Coordination and Clash Detection
On new construction, scanning the structure after framing and before MEP rough-in gives you an accurate model of what was actually built, not just what was designed. Comparing this scan against the MEP coordination model reveals clashes before your plumbers and electricians discover them the hard way.
Even on well-coordinated projects, field conditions vary from the BIM model. Steel connections might be slightly different. Concrete walls might not be perfectly plumb. Slab elevations might vary by half an inch. These small deviations can create big problems for trades that need precise clearances.
Scanning after framing and sharing the point cloud with your MEP subs gives everyone accurate data to work from. It costs a few thousand dollars and can prevent tens of thousands in field modifications.
3. Quality Assurance and Verification
Is that concrete wall plumb? Is the steel in the right place? Is the curtain wall mullion spacing correct? Are the anchor bolts where they need to be?
Laser scanning answers all of these questions with data instead of guesswork. Software can automatically compare scan data to the design model and flag deviations that exceed your tolerances. Instead of a superintendent with a plumb bob checking a few spots, you get a complete verification of every surface.
This is especially valuable for:
- Concrete formwork verification before pours
- Steel erection verification before connections are completed
- Curtain wall anchor and embed placement
- Elevator shaft plumbness
- Floor flatness and levelness (FF/FL numbers)
4. Progress Monitoring
Scanning at regular intervals during construction creates a time-stamped record of what was built and when. This data supports schedule tracking, payment applications, and dispute resolution.
If an owner questions whether you hit a milestone, the scan data provides objective evidence. If a subcontractor claims they completed work by a certain date, the scan confirms or refutes it. This documentation is especially valuable on large commercial and public projects where disputes over progress are common.
5. As-Built Documentation
At project completion, a laser scan creates the most accurate as-built record possible. Traditional as-built drawings are redlined versions of design documents that may or may not reflect actual conditions. Scan-based as-builts capture the real building with millimeter accuracy.
This matters for facility management, future renovations, and insurance documentation. An owner who receives scan-based as-builts has a permanent, accurate record of their building that traditional methods simply cannot match.
How to Run a Laser Scan on a Construction Site
If you have never worked with scanning before, here is what the process actually looks like:
Step 1: Plan Your Scan Positions
Before arriving on site, identify where the scanner needs to be placed to capture the areas you need. Each scan position captures a 360-degree view, but the scanner can only see what it has line of sight to. Columns, walls, and equipment create shadows.
For a typical office floor (10,000 square feet), plan on 15 to 25 scan positions. For a more complex space with many rooms and corridors, you might need 40 to 60 positions. Each position takes 2 to 5 minutes depending on your scanner settings and desired resolution.
Step 2: Set Up Targets (Optional but Recommended)
Placing survey targets (checkerboard spheres or flat targets) around the scan area helps the software accurately register (stitch together) multiple scans. Modern scanners with built-in cameras and IMU sensors can often register scans without targets, but targets improve accuracy, especially in large or featureless spaces.
Step 3: Scan
Set the scanner on a tripod, level it (many scanners self-level), and press start. The scanner rotates, captures data, and signals when it is done. Move to the next position and repeat. A skilled operator can scan an entire floor of a mid-rise building in a few hours.
Step 4: Process and Register
Back in the office (or increasingly, in the field on a laptop), import the raw scan data into processing software. Registration aligns all the individual scans into a single, unified point cloud. Modern software automates most of this process, but manual cleanup is usually needed to remove noise, stray points, and moving objects (like workers who walked through the scan).
Step 5: Deliver Usable Data
The final deliverable depends on what you need:
- Point cloud files (E57 or RCP format) for viewing in Autodesk or other platforms
- 3D mesh models for visualization and virtual walkthroughs
- 2D floor plans and sections extracted from the point cloud
- BIM comparison reports showing deviations from the design model
- Virtual tours for remote stakeholder review
Buy vs. Hire: Making the Business Case
The buy-versus-hire decision comes down to volume and control.
Hiring a Scanning Service
Most contractors start here, and it makes sense. A scanning service brings the equipment, expertise, and software. You get deliverables without a capital investment or learning curve.
Typical costs:
- Small interior space (under 5,000 SF): $2,000 to $4,000
- Mid-size commercial floor (5,000 to 20,000 SF): $4,000 to $8,000
- Large building or campus: $8,000 to $25,000 or more
- Deliverable processing adds 20 to 50 percent to scan costs
The downside is scheduling. You are dependent on the service provider’s availability, and emergency scans (like verifying a suspected defect before concrete placement) may not be feasible on short notice.
Buying a Scanner
If you are running multiple projects that benefit from scanning, owning equipment gives you flexibility and lower per-scan costs. Here is a rough business case:
- Scanner hardware: $40,000 to $60,000
- Software licenses: $5,000 to $15,000 per year
- Training: $3,000 to $5,000
- Annual operating cost (after year 1): $10,000 to $20,000
If you would otherwise hire a scanning service 15 to 25 times per year, buying breaks even within the first year or two. Plus, you gain the ability to scan whenever you need to, not just when you can schedule and budget for an outside service.
The Hybrid Approach
Many contractors buy an entry-level or mid-range scanner for routine work (existing conditions, progress documentation) and hire a service for high-precision or complex deliverables (BIM comparison, full as-built packages). This gives you daily flexibility while preserving access to specialized expertise.
Common Mistakes When Adopting Laser Scanning
Scanning Without a Plan
Walking onto a site and scanning randomly produces a lot of data but not much value. Before every scan, define what you need to capture, why, and what deliverables you will produce. This focuses the scan, reduces time, and ensures the data actually serves a purpose.
Ignoring File Management
A single scan session can produce 50 to 200 gigabytes of data. Multiply that by multiple scan sessions across multiple projects, and you quickly have a storage problem. Establish a file naming convention, folder structure, and storage strategy before your first scan. Cloud storage with version control is strongly recommended.
Not Connecting Scans to Project Workflows
Scan data is most valuable when it is connected to your project management workflow. If the scan reveals a dimensional conflict, that information needs to become an RFI, get tracked, and get resolved. If the scan documents progress, that data should feed into your daily logs and schedule updates.
This is where construction project management software like Projul makes a difference. When scan deliverables live alongside your schedules, budgets, daily logs, and team communication, the insights actually drive action instead of sitting in a folder nobody opens.
Expecting Perfection From Day One
Your first few scans will be slower and produce less polished deliverables than a specialized service. That is normal. Like any tool, scanning has a learning curve. Plan for it, and do not judge the technology’s value based on your first attempt.
The Future of Scanning in Construction
Several trends are worth watching:
Mobile and Wearable Scanning
Handheld scanners and even iPhone LiDAR are getting better every year. While they cannot match the accuracy of tripod-mounted survey-grade units, they are increasingly useful for quick measurements, room documentation, and progress photos with spatial context. The gap between phone-based scanning and professional equipment will continue to narrow.
Automated Processing and AI
Software is getting smarter at automatically extracting useful information from point clouds. AI can now identify pipe sizes, classify structural elements, and detect deviations from BIM models with minimal human input. Within a few years, processing a scan into actionable deliverables will take minutes, not hours.
Integration With Project Management
The industry is moving toward tighter connections between reality capture data and project management platforms. Imagine scanning a floor, having software automatically compare it to the schedule, and flagging areas that are behind. The technology exists; the integration just needs to mature.
Lower Costs
Scanner prices have dropped roughly 50 percent over the past 5 years, and that trend will continue. Entry-level construction scanners that cost $50,000 five years ago are now available for $20,000 to $25,000 with better performance.
Getting Started With Laser Scanning
If you have never used laser scanning on a project, here is a practical path forward:
-
Identify a good first project. A renovation or tenant improvement with complex existing conditions is ideal. The ROI from avoided measurement errors is immediate and obvious.
-
Hire a reputable scanning service. Ask for references from other contractors, and request sample deliverables so you know what to expect.
-
Define your deliverables upfront. Do you need a point cloud file? 2D floor plans? BIM comparison? Knowing what you need prevents over-scanning and over-spending.
-
Share the data with your team. Point cloud viewers are free (Autodesk ReCap, CloudCompare). Get your superintendents and project managers comfortable viewing and navigating scan data.
-
Measure the results. Track time saved on field measurements, rework avoided, and RFIs resolved using scan data. Build a business case for expanded use.
The contractors who are already using laser scanning consistently report that they cannot imagine going back. Once you have worked with accurate, complete spatial data, relying on tape measures and as-built redlines feels like guessing. And in construction, guessing costs money.
Frequently Asked Questions
What is 3D laser scanning in construction?
How much does a 3D laser scan cost?
How accurate is construction laser scanning?
What is a point cloud and how do contractors use it?
When should you scan during a construction project?
Do I need to buy a scanner or hire a scanning service?
Can laser scanning replace traditional surveying?
How does Projul help manage scan data and project documentation?
Related Articles

How to Implement Construction Software Without Losing Your Mind
Most construction software rollouts fail. Not because the software is bad, but because the rollout was rushed. Here are...
Read More →
How Selections Can Pay for Themselves in Three Easy Steps
Most contractors lose thousands each year on wrong material orders, slow client decisions, and missed upsell chances....
Read More →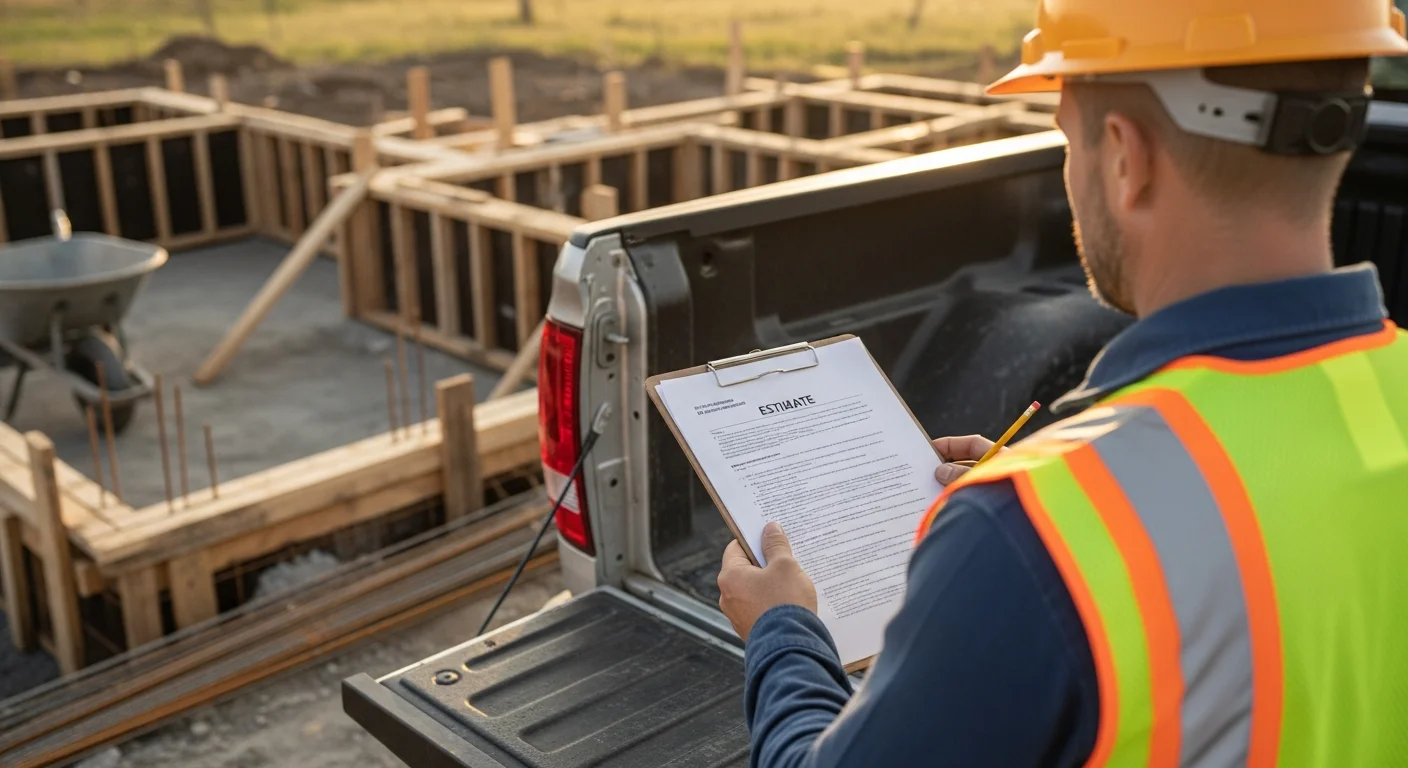
3 Free Concrete Estimate Templates for Every Pour Type (2026)
Three ready-to-use concrete estimate templates with realistic line items, material costs, labor rates, and markup...
Read More →