Commercial Tenant Improvement Guide: Lease, Permits, MEP, and ADA Compliance | Projul
Tenant improvement work is a different animal from ground-up construction. You are working inside an existing building, under someone else’s lease terms, with systems that may be decades old, and on a timeline driven by a tenant who needs to open for business. The work involves landlords, property managers, tenants, architects, and a stack of regulations that can trip you up if you are not paying attention.
This guide covers what contractors need to know about commercial TI projects, from understanding the lease to passing final inspection.
Understanding the Lease Agreement
Before you pick up a hammer, you need to understand the lease. The lease agreement between the landlord and tenant controls almost every aspect of a TI project: what work can be done, who pays for it, who approves the plans, what materials can be used, and what happens to the improvements when the lease ends.
Tenant Improvement Allowance (TIA)
Most commercial leases include a TIA, expressed as a dollar amount per square foot. For example, a $50 per square foot TIA on a 2,000 square foot space gives the tenant $100,000 toward the build-out. Anything above that amount is the tenant’s responsibility.
As the contractor, you need to understand the TIA because it directly affects the scope. A tenant with a $30 per square foot allowance has a very different budget than one with $80 per square foot. Your job during preconstruction is to help the tenant and their architect understand what their allowance will actually buy and where they may need to spend additional money.
Landlord Approval Process
Nearly every commercial lease requires the landlord to approve the TI plans before work begins. This approval process can take anywhere from a few days to several weeks, depending on the landlord and the complexity of the work.
What landlords typically review:
- Architectural plans and specifications
- MEP design
- Structural modifications (if any)
- Material selections that affect the building exterior or common areas
- Contractor qualifications and insurance
- Construction schedule and access requirements
Common landlord requirements:
- The tenant must use licensed, insured contractors (minimum insurance limits are usually specified in the lease)
- All work must comply with building codes and the building’s design standards
- The contractor must provide certificates of insurance naming the landlord as additional insured
- A construction deposit may be required to cover potential damage to common areas
- After-hours work may be required to avoid disrupting other tenants
- Building-standard materials must be used for storefronts, signage, and anything visible from common areas
Restoration Clauses
Pay attention to the lease restoration clause. Some leases require the tenant to remove all improvements and restore the space to its original condition (vanilla shell) at the end of the lease term. Others allow the tenant to leave improvements in place. This affects your scope and the tenant’s long-term costs.
As a contractor, you may be called back at the end of a lease to do the demolition and restoration work. It is good repeat business, so keep good records of what you installed and where the original building systems are located.
The Permitting Process
TI projects require building permits in almost every jurisdiction. The permitting process for TI work has some wrinkles that differ from new construction.
What Triggers a Permit
Any work that involves:
- New or relocated walls (even non-load-bearing partitions)
- Electrical work beyond simple fixture swaps
- Plumbing work (adding or moving fixtures)
- HVAC modifications
- Fire sprinkler modifications
- Structural modifications
- Change of occupancy type (retail to restaurant, for example)
Change of Use and Occupancy
This is where TI projects can get expensive in a hurry. If the new tenant’s use is different from the previous tenant’s use, the building department may classify it as a change of occupancy. A change from retail (Group M) to restaurant (Group A-2) triggers a whole different set of code requirements, including:
- Higher fire sprinkler requirements (restaurants need more coverage than retail)
- Different plumbing fixture counts
- Grease trap and exhaust hood requirements
- Different egress requirements
- Accessibility upgrades to the path of travel
Even within the same occupancy group, changes in use can trigger upgrades. A retail clothing store converting to a medical office has very different MEP, accessibility, and plumbing requirements.
Plan Review Timeline
Commercial plan review typically takes 2 to 6 weeks for a standard TI project. Complex projects or those involving change of use can take longer. Some jurisdictions offer expedited review for an additional fee, which can be worth it when the tenant is paying rent on a space they cannot use until construction is complete.
Tips for faster plan review:
- Submit complete plans. Incomplete submittals get sent back and restart the review clock.
- Include a code analysis sheet with your plans showing occupancy classification, construction type, area and height limitations, required fire ratings, plumbing fixture count, and egress calculations.
- Pre-submit to the fire marshal for fire sprinkler and alarm reviews. These reviews often take the longest and can be done in parallel with the building department review.
- Call the plan reviewer. A quick phone conversation to discuss any unusual conditions before you submit can prevent weeks of back-and-forth in comment letters.
MEP Coordination
Mechanical, electrical, and plumbing coordination is one of the biggest challenges on TI projects because you are working within the constraints of an existing building’s infrastructure.
Assessing Existing Systems
Before you design anything, you need to understand what the existing building provides:
Electrical: What is the available electrical capacity at the panel? Is there a dedicated panel for the tenant space, or does it share with other tenants? What voltage and amperage is available? Where are the main feeders routed?
Plumbing: Where are the closest water supply, waste, and vent connections? What size are they? Where does the waste line connect to the building main? Is there a grease interceptor available (critical for restaurants)?
HVAC: Is the building served by a central system or individual rooftop units per tenant space? What is the available capacity? Can the existing ductwork be modified, or does the space need new ductwork?
Fire protection: Is the building sprinklered? What is the available water pressure? Where are the closest branch lines for tapping into the sprinkler system?
Getting this information early prevents expensive redesigns later. A restaurant tenant who plans a 30-seat dining room may discover that the building’s electrical service cannot support their commercial kitchen equipment, requiring a costly service upgrade.
Ceiling Plenum Coordination
In most commercial TI work, the mechanical, electrical, plumbing, and fire protection systems all share the ceiling plenum space (the area between the finished ceiling and the structure above). On a typical TI project, you might have:
- HVAC supply and return ductwork
- Sprinkler branch lines and heads
- Electrical conduit and junction boxes
- Data and communication cabling
- Plumbing vent lines
- Structural beams, joists, and deck above
All of this has to fit in a space that is usually 18 to 36 inches deep. Without careful coordination, trades will conflict with each other, and the last one in will not have room for their work.
Coordination approach:
- Produce a reflected ceiling plan showing all ceiling-mounted items: light fixtures, sprinkler heads, HVAC diffusers, access panels, speakers.
- Produce a ceiling plenum section drawing showing the vertical arrangement of ductwork, piping, and conduit.
- Establish an installation sequence: ductwork first (largest and least flexible), then sprinkler piping, then plumbing vents, then electrical conduit.
- Hold a pre-installation coordination meeting with all MEP trades before anyone starts rough-in.
HVAC Considerations for TI
HVAC is usually the most complex and expensive MEP system in a TI project. Common HVAC challenges include:
Insufficient capacity. The existing system may not have enough cooling or heating capacity for the new tenant’s use, especially for restaurants, server rooms, or spaces with high occupant density.
Zone control. The existing system may serve the tenant space as a single zone. If the new layout has different thermal requirements (a server closet needs cooling year-round; a reception area needs heating in winter), you may need to add zone controls, VAV boxes, or supplemental units.
Exhaust requirements. Restaurants, salons, medical offices, and other specialized tenants need exhaust systems that may not exist in the building. Kitchen exhaust hoods, in particular, require large ductwork routed to the roof, makeup air systems, and fire suppression systems.
Fresh air. Building codes require minimum outdoor air ventilation based on the number of occupants and the type of space. A change in use that increases occupant density (retail to restaurant, for example) may require additional fresh air capacity.
ADA Compliance
ADA compliance is one of the most misunderstood aspects of TI construction. Many contractors and tenants assume that if the existing building is not accessible, they do not have to make it accessible. That is not how it works.
The Disproportionate Cost Rule
When you renovate a commercial space, ADA requires that you make the “path of travel” to the renovated area accessible. The path of travel includes sidewalks, parking, building entrance, corridors, elevators, restrooms, and drinking fountains serving the renovated area.
The catch: you only have to spend up to 20% of the total renovation cost on accessibility improvements. If your TI project costs $200,000, you must spend up to $40,000 on accessibility upgrades to the path of travel. If full accessibility would cost more than 20%, you prioritize improvements in this order:
- Accessible entrance from the street or parking area
- Accessible route to the renovated area
- Accessible restrooms
- Accessible telephones (less relevant today)
- Accessible drinking fountains
Common ADA Requirements in TI Projects
Doorways. Minimum 32 inches clear width. Door hardware must be operable with one hand without tight grasping or twisting (no round doorknobs; use lever handles).
Restrooms. If you are adding or renovating a restroom, it must be accessible. This means a 60-inch turning radius, grab bars at the toilet, accessible lavatory, and accessible hardware and accessories. In many TI projects, the restroom renovation is the most expensive single ADA item.
Counters. Service counters must have a 36-inch-high accessible section at least 36 inches wide. Sales and service counters used by the public need an accessible transaction surface.
Floor surfaces. Floors must be stable, firm, and slip-resistant. Changes in floor level greater than 1/4 inch must have a ramp or beveled transition.
Signage. Room signs must include raised characters and Braille. Exit signs, directional signs, and room identification signs all have specific ADA requirements.
Parking. If the project includes parking lot work, accessible parking spaces must be provided per ADA ratios.
ADA and Existing Conditions
Here is where it gets tricky. ADA does not require you to fix existing non-compliant conditions that are outside the scope of the TI project (beyond the 20% disproportionate cost rule). But some jurisdictions have state accessibility codes that are more stringent than federal ADA and may require additional upgrades. California’s CBC accessibility requirements, for example, are significantly more demanding than federal ADA in several areas.
Always check both federal ADA and state/local accessibility codes. Apply the more stringent requirement.
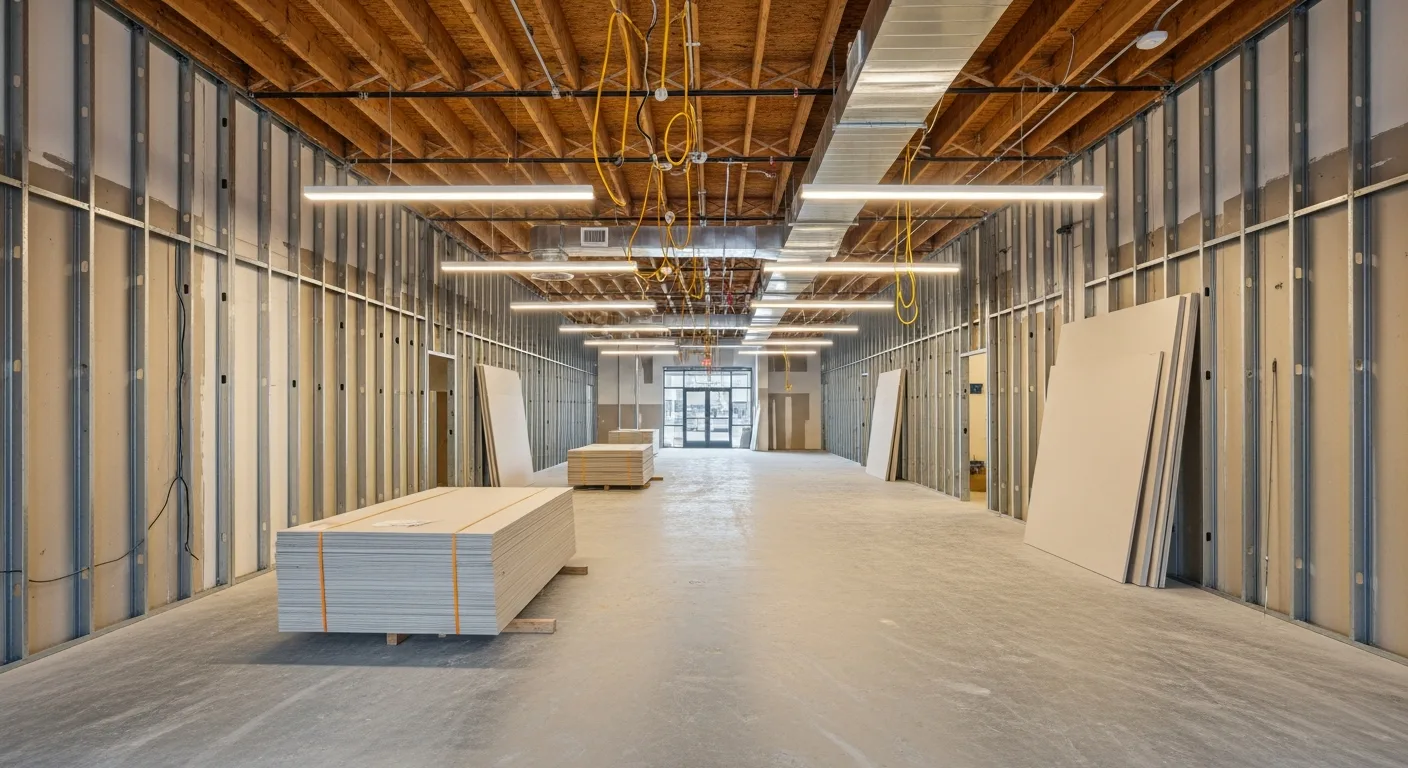
Construction Execution
With the lease understood, permits in hand, and MEP systems coordinated, it is time to build.
Demolition
Most TI projects start with demolition of the previous tenant’s improvements. Before you start swinging, verify:
- What stays and what goes. The landlord may want to keep certain elements (ceiling grid, sprinklers, HVAC ductwork). Clarify this in writing before demo begins.
- Hazardous materials. Older buildings may contain asbestos in floor tiles, pipe insulation, ceiling tiles, or joint compound. Lead paint is possible in buildings built before 1978. Survey before you demo.
- Utility disconnection. Disconnect electrical circuits, cap plumbing lines, and isolate HVAC connections before demolition. Verify that the circuits you are disconnecting serve only the tenant space and not adjacent spaces.
- Protection of adjacent tenants. In an occupied building, you need dust barriers, noise control, and careful scheduling to avoid disrupting neighboring tenants and common areas.
Framing and Rough-In
Metal stud framing is standard for commercial TI work. It is lightweight, straight, non-combustible, and easy to modify.
Framing sequence:
- Lay out wall locations from the architectural plans. Snap chalk lines on the floor.
- Install floor track and ceiling track.
- Set studs at the specified spacing (typically 16 or 24 inches on center).
- Frame door and window openings with proper headers.
- Install blocking for heavy wall-mounted items (TV mounts, cabinets, grab bars).
After framing, MEP trades rough in their systems in the walls and above the ceiling. The typical sequence is:
- Plumbing rough-in (above ceiling and in walls)
- HVAC ductwork and equipment installation
- Fire sprinkler modifications
- Electrical rough-in (conduit, boxes, wire)
- Data and communication cabling
- Fire alarm devices
Inspections
Commercial TI projects require multiple inspections:
- Rough-in inspections: Framing, electrical, plumbing, mechanical, fire sprinkler, and fire alarm each need a rough-in inspection before you cover them with drywall or ceiling tiles.
- Above-ceiling inspection: Before you install the ceiling grid and tiles, the building inspector wants to see all of the work in the plenum space.
- Final inspections: Building, electrical, plumbing, mechanical, fire sprinkler, fire alarm, and health department (for food service spaces) each do a final inspection.
Schedule your inspections proactively. In busy jurisdictions, inspection wait times can be several days. A missed inspection can hold up your drywall crew and cascade delays through the rest of the schedule.
Finishes
After rough-in inspections pass, close up the walls and ceiling and move to finishes:
- Drywall hanging, taping, and finishing
- Ceiling grid and tile installation
- Priming and painting
- Flooring installation (tile, carpet, LVP, polished concrete)
- Millwork and casework installation
- Fixture and equipment installation
- Final electrical trim (devices, covers, fixtures)
- Final plumbing trim (fixtures, accessories)
- HVAC trim (registers, thermostats)
Punch List and Turnover
Walk the completed space with the tenant and the landlord’s representative to develop a punch list of items that need correction or completion. Common punch list items on TI projects include:
- Paint touch-ups
- Ceiling tile alignment
- Door hardware adjustment
- Electrical device issues (dead outlets, wrong switch legs)
- Flooring transitions and thresholds
- HVAC balancing and comfort issues
- Signage installation
Complete the punch list, obtain final inspection approvals, and turn the space over to the tenant with all warranties, O&M manuals, as-built drawings, and lien releases.
Managing TI Projects Effectively
TI projects move fast and involve a lot of stakeholders. You have the tenant, the landlord, the architect, the property manager, and multiple subcontractors all needing information and updates. Keeping everyone aligned is a full-time job.
Projul helps TI contractors manage the entire process from bid through turnover. Track submittals and approvals, schedule inspections, manage subcontractor coordination, and keep all project documentation organized and accessible. When the tenant asks for a status update, you can give them one in minutes instead of spending an hour digging through emails and spreadsheets.
For contractors who specialize in TI work and run multiple projects simultaneously, having a clear system for tracking each project’s status is the difference between controlled growth and chaos. See what Projul offers or schedule a demo.
Common Mistakes on TI Projects
Not Reading the Lease
The lease controls the project. If you do not understand the lease requirements before you bid, you will miss costs related to insurance, working hours restrictions, restoration obligations, and landlord-required materials. Ask the tenant for a copy of the relevant lease sections (specifically the TI and construction provisions) during the bidding phase.
Underestimating Existing Conditions
Existing buildings are full of surprises. The mechanical drawings from 1987 do not match what is actually installed in the ceiling. The electrical panel has less available capacity than the nameplate suggests because someone added circuits that were never documented. The floor is not level, the walls are not straight, and the ceiling height varies by 2 inches across the space.
Budget time and money for existing condition surprises. A 10% contingency on TI projects is not paranoia; it is realism.
Ignoring the Other Tenants
In an occupied building, your construction noise, dust, dumpster placement, material staging, and truck deliveries all affect the other tenants. A noise complaint from the law firm next door can result in the landlord shutting down your project until you develop an acceptable noise mitigation plan.
Plan your noisy work for off-hours. Use dust barriers. Keep common areas clean. Communicate with the property manager about your schedule and any activities that may affect other tenants.
Skipping MEP Coordination
On small TI projects, contractors sometimes skip formal MEP coordination and let the trades figure it out in the field. This works until it does not. The HVAC ductwork runs right through where the electrician planned his junction box. The plumber’s drain line conflicts with the structural beam. Field conflicts cost more to resolve than a coordination meeting costs to hold.
Wrapping Up
Commercial tenant improvement work is a solid niche for contractors who are good at managing details, coordinating trades, and working within constraints. The work is steady, the clients tend to be repeat customers (property managers and commercial tenants), and the project sizes are manageable.
The keys to success are understanding the lease requirements, getting your permitting done right, coordinating MEP systems carefully, and taking ADA compliance seriously. Get those things right, and you will build a reputation as a TI contractor that landlords and tenants trust with their spaces.
If you are looking for a better way to manage your TI projects, Projul is worth a look. It is built for contractors who need to keep multiple projects organized without drowning in paperwork.
Frequently Asked Questions
What is a tenant improvement in commercial construction?
Who pays for tenant improvements?
How long does a typical tenant improvement project take?
Do tenant improvements require building permits?
What ADA requirements apply to tenant improvements?
What is the difference between a vanilla shell and a warm shell?
How do you coordinate MEP work in a tenant improvement?
Can a tenant make improvements without landlord approval?
Related Articles

BIM Clash Detection: How to Catch Conflicts Before They Cost You on the Jobsite
BIM Clash Detection: How to Catch Conflicts Before They Cost You on the Jobsite Every contractor has a story about the...
Read More →
Asphalt Paving and Compaction Guide: Mix Types, Laydown Temperatures, and Quality Testing
Asphalt paving looks straightforward from a distance. A truck dumps material, the paver lays it down, and rollers...
Read More →
Construction Jobsite Wi-Fi & Connectivity Guide: Setting Up Reliable Internet in the Field
A practical guide to getting reliable internet on construction job sites. Learn about cellular hotspots, mesh networks,...
Read More →