Concrete Expansion Joints: Types, Placement, Materials, and Common Failures | Projul
If you have ever walked across a parking lot and noticed a long strip of dark filler material running between concrete sections, you were looking at an expansion joint. These joints are one of the most important details in any concrete pour, and they are also one of the most commonly botched.
Concrete expands when it heats up and contracts when it cools down. Without somewhere to go, that movement creates enormous pressure that cracks slabs, buckles sidewalks, and pushes walls out of plumb. Expansion joints give concrete room to breathe.
This guide covers everything contractors need to know about concrete expansion joints: the different types, where to place them, what materials to use, and the mistakes that lead to callbacks and costly repairs.
What Is a Concrete Expansion Joint?
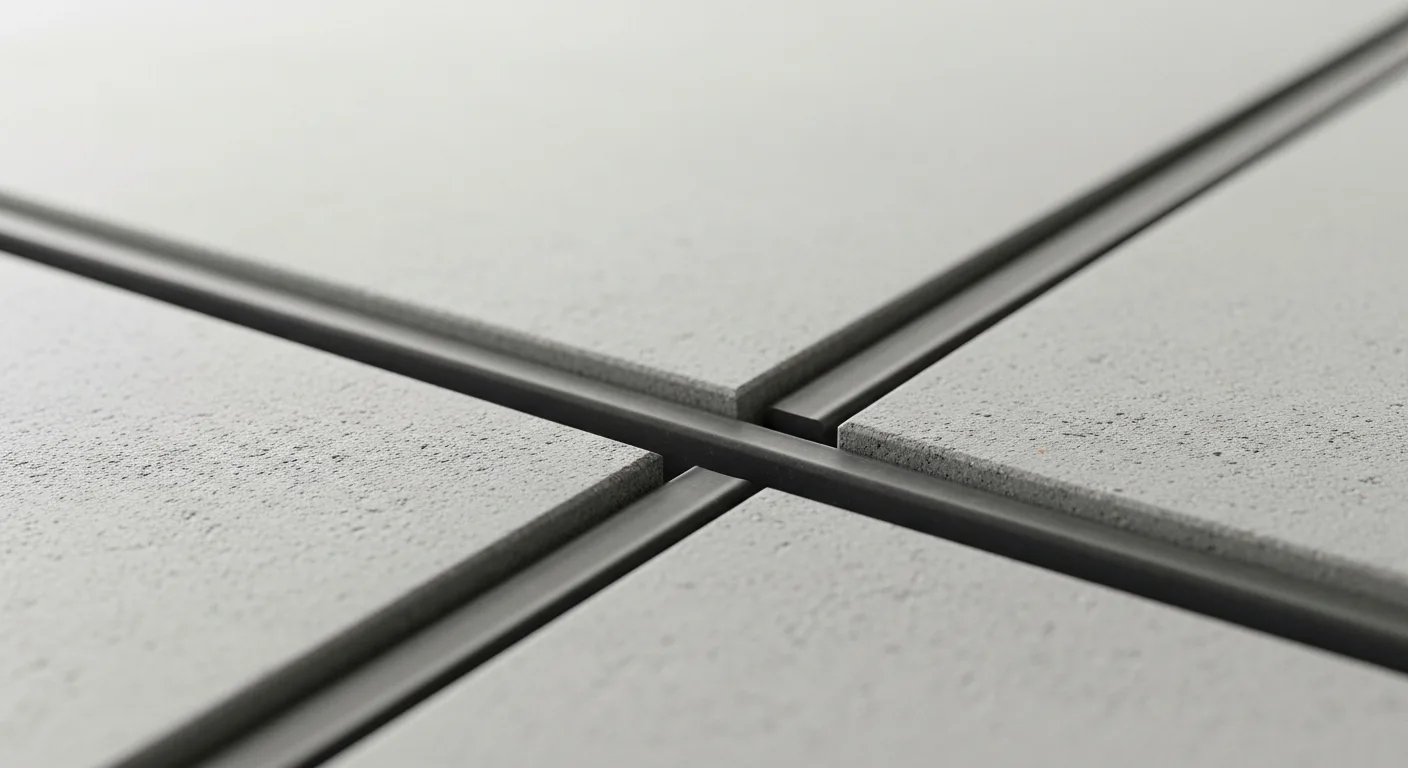
An expansion joint is a full-depth gap between two sections of concrete, filled with a compressible material. Unlike control joints (which are shallow grooves designed to control where cracks form), expansion joints separate slabs completely so they can move independently.
When temperatures rise, concrete grows. A 100-foot slab can expand by nearly 3/4 of an inch between winter lows and summer highs. That movement has to go somewhere. The expansion joint absorbs it.
Think of expansion joints as shock absorbers for your flatwork. They take the stress so the slab does not have to.
Expansion Joints vs. Control Joints vs. Isolation Joints
Before we go further, let’s clear up the terminology. Contractors and engineers sometimes use these terms interchangeably, but they are three different things.
Control Joints (Contraction Joints)
Control joints are grooves cut or tooled into the surface of wet or freshly cured concrete. They are typically one-quarter to one-third of the slab depth. Their job is to create a weak point so that when the concrete shrinks during curing, it cracks along the groove instead of randomly across the surface.
Control joints do not allow for expansion. They only manage shrinkage cracking.
Expansion Joints
Expansion joints are full-depth separations between slabs, filled with a compressible material. They handle both expansion and contraction. You will find them where concrete meets fixed structures like buildings, columns, and utility manholes, as well as at regular intervals in large pours.
Isolation Joints
Isolation joints separate the slab from other structural elements like columns, walls, or footings. They prevent the slab from transferring load to those elements. In practice, many people use “isolation joint” and “expansion joint” interchangeably, though isolation joints are specifically about structural separation rather than thermal movement.
Types of Expansion Joint Materials
The material you put inside an expansion joint matters just as much as the joint itself. Here are the most common options.
Asphalt-Impregnated Fiber Board
This is the old standby. It is a rigid board made from cellulose fibers saturated with asphalt. You have probably seen it on countless residential jobs as the dark brown strip between a driveway and a garage floor.
Pros: Inexpensive, widely available, easy to cut and install.
Cons: Absorbs water over time, can rot and compress permanently, does not bounce back well after repeated cycles.
Fiber board works fine for basic residential applications, but it has a limited lifespan. On commercial work or anywhere longevity matters, consider better options.
Closed-Cell Foam (Polyethylene)
Closed-cell foam strips are lightweight, flexible, and do not absorb water. They compress and rebound well through multiple expansion and contraction cycles.
Pros: Water-resistant, consistent compression, available in various thicknesses and densities.
Cons: Can be displaced during the pour if not properly secured, may need a sealant cap for exposed applications.
This is a solid upgrade from fiber board for most applications.
Self-Leveling Polyurethane Sealant
For joints that are already formed, self-leveling polyurethane sealant is poured into the gap. It cures into a flexible, rubber-like material that bonds to the concrete edges and moves with the joint.
Pros: Excellent adhesion, stays flexible for years, self-levels for a smooth finish, resists water and chemicals.
Cons: More expensive per linear foot, requires proper joint preparation and backer rod installation, temperature-sensitive during application.
This is the go-to for commercial work, warehouse floors, and any joint that will see heavy traffic.
Rubber and Neoprene Strips
Pre-formed rubber or neoprene strips are used in heavy commercial and industrial applications. They are engineered for specific joint widths and movement ranges.
Pros: Extremely durable, engineered for precise movement ranges, long service life.
Cons: Expensive, typically overkill for residential work.
Backer Rod
Backer rod is not a standalone joint filler. It is a round foam rope that you push into the joint before applying sealant. It controls the depth of the sealant, prevents three-sided adhesion (which causes sealant failure), and saves material.
Always use backer rod with poured sealants. It is cheap insurance against sealant failure.
Where to Place Expansion Joints
Proper placement is where many contractors get into trouble. Here are the rules.
Where Concrete Meets Fixed Structures
Every place where a slab meets something that does not move needs an expansion joint. This includes:
- Building foundations and walls
- Garage floors where they meet the driveway
- Columns and posts
- Utility manholes and catch basins
- Existing concrete that is already cured
- Steps and stoops
The concrete will expand toward these structures. Without a joint, it will push against them, and something will crack.
At Regular Intervals in Large Pours
For large slabs, expansion joints should be placed at regular intervals based on slab thickness and local climate. The general guideline:
- 4-inch slab: Every 8 to 12 feet
- 6-inch slab: Every 12 to 18 feet
- 8-inch slab: Every 16 to 24 feet
Hotter climates with bigger temperature swings need tighter spacing. Check your local building code for specific requirements.
At Changes in Direction
Anywhere the slab changes direction (L-shapes, T-intersections, jogs in the layout), you need a joint. These geometry changes create stress concentrations that will crack without relief.
At Thickness Changes
If the slab thickness changes (say from 4 inches to 6 inches at a loading dock), put a joint at the transition. Different thicknesses expand at different rates.
How to Install Expansion Joints Properly
Getting the installation right is not complicated, but it requires attention to detail.
Step 1: Set the Joint Material Before the Pour
Expansion joint material needs to be in place before concrete is placed. Secure it to the subgrade or formwork so it stays upright and in position during the pour.
Use stakes, adhesive, or wire ties to hold the material in place. If it shifts during the pour, you will end up with an uneven or incomplete joint.
Step 2: Make Sure the Joint Is Full Depth
The filler material must extend from the bottom of the slab to the surface. A partial-depth expansion joint is just a control joint with extra steps. The whole point is to separate the slabs completely.
Step 3: Keep the Top Flush or Slightly Below the Surface
The top of the joint material should be flush with the finished concrete surface or up to 1/4 inch below it. If it sticks up, it will be a trip hazard and will get damaged. If it is too low, debris will collect in the gap.
Step 4: Apply Sealant (When Required)
For joints that will be exposed to water, chemicals, or heavy traffic, apply a flexible sealant over the filler material. Install backer rod first to control sealant depth, then apply polyurethane or silicone sealant.
The sealant depth should be roughly half the joint width. A 1/2-inch wide joint gets about 1/4 inch of sealant depth. This ratio allows the sealant to stretch without tearing.
Common Expansion Joint Failures and How to Avoid Them
Here is where the real-world lessons come in. These are the failures we see over and over on job sites.
Failure 1: Joints Spaced Too Far Apart
This is the number one cause of random cracking in large slabs. The contractor either forgot to plan joint spacing or tried to save time by spacing them further apart than the slab thickness allows.
The fix: Follow the 2-to-3 times slab thickness rule and check local codes. When in doubt, add more joints. An extra joint costs almost nothing compared to a crack repair.
Failure 2: Wrong Filler Material for the Application
Using cheap fiber board in a commercial freezer floor or a chemical processing plant is asking for trouble. The material breaks down, compresses permanently, and stops doing its job.
The fix: Match the filler material to the environment. Consider temperature range, moisture exposure, chemical exposure, and traffic type.
Failure 3: Filler Material Not Full Depth
We see this constantly. The contractor lays a strip of filler on top of the subgrade, but it only goes halfway up the slab. The bottom half of the slab is monolithic with the adjacent section, and it cracks.
The fix: Measure your filler material against the form height. It needs to go from bottom to top, no exceptions.
Failure 4: Sealant Applied Without Backer Rod
When sealant bonds to three surfaces (both sides and the bottom of the joint), it cannot stretch. The next expansion cycle tears it apart. This is called three-sided adhesion, and it is the leading cause of sealant failure.
The fix: Always install backer rod before applying sealant. The rod prevents bottom adhesion and controls sealant depth.
Failure 5: No Joint Where the Slab Meets a Structure
The driveway that is poured tight against the garage foundation with no expansion joint is a classic. Within a few summers, the concrete pushes against the foundation, cracks the slab, and sometimes damages the foundation wall.
The fix: Never pour concrete directly against a fixed structure without an expansion joint. This is non-negotiable.
Failure 6: Debris-Packed Joints
Over time, dirt, gravel, and other debris fill the joint and prevent it from compressing. The joint effectively becomes solid, and the concrete cracks somewhere else to relieve the pressure.
The fix: For exterior joints, use a sealant cap to keep debris out. For interior joints in commercial settings, schedule periodic cleaning and re-sealing.
Failure 7: Saw-Cutting Too Late
If you are saw-cutting control joints (which work alongside expansion joints in your overall joint plan), timing is critical. Cut too late and the concrete has already cracked on its own. The window is typically 6 to 18 hours after the pour, depending on conditions.
The fix: Plan your cutting schedule before the pour. Have the saw on site and ready to go. In hot weather, you may need to start cutting within 4 to 6 hours.
Expansion Joints in Different Applications
Residential Driveways and Sidewalks
For standard 4-inch residential flatwork, use fiber board or closed-cell foam at 8 to 10-foot intervals and at every point where the concrete meets a structure. Seal exterior joints with polyurethane to keep water and debris out.
Commercial Floors and Warehouses
Warehouse floors see forklift traffic, heavy loads, and often harsh chemicals. Use closed-cell foam or engineered rubber with a polyurethane sealant cap. Joint edges should be armored with steel angles on heavy-traffic floors to prevent spalling.
Parking Structures
Parking garages deal with thermal movement, vehicle traffic, and constant water exposure from rain and car wash runoff. Expansion joints in parking structures are engineered assemblies with waterproof membranes, traffic-rated covers, and fire barriers. These are not DIY details.
Bridge Decks and Highway Slabs
Highway and bridge expansion joints are a specialty unto themselves, with finger joints, modular expansion joints, and strip seal systems designed for massive movement ranges. If you are working on DOT projects, the joint specifications will be in the plans.
Tracking Concrete Work and Joint Details with Project Management Software
Expansion joints are the kind of detail that gets missed when your project tracking lives on paper or in someone’s head. When you are running multiple concrete pours across different jobs, you need a system that keeps every detail organized.
Projul’s project management features let you attach joint layout drawings, track material orders, schedule saw-cutting crews, and document completed joints with photos, all from your phone or tablet in the field. When the inspector shows up asking about joint spacing, you have the documentation ready.
If you are still tracking concrete details on paper or spreadsheets, check out Projul’s pricing or schedule a demo to see how it works on a real project.
Quick Reference: Expansion Joint Best Practices
Here is a checklist you can use on your next concrete pour:
- Plan joint locations before the pour. Mark them on the layout drawing and the forms.
- Use the right filler material for the application and environment.
- Secure filler material so it stays in position during placement.
- Verify full-depth coverage from the bottom of the slab to the surface.
- Place joints at every structure interface, no exceptions.
- Follow spacing guidelines based on slab thickness and local code.
- Install backer rod before applying any poured sealant.
- Seal exposed joints to prevent debris infiltration and water damage.
- Document everything with photos and notes for your project records.
- Schedule maintenance for high-traffic and exterior joints.
Final Thoughts
Expansion joints are not glamorous. Nobody is going to compliment you on a beautiful joint layout. But get them wrong, and you will hear about it, loudly and expensively.
The good news is that proper expansion joint work is straightforward. Use the right material, place joints at the right intervals and at every structure interface, install them full depth, and seal them properly. Do those four things, and your concrete work will hold up for decades.
Take the time to plan your joints before every pour. Your slabs (and your callbacks) will thank you.
Frequently Asked Questions
What is the purpose of an expansion joint in concrete?
How far apart should expansion joints be in concrete?
What is the difference between expansion joints and control joints?
What material is used to fill concrete expansion joints?
Can you add expansion joints after concrete is poured?
Why do concrete expansion joints fail?
Do you need expansion joints in a concrete driveway?
How wide should a concrete expansion joint be?
Related Articles

BIM Clash Detection: How to Catch Conflicts Before They Cost You on the Jobsite
BIM Clash Detection: How to Catch Conflicts Before They Cost You on the Jobsite Every contractor has a story about the...
Read More →
Asphalt Paving and Compaction Guide: Mix Types, Laydown Temperatures, and Quality Testing
Asphalt paving looks straightforward from a distance. A truck dumps material, the paver lays it down, and rollers...
Read More →
Construction Jobsite Wi-Fi & Connectivity Guide: Setting Up Reliable Internet in the Field
A practical guide to getting reliable internet on construction job sites. Learn about cellular hotspots, mesh networks,...
Read More →