Concrete Form Stripping and Curing Guide: Timing, Methods, and Strength Testing | Projul
Concrete does not care about your schedule. It gains strength on its own timeline, driven by the mix design, the water-to-cement ratio, the temperature, and whether you give it enough moisture to keep hydrating. Strip the forms too early and you get cracks, deflection, and surface defects. Skip proper curing and you lose long-term strength and durability. Neither mistake is cheap to fix.
This guide covers the practical side of form stripping and curing: when to strip, how to cure, and how to verify that the concrete has actually reached the strength you need.
Why Form Stripping Timing Matters
Forms do two things for fresh concrete. First, they contain the concrete and give it shape while it is still plastic. Second, for horizontal elements like slabs, beams, and elevated decks, the forms and shoring carry the weight of the concrete until it gains enough strength to support itself.
Stripping forms at the right time means removing them as soon as the concrete is strong enough to handle the loads it will see, but not so soon that you risk damage or failure.
The Risks of Stripping Too Early
Structural failure is the worst case. If you remove shoring from a beam or slab before the concrete can carry its own weight, the element will deflect excessively or collapse. This is not theoretical; it happens on job sites every year, usually when someone decides to strip forms on a Friday afternoon to get ready for the next pour on Monday.
Surface defects like bug holes, form marks, and rough spots are more likely when concrete is stripped before it has developed enough surface hardness. Green concrete is soft and will tear if forms are removed roughly.
Cracking can occur when forms are stripped from elements that are not yet strong enough to resist the stresses of self-weight, thermal changes, or construction loads.
Cold weather damage is a risk any time you remove forms from concrete that has not reached a minimum strength of 500 PSI. Below that threshold, fresh concrete has almost no resistance to freeze-thaw damage. In cold weather, forms also serve as insulation, and removing them exposes the concrete to freezing temperatures.
The Cost of Stripping Too Late
While early stripping gets most of the attention (because the consequences are more dramatic), late stripping has costs too. Forms and shoring that stay in place longer than necessary tie up materials, prevent subsequent trades from accessing the work, and add rental costs if you are using rented forming systems.
The goal is to strip at the right time: early enough to maintain project schedule and minimize forming costs, but late enough to protect the concrete.
Form Stripping Schedules
The stripping schedule depends on the type of element, the concrete mix, the ambient conditions during curing, and the project specifications.
General Guidelines by Element Type
These are general guidelines for normal-weight concrete with a 28-day specified strength of 3,000 to 5,000 PSI, cured at temperatures above 50 degrees Fahrenheit. Your actual stripping schedule should be based on the project specifications and the structural engineer’s requirements.
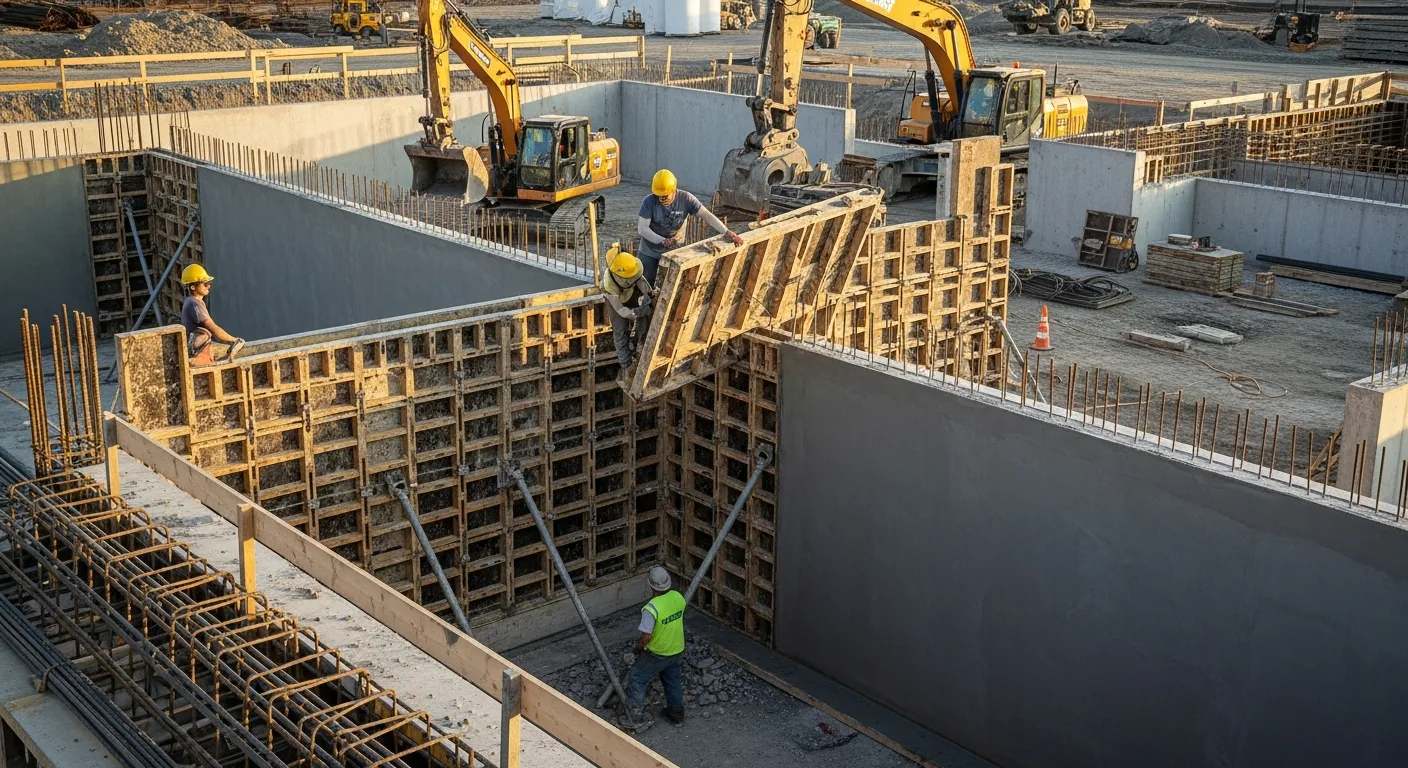
Vertical forms (walls, columns, and sides of beams): 12 to 24 hours. These forms only contain the concrete; they do not carry structural loads after the concrete sets. Once the concrete is hard enough to hold its shape without surface damage, the forms can come off.
Slab soffits (with shoring left in place): 3 to 7 days. You can strip the soffit panels and drop the forms while leaving the shoring posts in place to carry the load. This frees up the forming material while the shoring continues to support the slab.
Beam soffits and slab soffits (removing all support): 7 to 21 days depending on span, load, and concrete strength gain. Longer spans and heavier loads require more strength before shoring can be removed. The structural engineer should specify the required concrete strength at time of shoring removal.
Reshoring requirements: On multi-story buildings, reshoring (reinstalling shores on lower floors to distribute construction loads through multiple levels) is typically required for 2 to 3 floors below the most recently poured floor. The reshoring plan should be designed by a professional engineer.
Strength-Based Stripping
The most reliable approach to form stripping is to base your schedule on actual concrete strength rather than calendar days. This means testing the concrete and stripping only when it reaches the required strength.
Minimum strengths for stripping are typically:
- Vertical forms: 500 PSI (enough to prevent surface damage and freeze-thaw damage)
- Slab soffits with reshoring: 50% of specified 28-day strength
- Slab soffits, full shoring removal: 75% of specified 28-day strength
- Beam soffits and long-span slabs: 75% to 100% of specified strength, per engineer
These are rules of thumb. Always follow the project-specific stripping schedule from the structural engineer.
Temperature Effects on Stripping Time
Temperature has a major effect on how fast concrete gains strength. At 70 degrees Fahrenheit, a typical Type I cement mix will reach about 65% of its 28-day strength in 7 days. At 50 degrees, the same mix takes about 10 to 12 days. At 40 degrees, it might take 14 to 18 days.
This means that a stripping schedule based on calendar days must account for the actual curing temperature. A 7-day stripping schedule that works fine in June may be dangerously early in November.
Curing Methods
Curing is the process of maintaining adequate moisture and temperature in concrete for a sufficient period to allow the cement to hydrate and the concrete to gain strength. Good curing is the cheapest and most effective way to improve concrete durability and strength. Bad curing is the cheapest and most common way to ruin an otherwise good pour.
Why Curing Matters
Cement hydration requires water. When concrete loses moisture from its surface before the cement has fully hydrated, the surface layer ends up weaker, more porous, and more susceptible to cracking and wear than it should be. The interior of the concrete continues to hydrate (because moisture cannot escape as easily from inside), but the surface suffers.
The result of poor curing is a concrete element that may test fine on cylinders (which are cured properly in a lab) but has a weak, dusty, craze-cracked surface in the field. This is especially problematic for slabs, where the surface is the working surface.
Wet Curing Methods
Wet curing provides the best results because it adds moisture to the concrete surface, ensuring that the cement has all the water it needs to hydrate.
Ponding involves flooding the surface with water and maintaining a standing layer of water for the entire curing period. This works well for flat slabs but requires edge dams to contain the water. It is the most effective curing method but also the most labor-intensive.
Continuous sprinkling uses soaker hoses or sprinklers to keep the surface continuously wet. The key word is “continuously.” If the surface dries out between sprinkler cycles, you can actually cause more harm than good because the wetting and drying cycles create surface stresses.
Wet coverings include wet burlap, wet cotton mats, or wet sand spread over the concrete surface. The coverings must be kept continuously wet. Burlap that dries out will wick moisture away from the concrete surface, making things worse. Use a soaker hose on top of the burlap to keep it saturated.
Membrane Curing
Membrane curing compounds are liquid products that are sprayed or rolled onto the fresh concrete surface. They form a thin film that retains moisture by reducing evaporation. This is the most common curing method on commercial job sites because it is fast, inexpensive, and requires no ongoing attention after application.
Application timing is critical. Apply the curing compound as soon as the final finishing operation is complete and the surface water sheen has disappeared, but before the surface starts to dry. On hot or windy days, this window can be very short.
Application rate matters. Most curing compounds are rated at 200 square feet per gallon. Applying too thin a coat reduces the moisture retention. Two coats applied at right angles to each other provides better coverage than a single heavier coat.
Types of curing compounds:
- White pigmented compounds reflect solar heat and keep the surface cooler. Best for hot weather and outdoor slabs.
- Clear or translucent compounds are used where the white pigment would be objectionable or where the surface will receive additional coatings.
- Resin-based dissipating compounds break down over time and do not interfere with subsequent adhesion of coatings or toppings.
Limitations: Membrane curing compounds should not be used on surfaces that will receive bonded toppings, coatings, or adhesives unless the compound is specifically designed to dissipate or unless you plan to remove it mechanically before applying the topping. Standard curing compounds will prevent bond.
Insulating Blanket Curing
Insulating blankets serve double duty: they retain moisture and retain heat. This makes them the go-to curing method in cold weather.
How they work: Concrete generates heat as the cement hydrates (called heat of hydration). Insulating blankets trap this heat and keep the concrete warm enough for hydration to continue even when ambient temperatures drop below freezing.
Types of blankets:
- Burlap-polyethylene combinations provide moderate insulation and moisture retention.
- Foam insulating blankets (2 to 4 inches thick) provide higher insulation values for cold weather work.
- Heated blankets with built-in electric or hydronic heating elements can maintain specific concrete temperatures in severe cold.
Coverage: Overlap blanket edges by at least 12 inches and weight or tape the edges to prevent wind from lifting the blankets and exposing the concrete surface.
Plastic Sheeting
Clear or white polyethylene sheeting can be used to retain moisture in concrete during curing. It is inexpensive but has some drawbacks:
- It must be laid flat against the surface. Any wrinkles or folds create air pockets where the surface dries unevenly, causing discoloration (curing stains).
- It provides minimal insulation in cold weather.
- It must be weighted or taped to prevent wind from lifting it.
Plastic sheeting works best as a secondary layer over wet burlap or as a vapor retarder over insulating blankets.
Strength Testing Methods
How do you know if your concrete has reached the required strength for form stripping, post-tensioning, loading, or opening to traffic? You test it.
Cylinder Break Tests
The standard method for measuring concrete compressive strength is the cylinder break test (ASTM C39). During placement, the testing lab casts standard 4-inch by 8-inch or 6-inch by 12-inch cylinders from the same concrete going into the forms. These cylinders are cured under controlled conditions (lab-cured) or under the same conditions as the structure (field-cured) and tested in a compression machine at specified ages (typically 7 and 28 days).
Lab-cured cylinders tell you whether the concrete mix is meeting its design strength. They represent the potential strength of the concrete under ideal curing conditions.
Field-cured cylinders tell you what the concrete has actually achieved in the structure, accounting for real-world curing conditions. These are the cylinders that matter for form stripping decisions.
Limitations of cylinder tests: They tell you the strength at the time of the test, not in real time. If you need to strip forms on day 5 and your cylinders are not scheduled for testing until day 7, you are stuck waiting or guessing. Also, the field-cured cylinders may not perfectly represent the concrete in the structure because they do not have the same mass, exposure, or curing conditions.
Maturity Testing
Maturity testing (ASTM C1074) solves the real-time problem. It uses the relationship between concrete temperature, time, and strength gain to estimate the in-place strength of the concrete in real time, without breaking cylinders.
How it works:
- Before the project, the testing lab develops a maturity curve for the specific concrete mix. This involves casting and curing cylinders at a controlled temperature, breaking them at various ages, and plotting strength versus maturity index.
- During construction, temperature sensors are embedded in the concrete at the time of placement. These sensors record the concrete temperature continuously.
- The maturity index (a function of temperature and time) is calculated from the sensor data and compared to the maturity curve to estimate the current in-place strength.
Advantages: You get real-time strength estimates without waiting for cylinder breaks. You can strip forms as soon as the maturity data shows the required strength has been reached. This can save days on the schedule, especially in cold weather when strength gain is slow.
Getting started with maturity: You need a testing lab willing to develop the maturity curve, temperature sensors (wired or wireless), and a data logging system. Several commercial systems are available that include wireless sensors and smartphone apps for reading and reporting maturity data.
Rebound Hammer Testing
The rebound hammer (Schmidt hammer) test (ASTM C805) is a quick field test that measures the surface hardness of concrete. A spring-loaded plunger strikes the concrete surface, and the rebound distance is measured and correlated to compressive strength.
Limitations: Rebound hammer results are affected by surface conditions, moisture content, aggregate type, and carbonation. The test is not very accurate for estimating compressive strength, but it is useful for comparing relative strength across different areas of the same pour or tracking strength gain over time at the same location.
The rebound hammer is not a substitute for cylinder tests or maturity testing for critical stripping decisions, but it is a handy tool for field quality control.
Core Testing
If there is a question about the in-place strength of concrete after it has hardened (for example, if cylinder tests fail or if there is concern about a specific area), cores can be drilled from the structure and tested in a compression machine (ASTM C42).
Core testing is expensive and destructive (you have to patch the core holes), so it is typically used only when other test results are questionable or when evaluating existing structures.
Cold Weather Concrete: Special Considerations
Cold weather concrete work requires extra attention to both curing and form stripping because low temperatures slow down strength gain significantly.
ACI 306 Cold Weather Requirements
ACI 306 defines cold weather concrete as any period when the average daily temperature is below 40 degrees Fahrenheit for 3 or more consecutive days. During cold weather:
- Fresh concrete must be placed at a minimum temperature of 50 to 65 degrees Fahrenheit (depending on section thickness).
- Concrete must be maintained above 50 degrees Fahrenheit for the first 48 hours.
- Concrete must be maintained above 40 degrees Fahrenheit for the remainder of the protection period (typically 7 days for normal structural concrete).
- Forms should not be stripped until the concrete reaches the required strength, regardless of age.
- After the protection period ends, the concrete temperature should be reduced gradually (no more than 40 degrees Fahrenheit in 24 hours) to prevent thermal shock and cracking.
Hot Weather Considerations
Hot weather (above 90 degrees Fahrenheit) presents the opposite challenge. Concrete sets and gains early strength faster in hot weather, but the rapid moisture loss from evaporation can cause plastic shrinkage cracking and reduce long-term strength if curing is inadequate.
In hot weather:
- Begin curing as soon as finishing operations are complete. Do not wait.
- Use white-pigmented curing compounds or wet curing methods to keep the surface cool.
- Consider evaporation retarders during finishing to prevent plastic shrinkage cracking.
- Accelerated early strength gain means you can often strip forms earlier, but verify with testing.
Putting It All Together: A Practical Workflow
Here is a practical workflow for managing form stripping and curing on a typical project:
Before the Pour
- Review the project specifications for curing requirements, form stripping criteria, and testing requirements.
- Coordinate with the testing lab on cylinder quantities, testing ages, and whether maturity testing will be used.
- Prepare curing materials (compounds, blankets, burlap, plastic) and have them on site before the pour.
- Develop a stripping schedule based on the anticipated concrete strength gain, the structural engineer’s requirements, and the weather forecast.
During the Pour
- Cast the required number of test cylinders. Label them clearly with the placement location, date, time, and batch.
- If using maturity testing, install temperature sensors at the specified locations.
- Begin curing as soon as finishing is complete.
During the Curing Period
- Monitor curing conditions daily. Make sure wet curing coverings stay wet, blankets stay in place, and curing compound coverage is adequate.
- In cold weather, monitor concrete temperature using embedded sensors or surface-mounted thermometers.
- Track maturity data if using maturity testing.
- Communicate with the testing lab on cylinder break schedule.
At Stripping Time
- Verify that the concrete has reached the required strength based on cylinder breaks, maturity data, or the calendar-based schedule specified by the engineer.
- Strip forms carefully to avoid damaging the concrete surface. Do not pry against the concrete with metal bars.
- Inspect the stripped surface for defects (honeycombing, bug holes, cold joints, cracks).
- Continue curing the exposed surface. Just because the forms are off does not mean curing is done. Forms retain moisture, and once they are removed, the concrete surface is exposed to drying. Apply curing compound to the newly exposed surface or cover it with wet burlap.
Managing Concrete Projects with Software
Concrete work involves a lot of coordination: mix design submittals, pre-pour inspections, testing lab scheduling, curing monitoring, form stripping schedules, and post-strip inspections. Keeping all of this organized across multiple pours on a multi-story project gets complicated fast.
Projul’s project management features let you track every pour from placement through final strength verification. Attach cylinder break reports and maturity data to specific placements, schedule inspections and stripping dates, and keep a complete record of your curing procedures for each pour.
When you have 12 pours on a building at different stages of curing and different stripping dates, a clear visual schedule is worth its weight in gold. Check out how Projul can help or see pricing options.
Wrapping Up
Form stripping and curing are not the glamorous parts of concrete work, but they are the parts that determine whether your concrete performs as designed for its full service life. Strip at the right time based on actual strength data, not guesswork. Cure properly for the full required duration. And keep good records of everything.
The difference between a concrete contractor who builds a reputation for quality and one who gets known for callbacks usually comes down to how seriously they take these two things. Do them right every time, and the quality of your work will speak for itself.
Frequently Asked Questions
How long should you wait before stripping concrete forms?
What happens if you strip concrete forms too early?
What is the best method for curing concrete?
How long does concrete need to cure?
What is the difference between curing and drying concrete?
How do you test concrete strength in the field?
Can you cure concrete in cold weather?
What causes white spots or discoloration after stripping concrete forms?
Related Articles

BIM Clash Detection: How to Catch Conflicts Before They Cost You on the Jobsite
BIM Clash Detection: How to Catch Conflicts Before They Cost You on the Jobsite Every contractor has a story about the...
Read More →
Asphalt Paving and Compaction Guide: Mix Types, Laydown Temperatures, and Quality Testing
Asphalt paving looks straightforward from a distance. A truck dumps material, the paver lays it down, and rollers...
Read More →
Construction Jobsite Wi-Fi & Connectivity Guide: Setting Up Reliable Internet in the Field
A practical guide to getting reliable internet on construction job sites. Learn about cellular hotspots, mesh networks,...
Read More →