Concrete Polishing & Decorative Finishes Guide for Contractors | Projul
Polished concrete and decorative finishes are booming right now. Homeowners want that high-end look, commercial clients want durable floors that last decades, and contractors who can deliver are charging premium rates. This isn’t a passing trend either. Architects and designers have been specifying polished concrete in commercial spaces for years, and the residential side has caught up fast.
Whether you’re a general contractor thinking about adding decorative concrete to your service list, a concrete contractor looking to move beyond flatwork and foundations, or already doing polish work and wanting to tighten up your process, this guide covers what matters. We’ll walk through the actual steps, the equipment you need, how to estimate these jobs accurately, and how to manage the workflow so you stay profitable.
If you’re running a concrete business and haven’t looked at software built for concrete contractors, now is a good time. Managing polishing projects with spreadsheets and sticky notes gets messy fast once you’re juggling multiple jobs with different finish levels and timelines.
Understanding Concrete Polishing: What It Actually Is
Let’s clear something up first. Polished concrete is not just putting a shiny coating on a floor. That’s a common misconception from homeowners and even some contractors who haven’t done this work before. True polished concrete means mechanically grinding the surface of the slab with progressively finer diamond abrasives until you reach the desired sheen level.
Think of it like sanding wood. You start with a coarse grit to remove imperfections and flatten the surface, then work through medium grits, then fine grits, until the concrete itself has a smooth, reflective finish. No topical coating needed for the shine. The concrete IS the finished product.
There are a few categories of polished concrete you should know:
Cream polish keeps the surface paste intact. You’re polishing the very top layer of the slab without exposing aggregate. This gives a smooth, uniform look and works well for residential spaces where people want a clean, modern floor without the speckled stone appearance.
Salt and pepper finish grinds slightly deeper, exposing fine aggregate particles scattered across the surface. This is probably the most popular commercial finish because it looks great, hides minor imperfections, and is forgiving during the grinding process.
Aggregate exposure goes deeper still, revealing the larger stones in the concrete mix. This is a bold look that works well in showrooms, retail spaces, and high-end residential. It requires more grinding passes and more material removal, which means more time and higher cost.
Full aggregate exposure takes it all the way, showing the full stone profile. This is dramatic and beautiful but requires a well-placed slab with quality aggregate. If the mix design used ugly rock, you’re going to see ugly rock.
The level of exposure you’re targeting determines how many grinding steps you need, which directly affects your labor hours and diamond tooling costs. Getting this conversation right with the client before you start is critical for accurate estimating.
The Grinding and Polishing Process Step by Step
Here’s how the actual work flows on a typical polished concrete job. Knowing these steps cold is what separates contractors who make money on polish work from those who lose their shirts.
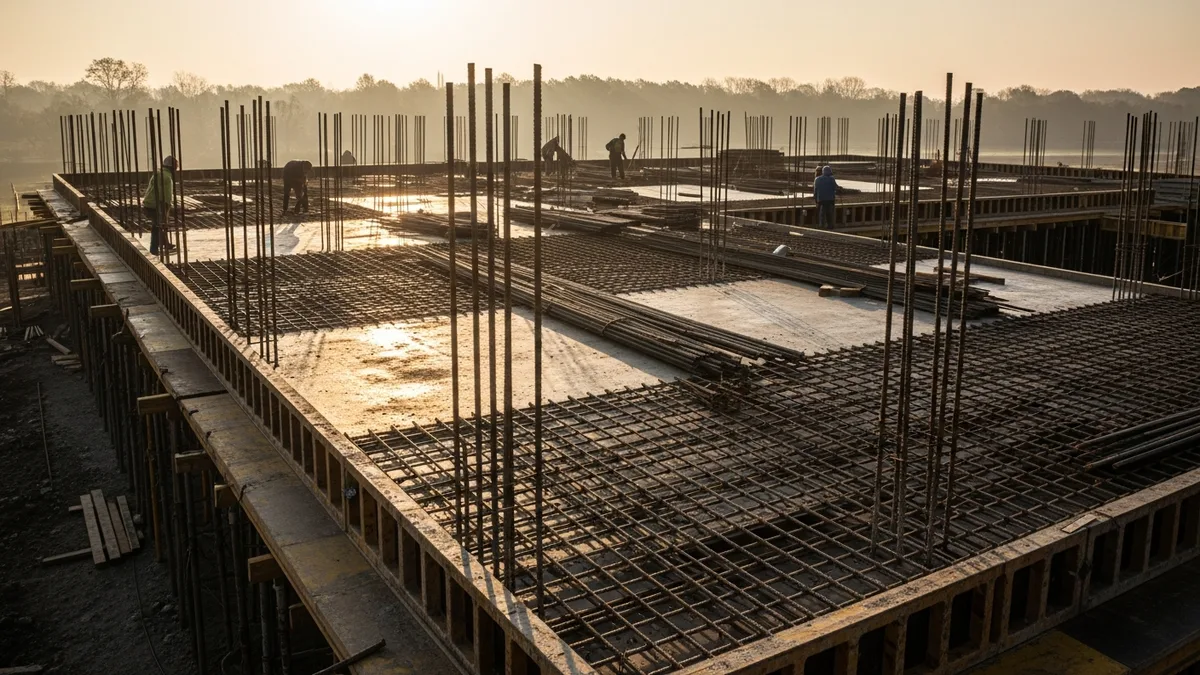
Step 1: Slab evaluation. Before you quote the job, get on site and look at the floor. Check for cracks, spalling, coatings, adhesive residue, lippage between slab sections, and moisture issues. All of these affect your approach and your price. Tap the floor in multiple spots. Listen for hollow areas that indicate delamination. Use a moisture meter. A slab reading above 4% moisture relative humidity is going to cause problems with densifiers and will definitely cause problems with any coating or overlay work.
Step 2: Coarse grinding. Start with metal-bond diamonds, typically 30 or 40 grit. This is where you remove existing coatings, flatten the slab, and start establishing your cut depth. Run the grinder in overlapping passes. East-west first, then north-south on the second pass. This crosshatch pattern prevents leaving directional scratches that show up later at higher gloss levels.
Step 3: Repair work. After the initial grind, cracks and holes become visible. Fill cracks with color-matched epoxy. Patch spalled areas with a cementitious repair mortar that accepts polish. Let repairs cure fully before moving on. Rushing this step is a mistake that shows up three grit levels later.
Step 4: Progressive grinding. Move through your grit sequence. A typical progression is 40, 80, 150, 300 on metal-bond diamonds, then transition to resin-bond diamonds at 100, 200, 400, 800, 1500, and 3000 grit. Not every job needs every step. A matte finish might stop at 400 resin. A high-gloss mirror finish needs all the way through 3000 or even higher.
Step 5: Densifier application. Between the metal-bond and resin-bond stages (usually after 150 or 200 metal grit), apply a lithium silicate densifier. This chemical soaks into the concrete and reacts with the calcium hydroxide to form calcium silicate hydrate, which is basically extra-hard crystal growth inside the pores. It hardens the surface, reduces dusting, and helps the resin-bond diamonds achieve a better polish. Apply it wet, let it soak for the manufacturer’s recommended time, and squeegee off the excess.
Step 6: Final polish and protection. After your final grit pass, clean the floor thoroughly. Apply a concrete guard or sealer if the client wants stain protection. For commercial spaces like restaurants, a guard product is almost always worth recommending because coffee, grease, and wine will stain unprotected polished concrete.
This entire process requires careful scheduling because each step needs to happen in sequence. You can’t skip ahead, and cure times between steps mean you need to plan your crew’s time carefully across multiple jobs.
Decorative Finishes Beyond Basic Polish
Polished concrete is just one piece of the decorative concrete world. If you’re going to compete in this space, you should understand the full menu of options you can offer clients.
Acid staining uses reactive metallic salts that penetrate the concrete surface and create permanent color through a chemical reaction with the lime in the cement. The results are always somewhat unpredictable, which is part of the appeal. You get mottled, variegated, organic-looking color that no two floors will match exactly. Earth tones like amber, brown, and green are the most common. Acid stain works on both new and old concrete, though old slabs may react unevenly depending on their history.
Water-based staining gives you more control over the final color. These are non-reactive stains that penetrate the surface and deposit pigment. You get consistent, predictable color in a wider range of options including blues, reds, and blacks that acid stains can’t produce. Water-based stains can be layered, blended, and even sprayed through stencils for custom designs.
Dye applications are similar to stains but use much finer pigment particles that penetrate deeper. Acetone-based dyes dry fast and produce vibrant colors. Water-based dyes are easier to work with and have lower VOCs. Dyes are often used in combination with polishing to create colored polished concrete floors.
Concrete overlays are thin cementitious coatings (usually 1/8” to 1/4” thick) applied over existing concrete. They’re your answer when the existing slab is too damaged for direct polishing or when the client wants a completely different look. Overlays can be stamped, stenciled, scored, stained, or polished just like new concrete. They’re also great for covering ugly tile removal scars or patched areas.
Epoxy and polyaspartic coatings are the fastest-growing segment in garage and commercial flooring. These are two-part resin systems that go down in layers with decorative flake, quartz, or metallic pigment broadcast into the wet coating. A full-flake garage floor is a bread-and-butter job that takes 1-2 days and commands $6-12 per square foot depending on your market.
Scored and stenciled patterns turn a plain slab into something that looks like tile, stone, or custom artwork. Scoring is done with a diamond blade after polishing. Stencils are laid down before stain application. Both add significant value to the finished floor and let you charge accordingly.
For contractors doing this kind of specialty work, keeping track of materials, labor, and profitability on each job is critical. Understanding your true job costing numbers is what keeps your decorative concrete division profitable instead of just busy.
Estimating and Pricing Decorative Concrete Work
Pricing polished and decorative concrete is more complex than standard flatwork. You’re not just calculating yards of material and labor hours for placement. There are multiple variables that affect your cost and your margin.
Square footage is the starting point, obviously. But square footage alone doesn’t tell you what a job will cost. A wide-open warehouse floor at 10,000 square feet will polish faster per square foot than a 500-square-foot residential bathroom with tight corners, cabinets to work around, and transitions to other flooring.
Slab condition is the biggest variable in your estimate. A brand-new slab with a good finish and no defects will polish quickly and cleanly. An old slab with multiple coatings, adhesive residue, cracks, and lippage issues can double or triple your grinding time. Always evaluate the slab before quoting.
Finish level directly drives labor hours. A basic cream polish with a matte finish might take 3-4 grinding passes. A high-gloss full-aggregate-exposure floor with dye could take 10-12 passes. Each pass is a full trip across the entire floor with the grinder.
Tooling costs add up faster than most new polishing contractors expect. Diamond segments wear out. Metal bonds wear faster on hard concrete (higher PSI means harder concrete means faster tooling wear). A single set of metal-bond diamonds for a 20-inch grinder can cost $400-800, and you might go through two or three sets on a single large job. Build tooling costs into every estimate as a line item, not an afterthought.
Mobilization and setup matter on smaller jobs. Loading and unloading a planetary grinder, edge grinder, vacuum system, and all your chemicals takes time. A half-day mobilization cost on a 200-square-foot job destroys your margins. Set minimum job sizes or minimum charges to protect yourself.
Here’s a rough pricing framework by finish level:
- Basic grind and seal (no polish): $2-4/sq ft
- Cream polish, matte to low sheen: $3-6/sq ft
- Salt and pepper, medium gloss: $6-10/sq ft
- Full polish with stain or dye: $10-18/sq ft
- Decorative overlay with polish: $12-20/sq ft
- Metallic epoxy: $8-15/sq ft
- Full-flake epoxy or polyaspartic: $6-12/sq ft
Don’t just take our word for it. See what contractors say about Projul.
These ranges vary by market. Urban areas with higher cost of living and more competition tend to sit in the middle of these ranges. Rural markets can swing either way depending on how many polishing contractors are operating in the area.
If you’re building out your estimating process, having templates for each finish level saves a ton of time. You can create standardized line items for each grit level, densifier application, stain work, and final seal, then adjust quantities based on square footage and slab condition. Good construction estimating software makes this process repeatable instead of reinventing the wheel on every bid.
Equipment and Materials You Need
Getting into concrete polishing requires a real equipment investment. Here’s what you need and what to expect to spend.
Planetary grinder is your primary machine. These have a large rotating head with multiple satellite discs that counter-rotate, creating an even grinding pattern. Entry-level machines with 20-inch heads run $8,000-15,000. Professional 25-30 inch machines cost $15,000-30,000. The bigger the head, the more square footage you cover per hour, and the better the finish quality because of more consistent contact pressure.
Edge grinder handles the 2-3 inches along walls and obstacles that the planetary grinder can’t reach. A good edge grinder costs $1,500-3,000. Don’t skip this. Hand-grinding edges is backbreaking and the results are inconsistent.
Dust collection is non-negotiable. OSHA silica dust regulations (Table 1, 29 CFR 1926.1153) require engineering controls when grinding concrete. You need either a dust shroud with a HEPA vacuum or a wet grinding system. Industrial HEPA vacuums rated for concrete dust run $2,000-5,000. Some grinders have integrated dust collection. Whatever system you use, make sure it keeps exposure below the permissible exposure limit of 50 micrograms per cubic meter over an 8-hour TWA.
Diamond tooling is your ongoing consumable cost. You need a full set of metal-bond diamonds (typically 30/40, 80, 150, 300 grit) and resin-bond diamonds (100, 200, 400, 800, 1500, 3000 grit). A complete tooling set for a 20-inch grinder costs $2,000-4,000. Budget for replacement tooling on every job.
Chemicals include lithium silicate densifier ($30-60/gallon, covers 200-400 sq ft per gallon), concrete guard/sealer ($40-80/gallon), stains and dyes ($50-150/gallon depending on type), and crack repair epoxy ($20-40 per cartridge).
Support equipment rounds out your kit: floor scrubber for cleaning between steps, moisture meter, pH test strips (for checking stain neutralization), sprayers for densifier and stain application, squeegees, and buckets of microfiber pads for guard application.
For contractors just testing the waters, renting a grinder for your first few jobs is smart. Most equipment rental houses carry planetary grinders for $300-500 per day. This lets you build skills and confirm market demand before dropping $20,000 on your own machine.
Managing all this equipment, plus crew assignments and scheduling across multiple job sites, gets complicated once you’re running more than two or three polish jobs at a time. That’s where having your operations organized in one system pays off fast.
Managing Polishing Projects for Profit
Here’s where most polishing contractors get into trouble. The actual grinding and finishing work is a skill you can learn. Managing the business side of polishing projects is where the money gets made or lost.
Accurate time tracking per grit level is your best friend. On your first several jobs, log exactly how long each grinding pass takes, including setup, edge work, and cleanup. After 10-15 jobs, you’ll have reliable production rates for different slab conditions and finish levels. These numbers become the foundation of accurate estimates going forward.
Material tracking prevents margin erosion. Diamond tooling and chemicals are your biggest variable costs after labor. If you’re not tracking how much tooling you’re using per square foot on each job, you’re guessing at your costs. And guessing usually means underestimating.
Change order management is critical in decorative work because clients often want to upgrade once they see the floor taking shape. “Can we go higher gloss?” or “What would it cost to add a border stain?” are conversations you want to have, but only if you can price the change accurately on the spot and get sign-off before doing the work.
Photo documentation at each stage protects you and sells future work. Take photos before you start, after coarse grinding, after repairs, and at the finished product. These photos resolve disputes about pre-existing conditions, demonstrate value to clients who can see the transformation, and give you portfolio content for your website and social media.
Crew development takes time with polishing. Unlike some concrete work where you can put a new laborer on a crew and have them productive by lunch, polishing has a learning curve. Running a grinder properly, reading the floor, knowing when to move to the next grit, and applying chemicals correctly all require training and practice. Invest in your people. Send them to manufacturer training. Have experienced operators mentor new ones.
Client communication throughout the project prevents surprises. Set expectations about dust (even with dust collection, some escapes), noise (grinders are loud), cure times between steps, and what the floor will look like at each stage. A floor that’s been coarse-ground looks terrible. If the client walks in during that phase and panics, you’ve got a problem. A quick text with a photo and a note saying “first pass done, starting fine grinding tomorrow” keeps everyone calm.
Running multiple polishing projects at once means tracking crews, equipment, materials, schedules, and client communications across several job sites. This is exactly the kind of operational complexity where construction management software for small contractors makes a real difference. When you can see all your active jobs, know which crew has which grinder, and track costs in real time, you make better decisions and catch problems before they eat your margins.
If you’re still running your concrete business on paper and basic tools, it might be time to look at what’s available. The contractors who are growing their polishing divisions the fastest are the ones who have their operations dialed in, not just their grinding technique. Check out how other successful concrete contractors are running their businesses to see what separates the ones who scale from the ones who plateau.
Book a quick demo to see how Projul handles this for real contractors.
Concrete polishing and decorative finishes represent some of the highest-margin work available to concrete contractors right now. The barrier to entry is real, with equipment costs, a learning curve, and the need for genuine craftsmanship. But that barrier is also what protects your margins once you’re in. Homeowners and commercial clients are willing to pay premium prices for quality decorative concrete because the results speak for themselves. Get your skills right, get your estimating tight, and get your project management organized, and this is work that will keep your crews busy and your bank account healthy for years to come.