Concrete Tilt-Up Construction Guide for Contractors

Tilt-up concrete construction has been around since the early 1900s, but it really took off in the 1970s and hasn’t slowed down since. Today it accounts for roughly 15 percent of all industrial and commercial buildings in North America, and in certain regions like Texas, Florida, and Southern California, that number is much higher.
The appeal is straightforward: you cast your wall panels flat on the ground (usually right on the building’s own floor slab), cure them, then tilt them up into position with a crane. You skip the formwork for vertical walls, you skip the exterior cladding on most projects, and you end up with a durable concrete shell that goes up faster and cheaper than most alternatives.
But tilt-up is not simple. There are a lot of moving parts, from casting bed preparation and panel design to rigging calculations and temporary bracing. Contractors who do it well make good money. Contractors who wing it end up with cracked panels, schedule delays, and change orders that eat their margin.
This guide covers the practical knowledge you need to run tilt-up jobs successfully. No theory for the sake of theory. Just the stuff that matters when you’re standing on the slab looking at 40 panels that need to be poured, lifted, and braced before the roof steel shows up.
How Tilt-Up Construction Works: The Basic Sequence
Before getting into the details, here’s the big picture of how a tilt-up project flows from start to finish. Understanding this sequence is critical because tilt-up is one of the most schedule-sensitive construction methods out there. One step done wrong or out of order can cascade into weeks of delays.
Step 1: Site Work and Foundations
Like any building, tilt-up starts with grading, utilities, and foundations. The difference is that your floor slab does double duty. It’s both the finished floor of the building and the casting bed for your wall panels. That means you need the slab poured and cured before you can start casting panels.
Foundation design for tilt-up typically includes continuous footings or grade beams along the building perimeter where the panels will sit, plus interior footings or piers for columns. The panel base connections need to line up precisely with the footings, so coordination between your foundation crew and your panel engineer is critical from day one. If your team is juggling multiple active projects at once, a solid project management system helps keep the coordination tight across all of them.
Step 2: Floor Slab Pour
The floor slab needs to be flat and strong enough to serve as a casting surface. You’re going to be setting edge forms on it, laying rebar and embeds, and pouring several inches of concrete on top of it for each panel. Then you’re going to drive a crane across it to pick those panels up.
Typical floor slabs for tilt-up are 5 to 6 inches thick with welded wire reinforcement or rebar, placed on a properly compacted subbase. The slab finish matters because any imperfections in the slab surface will transfer directly to the exterior face of your tilt-up panels. A hard-troweled finish is standard for casting beds.
After the slab is poured and cured, you’ll apply a bond breaker compound to the surface. The bond breaker is what allows your wall panels to release cleanly from the slab when it’s time to tilt them up. We’ll cover bond breakers in detail later because getting this wrong is one of the most expensive mistakes you can make on a tilt-up job.
Step 3: Panel Layout and Casting
With the slab cured and bond breaker applied, your crew lays out the panel locations on the slab using chalk lines and edge forms. Each panel is essentially a flat concrete pour with its own rebar mat, embed plates, lift inserts, window and door blockouts, and any architectural features like reveals or textures.
Panel casting is where the bulk of the field labor goes on a tilt-up job. Depending on the building size, you might cast all your panels at once (if the slab is large enough) or in multiple casting cycles. A typical approach is to cast panels in two or three rounds, with earlier panels curing while later ones are being formed and poured.
Step 4: Panel Erection
Once panels reach the required lifting strength (usually 2,500 to 3,000 psi, but your engineer will specify), the crane comes in and tilts each panel from horizontal to vertical, then sets it on the footing. A rigging crew manages the lift hardware and tag lines, while a bracing crew bolts temporary pipe braces to the panel and the slab as soon as the panel is plumb.
Panel erection day is the most visible and exciting part of a tilt-up project. It’s also the most dangerous and the most coordination-intensive. We’ll break down the erection process in detail below.
Step 5: Connections, Roof, and Finish
After all panels are standing and braced, the structural connections between panels and between panels and the roof structure get installed. Once the roof framing is in place and the permanent lateral bracing system is complete, the temporary braces come off. Then your finishing crews handle joint sealants, interior and exterior coatings, window and door installation, and whatever architectural finishes the project requires.
Panel Design: What Contractors Need to Know
Panel design is the engineer’s job, but as a contractor you need to understand what goes into it because design decisions directly affect your casting and erection operations. If you don’t speak the language, you’ll miss critical details in the shop drawings and end up with problems in the field.
Panel Dimensions and Thickness
Tilt-up panels are big. A typical warehouse panel might be 30 to 50 feet wide and 30 to 40 feet tall. Some panels on distribution centers and manufacturing plants run over 60 feet tall. Widths are usually set by the building column spacing or by the practical limits of crane capacity and rigging.
Panel thickness is driven by structural loads (wind, seismic, building height), fire rating requirements, and insulation needs. Common thicknesses for single-wythe panels are 5.5, 6.25, and 7.25 inches. Sandwich panels (two concrete wythes with rigid insulation in the middle) can be 9 to 11 inches total.
Thicker panels are heavier, and weight drives your crane selection and rigging requirements. A 40-foot by 50-foot panel that’s 7.25 inches thick weighs around 110,000 pounds. That’s 55 tons of concrete swinging at the end of a crane boom. The weight calculation needs to be precise because it determines everything from the crane size you need to rent to the lift insert pattern in the panel.
Reinforcement
Tilt-up panels carry both in-service loads (wind, seismic, gravity) and lifting loads. The lifting condition often controls the reinforcement design because the stresses on a panel being tilted from flat to vertical are different from the stresses on a panel standing in its final position.
Most panels use a grid of #4 or #5 rebar at specific spacings, with additional bars around openings and at the panel edges. The engineer will also specify where reinforcement needs to be placed relative to the panel thickness (near the inside face, near the outside face, or both) based on the loading conditions.
Your rebar crew needs to hit the specified cover dimensions (the distance from the rebar to the nearest concrete surface) accurately. Too little cover and you’ll get corrosion problems down the road. Too much cover and the reinforcement won’t perform as designed.
Openings, Blockouts, and Embeds
Almost every tilt-up panel has openings for windows, doors, or louvers. These are created using blockout forms, which are typically wood or foam frames set on the casting slab before the pour. The blockout edges need to be accurately placed because they’ll be visible on the finished building and need to align with the window and door frames that get installed later.
Panels also contain a range of embedded items:
- Lift inserts: Cast-in hardware that the crane rigging attaches to. Location is critical and specified by the lifting engineer.
- Brace inserts: Hardware for temporary pipe braces. Usually located in the upper third of the panel.
- Connection plates and angles: Steel embeds for welding panel-to-panel and panel-to-structure connections.
- Electrical boxes and conduit: Some projects cast electrical rough-in directly into the panels.
Getting all these embeds in the right location, at the right elevation within the panel thickness, and securely tied in place before the pour is one of the most detail-intensive parts of tilt-up work. A missed or misplaced lift insert can mean you can’t pick a panel, and you’ll be coring and epoxying a retrofit insert while the crane sits idle at $500 or more per hour.
Architectural Finishes
Tilt-up panels can look like plain concrete boxes, or they can look like stone, brick, or any number of textured finishes. Common architectural treatments include:
- Form liner textures: Rubber or plastic liners placed on the casting slab to impart a texture (brick pattern, stone, wood grain) to the panel face.
- Thin brick or stone veneer: Actual brick or stone units set face-down on the casting slab before the pour, so they bond into the panel.
- Reveals and rustication strips: Foam or rubber strips that create recessed lines in the panel surface for visual articulation.
- Sandblasting or acid etching: Post-erection surface treatments that expose the aggregate for a textured look.
- Paint and elastomeric coatings: Applied after erection for color and weather protection.
The architectural finish affects your casting procedure, your cure time, and your stripping/cleaning process after erection. A panel with thin brick veneer requires a lot more setup time and care during casting than a plain panel. Price accordingly.
The Casting Bed: Getting Your Slab Ready for Panel Pours
The casting bed is the foundation of your tilt-up panels, literally. The quality of your casting surface directly controls the quality of your panel faces, and problems here show up on every single panel you pour.
Slab Flatness and Finish
The floor slab surface becomes the exterior face of your tilt-up panels (since panels are cast face-down). That means every crack, trowel mark, joint, and imperfection in your slab will telegraph onto the finished wall.
For tilt-up casting, you want a hard-troweled finish with FF/FL (Floor Flatness/Floor Levelness) numbers that meet or exceed the project spec. Most tilt-up specs call for FF 35/FL 25 minimum. If your slab crew isn’t used to tilt-up work, stress that the finish standards are higher than a typical warehouse floor.
Control joints and construction joints in the slab need to be planned carefully because they’ll create lines on the panel face. Some engineers locate the casting layout to put panel edges right on the joints so they don’t telegraph across a panel face.
Bond Breakers
Bond breaker is the material applied to the casting slab that prevents the panel concrete from bonding to the slab concrete. Without it, your panels will stick to the slab and crack when you try to lift them.
There are three main types:
- Wax-based curing compounds: Applied after the slab pour serves as both a curing agent and a bond breaker. The most common choice on tilt-up projects.
- Liquid membrane bond breakers: Applied as a separate coat after the slab has cured. Provides a more reliable release than wax-based products.
- Polyethylene sheeting: Plastic sheet laid over the slab before casting. Used sometimes for architectural panels where the finish needs to be different from the slab surface.
The most common bond breaker failure is incomplete coverage. Every square inch of the slab under a panel must be covered. Missed spots create bond points where the panel can crack during lifting. Apply the bond breaker per the manufacturer’s instructions, at the recommended coverage rate, and inspect it before you start placing panel forms.
Also watch for contamination. Foot traffic, rain, dirt, and other trades working on the slab can compromise the bond breaker between application and panel casting. Some contractors apply the bond breaker in two coats and restrict traffic on the casting bed. The extra material and precaution cost a fraction of what a cracked panel costs.
Panel Layout on the Casting Bed
Planning where each panel gets cast on the slab is a puzzle that’s worth spending time on. The layout affects your casting sequence, your crane pick locations, and how much working room your crews have.
Key considerations:
- Panel orientation: Panels are usually cast with their bottom edge near the footing where they’ll ultimately stand. This minimizes the crane’s travel distance during erection.
- Stacking: When you don’t have enough slab area to cast all panels at once, you can stack panels by pouring one, applying bond breaker on top of the cured panel, and pouring the next one on top. Stacking adds casting cycles and complicates erection sequencing, but it’s standard on projects where the building footprint is smaller than the total panel area.
- Clearances: Leave enough room between panels for your crew to access all four edges for forming, rebar placement, and finishing. Three to four feet between panels is typical.
- Crane access: Think about where the crane will sit during erection and make sure it can reach all the panels at the angles needed. If a panel is cast in a location that requires the crane to work at maximum radius, you may need a bigger crane (more cost) or you’ll need to move the crane (more time).
Draw out your casting layout before you start any panel work and review it with your crane operator. Changes after you’ve started forming are expensive.
Lifting and Erection: The Day Everything Goes Vertical
Panel erection is the culmination of all your preparation work. It’s fast-paced, high-stakes, and there’s no room for improvisation. Everything about erection day should be planned, rehearsed, and documented before the crane shows up.
Crane Selection
The crane is the single most expensive piece of equipment on a tilt-up job, and selecting the right one requires careful analysis. You need to know:
- Maximum panel weight: Including the weight of any attached braces, rebar sticking out, or other items that add to the pick weight.
- Maximum pick radius: The distance from the crane’s center of rotation to the farthest panel location.
- Required lift height: The crane needs to lift the panel high enough to clear the footing and any previously erected panels.
- Ground conditions: The crane needs firm, level ground to set up on. Outrigger pads must bear on surfaces that can handle the concentrated loads.
Cross-reference your panel weights and pick radii against the crane’s load chart to make sure you have adequate capacity with a safety factor. Most tilt-up specs require the crane to be rated for at least 125 percent of the actual pick weight at the planned radius.
On large projects, you’ll often use a 200 to 300 ton hydraulic crane. Some very large panels or challenging site conditions require crawler cranes with higher capacities. The crane rental cost typically runs $15,000 to $40,000 per week depending on the size, so efficient erection sequencing matters a lot for your bottom line.
Lift Insert Patterns and Rigging
Tilt-up panels are picked using cast-in lift inserts connected to a strongback (a steel beam that distributes the crane load across multiple pick points) or a spreader bar arrangement. The lift insert locations are engineered based on panel geometry, weight distribution, and the stresses that develop during the tilt from horizontal to vertical.
A typical panel has 4 to 8 lift inserts arranged in a pattern that keeps the bending stresses within the panel’s capacity during lifting. Panels with large openings often require extra inserts near the openings to prevent cracking.
Before each pick, your rigging crew needs to:
- Verify all lift inserts are at the correct locations per the lift drawings
- Connect the rigging hardware and inspect all shackles, pins, and cables
- Confirm that the bond breaker has been cracked along all panel edges (some contractors run a small loader along the panel perimeter to break the initial bond)
- Confirm the panel is free of any hold-downs, screws, or connections to adjacent panels or the slab
- Get a green light from the crane operator and the erection superintendent
The Tilt Sequence
When the crane takes tension on the rigging, the panel begins to rotate from horizontal to vertical around its bottom edge. This is the most structurally demanding moment in the panel’s life. The bending stresses in the panel change continuously as the angle increases from 0 to 90 degrees.
The crane operator lifts slowly and steadily. Tag line handlers control the panel’s swing and rotation. Once the panel is vertical, the crane walks or swings it to its final position on the footing. The panel is set down on shim stacks or leveling bolts that allow fine adjustment of the panel elevation and plumb.
Once the panel is plumb and at the right elevation, the bracing crew moves in immediately to install temporary pipe braces. Nobody lets go of a tilt-up panel until the braces are bolted and secured. Period.
Erection Sequencing
The order in which you erect panels matters for several reasons:
- Crane efficiency: Erect panels in a sequence that minimizes crane repositioning. Usually, start at one end of the building and work your way around.
- Bracing clearance: Make sure you have room to install braces on each panel without conflicting with previously erected panels or upcoming erection positions.
- Corner panels: Corners often get erected first because they provide two bracing directions and help establish the building geometry.
- Panel interdependence: Some panels may need to be erected before others due to connection sequences or weight distribution on the slab.
Plan your erection sequence as part of your overall project schedule and review it with the crane operator, rigging crew, and bracing crew before the first pick.
Temporary Bracing: Keeping Panels Standing Until the Roof Goes On
Temporary bracing is what keeps your panels vertical from the moment the crane releases them until the permanent roof structure and connections are complete. Bracing failures have caused some of the most serious tilt-up construction accidents, so this is not a detail you take lightly.
Brace Design and Installation
Temporary braces are typically steel pipe or tube sections that connect to the upper portion of the panel (via cast-in brace inserts) and to the floor slab (via drilled-in anchors or cast-in anchors). Each panel needs a minimum number of braces based on its size, weight, and the wind loads it could see during construction.
The brace engineer determines the number, size, and angle of the braces for each panel. Common brace angles are 45 to 60 degrees from horizontal. Steeper angles provide less resistance to lateral loads, while shallower angles require longer braces and more slab anchor capacity.
Key bracing rules:
- Minimum two braces per panel. Small panels might need only two. Large panels often need four or more.
- Braces go on before the crane releases. The bracing crew should have anchors pre-drilled and braces staged and ready before each panel pick.
- Brace turnbuckles allow plumb adjustment. After the crane releases, the crew uses the turnbuckles to fine-tune the panel to plumb.
- Braces stay on until the permanent structure is complete. This means the roof framing, connections, and any required concrete topping or diaphragm must be in place before you start removing braces.
Wind During Construction
Wind is the enemy of temporarily braced tilt-up panels. A panel that’s standing with temporary braces and no roof structure has no lateral support at the top. It’s essentially a big concrete sail.
Most tilt-up bracing is designed for a specific construction wind speed, usually 70 to 90 mph depending on the project location. But that’s the design wind, not a guarantee. If high winds are forecast, you may need to delay erection or add supplemental bracing.
Monitor weather forecasts daily during panel erection and the bracing period. Have a high-wind action plan that specifies what wind speed triggers a work stoppage and what additional bracing measures you’ll take. This is the kind of safety planning that belongs in your construction safety program.
Brace Removal Sequence
Removing braces is just as engineered as installing them. You don’t just walk down the building and pull all the braces off. The removal sequence needs to follow the structural engineer’s directions, which typically require:
- Roof framing complete and connected to panels
- Roof diaphragm (metal deck or plywood) installed and fastened
- Panel-to-panel connections welded and inspected
- Panel-to-foundation connections completed
- Engineer’s inspection and sign-off
Remove braces in a sequence that doesn’t leave any section of the building temporarily under-braced. This usually means removing braces from interior panels first and leaving corner and end panels braced until last.
Connections: Tying the Building Together
Once panels are standing and braced, the structural connections turn a collection of individual concrete slabs into a building. Connection design is entirely the engineer’s territory, but you need to understand the types and what they require from your field crews.
Panel-to-Foundation Connections
The base of each panel connects to the foundation with some combination of:
- Welded connections: Steel embed plates in the panel base are welded to embed plates in the footing. This is the most common base connection.
- Grouted pockets: The panel sits over rebar dowels projecting from the footing. After the panel is set and plumbed, the pockets are grouted to lock the dowels in place.
- Cast-in-place haunches: Concrete is placed around the panel base after erection to form a structural haunch.
The base connection is critical because it transfers all the gravity and lateral loads from the panel into the foundation. If embeds are out of position (in either the panel or the footing), you’re looking at retrofit connections that are more expensive and often weaker than the original design.
Panel-to-Panel Connections
Adjacent panels are typically connected at their vertical edges with welded steel plates or with cast-in-place pilasters (columns of concrete poured between panels). The connection type depends on the building’s structural system and the seismic requirements.
Welded connections require access to the embed plates on both panel edges, proper fit-up, and qualified welders. If your panel casting tolerances weren’t tight and the embeds don’t line up, the welder is going to have a tough time and the engineer may need to redesign the connection.
Panel-to-Roof Connections
The roof structure (usually steel joists, steel beams, or wood glulam beams) connects to embeds in the upper portion of the panels. These connections transfer lateral loads from the roof diaphragm into the walls and are critical for the building’s resistance to wind and seismic forces.
Ledger angles or embed plates are cast into the panel at the roof bearing elevation. The roof framing is then bolted or welded to these embeds. Elevation accuracy is important because the roof framing has to work at the as-built panel height, not just the design height.
Scheduling and Coordination: Running a Tight Tilt-Up Job
Tilt-up projects have a distinctive scheduling rhythm that’s different from conventional construction. Understanding that rhythm and planning for it is what separates profitable tilt-up contractors from the ones who lose money.
The Critical Path
On most tilt-up projects, the critical path runs through: slab pour, panel casting, panel erection, roof framing, and brace removal. Everything else (MEP rough-in, interior framing, finishes) happens after the shell is up.
The two biggest schedule risks are:
- Slab delays: If the slab is late, everything is late. You can’t cast panels without a casting bed.
- Concrete strength gain: Panels need to reach lifting strength before the crane shows up. If your concrete is slow to gain strength (due to cold weather, mix issues, or late pours), the crane sits idle.
Build float into your schedule around panel curing. Having a week of buffer between your last panel pour and your scheduled crane mobilization can save you tens of thousands of dollars in crane standby charges.
Crew Coordination
A tilt-up job at peak activity has a lot of trades on site at the same time: slab finishers, rebar crews, embed installers, concrete pumpers, form carpenters, bracing crews, crane operators, riggers, welders, and general laborers. Keeping all these groups productive without stepping on each other requires clear daily planning and communication.
Hold a daily coordination meeting during the casting and erection phases. Cover what panels are being formed today, what’s being poured, what’s curing, and what’s being erected. Make sure every crew lead knows where their work area is and what’s happening around them. This is the type of crew scheduling that makes or breaks your productivity on site.
Weather Planning
Tilt-up is weather-sensitive at almost every phase:
- Slab pour: Rain ruins a fresh slab finish. Wind accelerates surface drying and causes plastic shrinkage cracking.
- Panel casting: Same weather concerns as the slab, plus the bond breaker can be compromised by rain between application and panel pour.
- Erection: High winds can delay or shut down crane operations. Most crane operations stop at sustained winds of 25 to 30 mph.
- Connections: Welding in rain is a code violation and quality problem.
Check the extended forecast before every major activity and have contingency plans ready. Having a rain-out protocol that your whole team knows prevents chaotic scrambling when the weather turns. For contractors dealing with seasonal weather challenges, building that knowledge into your planning process is essential.
Common Tilt-Up Mistakes and How to Avoid Them
After decades of tilt-up construction across the industry, the same mistakes keep showing up. Here are the ones that cost the most money and cause the most headaches, along with what to do about them.
Inadequate Bond Breaker Coverage
This is the number one field problem on tilt-up jobs. If even a small area of the casting slab doesn’t have bond breaker, the panel will stick. When the crane tries to lift a panel that’s bonded to the slab, one of two things happens: the panel cracks, or a chunk of the floor slab rips up with the panel. Both are expensive.
Prevention: Apply bond breaker in two coats. Inspect coverage before every panel pour. Restrict traffic on the casting bed between bond breaker application and panel casting. If the bond breaker gets rained on or contaminated, reapply it.
Misplaced Lift Inserts
Lift inserts that aren’t where the lifting engineer specified create a risky situation. The panel may crack during lifting because the stresses don’t match the design, or the rigging may not balance properly and the panel hangs crooked.
Prevention: Use a template or precise measurements to locate every lift insert. Have the lifting engineer’s drawings at the casting location. Survey the insert locations before the pour and compare them to the drawings. Double-check is not overkill here.
Pouring Panels Too Thin or Too Thick
Concrete thickness variations across a panel affect its weight (which matters for crane capacity), its structural capacity, and its appearance. A panel that’s an inch thinner than designed in one area may not have enough concrete cover over the rebar. A panel that’s an inch thicker adds thousands of pounds to the pick weight.
Prevention: Set your edge forms accurately and check them before and during the pour. Use a depth gauge or screed rails to control panel thickness consistently. If you’re tracking job costs carefully, concrete overruns from thick panels add up fast across a project with 50 or more panels.
Ignoring the Erection Plan
Some contractors treat erection day as “just start picking panels.” That approach leads to crane repositioning delays, bracing conflicts, panels set in the wrong sequence, and general chaos.
Prevention: Have a written erection plan that specifies the sequence, crane positions, rigging configurations, and bracing crew assignments for every panel. Review it in a pre-erection meeting with the crane operator, riggers, bracing crew, ironworkers, and superintendent. When everyone knows the plan, the day runs smoothly.
Insufficient Curing Time
The pressure to stay on schedule pushes some contractors to lift panels before they’ve reached the required strength. This is one of those decisions that can end careers. A panel that cracks during lifting because it was only at 2,000 psi instead of the required 3,000 psi is a serious safety incident and a massive project cost.
Prevention: Test concrete cylinders at the correct intervals and don’t lift until the break results confirm the required strength. If cold weather or mix issues are slowing strength gain, push the crane date back rather than gambling. The crane standby cost is nothing compared to a dropped or cracked panel.
Poor Panel Finish Quality
Tilt-up panels are the finished exterior of the building. Bug holes, honeycombing, cold lines, form marks, and color variations all show on the finished wall. Unlike conventional cast-in-place work where formwork creates the finished surface, tilt-up panel quality depends on your casting bed preparation, concrete placement technique, and finishing.
Prevention: Vibrate the concrete thoroughly, especially around blockouts and embeds where air tends to get trapped. Finish the exposed face (which becomes the interior wall surface) properly. For the cast face (exterior), your slab finish quality and bond breaker application are what determine the final appearance. If you want a deeper understanding of concrete finishing in general, our concrete finishing guide covers the techniques that apply here too.
Estimating and Bidding Tilt-Up Projects
Tilt-up estimating is different from conventional concrete estimating because you’re pricing a system, not just a series of individual pours. Getting the estimate right requires understanding how all the pieces fit together and where the costs actually live.
Major Cost Categories
A tilt-up estimate typically breaks down into these buckets:
- Casting slab: This is the floor slab, but the cost is partially allocated to the tilt-up scope because it doubles as the casting bed. Bond breaker, additional flatness requirements, and any slab repairs needed after panel removal are tilt-up costs.
- Panel forming: Edge forms, blockout forms, reveal strips, form liners, and the labor to set and strip them. On a project with lots of openings and architectural details, forming can be 20 to 30 percent of the panel cost.
- Reinforcement: Rebar, welded wire, and the labor to place and tie it. Panel rebar is usually straightforward, but panels with large openings need extra reinforcement that adds cost.
- Embeds and inserts: Lift inserts, brace inserts, connection plates, electrical boxes, and the labor to place them accurately. Budget about $3 to $5 per square foot of panel for embeds on a typical project.
- Concrete: The material and placement cost for the panels themselves. Calculate volume carefully based on panel thickness and area, plus waste.
- Crane and erection: Crane rental, mobilization, rigging hardware, rigging crew labor, and the bracing crew. The crane is usually the single largest line item in the erection scope.
- Bracing: Brace materials (rented or owned), slab anchors, and the labor to install and later remove braces.
- Connections: Weld plates, weld labor, grouting, and any post-erection connection work.
- Finishes: Patching, sealants, coatings, and any post-erection architectural work.
Where Bids Go Wrong
The most common estimating mistakes on tilt-up projects are:
- Underestimating forming labor for complex panels. A panel with four window openings, a personnel door, an overhead door, reveals, and a form liner takes three to four times longer to form than a solid panel.
- Not accounting for stacking. If you need to stack panels on the casting slab, you’re paying for the bond breaker, forming, and casting effort twice for the same slab area.
- Low-balling the crane. If erection takes an extra day because of weather, sequencing issues, or bracing delays, that crane rental cost keeps running. Build contingency time into your crane rental.
- Missing the finishing costs. Panel patching, joint sealants, and coatings are often underestimated because estimators focus on the structural scope and treat finishes as an afterthought.
- Ignoring the learning curve. If your crew hasn’t done tilt-up before, your productivity won’t match industry averages. Be honest about your crew’s experience level in your estimate.
When you’re tracking costs on the actual job, a good job costing system lets you compare your actual costs against your estimate in real time so you can catch problems before they eat your profit.
Quality Control on Tilt-Up Projects
Quality control on tilt-up jobs isn’t just about the finished product. It’s about catching problems at each stage before they compound into bigger problems downstream. A defect in the casting bed that’s caught before panel pouring costs you an hour of rework. That same defect caught after panel erection costs you thousands.
Pre-Pour Inspection Checklist
Before every panel pour, walk the panel and verify:
- Edge forms are at the correct dimensions and securely braced
- Rebar is placed at the correct spacing and cover
- All lift inserts are in the correct locations per the lifting drawings
- All brace inserts are placed per the bracing engineer’s requirements
- All connection embeds are located per the structural drawings
- Blockouts are securely fastened and braced against flotation
- Reveal strips and form liners are in good condition and properly placed
- Bond breaker coverage is complete and uncontaminated
- Electrical and mechanical rough-in items are in place if applicable
- Concrete mix design is confirmed with the batch plant
During the Pour
Monitor concrete placement and finishing carefully:
- Check concrete temperature and slump at the truck
- Ensure adequate vibration, especially around blockouts and embeds
- Watch for blockout flotation (blockouts can lift out of position as concrete rises around them)
- Maintain consistent panel thickness using depth checks
- Protect freshly placed concrete from wind and direct sun to prevent plastic shrinkage cracking
Post-Erection Inspection
After panels are standing:
- Check panel plumb and elevation at multiple points
- Inspect all weld connections for quality and completeness
- Check that braces are properly tensioned and anchored
- Look for lifting cracks, especially around inserts and openings
- Document any panel damage that occurred during lifting
Quality problems caught early are cheap to fix. Quality problems caught after the building is enclosed are expensive headaches. Building quality checks into your daily workflow makes it routine rather than something that only happens when there’s a problem.
Why Tilt-Up Keeps Growing
Tilt-up construction continues to gain market share for good reasons. It’s cost-effective for single-story commercial buildings, it’s fast once your crews are experienced, and it produces a durable structure with minimal exterior maintenance.
The method has also evolved beyond plain warehouse boxes. Architects are pushing tilt-up into multi-story office buildings, retail centers, schools, and even churches. With sandwich panels providing energy-efficient envelopes and form liners creating sophisticated architectural finishes, tilt-up can compete aesthetically with precast and curtain wall systems at a lower cost.
For contractors looking to grow in the commercial construction market, tilt-up capability is a significant differentiator. It’s a specialty that commands better margins than conventional flat work, and once your crews have the experience, you’ll find a steady pipeline of work from developers who appreciate the speed and value that tilt-up delivers.
The contractors who do tilt-up well share a few common traits: they invest in training, they plan thoroughly, they respect the engineering, and they don’t cut corners on the details that matter. If that sounds like how you run your business, tilt-up might be the right next step for your company.
Wrapping Up
Tilt-up concrete construction is a method that rewards preparation and punishes shortcuts. From the casting slab to the final brace removal, every phase depends on the one before it. Get the bond breaker right and your panels release cleanly. Place the lift inserts accurately and your erection day goes smoothly. Cure your concrete to the right strength and your panels don’t crack. Plan your erection sequence and your crane costs stay on budget.
The contractors who succeed with tilt-up are the ones who treat it as a system rather than a series of disconnected concrete pours. Every decision you make at the casting stage affects what happens on erection day, and every erection decision affects your connection and finishing work.
If you’re running tilt-up projects and looking for a way to keep your casting schedules, crane bookings, crew assignments, and job costs organized in one place, Projul was built for contractors who’d rather focus on building than chasing paperwork. Give it a look.
Ready to see how Projul fits your operation? Schedule a free demo and we’ll walk you through it.
Frequently Asked Questions
How thick are tilt-up concrete panels?
How long does it take to erect tilt-up panels?
What is the biggest risk in tilt-up construction?
Can you do tilt-up construction in cold weather?
How much does tilt-up construction cost compared to steel frame?
Related Articles

How to Implement Construction Software Without Losing Your Mind
Most construction software rollouts fail. Not because the software is bad, but because the rollout was rushed. Here are...
Read More →
How Selections Can Pay for Themselves in Three Easy Steps
Most contractors lose thousands each year on wrong material orders, slow client decisions, and missed upsell chances....
Read More →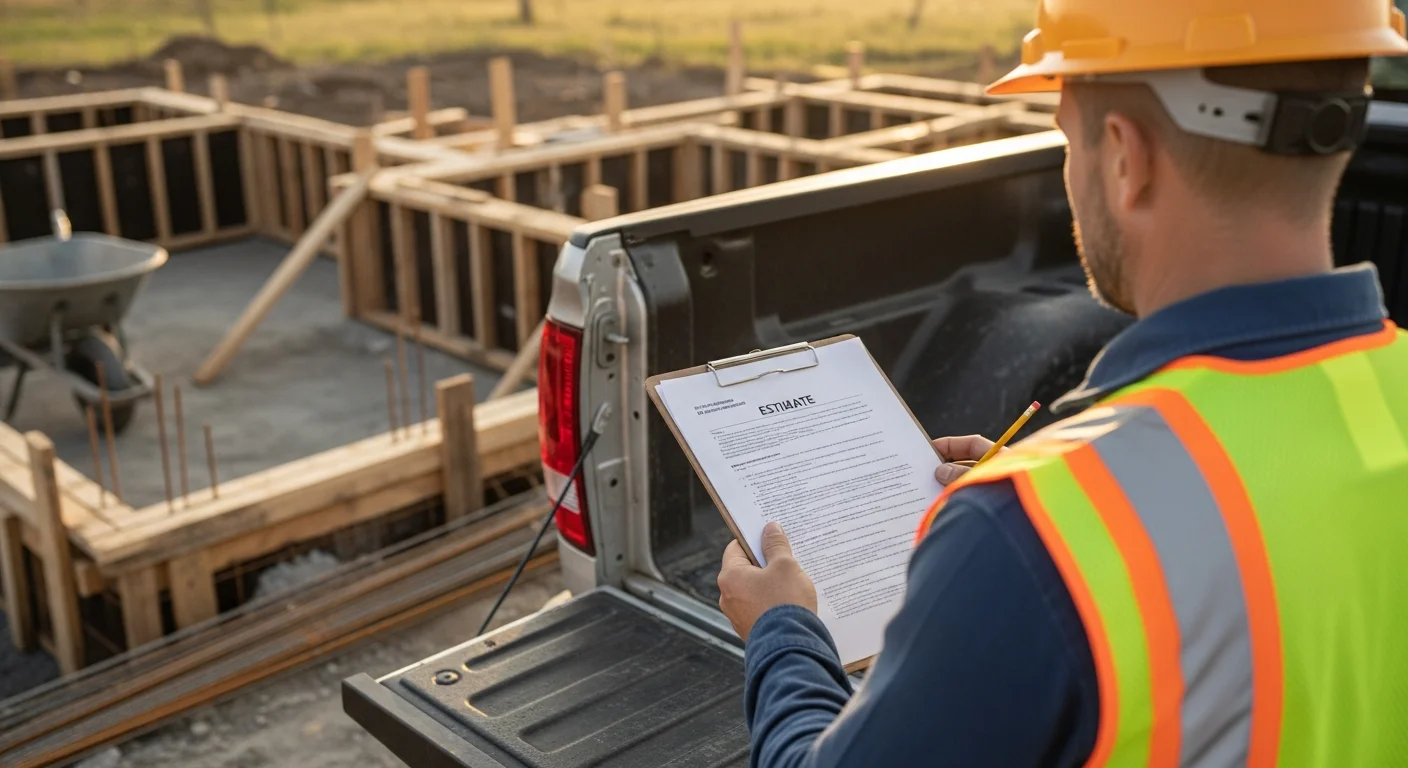
3 Free Concrete Estimate Templates for Every Pour Type (2026)
Three ready-to-use concrete estimate templates with realistic line items, material costs, labor rates, and markup...
Read More →