Electrical Rough-In Guide for GCs
Construction Electrical Rough-In Guide for General Contractors
The electrical rough-in is one of those phases that can look fine to an untrained eye and still fail inspection six different ways. Wires are in the walls, boxes are nailed to studs, and the panel has circuits landed. Everything looks done. But the inspector shows up and starts counting wires in boxes, checking staple distances, and asking about arc fault protection on bedroom circuits, and suddenly your electrician is back on site for two more days of corrections.
As a GC, you are not pulling wire or bending conduit. But you are the one who owns the schedule, and a failed electrical rough-in inspection does not just affect your electrician. It holds up insulation, drywall, paint, trim, and every finish trade behind it. One bad inspection can push a project back a week or more, and that cost lands on you.
This guide covers what you need to know about the electrical rough-in phase: what to look for during your walkthrough, how to coordinate your electrician with other trades, what the most common inspection failures are, and how to build a process that passes inspection consistently across every job you run.
What the Electrical Rough-In Actually Covers
The electrical rough-in includes all the wiring, boxes, panels, and connections that get installed inside walls, ceilings, and floors before they are closed up. No devices get installed yet. No switches, no outlets, no light fixtures. Just the infrastructure that everything plugs into later.
Here is what your electrician is installing during rough-in:
Electrical panel and subpanels. The main panel gets mounted and the bus bars, neutral bars, and ground bars get set up. Subpanels in garages, workshops, or detached structures get their feeders run during this phase too.
Branch circuit wiring. Every circuit in the house gets its wire pulled from the panel to the boxes. This includes general purpose circuits, dedicated appliance circuits, lighting circuits, and any specialty circuits for things like hot tubs, EV chargers, or workshop equipment.
Boxes. Switch boxes, outlet boxes, junction boxes, and ceiling fan boxes all get mounted to framing during rough-in. Box placement has to match the electrical plan, and every box has to be the right size for the number of wires entering it.
Grounding system. The grounding electrode conductor gets run from the panel to the grounding electrode, which is usually a ground rod driven into the earth, a connection to the rebar in the foundation, or both. The grounding system ties the entire electrical system to earth and is critical for safety.
Low voltage rough-in. While not always done by the same electrician, low voltage wiring for data, cable TV, security systems, and audio often happens during this phase. Some GCs use a separate low voltage sub for this work.
The rough-in happens after framing is complete and typically after plumbing rough-in, since plumbing drain lines have slope requirements that make them harder to reroute. Your electrician works around the plumbing that is already in place and coordinates with HVAC on shared wall and ceiling cavities. If you are also managing an HVAC rough-in on the same project, getting the sequence right between these trades is critical.
Your Pre-Inspection Walkthrough: What to Check
Do not rely on the inspector to be your quality control. Walk the job yourself before calling for inspection. You do not need to be a master electrician, but you do need to know what the common failures look like. Here is a system-by-system breakdown.
Box Placement and Mounting
Start with the boxes. Every box should match the electrical plan for location and height. Standard outlet boxes sit 12 to 18 inches from the floor (measured to the bottom of the box in most jurisdictions). Switch boxes sit 48 inches from the floor. Counter outlets in kitchens and bathrooms sit at the height specified in the plans, usually 42 to 44 inches.
Check that boxes are mounted securely to framing. A box that wobbles when you push on it is going to cause problems later when someone installs a heavy device or plugs something in. Ceiling fan boxes need to be rated for fan support, not just a standard round box. If you see a pancake box where a ceiling fan is supposed to go, flag it immediately.
Look for missing boxes. Walk the plans room by room and verify every outlet, switch, and fixture location has a box. It is common for electricians to miss a box or two, especially in closets, hallways, and exterior locations. Finding a missing box now takes five minutes. Finding it after drywall takes half a day.
Also check box fill. The NEC limits how many wires can enter a box based on the box volume and the wire gauge. Overfilled boxes are a fire hazard and a guaranteed inspection failure. If you see a single gang box with what looks like too many wires crammed in, ask your electrician to verify the box fill calculation. A deeper box or a two-gang box might be needed.
Wire Routing and Support
Check how wire is routed through the framing. NM cable (Romex) needs to be stapled within 12 inches of every box and supported every 4.5 feet along its run. Missing staples are one of the most common rough-in failures because they are easy to skip when you are pulling wire fast.
Wires running through studs should pass through holes drilled in the center of the stud, not notches cut into the edge. When the hole is less than 1-1/4 inches from the face of the stud, a steel nail plate is required to protect the wire from drywall screws. Your electrician should install nail plates wherever wires are close to the face of framing. If they skipped them, send them back. This is not optional. A drywall screw through a live wire is a fire waiting to happen.
Look for wire that is running across the face of framing instead of through it. Exposed wire on the face of a stud or joist is vulnerable to damage from other trades and is a code violation in most cases. The wire needs to be protected, either by running it through the framing or by covering it with a nail plate or conduit.
In areas where wiring runs through a ceiling joist space that is used as a return air plenum, standard NM cable is not allowed. The wire needs to be rated for plenum use or run in conduit. This comes up on jobs with open return air systems and it catches a lot of electricians off guard.
Circuit Layout and Wire Sizing
You do not need to trace every circuit, but a quick check of wire sizing on key circuits prevents the most expensive failures. Here are the basics:
- 15-amp circuits use 14 AWG wire
- 20-amp circuits use 12 AWG wire
- 30-amp circuits (dryers, large AC units) use 10 AWG wire
- 40-amp circuits (ranges, cooktops) use 8 AWG wire
- 50-amp circuits (ranges, EV chargers, subpanels) use 6 AWG wire
If you see thin wire on a circuit that should be carrying a heavy load, flag it. An undersized wire on a 40-amp range circuit is not just an inspection failure, it is a fire hazard.
The NEC also requires dedicated circuits for specific appliances: dishwasher, disposal, microwave, refrigerator, laundry, and bathroom receptacles. Each of these needs its own circuit, not a shared one. If your electrician is trying to double up appliances on a single circuit to save wire, that is a code violation.
Kitchen and bathroom counter receptacles must be on 20-amp circuits. Bedroom circuits require AFCI protection. Bathroom, kitchen, garage, outdoor, laundry, and crawl space receptacles require GFCI protection. The specifics vary by code year and local amendments, so your electrician needs to know which version of the NEC your jurisdiction has adopted.
Grounding and Bonding
Check that the grounding electrode system is installed. You should see a ground wire running from the panel to a ground rod (or rods) outside the building. Most jurisdictions require two ground rods spaced at least 6 feet apart, or a single rod that tests below 25 ohms resistance.
Inside the panel, verify that the neutral and ground bars are properly configured. In the main panel, neutrals and grounds can share a bar. In a subpanel, they must be separated with the neutral bar isolated from the panel enclosure. Getting this wrong is a common failure on projects with detached garages or accessory dwelling units that have their own subpanel.
Also look for bonding on metal systems. Water piping, gas piping, and structural steel all need to be bonded to the electrical grounding system. Your electrician should have bonding jumpers installed on these systems. If the water heater has dielectric unions that break the metal continuity of the water piping, a bonding jumper needs to bridge that gap.
AFCI and GFCI Protection
Arc fault and ground fault protection requirements have expanded dramatically in recent code cycles, and this is where a lot of inspections fail because the electrician is working from memory of an older code.
Under the 2020 and 2023 NEC, AFCI protection is required in virtually every living space: bedrooms, living rooms, dining rooms, kitchens, hallways, closets, laundry rooms, and similar areas. The only spaces typically exempt are bathrooms, garages, and outdoors (which require GFCI instead).
GFCI protection is required for receptacles in bathrooms, kitchens (within 6 feet of a sink), garages, outdoors, crawl spaces, unfinished basements, laundry areas, and near pools or hot tubs. Some jurisdictions also require GFCI protection on dishwasher and disposal circuits.
Your electrician can provide AFCI and GFCI protection at the breaker or at the first receptacle in the circuit. During rough-in, you will not see the devices installed yet, but you should see that the wiring is configured to support the required protection. If your electrician is using combination AFCI/GFCI breakers in the panel, the panel layout should show them allocated to the correct circuits.
Common Reasons Electrical Rough-Ins Fail Inspection
Knowing the failure points helps you prevent them. These are the issues that come up on inspection day over and over again.
Missing staples on NM cable. This is probably the single most common failure. Wire has to be secured within 12 inches of each box and every 4.5 feet along its run. When an electrician is pulling wire fast to stay on schedule, staples get skipped. The inspector will catch every one.
Box fill violations. Too many wires in a box that is too small. Every wire, clamp, device, and ground counts toward the fill calculation. An overstuffed box is a fire risk and an automatic failure.
Missing nail plates. Anywhere a wire passes through framing within 1-1/4 inches of the face, a steel nail plate is required. Inspectors look for these on every penetration and they are easy to spot when missing.
Wrong wire gauge for the circuit. 14 AWG wire on a 20-amp breaker is a failure. It seems obvious, but it happens, especially when an electrician uses scrap wire from another circuit to finish a run.
AFCI or GFCI protection missing or on the wrong circuits. Code requirements change with each cycle, and electricians who are used to the previous code version miss the new requirements. This is especially common with AFCI protection, which now covers far more of the house than it did ten years ago.
Improper grounding. Missing ground rods, neutral and ground combined in a subpanel, or missing bonding on metal piping systems. Any grounding deficiency is a safety issue and a guaranteed failure.
Boxes not flush with the framing face. When drywall goes up, the box needs to be flush with the finished wall surface. During rough-in, that means the box should extend past the face of the stud by the thickness of the drywall, typically 1/2 inch. Boxes that are too deep will not support devices properly and can create a fire hazard at the gap between the box and the drywall.
Open knockouts on boxes and panels. Every unused opening in a box or panel enclosure must be closed. Open knockouts allow debris, insects, and fingers into energized equipment.
Wire damage. Nicked insulation, kinked wire, or wire that has been bent too sharply around corners. Damaged wire has to be replaced, not taped.
Building a solid quality control checklist that includes these items means your team catches them before the inspector does. Consistent inspection pass rates come from consistent pre-inspection processes.
Managing Your Electrical Sub Through the Rough-In Phase
The electrical rough-in is usually the longest single-trade phase in the rough-in sequence, and it touches every room in the building. Managing your electrician through this phase requires clear communication, realistic scheduling, and a willingness to walk the job before calling it done.
Pre-Work Coordination
Before your electrician starts, sit down with them and the plans. Walk through any unusual conditions: high ceilings that require scaffolding, complex lighting layouts, specialty circuits for equipment the homeowner is supplying, and any coordination issues with plumbing or HVAC that are already in the walls.
If there are changes from the original electrical plan, document them now. Homeowners love to add outlets, move switches, and upgrade lighting plans after framing is complete. Every one of those changes affects the electrical rough-in scope and cost. Capture them as formal change orders before the work happens, not as “oh by the way” conversations on site. A proper change order process keeps everyone aligned on scope and cost.
Also confirm that your electrician has pulled the electrical permit and has the approved plans on site. The inspector will want to see both, and showing up without them is a wasted trip.
Schedule Realistically
The electrical rough-in takes longer than most GCs expect, especially on custom homes with complex lighting plans, home automation systems, and lots of dedicated circuits. A standard 2,500 square foot production home might take 3 to 4 days. A 4,000 square foot custom home with recessed lighting everywhere, a home theater, a workshop sub-panel, and an EV charger can take 7 to 10 days.
Build your project schedule with realistic durations for the electrical rough-in, and give your electrician a clear start date that accounts for the trades that need to finish ahead of them. Compressing the electrical rough-in window to make up for earlier delays is a recipe for sloppy work and failed inspections.
Document Everything
Have your electrician photograph their work as they go, especially inside wall cavities that will be covered by drywall. Require photos of the panel layout, the grounding system, any unusual wiring configurations, and every box before it gets buried.
Store these photos in your project documentation system so they are organized by project and accessible years later. When a homeowner calls about a tripped breaker or a dead outlet 18 months after closing, those rough-in photos tell you exactly what is behind the wall without cutting it open.
Handle Disputes Professionally
Electricians and inspectors do not always agree on code interpretation. When your electrician thinks the installation is correct and the inspector says it is not, your job as the GC is to get it resolved without it becoming personal.
Ask the inspector to cite the specific code section. Share it with your electrician. Most of the time, one side is clearly right and the fix is straightforward. Occasionally, the code is genuinely ambiguous, and a conversation between your electrician and the inspector resolves it. What you do not want is your electrician arguing with the inspector on site. That never ends well for anyone.
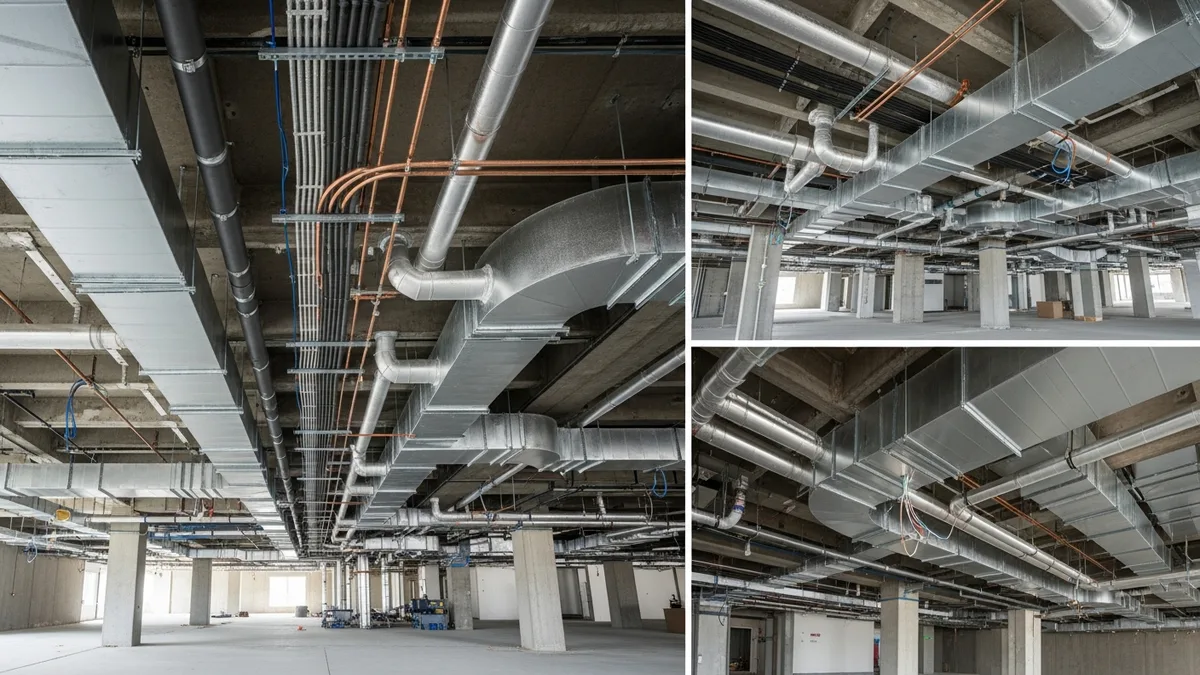
Coordinating Electrical with Other Rough-In Trades
The electrical rough-in shares wall and ceiling cavities with plumbing, HVAC, and low voltage. Getting these trades to coexist without conflict requires planning, sequencing, and communication that flows through you as the GC.
The Standard Rough-In Sequence
Most residential projects follow this general rough-in order:
- Plumbing (drains and vents first, then supply lines)
- HVAC (ductwork and refrigerant lines)
- Electrical (branch circuits, panels, and boxes)
- Low voltage (data, security, audio, video)
- All rough-in inspections
- Insulation
- Drywall
Plumbing goes first because drain lines need specific slopes and cannot be easily rerouted. HVAC ductwork is bulky and somewhat inflexible. Electrical is the most flexible of the three because wire can bend around obstacles relatively easily. That does not mean your electrician should be left with whatever space is remaining. It means a quick coordination meeting between all three subs before any of them start prevents most conflicts.
When your plumber has already run a 3-inch drain line through a stud bay that your electrician also needs, the electrician needs to work around it. If your HVAC sub ran a supply duct through a joist bay where the electrician planned to route a circuit, someone has to adjust. These conflicts happen on every job. The question is whether you deal with them proactively in a 20-minute meeting or reactively when two subs are standing on site pointing at each other.
For a deeper look at how to manage the plumbing rough-in that your electrician will need to work around, our plumbing rough-in guide covers the coordination from the plumbing side.
Electrical and HVAC Conflicts
The most common electrical/HVAC conflict is in ceiling cavities where ductwork and wiring both need to run. Recessed light cans are a frequent problem. The electrician installs can lights in a ceiling, and then the HVAC sub needs to run a duct through the same joist bay. Or the duct is already in place and the can light does not fit.
Resolve these on paper before either trade starts. Lay the electrical plan and the mechanical plan over each other and look for conflicts. In most cases, shifting a can light 6 inches or rerouting a duct run solves the problem. But it has to happen during planning, not during installation.
Another common issue is wiring that runs too close to HVAC equipment. The NEC requires clearances around electrical panels and disconnects. If your HVAC sub installs equipment that blocks access to a panel or disconnect switch, it will fail inspection. Verify clearances during your walkthrough.
Low Voltage Coordination
Low voltage wiring (Cat6 data, coax, security, audio) often gets treated as an afterthought, and that is when it causes problems. Low voltage wire should not be bundled with or run parallel to power wiring. The NEC requires separation between power and communication cables, and running them through the same holes in framing creates interference and code issues.
If your project has a separate low voltage sub, make sure they coordinate with your electrician on routing paths. If your electrician is also handling low voltage, confirm they are keeping proper separation. This is especially important in home offices and media rooms where data performance matters.
Understanding NEC Requirements That Affect Rough-In
You do not need to memorize the National Electrical Code, but understanding the sections that directly affect rough-in work helps you have informed conversations with your electrician and your inspector.
Receptacle Spacing Rules
The NEC requires that no point along a wall line in a habitable room be more than 6 feet from a receptacle. This means receptacles must be spaced no more than 12 feet apart along any wall. Any wall section 2 feet or wider needs a receptacle. Doorways and fireplaces break the wall, but the 6-foot rule starts over on each side.
Kitchen countertops have their own rules. Receptacles are required every 4 feet along the counter, and no point on the countertop should be more than 2 feet from a receptacle. Island and peninsula countertops need at least one receptacle each.
Bathrooms require at least one receptacle within 3 feet of each lavatory basin. This receptacle must be on a dedicated 20-amp circuit (or a circuit shared only with other bathroom receptacles).
These spacing rules drive box placement during rough-in. If your electrician is short on boxes in a room, there is a good chance they are violating receptacle spacing. Walk the plans and count.
Panel Access and Working Space
The NEC requires specific clearances around electrical panels: 30 inches wide, 36 inches deep, and 78 inches high (or to the ceiling if lower). This working space must be kept clear and accessible. Panels cannot be installed in bathrooms or clothes closets.
During rough-in, the panel location is set, but the working space might not be fully clear yet. Make a mental note of where the panel is and what else is planned for that area. If the laundry equipment, water heater, or HVAC unit will end up in front of or beside the panel, you have a clearance problem that needs to be addressed now, not after everything is installed.
Smoke and Carbon Monoxide Detector Wiring
The NEC and local building codes require interconnected, hardwired smoke detectors in specific locations. During rough-in, your electrician runs a dedicated circuit to all smoke detector locations and connects them with a traveler wire so they all sound when one detects smoke.
Carbon monoxide detectors are also required in homes with fuel-burning appliances or attached garages. Some jurisdictions require combination smoke/CO detectors in every location.
Check that your electrician has boxes at every required detector location. The number and placement depends on your local code, but generally you need one in every bedroom, one outside each sleeping area, and one on every level of the home. Missing a detector location is a common fail that is easy to prevent.
Budgeting and Cost Control for Electrical Rough-In
Electrical work is one of the larger line items on any residential project, and the rough-in phase is where most of that cost occurs. Keeping the electrical rough-in on budget takes upfront planning and real-time tracking.
What Drives Electrical Costs
The biggest cost drivers in the electrical rough-in are:
Number of circuits and devices. More outlets, switches, and dedicated circuits mean more wire, more boxes, and more labor hours. A basic code-minimum house might have 25 to 30 circuits. A fully loaded custom home can easily hit 60 or more.
Wire distance. A ranch-style home with the panel on one end means longer wire runs to the far side of the house. A two-story home with the panel in the basement has long runs to second-floor circuits. Wire is priced by the foot, and those long runs add up.
Panel size and complexity. A 200-amp panel is standard for most new homes. Custom homes with workshops, EV chargers, pools, and heavy appliance loads may need 400-amp service or multiple subpanels. Each upgrade increases material and labor costs.
Specialty systems. Whole-house generators, solar prep, EV charger circuits, home automation, landscape lighting transformers, and structured wiring systems all add cost beyond the base electrical plan.
Local code requirements. Jurisdictions that require conduit instead of NM cable (common in Chicago and parts of the Northeast) have significantly higher labor costs for rough-in because pulling wire through conduit takes much longer than stapling Romex to framing.
Avoiding Cost Overruns
The biggest source of electrical cost overruns is scope changes after rough-in starts. The homeowner wants to add recessed lights in every room. The kitchen designer moves the island and needs outlets relocated. The homeowner’s IT guy shows up and wants 47 data drops that were not in the original plan.
Each change is individually small, but collectively they can add 15 to 25 percent to the electrical budget on a custom home. Capture every change as a written change order with a price before the work happens. Your electrician should not be doing extra work on a handshake.
Get the electrical plan finalized as early as possible. The more decisions that are locked down before rough-in starts, the fewer changes happen in the field. Walk the homeowner through the electrical plan during framing and confirm outlet placement, switch locations, and lighting layouts while they can actually stand in the rooms and visualize the space.
Getting Accurate Bids
When comparing electrical bids, make sure every bid covers the same scope. Key items that should be in every electrical rough-in bid:
- Permit and inspection fees
- Main panel and all breakers
- All branch circuit wiring per the approved electrical plan
- All boxes, connectors, clamps, nail plates, and supports
- Grounding electrode system
- Smoke and CO detector wiring
- Low voltage rough-in (if included in scope)
- Temporary power during construction (if included)
- Cleanup and debris removal
A bid that excludes permits, low voltage, or temporary power looks cheaper but is not. Get apples-to-apples pricing and evaluate based on total cost, schedule commitment, and the electrician’s inspection track record. If you need a starting point for electrical pricing, our free electrical estimate template breaks down the standard line items.
Building a Repeatable Inspection Process
Passing electrical rough-in inspections consistently is not about having the best electrician on every job. It is about having a process that catches problems before the inspector shows up, regardless of which electrician did the work.
Create a Standard Walkthrough Checklist
Build a checklist that covers every item we discussed in this guide and walk it on every single job. Include:
- Box placement matches plans (location and height)
- All boxes are securely mounted
- Ceiling fan boxes are fan-rated
- Wire is stapled within 12 inches of boxes and every 4.5 feet
- Nail plates on all penetrations within 1-1/4 inches of framing face
- Wire gauge matches circuit amperage
- AFCI protection on all required circuits
- GFCI protection on all required circuits
- Grounding electrode system is complete
- Panel has proper working clearances
- Smoke and CO detector locations are wired
- No open knockouts on boxes or panels
- No wire damage (nicked insulation, kinks, sharp bends)
- Receptacle spacing meets code in all rooms
- Kitchen counter receptacle spacing meets code
- Bathroom receptacles are on dedicated 20-amp circuits
- Dedicated circuits for all required appliances
- Low voltage is separated from power wiring
- Pressure test or megger test results (if required by jurisdiction)
Hand this checklist to your superintendent or project manager and make it part of the standard pre-inspection process. Over time, your team memorizes it and the walkthrough becomes second nature. New hires get trained on the checklist and start contributing to quality control from day one.
For a broader look at building inspection checklists across all trades, our construction inspection checklist guide covers the framework.
Track Inspection Results Across Projects
Every inspection result, pass or fail, should be logged in your project management system. Track which inspectors are in which jurisdictions, what they tend to focus on, and what correction items come up repeatedly.
After six months of tracking, patterns emerge. Maybe Inspector Johnson in your county always checks box fill calculations closely. Maybe your electrician keeps getting flagged for missing staples near panels. Maybe a specific code section trips up everyone in your market because the local amendment is different from the national code.
These patterns tell you where to focus your walkthrough time and where to coach your subs. The GCs who track this data pass inspections at a higher rate because they are learning from every job, not starting from scratch each time.
Train Your Team
Your superintendents and project managers should know enough about electrical rough-in to spot the obvious problems. They do not need to be electricians, but they should be able to identify a missing nail plate, count wires in a box, check a staple distance, and verify that a box is in the right location.
Invest time in walking jobs with your team and explaining what you are looking for. The first few walkthroughs take longer because you are teaching. After that, your team runs the checklist themselves and only escalates issues they are unsure about. This scales your quality control without requiring you to personally walk every job.
Use Your Project Management Tools
Managing electrical rough-ins across multiple active projects means tracking schedules, inspections, photos, change orders, and sub communications for each one. Doing this in email, text messages, and spreadsheets works until it does not. And it usually stops working right around the time you go from three active jobs to six.
A project management platform built for contractors keeps everything in one place: the schedule that shows when your electrician starts and when the inspection is called, the photos that document what is behind the walls, the change orders that track scope additions, and the communication history that proves what was discussed and agreed to.
The electrical rough-in is too important to manage with sticky notes. Build the systems that make quality consistent, and the inspections take care of themselves.
Final Thoughts
The electrical rough-in is not the flashiest part of a construction project, but it is one of the most consequential. Every wire in every wall will be carrying current for decades. Every box, every connection, every ground wire matters. And once drywall goes up, you are trusting that what is behind it was done right.
As a GC, your job is not to do the electrical work. Your job is to make sure the electrical work gets done correctly, on schedule, and to code. That means walking the job before inspection, knowing what the common failures look like, coordinating your trades so they are not fighting over the same spaces, and building a process that works on every project.
The contractors who pass inspections consistently are not lucky. They are organized. They have checklists. They document everything. And they hold their subs to a standard that does not change from job to job.
Get the rough-in right, and everything that follows goes smoother. Get it wrong, and you spend the rest of the project catching up.
If you want to see how other contractors manage their rough-in phases and inspections, check out what real Projul users have to say about running their projects with better visibility and less chaos.
Frequently Asked Questions
What is an electrical rough-in inspection?
How long does an electrical rough-in take on a typical house?
Who schedules the electrical rough-in inspection?
What happens if the electrical rough-in fails inspection?
Can you install insulation before the electrical rough-in passes?
What is the difference between AFCI and GFCI protection?
Related Articles

Interior Finishing for Contractors: The Complete Drywall, Paint, and Trim Guide
Interior finishing is where your project goes from bare studs to a space your client can actually picture living in....
Read More →
Helical Piles and Screw Foundations: The Contractor's Complete Guide
Helical piles are showing up on more and more project specs. This guide covers everything a contractor needs to know...
Read More →
Construction Septic System Installation: What Every GC Needs to Know
Septic systems on rural builds bring unique scheduling, permitting, and soil challenges that can wreck your timeline if...
Read More →