Epoxy and Resinous Flooring Guide: Surface Prep, Application, and Maintenance for Commercial and Industrial Projects | Projul
Why Resinous Flooring Is a Growing Market
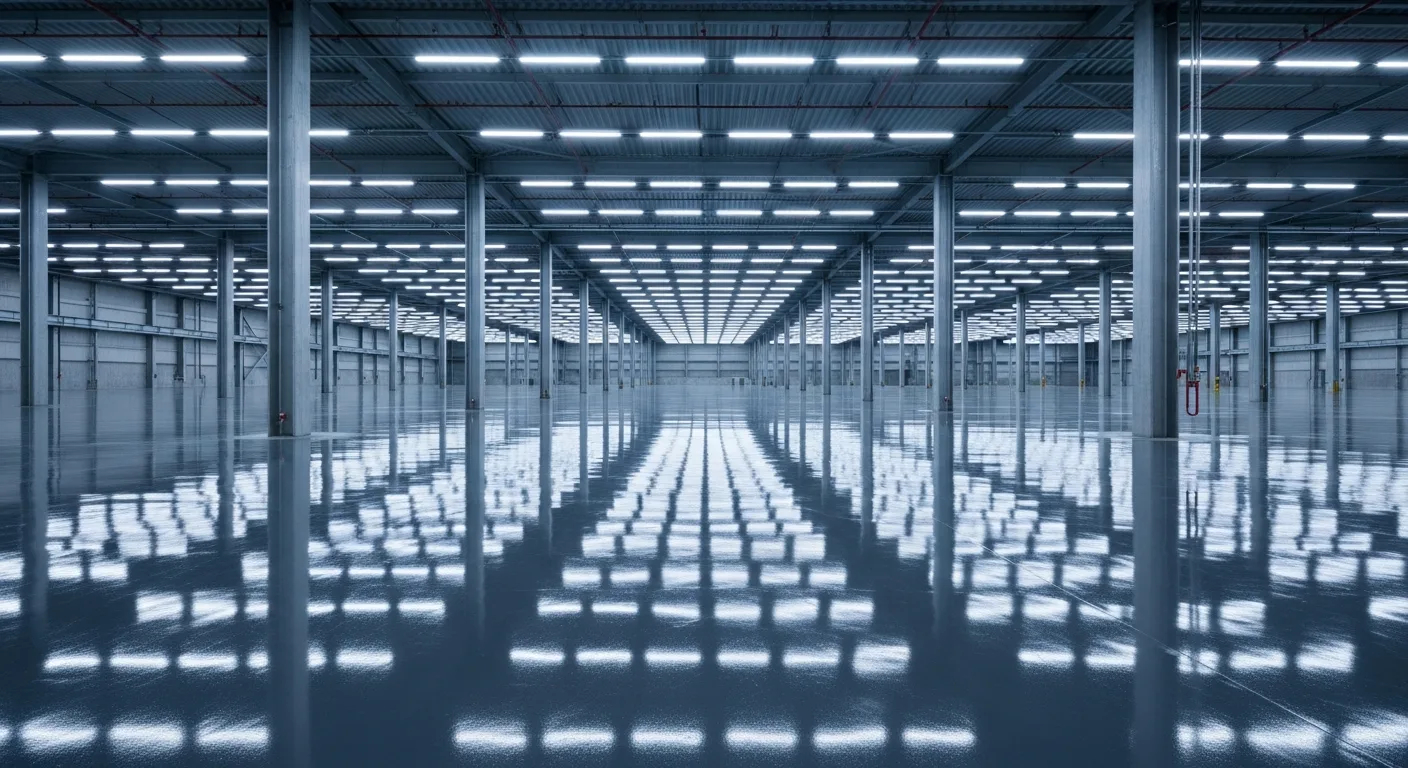
Walk into any modern warehouse, food processing plant, brewery, auto dealership, or commercial kitchen and look down. Chances are you are standing on some type of resinous floor coating. The market has exploded over the past decade, expanding from heavy industrial applications into retail, healthcare, education, and even residential garages.
For flooring contractors, this work pays well and generates repeat business. A properly installed epoxy floor system lasts 10 to 20 years in commercial use, and when it eventually needs recoating, the same client calls you back. The margins are solid, especially on larger commercial and industrial projects where your experience with surface prep and system selection separates you from the garage-floor-weekend-warrior crowd.
But resinous flooring is unforgiving. The chemistry is time-sensitive. The surface prep requirements are absolute. And if you get the system selection wrong for the client’s environment, you own the failure. This guide covers the practical knowledge you need to bid, prep, install, and maintain commercial and industrial resinous floor systems.
Types of Resinous Floor Systems
“Epoxy flooring” is a catch-all term that people use for everything from a thin garage floor paint to a 1/4-inch industrial mortar system. In reality, there are several distinct resin chemistries, each with different strengths and applications.
Epoxy (Epoxide Resins)
Epoxy is the workhorse of the resinous flooring industry. It is a two-component system (resin and hardener) that cures through a chemical reaction. Epoxies bond extremely well to concrete, resist chemicals and abrasion, and build thickness efficiently.
Best for: Warehouses, manufacturing, garages, mechanical rooms, retail
Limitations: Yellows and chalks under UV exposure (not ideal for outdoor or sun-exposed areas), limited flexibility (can crack on slabs that move), and sensitive to moisture during application.
Polyurethane
Polyurethane coatings are tougher and more flexible than epoxies. They resist UV exposure, abrasion, and thermal shock better. In floor systems, polyurethane is most commonly used as a topcoat over an epoxy base to combine the best properties of both materials.
Best for: Topcoats, UV-exposed areas, high-traffic zones, areas subject to thermal cycling
Limitations: Does not build thickness as well as epoxy, costs more per mil of thickness, sensitive to moisture during application.
Urethane Cement (Cementitious Urethane)
Urethane cement is the heavy-duty option for the most demanding environments. It bonds to concrete even in the presence of moisture, resists extreme temperatures (from -40 to 250+ degrees Fahrenheit), and handles aggressive chemical exposure and thermal shock.
Best for: Food and beverage processing, commercial kitchens, breweries, chemical plants, cold storage
Limitations: Highest material cost, requires skilled installers, heavier application equipment, and generates more waste.
Methyl Methacrylate (MMA)
MMA systems cure extremely fast, often within 1 to 2 hours, making them ideal for facilities that cannot afford extended shutdowns. They perform well in cold temperatures and have good chemical resistance.
Best for: Retail spaces, hospitals, food service, any facility that needs minimal downtime
Limitations: Very strong odor during application (requires ventilation), highest material cost, and the fast cure time leaves little room for error.
Polyaspartic
Polyaspartic coatings are a subset of polyurethane that cure faster and tolerate a wider range of application temperatures. They have become extremely popular for decorative garage floors and light commercial applications.
Best for: Garage floors, showrooms, light commercial, decorative applications
Limitations: Fast cure gives limited working time, does not handle heavy chemical exposure as well as epoxy or urethane cement.
Surface Preparation: The Make-or-Break Step
Ask any experienced resinous flooring installer what determines success or failure and they will give you the same answer: surface prep. It accounts for 70% to 80% of the job’s success. A perfect coating applied over a poorly prepared slab will fail. A decent coating applied over a perfectly prepared slab will perform.
Why Surface Prep Matters
Resinous coatings bond to concrete through mechanical adhesion (gripping into the pores and profile of the surface) and, to a lesser extent, chemical adhesion. If the surface is smooth, contaminated, or sealed, there is nothing for the coating to grab. It will peel.
Concrete Surface Profile (CSP)
The International Concrete Repair Institute (ICRI) developed the CSP scale, which runs from 1 (nearly flat) to 10 (very rough, like a heavily scarified surface). Different coating systems require different CSP levels:
- CSP 1-2: Thin-film sealers and light coatings. Achieved with acid etching or light grinding.
- CSP 2-3: Standard epoxy coatings. Achieved with diamond grinding.
- CSP 3-5: High-build and self-leveling systems. Achieved with shot blasting or aggressive grinding.
- CSP 5-9: Thick overlay and mortar systems. Achieved with scarifying or heavy shot blasting.
Preparation Methods
Diamond Grinding: A walk-behind grinder with diamond-segmented tooling removes the top layer of concrete, producing a uniform profile. This is the most common prep method for commercial floor coatings. Grinding also levels minor surface irregularities.
Shot Blasting: A machine propels steel shot at the concrete surface, blasting away the top layer and creating a rough profile. Shot blasting is fast, dust-free (the machine vacuums as it goes), and produces a very consistent CSP. It is the preferred method for large industrial floors.
Scarifying: Rotating cutters aggressively remove concrete. Used for heavy contamination, thick coatings removal, or when a deep profile is needed. Scarifying leaves a rough surface that usually needs a skim coat before coating.
Acid Etching: Muriatic or phosphoric acid reacts with the concrete to create a light profile. This method is inconsistent, hard to control, generates hazardous waste, and is not recommended for commercial work. It is acceptable only for small residential jobs where other equipment is not practical.
Moisture Testing
Moisture vapor transmission (MVT) from below the concrete slab is one of the most common causes of coating failure. Water vapor pushes up through the slab and lifts the coating from underneath, causing bubbles, blisters, and delamination.
Test every slab before you commit to a coating system:
- Calcium chloride test (ASTM F1869): Place a sealed dish of calcium chloride on the slab for 60 to 72 hours. Weigh it before and after. The weight gain tells you the moisture vapor emission rate (MVER). Most epoxy manufacturers require an MVER below 3 lbs/1,000 sq ft/24 hrs.
- Relative humidity test (ASTM F2170): Drill holes in the slab, insert RH probes, and let them equilibrate for 72 hours. Read the RH at 40% slab depth. Most manufacturers require RH below 75%.
If moisture levels exceed the coating manufacturer’s limits, you have several options:
- Install a moisture mitigation primer (vapor barrier coating)
- Use a urethane cement system that tolerates higher moisture
- Allow the slab to dry longer (if new construction)
- Address the moisture source (drainage, vapor barrier below slab)
Contamination
Oil, grease, curing compounds, paint, tire marks, and other contaminants must be completely removed before coating. Grinding or shot blasting removes surface contaminants, but deep oil penetration may require chemical degreasers or even slab replacement in extreme cases.
Test for contamination by pouring water on the slab. If it beads up, something is repelling it, and that same something will repel your coating.
Application Process
With the surface properly prepared, tested, and approved, it is time to coat. The specifics vary by system, but here is the general process for a standard commercial epoxy floor system.
System Components
A typical commercial system includes:
- Primer: Thin, penetrating epoxy that soaks into the concrete pores and creates a bonding layer. Applied at 3 to 5 mils.
- Body coat (base coat): High-build epoxy that provides the main thickness and chemical resistance. Applied at 10 to 20 mils per coat. May include decorative flake or quartz broadcast.
- Topcoat: Polyurethane or polyaspartic clear coat that provides UV stability, wear resistance, and gloss. Applied at 3 to 5 mils.
Mixing
Resinous coatings are two-component (2K) systems that must be mixed at the exact ratio specified by the manufacturer. Use a slow-speed drill with a mixing paddle (not a paint stir stick) and mix for the full time specified, usually 2 to 3 minutes. Scrape the sides and bottom of the container during mixing.
Once mixed, the material has a limited pot life, typically 20 to 45 minutes for epoxy at 70 degrees. Do not mix more than your crew can apply within the pot life. As the material sits, it generates heat from the chemical reaction, which accelerates the cure and shortens working time.
Application Tools
- Squeegee or notched squeegee: For spreading self-leveling and high-build materials
- Roller: 3/8-inch nap for thin coats, 1/2 to 3/4-inch for higher builds. Use solvent-resistant roller covers.
- Spike shoes: For walking on freshly applied material without leaving marks
- Backroller: After squeegee application, back-roll to even out the material and release air bubbles
- Spray equipment: For large-area primer and topcoat application
Temperature and Humidity
Most epoxy systems require:
- Air temperature: 50 to 90 degrees Fahrenheit
- Concrete temperature: 50 to 90 degrees Fahrenheit
- Concrete temperature must be at least 5 degrees above the dew point (to prevent condensation)
- Relative humidity: below 85%
Cold slabs slow the cure and can cause amine blush (a waxy film on the surface). Hot slabs accelerate the cure and shorten working time. Measure both air and slab temperatures with an infrared thermometer before you start.
Broadcast Systems (Flake and Quartz)
Decorative broadcast systems are popular for commercial, retail, and garage floors. After applying the base coat, broadcast vinyl color flakes or colored quartz aggregate into the wet material until you achieve the desired coverage.
Full broadcast (full rejection): Throw enough flake or quartz to completely cover the surface, then scrape off the excess after curing. This gives you a uniform, fully textured surface with excellent slip resistance.
Random broadcast: Throw flake lightly for a scattered, less dense appearance. This is less durable than full broadcast but simpler and uses less material.
After the broadcast cures, scrape the surface smooth, vacuum, and apply the topcoat.
Common Epoxy Flooring Failures
Understanding what goes wrong helps you prevent it. Here are the failures you see most often:
Peeling and Delamination
Cause: Poor surface prep (insufficient CSP, contamination, moisture). The coating never bonded properly.
Prevention: Follow the prep protocol exactly. Test for moisture. Do a test patch if you have any doubts about adhesion.
Bubbling and Blistering
Cause: Outgassing from the concrete (air escaping from the slab pores as temperature rises), moisture vapor transmission, or solvent entrapment from applying too thick.
Prevention: Apply primer first to seal pores. Coat in the evening when slab temperatures are falling (not rising). Stay within recommended thickness.
Amine Blush
Cause: Applying epoxy in cool, humid conditions. The amine hardener reacts with carbon dioxide and moisture in the air, forming a waxy, whitish film on the surface.
Prevention: Maintain temperature and humidity within spec. If amine blush occurs, wash the surface with warm water and a scrub pad before applying the next coat.
Hot Joints and Roller Marks
Cause: Working too slowly and rolling back into partially cured material. The lap marks where fresh material meets setting material remain visible.
Prevention: Work in manageable sections. Keep a wet edge. Have enough crew to move at the pace the material demands.
Yellowing
Cause: UV exposure on standard epoxy (which is not UV-stable).
Prevention: Use a polyurethane or polyaspartic topcoat on any floor exposed to sunlight or UV lighting.
Job Management for Flooring Contractors
Resinous flooring projects require tight coordination. Surface prep, coating application, and cure times create a fixed sequence that does not tolerate delays or miscommunication. If your grinding crew preps the floor on Monday but the coating crew does not show until Wednesday, dust and contamination settle back onto the surface, and you are re-cleaning.
Projul helps flooring contractors schedule multi-phase jobs, track material costs, and communicate with clients about access restrictions during cure times. When you are running multiple jobs across different facilities, having one place to see your crew assignments, material orders, and project timelines keeps things on track.
See pricing for your team size, or schedule a demo to walk through how it works for specialty flooring operations.
Maintenance and Long-Term Care
A properly installed resinous floor needs minimal maintenance, but it does need some care to reach its full lifespan.
Daily Cleaning
Sweep or dust-mop daily to remove abrasive grit that wears the surface. In food processing and commercial kitchens, scrub with a neutral pH cleaner and auto-scrubber.
Periodic Deep Cleaning
Monthly or quarterly (depending on traffic), scrub the floor with a walk-behind auto-scrubber and a floor cleaner approved for resinous coatings. Avoid harsh solvents, citrus-based cleaners, and anything with a pH above 10 or below 4 unless the coating manufacturer specifically approves it.
Spot Repairs
Small chips and scratches can be repaired by lightly sanding the damaged area, cleaning, and applying a touch-up coat of the same material. Match the batch and sheen as closely as possible.
Recoating
When the topcoat wears thin (typically 5 to 10 years in high-traffic commercial use), lightly abrade the entire surface and apply a fresh topcoat. This is far cheaper than stripping and starting over, and it extends the system life by another 5 to 10 years.
Choosing the Right System for the Application
System selection is a technical decision that should match the environment, not the budget. Here is a quick guide:
| Environment | Recommended System | Why |
|---|---|---|
| Warehouse / distribution | Epoxy base + polyurethane top | Abrasion resistance, forklift traffic |
| Food processing | Urethane cement | Thermal shock, chemicals, moisture tolerance |
| Commercial kitchen | Urethane cement with anti-slip | Heat, grease, sanitation requirements |
| Retail / showroom | Epoxy with decorative flake + polyaspartic top | Aesthetics, UV stability, fast return to service |
| Garage floor | Polyaspartic or epoxy + polyaspartic | Hot tire pickup resistance, fast cure |
| Pharmaceutical / clean room | Epoxy self-leveling + polyurethane | Seamless, chemical resistant, easy to clean |
| Cold storage | Urethane cement | Low-temperature tolerance |
| Brewery / winery | Urethane cement with cove base | Chemical resistance, thermal shock, seamless walls |
Bidding Resinous Flooring Projects
Pricing resinous flooring requires knowing your material costs, labor rates, equipment costs, and the specific conditions of each slab. Here is a framework:
Material costs: Request spec sheets and pricing from your coating supplier for each project. Material costs vary widely based on system type, thickness, and decorative options.
Labor: Track your crew’s production rates (square feet per hour) for each system type. A standard two-coat epoxy goes down faster than a full-broadcast quartz system. New concrete is faster than renovation work with heavy prep.
Equipment: Factor in grinder rental, shot blaster rental, diamond tooling consumption, and consumables (rollers, squeegees, mixing buckets, spike shoes).
Mobilization: Travel, setup, and cleanup time. On multi-day projects, factor in overnight security for your equipment and materials.
Waste and contingency: Resinous materials have limited pot life. Mixed material that is not applied is waste. Budget 5% to 10% material waste on most jobs.
Wrapping Up
Resinous flooring is skilled, profitable work that rewards contractors who invest in understanding the chemistry, mastering surface preparation, and building efficient crews. The market continues to grow as more facility owners discover the durability and aesthetics of properly installed floor systems.
The difference between a floor coating company that builds a strong reputation and one that drowns in callbacks comes down to surface prep, system selection, and attention to the manufacturer’s application specs. Take those seriously, and the work speaks for itself.
Frequently Asked Questions
How thick should an epoxy floor coating be?
How long does epoxy flooring take to cure?
What causes epoxy floor coating to peel?
Can you apply epoxy over existing epoxy flooring?
What is the difference between epoxy and polyurethane floor coatings?
How do you test concrete moisture before applying epoxy?
What is concrete surface profile (CSP) and why does it matter?
How much does epoxy flooring cost per square foot?
Related Articles

BIM Clash Detection: How to Catch Conflicts Before They Cost You on the Jobsite
BIM Clash Detection: How to Catch Conflicts Before They Cost You on the Jobsite Every contractor has a story about the...
Read More →
Asphalt Paving and Compaction Guide: Mix Types, Laydown Temperatures, and Quality Testing
Asphalt paving looks straightforward from a distance. A truck dumps material, the paver lays it down, and rollers...
Read More →
Construction Jobsite Wi-Fi & Connectivity Guide: Setting Up Reliable Internet in the Field
A practical guide to getting reliable internet on construction job sites. Learn about cellular hotspots, mesh networks,...
Read More →