Fiber Cement Siding Installation Guide: Cutting, Fastening, Flashing, and Painting Best Practices | Projul
Why Fiber Cement Siding Has Taken Over the Market
Walk through any mid-range to upscale residential neighborhood built in the last 15 years and you will see fiber cement siding everywhere. There is a good reason for that. The material resists rot, fire, termites, and hail better than wood, vinyl, or engineered wood products. It holds paint longer, does not warp in heat, and carries warranties that make homeowners feel good about their investment.
For siding contractors, fiber cement is steady work. But the installation process is nothing like hanging vinyl. Fiber cement is heavy, brittle until fastened, and extremely unforgiving if you skip steps. Bad cuts show. Poor flashing leaks. Sloppy caulking cracks. And when callbacks come, they eat into your profit fast.
This guide walks through the full installation process: substrate prep, cutting methods, fastening patterns, flashing details, and painting. If you are already running siding crews, think of this as a field reference. If you are adding fiber cement to your services, this is your starting point.
Understanding Fiber Cement as a Material
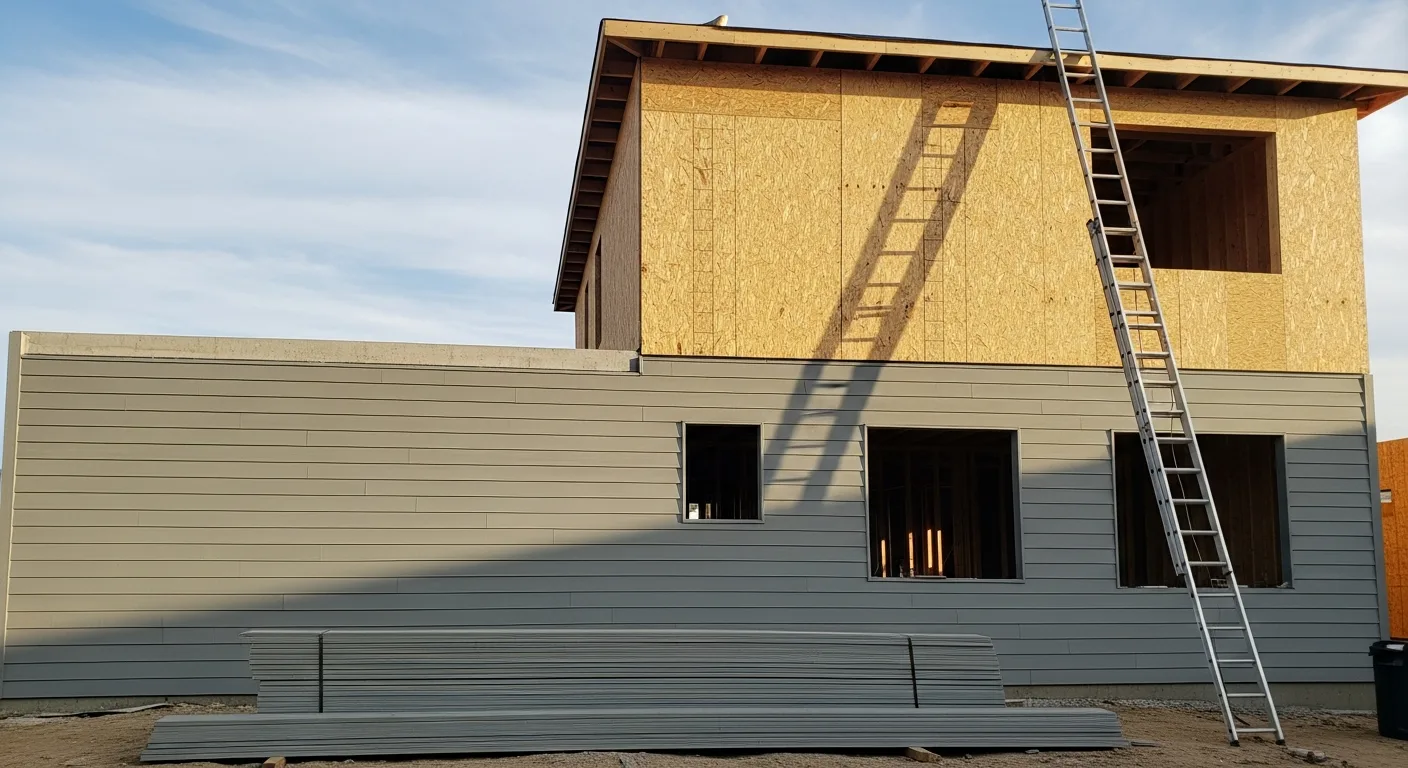
Fiber cement is a composite made from Portland cement, cellulose fibers, sand, and water. The mix gets pressed and cured into planks, panels, shingles, and trim boards. James Hardie controls roughly 90% of the North American market with their HardiePlank line, but Allura (formerly CertainTeed), Nichiha, and others offer competing products.
The material is dense, typically weighing 2.3 to 2.5 pounds per square foot for standard 5/16-inch lap siding. A 12-foot plank weighs about 18 pounds. That weight adds up fast when your crew is carrying bundles up scaffolding all day.
Key properties to know:
- Fire resistance: Non-combustible, rated for fire-prone zones (WUI areas)
- Moisture: Absorbs water but does not rot; proper drainage prevents trapped moisture
- Thermal movement: Expands and contracts with temperature changes, roughly 1/8 inch per 12-foot plank
- Impact resistance: Class 4 hail rating on most products
- Workability: Cuts cleanly with proper tooling, but generates hazardous silica dust
That silica dust point is critical. OSHA’s permissible exposure limit (PEL) for respirable crystalline silica is 50 micrograms per cubic meter over an 8-hour shift. Cutting fiber cement without dust controls and proper respiratory protection puts your crew at risk and puts you on the wrong side of an OSHA inspection.
Substrate Preparation
Fiber cement siding requires a solid, flat substrate. You are not just nailing into air like some vinyl installations. Here is what needs to happen before the first plank goes up.
Sheathing
The wall sheathing must be structural-grade OSB or plywood, minimum 7/16-inch thickness, fastened per code to the framing. If you are working a re-side job over old sheathing, check for rot, delamination, and fastener integrity. Replace anything questionable. This is not the place to cut corners.
Weather-Resistive Barrier (WRB)
Install a code-compliant WRB over the sheathing. Common options include:
- Housewrap: Tyvek, Typar, or similar. Tape all seams and seal penetrations.
- Felt paper: #15 or #30 felt, lapped shingle-style from bottom up.
- Fluid-applied WRB: Increasingly popular on high-end and commercial jobs for seamless coverage.
The WRB must be installed before any flashing or trim. It is your drainage plane. Water that gets behind the siding (and it will) needs a clear path down and out.
Furring Strips and Rainscreen
In wet climates or on any wall assembly where drying potential is limited, consider installing furring strips (3/8-inch minimum) to create a rainscreen gap. This airspace behind the siding allows moisture to drain and air to circulate, which dramatically reduces the risk of moisture-related failures.
James Hardie now recommends rainscreen installation in certain climate zones and wall assemblies. Check their current technical bulletins for your region.
Cutting Fiber Cement
Cutting is where new fiber cement crews struggle most. The material cuts differently than wood, and the dust is a serious health hazard. Here are your options.
Circular Saw with PCD Blade
This is the go-to for rip cuts and long crosscuts. Use a polycrystalline diamond (PCD) blade, sometimes called a fiber cement blade. Standard carbide-tipped blades wear out fast and kick up more dust.
Set up a cutting station away from the install area. Use a dust-collecting circular saw or attach a shop vac to your saw’s dust port. Cut outdoors whenever possible. P100 respirators are mandatory for the cutter.
Fiber Cement Shears
Electric shears make fast, clean crosscuts with almost zero dust. They work like a guillotine, scoring and snapping the plank. Most crews use shears for the majority of straight cuts and save the circular saw for rips and angles.
Popular models include the Malco TurboShear and PacTool Snapper Shear. They mount on a standard drill, keeping costs reasonable.
Jigsaw
For curved cuts around fixtures, lights, and hose bibs, use a jigsaw with a carbide-tipped blade designed for fiber cement. Go slow and support the material to prevent breakage.
Scoring and Snapping
For quick, dust-free straight cuts, you can score fiber cement with a carbide scoring tool and snap it over a straight edge. This works well for 5/16-inch planks but is less reliable on thicker material.
Dust Control Summary
No matter which cutting method you use:
- Cut outdoors, downwind from the crew
- P100 respirator on the cutter at all times
- Dust-collecting tools or wet cutting when feasible
- Clean up silica dust; do not blow it around with compressed air
Fastening Fiber Cement Siding
Proper fastening keeps the siding tight, flat, and secure for decades. Bad fastening causes cracks, loosening, and moisture intrusion. The details matter here.
Nail Types
Use corrosion-resistant nails: hot-dipped galvanized, stainless steel, or proprietary coated nails approved by the siding manufacturer. Ring-shank nails hold better than smooth-shank in wood framing.
For pneumatic nailing, use a siding coil nailer set to the correct depth. The nail head should be flush with the surface or no more than 1/32 inch below. Overdriven nails crack the material. Underdriven nails leave bumps under the paint.
Blind Nailing
For lap siding (HardiePlank), the standard method is blind nailing. Drive one nail through each stud, 1 inch down from the top edge of the plank, and 3/4 inch from the ends. The overlapping plank above covers the nail heads.
This method only works with a minimum 1-1/4 inch overlap. If your overlap is less (not recommended), you will need to face-nail.
Face Nailing
Some situations require face-nailing: panels, shingles, and certain trim applications. Place face nails 3/4 inch from the bottom edge of the plank and 3/8 inch from the ends. Countersink slightly, fill with exterior-grade filler, and touch up with paint.
Stud Spacing
Standard installation calls for 16-inch on-center stud spacing. If studs are 24 inches on center, check the manufacturer’s requirements. Some products and profiles are not rated for 24-inch spacing without additional support.
Common Fastening Mistakes
- Nailing too close to the edge: Causes cracking at the nail point
- Overdriving: Cracks the plank and reduces holding power
- Wrong nail type: Non-corrosion-resistant nails cause rust stains and premature failure
- Missing the stud: The nail does nothing, and you now have a hole that needs filling
Flashing Details
Flashing is where good siding jobs separate from bad ones. Water finds every gap, every missed kick-out, every improperly lapped joint. Get the flashing right and the siding lasts 50 years. Get it wrong and you are back in two years tearing off wet, moldy sheathing.
Window and Door Head Flashing
Install a metal or peel-and-stick head flashing over every window and door. The flashing must extend at least 2 inches beyond the opening on each side and integrate with the WRB above. The WRB laps over the top of the flashing so water sheds outward.
Sill Flashing
At the bottom of windows, install a pan flashing or sill dam that directs water outward. This is the most commonly missed flashing detail in siding work, and it causes more rot than any other single failure point.
Kick-Out Flashing
Where a roof meets a sidewall, install kick-out flashing at the bottom of the roof-to-wall intersection. Without it, water running down the roof edge gets directed straight behind the siding. Kick-out flashing diverts that water into the gutter where it belongs.
Butt Joints
Where two planks meet end-to-end, leave a 1/8-inch gap and caulk with a paintable, flexible sealant. Some manufacturers require metal H-flashing behind butt joints; others allow caulk alone. Read your product’s installation guide carefully.
Penetrations
Seal around all penetrations: hose bibs, electrical boxes, light fixtures, vents. Use backer rod and sealant for larger gaps. The WRB must be intact around every penetration before siding goes on.
Painting Fiber Cement Siding
Fiber cement accepts paint beautifully when properly prepared. You have two paths: field painting after installation or ordering factory-prefinished (ColorPlus) siding.
Factory-Prefinished (ColorPlus)
James Hardie’s ColorPlus line comes with a multi-coat, baked-on finish applied in a controlled factory environment. The finish is more durable and consistent than field paint, and it comes with a 15-year color warranty.
The trade-off is higher material cost and the need for careful handling. Every scuff, chip, and saw cut needs touch-up with manufacturer-supplied paint. You also lose color flexibility since you are limited to the factory color palette.
Field Painting
For field-painted fiber cement:
- Prime first. If the siding comes primed (most do), inspect the primer for damage. Touch up bare spots before painting. If using unprimed siding, apply a high-quality exterior primer before installation or immediately after.
- Paint within 180 days. Do not leave primed fiber cement exposed for more than 180 days. The primer breaks down in UV light, and you will need to re-prime.
- Use 100% acrylic latex paint. Two coats minimum. Apply at the manufacturer’s recommended spread rate. Do not thin the paint.
- Mind the weather. Paint when temperatures are between 50 and 90 degrees Fahrenheit. Avoid direct sunlight on hot days, which causes the paint to dry too fast and reduces adhesion.
Touch-Up Kit
Keep a supply of matching paint on hand for every job. Nail holes, cut edges, and minor scuffs all need touch-up before you walk away. Leaving exposed cement or primer is not just cosmetic; it is a moisture entry point.
Managing Fiber Cement Siding Projects
Fiber cement installation involves heavy materials, specialty tools, silica dust management, and precise sequencing. A single residential re-side can generate hundreds of individual tasks across multiple crew members and several days.
Keeping track of material deliveries, cut lists, crew assignments, and inspection schedules on paper or through text messages breaks down fast. Construction project management software like Projul gives siding contractors a central place to schedule crews, track job costs, communicate with homeowners, and manage punch lists.
If your siding business is growing beyond what you can manage from your truck cab, schedule a demo to see how the platform fits your workflow. Pricing scales with your team size, so you are not paying for features you do not need.
Installation Sequence: Step by Step
Here is the complete installation sequence for fiber cement lap siding on a standard wood-framed wall:
- Inspect and prep sheathing. Replace damaged sheathing. Verify stud layout and marking.
- Install WRB. Lap joints shingle-style, tape all seams, seal penetrations.
- Install flashing. Head, sill, kick-out, and penetration flashing all go in before any siding.
- Install corner trim and accessories. Outside corners, inside corners, and trim boards go on first so the siding butts to them.
- Install starter strip. A 1-1/4 inch starter strip at the bottom of the wall kicks the first course out to match the angle of overlapping courses above.
- Hang the first course. Level it carefully. Every course above follows the first, so errors here compound.
- Work up the wall. Maintain consistent overlap (1-1/4 inch minimum). Check level every few courses. Stagger butt joints by at least one stud bay.
- Cut around windows and doors. Maintain 1/8-inch clearance to trim. Caulk all joints.
- Install final course and soffit trim. The top course often needs a rip cut. Fasten securely and flash to the soffit.
- Caulk all joints and gaps. 1/8-inch gaps at butt joints, corners, and trim. Paintable, flexible exterior sealant.
- Touch up and paint. Fill nail holes, touch up cut edges, apply final paint coats.
Common Mistakes and How to Avoid Them
After years of seeing fiber cement jobs done well and done poorly, these are the most frequent problems:
- Skipping the starter strip: Without it, the first course sits flat against the wall while every course above has an angle. The bottom edge looks wrong and water management suffers.
- Ignoring the gap at butt joints: Butting planks tight leads to buckling when the material expands in heat. Always leave 1/8 inch.
- Poor dust control: Silica exposure is cumulative and irreversible. One day without a respirator will not cause silicosis, but a career of sloppy cutting might.
- Wrong caulk: Do not use silicone on fiber cement. It does not accept paint. Use polyurethane or modified silicone sealants rated for exterior use and paintability.
- Stacking butt joints: Never align butt joints on consecutive courses. Stagger them by at least one stud bay (16 inches minimum). Stacked joints look terrible and create a water channel straight down the wall.
Fiber Cement vs. Other Siding Materials
How does fiber cement compare to the alternatives?
Vinyl siding costs less, installs faster, and weighs almost nothing. But it fades, warps in extreme heat, cracks in cold, and looks cheap on higher-end homes. It also melts near grills and fire pits.
Engineered wood (LP SmartSide) installs more like traditional wood and weighs less than fiber cement. It is a good product, but it is more vulnerable to moisture damage if the coating gets compromised. It also dents easier.
Real wood (cedar, redwood) looks beautiful but costs a fortune, needs regular maintenance, and is susceptible to rot, insects, and fire.
Fiber cement sits in the middle: more durable than vinyl and engineered wood, lower maintenance than real wood, and fire-resistant. The trade-offs are weight, cutting difficulty, and higher labor costs.
For most residential projects in the mid to high price range, fiber cement is the default choice. Understanding its installation requirements is what separates profitable siding contractors from those eating callbacks.
Wrapping Up
Fiber cement siding is a premium product that demands premium installation. The material will outlast most of the homes it goes on, but only if the substrate is solid, the flashing is right, the fastening is correct, and the finish is maintained. Cutting corners on any of these steps leads to callbacks, warranty claims, and damage to your reputation.
If you are running a siding crew or a general contracting business that does exterior work, investing in proper fiber cement training and tooling pays for itself within the first few jobs. And as your project volume grows, having a system to track materials, schedules, and crew productivity makes the difference between scaling up and burning out.
Frequently Asked Questions
What tools do I need to cut fiber cement siding?
How far apart should nails be on fiber cement siding?
Can you install fiber cement siding over old siding?
Does fiber cement siding need to be painted?
What is the proper gap between fiber cement siding and trim?
How long does fiber cement siding last?
What is the minimum overlap for fiber cement lap siding?
Should fiber cement siding be back-primed?
Related Articles

BIM Clash Detection: How to Catch Conflicts Before They Cost You on the Jobsite
BIM Clash Detection: How to Catch Conflicts Before They Cost You on the Jobsite Every contractor has a story about the...
Read More →
Asphalt Paving and Compaction Guide: Mix Types, Laydown Temperatures, and Quality Testing
Asphalt paving looks straightforward from a distance. A truck dumps material, the paver lays it down, and rollers...
Read More →
Construction Jobsite Wi-Fi & Connectivity Guide: Setting Up Reliable Internet in the Field
A practical guide to getting reliable internet on construction job sites. Learn about cellular hotspots, mesh networks,...
Read More →