Interior Painting Prep Guide for Contractors
Interior Painting Preparation: What Separates a Pro Job from a Hack Job
Every painting contractor knows the truth that homeowners often miss: the actual painting is the easy part. The work that makes or breaks an interior paint job happens before you ever open a can. Surface preparation, proper priming, and solid technique are what separate a $2,000 repaint from a callback nightmare.
Whether you are running a dedicated painting crew or handling interior finishing as part of a larger remodel, this guide covers the full process from bare drywall to final coat. We will walk through surface prep, primer selection, cutting in, rolling techniques, and the mistakes that cost contractors time and money on every job.
Surface Preparation: The Foundation of Every Good Paint Job
Inspecting the Surfaces
Before you tape a single edge or crack open a primer can, walk the entire space and inspect every surface. You are looking for:
- Nail pops and screw dimples that were missed during drywall finishing
- Cracks at seams, corners, and around door and window frames
- Water stains that indicate active or past moisture problems
- Peeling or flaking paint on previously finished surfaces
- Glossy or slick surfaces that need sanding for adhesion
- Mildew or mold spots, especially in bathrooms and kitchens
Document everything before you start. Taking photos with your phone and logging them in your project management software saves you from disputes later about what was there before your crew showed up.
Repairing Drywall Defects
Nail pops get a new screw driven 2 inches above or below, then the popped nail gets pulled or set. Skim coat both the new screw and old hole with lightweight joint compound. For hairline cracks along seams, apply mesh tape and a thin coat of mud. Wider cracks or damaged areas may need paper tape and a full three-coat mud sequence.
Sand every repaired area smooth with 120-grit sandpaper once the compound is fully cured. Feather the edges so repairs blend into the surrounding surface. Run your hand across every patch. If you can feel a ridge or bump, it will show through the paint.
Cleaning the Surfaces
Dust from sanding, construction debris, and even fingerprints from the framing crew can ruin paint adhesion. Wipe down all walls with a damp rag or use a vacuum with a brush attachment. For kitchens or bathrooms with grease or soap residue, wash walls with TSP (trisodium phosphate) solution and rinse thoroughly.
On repaints, cleaning is even more important. Nicotine stains, cooking grease, and general grime create a film that primer and paint will not bond to properly.
Sanding for Adhesion
New drywall with a smooth finish only needs a light scuff with 150-grit paper to knock down any fuzz. Previously painted surfaces with a satin or semi-gloss sheen need a more thorough sanding with 120 to 150-grit to give the new paint something to grip.
Use a pole sander for walls and ceilings to save your shoulders. For trim and detailed areas, a sanding sponge works better than flat sandpaper because it conforms to profiles and contours.
Primer Selection: Getting It Right the First Time
Primer is not optional, and not all primers are the same. The right primer saves you coats of finish paint and prevents problems that show up weeks or months after the job is done.
When to Use PVA Primer
PVA (polyvinyl acetate) primer is your go-to for new, unpainted drywall. It seals the porous surface of joint compound and paper so your topcoat goes on evenly. Without PVA primer on new drywall, you get “flashing” where the mud-coated seams and screw spots absorb paint differently than the paper face, leaving visible differences in sheen.
PVA primer is cheap, dries fast (usually 30 to 60 minutes), and sands easily. It is not designed for stain blocking or adhesion on slick surfaces, so do not try to use it for those purposes.
When to Use Shellac-Based Primer
Shellac primer (like Zinsser B-I-N) is the heavy hitter. Use it for:
- Water stains on ceilings and walls
- Smoke and nicotine damage
- Tannin bleed from knots in wood trim
- Pet urine stains
- Any stain that bleeds through latex primer
Shellac dries incredibly fast, blocks almost anything, and sands to a smooth finish. The downsides are strong odor (you need ventilation) and cleanup requires denatured alcohol, not water.
When to Use Bonding Primer
If you are painting over glossy surfaces, tile, laminate, or any surface where adhesion is a concern, use a bonding primer. These products (like Stix or Gripper) create a tacky surface that finish paint can grab onto without extensive sanding.
Bonding primers are also useful over wallpaper residue that will not come off completely, though removing all wallpaper and adhesive is always the better approach.
Tinting Your Primer
For a pro tip that saves real time and money: have your primer tinted to roughly match your finish color. This is especially important with deep or bold colors. Gray-tinted primer under dark colors and white primer under light colors means better coverage in fewer finish coats.
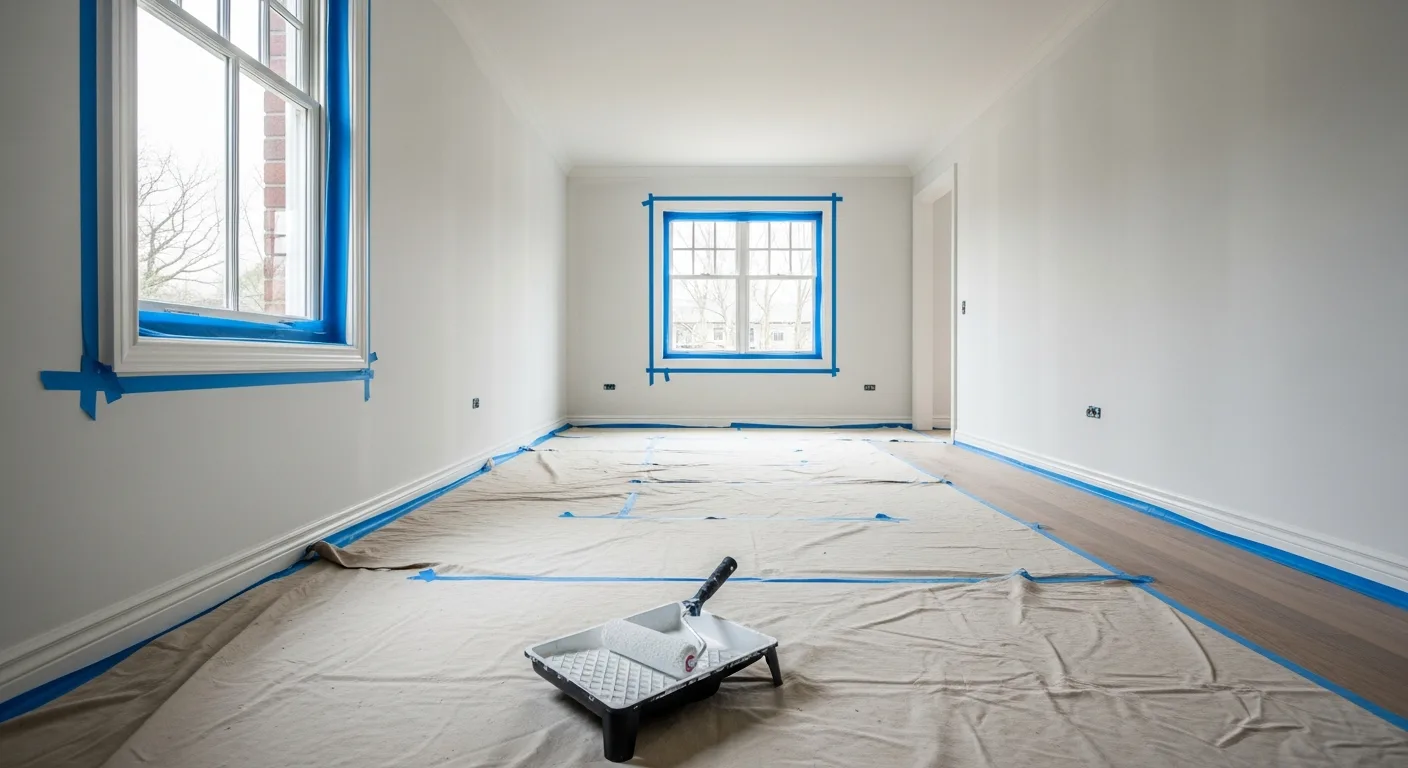
Masking and Protection: Doing It Right
Taping Techniques
Use painter’s tape (not masking tape) on all edges where different colors meet or where walls meet trim. Press the tape edge firmly with a putty knife or 5-in-1 tool to prevent paint from bleeding underneath.
For ceilings, tape along the wall-ceiling joint unless you are confident enough to freehand the cut line. Even experienced painters tape ceilings on high-end jobs because the time spent taping is less than the time spent touching up a wavy line.
Protecting Floors and Fixtures
Drop cloths go down before anything else. Canvas drop cloths stay put and absorb drips better than plastic. Plastic sheeting works for covering furniture but is slippery and dangerous on floors.
Remove all outlet covers, switch plates, and light fixtures. It takes five minutes and saves an hour of careful cutting around them. Bag doorknobs with painter’s plastic and tape. Remove or mask cabinet hardware.
Cutting In: The Skill That Defines a Painter
Cutting in is the process of painting a clean line along edges, corners, and trim with a brush before rolling the open wall areas. This is where experience shows.
Brush Selection
Use a 2.5 or 3-inch angled sash brush for cutting in. The angle makes it easier to control the paint line along ceiling edges and trim. Cheap brushes shed bristles and leave visible brush marks. Invest in quality brushes from Purdy, Wooster, or Corona. A $15 brush pays for itself on the first job.
Technique
Load the brush about one-third of the way up the bristles. Tap off the excess against the inside of the can, but do not scrape the bristles across the rim. That pulls paint out of the center of the brush where you need it.
Start your cut line about 1/4 inch away from the edge, then slowly bring the brush up to the line. Use the tip of the bristles to create a precise line while the body of the brush deposits a band of paint about 2 to 3 inches wide.
Work in sections of about 3 to 4 feet, cutting in one wall at a time. The key is blending: you want the cut-in area still wet when the roller gets to it. If the brushwork dries before rolling, you get a visible “picture frame” effect around the edges of every wall.
Common Cutting-In Mistakes
- Overloading the brush causes drips and a thick, uneven paint line
- Working with a dry brush leaves skips and thin spots
- Rushing the line produces a wavy edge that is obvious from across the room
- Cutting in the whole room before rolling guarantees visible brush lines at every edge
Rolling Techniques: Covering Ground with a Pro Finish
Roller Selection
Match your roller nap to the surface texture:
| Surface | Nap Thickness |
|---|---|
| Smooth drywall | 3/8 inch |
| Light texture (orange peel) | 1/2 inch |
| Medium texture (knockdown) | 3/4 inch |
| Heavy texture (popcorn) | 1 inch or thicker |
Use a 9-inch roller for walls and an 18-inch roller for ceilings and large open walls where speed matters. Mini rollers (4 to 6 inch) work well for small areas and behind toilets.
Loading the Roller
Use a roller screen in a 5-gallon bucket rather than a paint tray for any job larger than a single room. Dip the roller into the paint, then roll it against the screen to distribute paint evenly across the cover. The roller should be fully loaded but not dripping.
The W Pattern
Start with a W or M pattern on the wall to distribute paint across a section about 3 feet wide and floor to ceiling. Then, without reloading, roll over the same area with even, overlapping vertical strokes to smooth out the paint. Finish with light pressure on the final pass to lay off the surface cleanly.
Keeping a Wet Edge
This is the single most important concept in rolling. Each section you roll must overlap into the previous section while that section is still wet. If you let an edge dry and then roll over it, you get a visible lap mark that stays in the finish permanently.
Work in vertical strips about 3 to 4 feet wide, from ceiling to floor. Keep your pace consistent. If you stop to take a phone call in the middle of a wall, you are going to see exactly where you stopped.
Ceilings
Roll ceilings in one direction, keeping your strokes parallel to the primary light source (usually the largest window). This minimizes the appearance of roller marks. Cut in the ceiling perimeter first, then roll the field immediately.
Ceiling paint is typically flat for a reason: flat sheen hides imperfections and roller texture better than any other finish.
Sheen Selection: Matching Finish to Function
Choosing the right sheen is about more than looks. Each sheen has practical implications for durability, washability, and appearance.
- Flat/Matte: Ceilings and low-traffic areas. Hides imperfections but marks easily and is hard to clean.
- Eggshell: The most popular choice for living rooms, bedrooms, and hallways. Slight sheen that cleans better than flat.
- Satin: Good for kitchens, bathrooms, kids’ rooms, and any high-traffic area. Wipes clean easily.
- Semi-Gloss: Standard for trim, doors, cabinets, and bathrooms. Durable and moisture-resistant.
- High-Gloss: Accent trim, front doors, and specialty applications. Shows every flaw, so surface prep must be perfect.
Common Interior Painting Mistakes That Cost Contractors Money
Skipping Primer
This is the most expensive shortcut in painting. Without proper primer, you end up applying three or four coats of finish paint to get coverage, spending more on paint than the primer would have cost. And the finish still will not look as good.
Not Fixing Surface Defects
Paint does not hide anything. It highlights everything. A bump, ridge, or dent that is barely visible on bare drywall becomes obvious under a coat of satin or semi-gloss paint. Fix every defect before priming.
Using Cheap Materials
Budget rollers shed fibers into wet paint. Cheap brushes leave bristles and visible stroke marks. Bargain paint requires extra coats and fades faster. The material cost difference between a budget job and a pro-quality job is usually $200 to $400 on a typical house. The callback cost of a bad finish is ten times that.
Painting in Bad Conditions
Cold garages in winter, unconditioned rooms in summer, or freshly mudded rooms with high humidity all cause paint failures. Make sure HVAC is running and the space is within the paint manufacturer’s recommended temperature and humidity range.
Poor Estimation and Tracking
Underbidding painting jobs is common, especially when you forget to account for surface prep time, multiple coats, or trim work. Track your actual hours and material costs on every painting job so your estimates improve over time. Projul’s job costing features make it easy to see exactly where your time and money go on each project.
Setting Up Your Painting Crew for Success
Job Staging
Before your crew arrives, the job site should be staged with all materials on hand: primer, paint (enough for the full job plus 10%), brushes, rollers, covers, tape, drop cloths, caulk, patch compound, and sandpaper. Nothing kills productivity like a mid-day supply run.
Workflow Order
The most efficient sequence for interior painting:
- Prep: Repair, sand, clean, and mask everything
- Prime: All repaired areas and new surfaces
- Caulk: Fill gaps between trim and walls after priming
- First coat ceilings: Cut in and roll
- First coat walls: Cut in and roll one wall at a time
- First coat trim: Brush or spray
- Second coat: Same sequence as first coat
- Touch up: Walk every room under work lights and fix any misses
Quality Control
Walk every room with a bright work light held at a low angle to the wall surface. This raking light reveals holidays (missed spots), lap marks, drips, and brush lines that are invisible under normal lighting. Fix them before the homeowner finds them.
Tracking Paint Jobs with Project Management Software
Interior painting projects have a lot of moving parts: prep time, material runs, multiple coats, color changes room by room, and punch list touch-ups. Keeping all of that organized on paper or in your head gets messy fast, especially when you are running multiple jobs at once.
Construction management platforms like Projul let you schedule crews, track material costs, log labor hours by task, and keep your customer updated with photos and progress notes. When a homeowner asks why the job took an extra day, you have a documented record of the three walls that needed skim coating because of bad drywall work.
For painting contractors looking to grow beyond a one-truck operation, having solid job tracking is not optional. Check out Projul’s pricing to see how it fits your business, or schedule a demo to see it in action.
Final Thoughts
Interior painting is one of those trades where the basics matter more than any trick or shortcut. Proper surface prep, the right primer for the situation, quality materials, and solid technique produce a finish that lasts years and generates referrals.
Rush the prep, skip the primer, or cheap out on materials, and you will spend more time on callbacks than new jobs. Take the time to do it right, document your process, and track your costs. That is how painting contractors build a reputation worth having.
Frequently Asked Questions
How long should drywall mud dry before priming?
Do I need to prime walls that are already painted?
What is the best roller nap for smooth drywall?
How do you prevent lap marks when rolling paint?
Should I cut in before or after rolling?
How many coats of paint do most interior jobs need?
What temperature should a room be for interior painting?
How do contractors estimate interior painting jobs accurately?
Related Articles

How to Implement Construction Software Without Losing Your Mind
Most construction software rollouts fail. Not because the software is bad, but because the rollout was rushed. Here are...
Read More →
How Selections Can Pay for Themselves in Three Easy Steps
Most contractors lose thousands each year on wrong material orders, slow client decisions, and missed upsell chances....
Read More →
3 Free Concrete Estimate Templates for Every Pour Type (2026)
Three ready-to-use concrete estimate templates with realistic line items, material costs, labor rates, and markup...
Read More →