Construction Material Management: Stop Wasting Money on Supplies | Projul
Most contractors can tell you their labor costs within a few percentage points. Ask them about material waste and you’ll get a shrug.
That shrug is costing you real money. Industry studies consistently show that 10% to 15% of all construction materials end up as waste. On a $500,000 project where materials make up half the budget, that’s $25,000 to $37,500 in wasted supplies. Not profit. Not overhead. Just gone.
And waste is only part of the problem. Bad ordering, theft, weather damage, and poor tracking add up fast. If you’re not actively managing your materials, you’re leaving thousands on the table every single month.
Here’s how to fix that.
How Material Waste Eats Your Profit
Let’s start with a number that should bother you: the average construction project wastes between 10% and 15% of its material budget. Some trades run even higher. Tile work and drywall can hit 15% to 20% waste rates because of cuts, breakage, and odd layouts.
But here’s what really hurts. Most contractors bake a generic waste factor into their bids and never look at it again. They add 10% to the material estimate and call it good. The problem is they never check whether their actual waste was 8% or 18%.
That gap is where profit disappears.
Think about it this way. If you’re running 20 jobs a year at $300,000 average and your material costs are 40% of each job, that’s $2.4 million in materials annually. The difference between 10% waste and 15% waste is $120,000. That’s a truck, a new hire, or a chunk of your retirement.
The most common sources of material waste on job sites:
- Over-ordering because your takeoffs aren’t accurate or you’re padding “just in case”
- Damage from poor storage like drywall left in the rain or lumber warping on uneven ground
- Cutting waste from bad layouts or crews that don’t plan their cuts
- Theft that nobody notices because nobody’s counting
- Rework from mistakes that require tearing out and replacing materials
- Scope changes that leave you with materials you can’t return or reuse
The fix isn’t one silver bullet. It’s a system that covers estimating, ordering, storing, tracking, and reviewing. Let’s walk through each piece.
Material Takeoffs Done Right
Everything starts with the takeoff. If your material quantities are wrong from the start, nothing downstream can save you.
A good material takeoff pulls exact quantities from the plans, then adds an appropriate waste factor for each material type. The key word is “appropriate.” A flat 10% waste factor on everything is lazy math.
Realistic waste factors by material type:
- Lumber (framing): 5% to 10%. Stick-frame walls and rafters produce offcuts, but a good framing crew reuses short pieces. Complex roof lines push waste higher.
- Drywall: 10% to 15%. Rooms with lots of openings (windows, doors) or non-standard dimensions generate more waste from cuts.
- Tile and stone: 12% to 20%. Diagonal layouts and small rooms with lots of cuts waste more. Natural stone with color variation means some pieces get rejected.
- Roofing (shingles): 5% to 15%. Simple gable roofs on the low end, complex roofs with hips, valleys, and dormers on the high end.
- Concrete: 3% to 7%. Forms and pours are reasonably predictable. Over-ordering is common because short pours are expensive callbacks.
- Paint: 5% to 10%. Textured surfaces and multiple coats increase coverage beyond the label estimate.
- Pipe and conduit: 5% to 10%. Depends on the number of fittings and direction changes in the run.
- Fasteners and small hardware: 10% to 15%. Easy to lose, drop, or miscount.
When you build your estimates, use waste factors based on your actual history, not industry averages. If your framing crew consistently wastes 12% on lumber, bid 12%. Using 5% because you read it in a textbook just means you eat the difference.
Tips for better takeoffs:
Track your actual waste on completed jobs and adjust your factors. It takes five minutes at the end of a project to count leftover materials and compare to what you ordered. Do this for ten jobs and you’ll have waste factors you can trust.
Use digital plans when possible. Measuring on screen with a takeoff tool is faster and more accurate than scaling off paper prints. It also creates a record you can reference if the bid gets questioned.
Break takeoffs into zones or phases. Instead of one giant lumber order for the whole project, calculate by floor, wing, or phase. This makes your order schedule more accurate and reduces the pile of materials sitting on site for weeks.
Ordering and Procurement Best Practices
Your takeoff gives you what you need. Now you have to buy it without bleeding money.
Build real vendor relationships. If you’re calling three suppliers for every order looking for the cheapest price, you’re doing it wrong. Pick one or two primary suppliers and give them consistent volume. In return, you should be getting:
- Better pricing tiers as your annual volume grows
- Priority on deliveries when things get tight
- Flexible return policies for unopened materials
- A dedicated rep who knows your account and your projects
That doesn’t mean you never price-check. Run competitive bids on big-ticket items like HVAC equipment, windows, and specialty materials. But your day-to-day lumber, drywall, and supplies should flow through a supplier who gives you terms and treats you like a partner.
Delivery scheduling matters more than you think. Getting all your materials delivered on day one feels efficient. It’s not. You end up with a mountain of supplies that need weather protection, takes up staging space, and sits around long enough for things to walk off.
Instead, schedule deliveries to match your construction sequence:
- Foundation materials first
- Framing lumber a few days before framing starts
- Mechanicals (plumbing, electrical, HVAC) when rough-in begins
- Finish materials as late as possible to avoid damage and theft
Yes, this means more deliveries. But the reduction in waste, damage, and theft more than covers the extra delivery fees. Some suppliers will schedule recurring deliveries at no extra charge if you’re buying enough.
Watch your pricing over time. Material prices shift constantly. Lumber prices in 2024 and 2025 reminded everyone how volatile supplies can be. When you’re bidding a job today for a start date three months out, you need to account for potential price changes.
Build price escalation clauses into your contracts when the project timeline is long. Your estimates and change orders should reflect current pricing with a note about when that pricing expires.
Curious what other contractors think? Check out Projul reviews from real users.
And keep a running record of what you pay for common materials. When you can pull up your average cost per thousand board feet of framing lumber over the last year, you’ll spot bad pricing immediately.
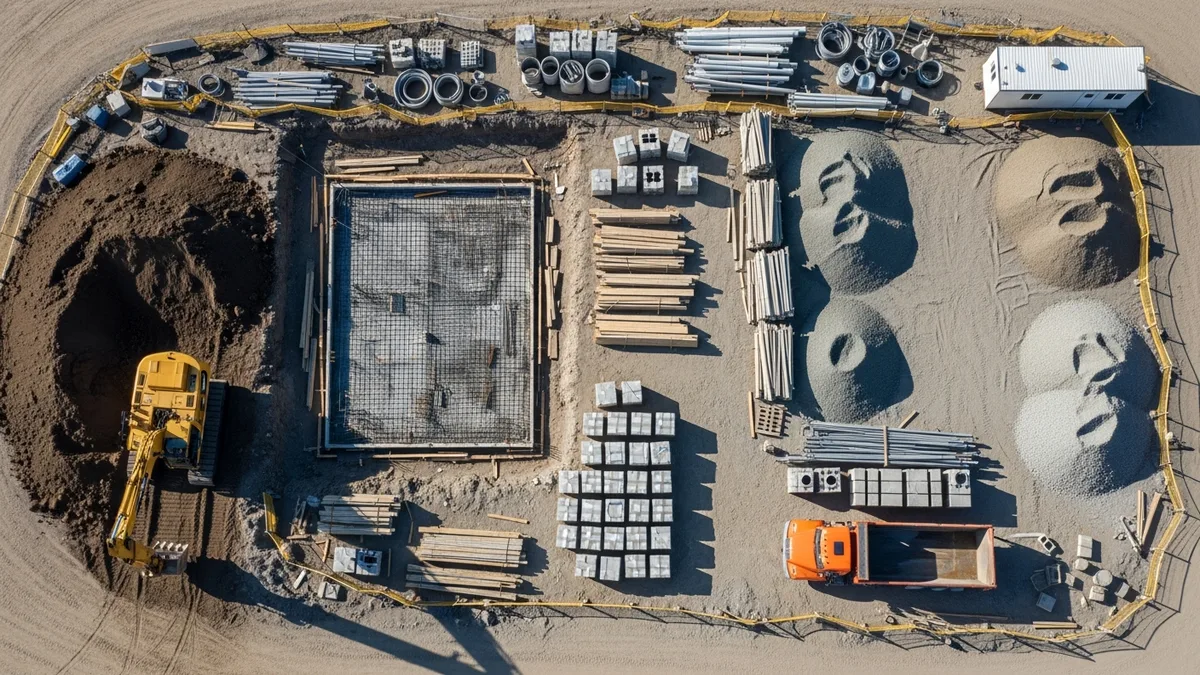
On-Site Material Management
Materials arrive at your job site. Now the clock starts ticking on damage, theft, and disorganization.
Storage and Weather Protection
This is where contractors lose money without even realizing it. A stack of OSB sheeting that sits in two rainstorms before it gets installed is compromised. Drywall that absorbs moisture will show mold later. Hardwood flooring that isn’t acclimated properly will buckle after install.
Basic storage rules that save thousands:
- Keep materials off the ground. Pallets, dunnage, or racks. Moisture wicks up from bare ground faster than you’d think.
- Cover everything that can’t get wet. Tarps are cheap. Replacing water-damaged materials is not.
- Store finish materials inside the structure once it’s dried in. Trim, flooring, cabinets, and fixtures should never sit outside.
- Stack lumber flat and supported to prevent warping. Leaning lumber against a wall for two weeks guarantees bowed boards.
- Keep packaged materials in their packaging until install time. The wrapping is there for a reason.
Theft Prevention
Construction material theft costs the industry billions every year. Copper pipe and wire are the obvious targets, but lumber, tools, fixtures, and even appliances walk off job sites regularly.
You don’t need a Fort Knox setup. But you do need some basics:
- Job boxes for high-value items. A good gang box costs $500 to $1,500. One prevented theft pays for it.
- Security cameras. Even visible dummy cameras reduce theft. Real ones with cellular connectivity cost $20 to $40 per month and pay for themselves the first time you catch something.
- Limit on-site inventory. Only have on site what you need for the next few days. This is the biggest single thing you can do to prevent theft.
- Assign responsibility. Someone on each crew should own the material count. If nobody’s responsible, nobody’s checking.
- Good relationships with neighbors. On residential jobs, a neighbor who knows you’re the contractor and calls when they see someone loading up a truck at midnight is worth more than any camera.
Staging for Efficiency
Where you put materials on site affects your crew’s productivity. If your framing lumber is 200 feet from where you’re framing, your crew spends more time carrying and less time building.
Think through material placement before deliveries arrive:
- Stage materials close to where they’ll be installed
- Keep high-use items accessible without moving other materials first
- Plan delivery drop points so trucks aren’t blocked by previous deliveries
- Create a designated waste area so scrap doesn’t pile up in the work zone
Five minutes of planning saves hours of moving materials around the site.
Tracking Material Costs Against Your Budget
Here’s where most contractors drop the ball. They bid the job, buy the materials, finish the project, and only then find out whether they made money.
That’s backwards.
You should know your material cost position on every active job, every week. Not at the end. During. Because you can only fix a cost overrun while the job is still in progress.
What tracking looks like in practice:
Start with your estimated material budget from the bid. That’s your baseline. As you order materials, log each purchase against the job. Compare ordered costs to budgeted costs at least weekly.
If you’re $2,000 over budget on framing lumber halfway through framing, you need to know now, not when you’re doing final invoicing. Maybe there was a price increase you didn’t catch. Maybe the crew is wasting more than expected. Maybe there was a scope change that didn’t get captured as a change order.
Whatever the cause, catching it during the job gives you options. Catching it after doesn’t.
What to track for each job:
- Estimated material cost (from your bid)
- Actual material cost (from purchase orders and receipts)
- Variance (the difference, updated weekly)
- Material cost as a percentage of total job cost
- Waste percentage (materials ordered vs. materials installed)
This is exactly what job costing is built for. When your estimates feed directly into your cost tracking, you see variances as they happen instead of reconstructing them from a shoebox of receipts after the fact.
Review completed jobs. After every project, spend 30 minutes reviewing your material costs against your estimates. Where were you over? Where were you under? What waste factors were accurate and which ones need adjusting?
This review loop is how you get better at bidding. Every job teaches you something about your material costs if you bother to look. Over time, your estimates get tighter, your waste factors get more accurate, and your profit margins improve.
Technology for Material Management
Spreadsheets work until they don’t. And for most growing contractors, they stop working once you’re running more than a handful of jobs at a time.
The problem with spreadsheets isn’t the math. It’s the data entry. When your material tracking depends on someone manually typing in every purchase order and receipt, it falls apart the first busy week. And one missed week turns into two, and suddenly you’re back to finding out about cost overruns after the fact.
What construction management software actually solves:
- Estimate-to-actuals tracking. Your bid numbers flow directly into cost tracking so you’re comparing apples to apples without re-entering data.
- Real-time cost visibility. See your material spending across all active jobs from one screen instead of opening twelve spreadsheets.
- Consistent waste factors. Build your proven waste percentages into your estimate templates so every bid uses accurate numbers.
- Change order capture. When scope changes affect materials, the cost adjustment flows into your job costing automatically. No more “we forgot to bill for the extra materials on that change order.”
- Historical data. After a year of tracking, you have real data on what materials cost on your jobs. That makes future estimates more accurate and more profitable.
You don’t need the most expensive platform on the market to get these basics right. Projul connects estimating, job costing, and change orders so your material costs stay visible from bid to closeout. And since there’s no per-user fee, your whole team can log costs without you worrying about the software bill growing every time you hire.
A note on inventory management systems. If you’re a larger operation that stocks materials in a warehouse or yard, dedicated inventory software might make sense. But for most contractors who order materials per-job and have them delivered to the site, your construction management platform handles the tracking you need without adding another system to manage.
The goal isn’t more software. It’s better visibility into where your money goes on every job.
Getting Started With Better Material Management
You don’t have to overhaul everything at once. Start with the pieces that will save you the most money the fastest.
Week one: Pick your next three jobs and track actual material waste at completion. Count what’s left over, what went in the dumpster, and what got returned. Calculate your real waste percentages.
Month one: Compare your estimated material costs to actual costs on every completed job. Find the patterns. Are you consistently over on certain materials? Under on others?
Month two: Adjust your waste factors and estimating templates based on what you learned. Build delivery schedules that match your construction sequence instead of dumping everything on site at once.
Month three: Implement weekly cost check-ins on active jobs. Ten minutes per job, once a week. Compare material spending to budget. Flag anything over 5% variance for investigation.
This isn’t complicated. It’s just discipline. The contractors who track their material costs closely make more money than the ones who don’t. Every time.
Try a live demo and see how Projul simplifies this for your team.
Your materials are the second biggest cost on every job after labor. Managing them with the same attention you give your crews is how you keep more of what you earn and stop watching your profit walk off the job site in a dumpster, or in somebody’s truck at midnight.