Construction Painting Management Guide
Construction Painting Project Management: Coordinating Interior and Exterior Phases
If you’ve been running jobs for any length of time, you know that painting is where all your scheduling sins come home to roost. Every delay from framing through drywall finishing lands squarely on the painting crew’s start date. And when painting gets squeezed, the whole back end of the project suffers.
The thing is, painting isn’t just one phase. It’s multiple phases spread across interior and exterior scopes, each with different weather dependencies, surface prep requirements, and crew needs. Coordinating all of that while keeping every other trade moving takes real planning.
This guide breaks down how to manage construction painting from start to finish, with a focus on sequencing interior and exterior work so nothing falls through the cracks.
Understanding the Painting Scope Before You Start
Before you can schedule a single paint crew, you need to fully understand what the painting scope actually involves. This sounds obvious, but I’ve seen plenty of GCs treat “painting” as one line item on the schedule when it’s really five or six distinct activities.
On a typical new construction project, painting includes:
- Exterior primer and finish coats on siding, trim, fascia, soffits, and sometimes masonry or stucco
- Interior primer on all drywall surfaces after finishing
- Interior finish coats on walls, ceilings, and trim
- Specialty coatings like garage floor epoxy, moisture barriers in bathrooms, or fire-rated coatings on steel
- Touch-up and punch list painting after all other trades are done
- Caulking and sealant work that often falls under the painter’s scope
Each of these has different prerequisites. Interior primer can’t go on until drywall mud is fully cured and sanded. Exterior painting depends on weather windows and the building envelope being complete. Specialty coatings may need specific temperature and humidity conditions that differ from standard paint products.
When you’re putting together your estimate, break painting into these sub-phases so your schedule reflects reality. A single “Painting: 10 days” line item doesn’t give you enough detail to coordinate with other trades. You need separate durations for primer, finish coats, exterior work, and touch-up.
Talk with your painting sub early about their preferred sequencing. Experienced paint contractors have strong opinions about the order of operations, and they’re usually right. They know which surfaces need to go first, how long between coats, and where they’ll need clear access without other trades working overhead.
Sequencing Interior Painting with Upstream Trades
Interior painting is completely dependent on the trades that come before it, especially drywall. If you haven’t already, read our drywall guide because problems in the finishing stage will absolutely wreck your paint schedule.
Here’s the typical sequence leading into interior painting:
- Drywall hanging and finishing (including all taping, mudding, and sanding)
- Final dust cleanup (critical and often skipped)
- Primer coat on all surfaces
- First finish coat on ceilings, then walls
- Trim and door installation (sometimes before, sometimes after first wall coat)
- Trim painting or staining (can be done on-site or pre-finished off-site)
- Second finish coat on walls and ceilings
- Final trim paint and touch-up
The biggest mistake I see is rushing the gap between drywall finishing and primer. Drywall mud needs to be fully dry, and in humid conditions or poorly ventilated spaces, that can take longer than you’d expect. Painting over mud that still has moisture in it leads to bubbling and peeling that shows up weeks after you’ve handed over the keys.
Not sure if Projul is the right fit? Hear from contractors who use it every day.
Dust control between drywall sanding and painting is another common failure point. If your drywall crew sands on Monday and the painters show up Tuesday morning, there’s dust on every surface. That dust prevents proper adhesion and leaves a gritty texture under the paint. Budget time for a thorough cleaning pass, including vacuuming ledges, wiping surfaces, and damp-mopping floors.
When building your project schedule, add a buffer day between drywall completion and painting start. It costs you one day on paper but saves you from rework that eats up three or four days later.
The other coordination challenge is managing other trades that need to work in painted spaces. HVAC trim-out, electrical finish, plumbing fixtures, and cabinet installation all happen after or during painting. You need clear rules about who can work in freshly painted areas and what protection is required. Drop cloths, clean hands, and no dragging ladders against walls should be non-negotiable.
Planning Exterior Painting Around Weather and Building Envelope
Exterior painting adds a layer of complexity that interior work doesn’t have: you’re at the mercy of the weather. Temperature, humidity, wind, rain, and even direct sunlight all affect when and how you can paint outside.
Most paint manufacturers spec a minimum application temperature of 50°F for latex products, with the surface temperature staying above that threshold for the full cure time. That means you can’t just check the forecast high for the day. You need to know what the temperature will be at 7 AM when crews start and whether it’ll drop below 50°F overnight before the paint has cured.
Our weather planning guide covers this in more detail, but here are the key principles for exterior painting:
- Check the 10-day forecast before scheduling exterior paint crews. You need at least 2 to 3 consecutive dry days for primer plus first coat.
- Watch overnight lows, not just daytime highs. A 65°F afternoon means nothing if it drops to 42°F at 2 AM.
- Avoid painting in direct sun on hot days. The surface temperature of dark-colored siding in direct sun can hit 120°F, which causes the paint to dry too fast and leads to cracking.
- Wind above 15 mph causes problems with spray application, from overspray drifting to uneven coverage.
- Humidity above 85% slows dry time dramatically and can cause lap marks and poor adhesion.
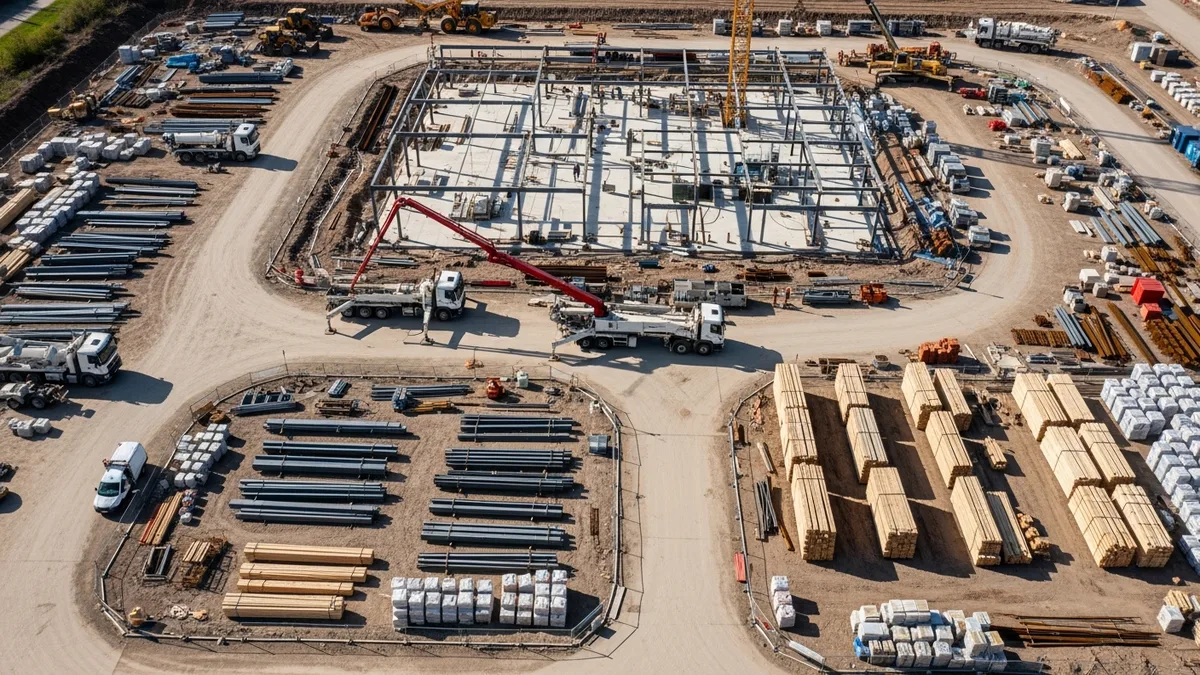
For the building itself, exterior painting can only start after the envelope is weather-tight. That means roofing is complete, windows and doors are installed, and any exterior sheathing or housewrap is in place. Painting over flashing that hasn’t been installed yet, or around window openings that aren’t sealed, creates moisture problems down the road.
On larger projects, you can phase exterior painting by elevation. Start on the side of the building that gets the least afternoon sun, or the side that’s most visible from the street if the owner is anxious about curb appeal. Just make sure your scaffolding or lift plan supports moving around the building without damaging completed work.
Managing Painting Subcontractors and Crews
Painting subs are some of the busiest contractors out there, especially in the spring and summer months when exterior work peaks. If you don’t have your painting subcontractor management dialed in, you’ll get bumped for another GC who does.
Here’s what works for keeping paint crews on schedule:
Book early, confirm often. Get your painting sub under contract with a start date window as early as possible. Then confirm weekly as that date approaches. Let them know immediately when upstream trades are running ahead or behind schedule so they can adjust their crew rotation.
Be specific about scope and access. Your painting sub needs to know exactly which surfaces are included, what products to use, how many coats, and which areas will be accessible on which days. Vague scopes lead to disputes about what’s included and what’s extra.
Provide clean, prepped surfaces. Nothing frustrates a paint crew faster than showing up to a job that isn’t ready. If they have to spend two days cleaning and prepping surfaces that should have been done by prior trades, they’re either going to back-charge you or cut corners somewhere else.
Don’t stack trades on top of painting. This is the golden rule. If painters are spraying walls on the second floor, don’t have electricians pulling wire in the same rooms. The painters can’t work around other trades efficiently, and the other trades will get paint on their materials and equipment. Separate by floor, wing, or time of day.
Pay on time. Painting subs often have thin margins and high labor costs. Slow payment is the fastest way to lose priority on their schedule. If they’re choosing between your job and another GC’s job, they’ll pick the one that pays reliably.
For multi-trade coordination in general, having good tools for scheduling makes a huge difference. When you can see all your subs on one timeline and flag conflicts before they happen in the field, you avoid the phone call at 6 AM where two crews show up to work in the same space.
Quality Control: Preventing Callbacks and Rework
Paint callbacks are one of the most common warranty items on new construction. They’re also one of the most preventable. The key is getting your quality control process right during the work, not just at the end.
Inspect between coats, not just after the last one. If the primer coat has adhesion issues or the first finish coat has drips and holidays (missed spots), catching it before the next coat goes on is ten times easier than fixing it later. Walk the job between each major coat.
Check lighting conditions. Paint defects are invisible under work lights but glaring in natural light. Do your inspections with the actual lighting conditions the space will have. Open blinds, turn off overhead work lights, and look at walls from the angles that occupants will see them.
Document everything with photos. When you find an issue, photograph it with enough context that the painter knows exactly where it is. A close-up of a drip on a white wall is useless without a wider shot showing which wall in which room.
Watch these common failure points:
- Flashing where drywall joints show through the paint as different sheen levels. This usually means not enough primer or the wrong primer over high-suction joint compound.
- Caulk lines cracking at trim joints within the first few months. This happens when painters caulk over gaps that are too wide or use the wrong type of caulk.
- Peeling on exterior wood within the first year. Almost always a moisture issue, either the wood was too wet when painted or there’s no vapor path behind the siding.
- Color inconsistency between rooms or even walls in the same room. This happens when paint is mixed in different batches. Make sure your painter boxes (mixes) all paint for a given color before starting.
Your punch list process should include a dedicated painting walk-through with the painting sub present. Go room by room, wall by wall, and mark every defect with blue tape. Give the painter a clear window to complete touch-ups before other trades come back for their own punch work.
Choosing the Right Paint Products and Coatings for Each Surface
Product selection on a painting project isn’t as simple as picking a color and buying whatever’s on sale at the supply house. The wrong product on the wrong surface will fail, and you’ll be the one paying for it six months down the road when the homeowner calls about peeling trim or chalking siding.
Here’s a breakdown of what works where and why it matters.
Interior Product Selection
For interior walls and ceilings in new construction, you want a high-quality latex paint with good hide (the ability to cover the surface in fewer coats). Flat or matte sheen on ceilings, eggshell or satin on walls, and semi-gloss on trim and doors is the standard spec for residential. Commercial projects often call for eggshell everywhere for easier cleaning, with semi-gloss in restrooms and kitchens.
Primer selection matters more than most contractors realize. A PVA (polyvinyl acetate) primer is the standard for new drywall. It seals the porous surface and gives the finish coat something to grab onto. But PVA primers aren’t all the same. Cheap PVA primers barely seal the surface and you’ll see flashing at every joint. Spend the extra money on a quality drywall primer and you’ll get better coverage with fewer coats of finish paint.
For areas with moisture exposure like bathrooms, laundry rooms, and kitchens, consider a moisture-resistant primer. Some contractors skip this and just use a kitchen-and-bath finish paint, but the primer is where moisture protection really starts. A moisture-resistant primer plus a satin or semi-gloss finish coat gives you a wall system that can handle steam and occasional splashes without breaking down.
Wood trim and doors need a different primer than drywall. A bonding primer or shellac-based primer works best on bare wood, especially if it’s a softwood like pine that has knots. Knots bleed tannins through latex paint if you don’t seal them first. One coat of shellac-based primer on the knots (or the whole surface) solves this problem permanently. Skip it and you’ll see yellow-brown blotches bleeding through white trim paint within a few weeks.
Exterior Product Selection
Exterior products need to handle UV exposure, temperature swings, rain, and sometimes salt air or industrial pollution. This is where you absolutely cannot cut corners on product quality.
For wood siding and trim, a 100% acrylic latex paint is the standard. Acrylic has the best flexibility and UV resistance of any latex formula. Cheaper vinyl-acrylic blends will chalk and crack faster, especially on south-facing and west-facing walls that take the brunt of sun exposure.
Fiber cement siding (like HardiePlank) is increasingly common and has its own requirements. Some fiber cement comes pre-primed from the factory, but that factory primer has a shelf life. If the siding has been sitting on the job site for months exposed to weather, that factory primer may need to be recoated before the finish paint goes on. Check the manufacturer’s installation guide for their specific coating requirements and warranty conditions.
For masonry surfaces like concrete block, stucco, and brick, you need a breathable coating that allows moisture vapor to pass through while keeping liquid water out. Elastomeric coatings are popular for stucco because they bridge small cracks and expand and contract with the surface. But they’re not appropriate for every masonry surface. Brick that needs to breathe (most brick does) should get a mineral-based masite paint or a breathable acrylic, not an elastomeric film that traps moisture inside the wall.
Specialty Coatings
Beyond standard wall and trim paint, many projects include specialty coatings that require different application methods and conditions:
- Garage floor epoxy needs the concrete to be clean, dry, and profiled (either acid-etched or mechanically ground). Moisture testing with a calcium chloride kit or relative humidity probe is essential. Epoxy over damp concrete delaminates within months. Our guide on epoxy flooring and industrial coatings covers this in detail.
- Fire-rated intumescent coatings on structural steel must be applied to the exact specified thickness, verified with wet film gauges during application and dry film gauges after curing. These coatings are life-safety items and inspectors will check them carefully.
- Waterproofing membranes on below-grade walls or wet areas like showers require specific surface prep and application conditions that differ from standard paint. Don’t let your painting sub treat these like just another coat of paint.
- Anti-graffiti coatings on commercial buildings come in sacrificial (wash off and reapply) and non-sacrificial (permanent, cleanable) types. The owner’s maintenance plan should drive which type you specify.
The takeaway here is simple: know what product goes on what surface, and make sure your painting sub is using exactly what the spec calls for. Product substitution without approval is a warranty risk and a liability on the job.
Product Storage and Handling on Site
Paint sitting in the back of a truck bed in July is going to have problems. Latex paint that freezes is ruined. Paint that gets too hot thickens and doesn’t apply correctly. Set up a temperature-controlled storage area on site, even if it’s just a corner of the garage with a space heater in winter or shade and ventilation in summer.
Keep all paint cans sealed when not in use. Skin that forms on opened cans of paint contaminates the product with dried chunks that show up on the wall. If cans have been opened, strain the paint through a mesh filter before pouring it into the sprayer or roller tray.
Label every can with the room or area it belongs to, the color name, and the batch number. When the homeowner calls in two years wanting to match the living room color, you want to be able to tell them the exact product and color formula. Keep a record of every product used on every surface in your project documentation.
Budgeting and Cost Control for Construction Painting
Painting typically accounts for somewhere between 5% and 10% of total construction costs on residential projects, and that percentage can climb higher on commercial work with specialty coatings or high-end finishes. Getting your painting budget right from the start prevents the kind of surprises that eat into your profit at the end of the job.
Estimating Paint Quantities
The most basic calculation is coverage rate times surface area. Most interior latex paints cover 350 to 400 square feet per gallon on smooth drywall. Exterior paints on rough or textured surfaces may only cover 200 to 300 square feet per gallon. Porous surfaces like bare wood or unsealed masonry soak up more paint and need more material.
Here’s where contractors get burned: they calculate wall area but forget about waste. Spraying wastes more paint than rolling, sometimes 20% to 30% more depending on the setup and how much masking is involved. Cutting in around trim and ceilings with a brush uses less material but more labor. Factor in 10% waste for rolling and 25% waste for spraying when you’re doing your material takeoff.
Don’t forget the small stuff that adds up:
- Caulk (often 1 tube per 50 linear feet of trim)
- Masking tape and paper or plastic sheeting
- Drop cloths
- Sandpaper and sanding supplies for between-coat scuffing
- Primer (separate from finish paint and often a different coverage rate)
- Touch-up paint allowance (keep 2 to 3 gallons of each color for the warranty period)
When you’re building your estimate, break painting costs into material, labor, and equipment as separate line items. This gives you visibility into where costs are actually going and makes it easier to compare bids from different painting subs.
Labor Productivity Benchmarks
Painting labor rates vary by region and by the type of work, but here are some rough benchmarks for estimating crew productivity:
- Interior spray and back-roll (walls and ceilings, two-person crew): 800 to 1,200 square feet per day per person for finish coats
- Interior brush and roll (walls only): 400 to 600 square feet per day per person
- Trim painting (brush work on baseboard, casing, crown): 200 to 350 linear feet per day per person
- Exterior spray (siding and trim): 1,000 to 1,500 square feet per day per person, weather permitting
- Exterior brush and roll (detail work): 300 to 500 square feet per day per person
These numbers assume clean, prepped surfaces and reasonable working conditions. If crews are working in tight spaces, on scaffolding, or dealing with complex trim details, productivity drops. High ceilings that require lifts or tall ladders slow everything down.
Use these benchmarks to cross-check your painting sub’s bid. If they’re quoting 3 days for a scope that should take 8 days based on these rates, either they’re planning to cut corners or they’ve underestimated the scope. Either scenario ends badly for you.
Change Order Management for Painting
Painting is one of the trades most likely to generate change orders, usually driven by:
- Owner color changes after painting has started (this is more common than you’d think)
- Additional prep work needed because upstream trades left surfaces in worse condition than expected
- Scope additions like accent walls, decorative finishes, or additional coats for coverage
- Weather delays on exterior work that push the schedule and require additional mobilizations
Protect yourself by having clear allowances in your contract for the number of colors included, the number of coats per surface, and the condition of surfaces to be painted. If the drywall finish is supposed to be Level 4 and your drywall sub delivers Level 3, the extra sanding and priming to bring it up to paintable condition should be a back-charge to the drywall sub, not absorbed by the painting budget.
Track all painting-related changes through your change order process as they happen. Don’t wait until the end of the project to reconcile. By then, nobody remembers who authorized the extra coat on the master bedroom ceiling, and you’re stuck eating the cost.
Reducing Paint Waste and Rework Costs
The two biggest budget killers in painting are wasted material and rework from poor quality. Here’s how to minimize both:
Color consolidation. Every additional color on a project adds cost for material, mixing, masking, and crew time to switch between products. Encourage owners to keep their color palette simple. A project with 15 different interior colors costs significantly more to paint than one with 5 colors, even if the square footage is identical.
Pre-finishing off-site. Trim, doors, and cabinetry can often be painted or stained in a shop environment before installation. Shop finishing is faster, produces better quality, and avoids the masking and protection issues that come with painting installed trim. The trade-off is that installed trim needs touch-up after installation, but touch-up is cheaper than full on-site finishing.
Protect completed work. The single biggest source of painting rework isn’t bad painting. It’s damage from other trades after the painters leave. Enforce protection requirements: cardboard on floors, corner guards on high-traffic areas, and clear rules about what happens when someone damages a painted surface. Make it the damaging party’s responsibility to pay for the touch-up.
Safety and Compliance on Painting Projects
Painting looks like one of the safer trades on a construction site, but it comes with real hazards that you need to manage. VOC exposure, fall risks from ladders and scaffolding, lead paint on renovation projects, and fire risks from solvent-based products all require attention.
VOC Exposure and Ventilation
Volatile organic compounds (VOCs) off-gas from wet paint and can cause headaches, dizziness, and respiratory irritation in the short term. Long-term exposure to high VOC levels is linked to more serious health effects. OSHA doesn’t have a specific standard for “paint fumes,” but the General Duty Clause requires you to provide a workplace free from recognized hazards.
For interior painting, ventilation is your primary control. Open windows and run fans to create cross-ventilation whenever possible. On occupied renovation projects where tenants are still in the building, low-VOC or zero-VOC products may be required by contract or by local regulations. Many green building standards (LEED, WELL, etc.) have strict VOC limits for interior paints and coatings.
If you’re spraying solvent-based products indoors (lacquers, oil-based primers, epoxies), respiratory protection is required. Half-face respirators with organic vapor cartridges are the minimum. Make sure your painting crew is fit-tested for their respirators and that cartridges are replaced on schedule.
Fall Protection for Painting Work
Falls are the number one killer in construction, and painting crews spend a lot of time on ladders, scaffolding, and aerial lifts. OSHA’s fall protection requirements apply to painting work the same as any other trade:
- Ladders must be inspected before each use, set up on stable surfaces, and extend at least 3 feet above the landing point. Step ladders should never be used as straight ladders.
- Scaffolding must be erected by qualified personnel, fully planked, and equipped with guardrails at 6 feet or higher. Painting crews sometimes remove guardrails “for access” and this is a citation waiting to happen.
- Aerial lifts (boom lifts, scissor lifts) require operator training and a daily pre-use inspection. Painters in lifts must wear fall restraint or fall arrest equipment as specified by the lift manufacturer.
On residential work, interior painting rarely involves heights that trigger formal fall protection requirements. But exterior work on two-story or taller homes absolutely does. Make sure your painting sub has a fall protection plan that covers their specific work methods.
Lead Paint and Renovation Work
If your project involves any renovation, remodeling, or repainting of structures built before 1978, the EPA’s RRP (Renovation, Repair, and Painting) Rule applies. This requires:
- Firm certification with the EPA (or your state if it has an authorized program)
- Certified renovator on site during the work
- Lead-safe work practices including containment, HEPA vacuuming, and proper cleanup verification
- Recordkeeping including documentation of lead testing, work practices, and waste disposal
Violations of the RRP Rule carry fines of up to $37,500 per day per violation. This isn’t something you can hand-wave away. If your painting sub is doing any disturbance of pre-1978 painted surfaces (scraping, sanding, removal), they need to be RRP-certified and following the rule. Our guide on asbestos and lead paint management goes deeper on this topic.
Even if you’re not legally required to follow RRP (new construction, post-1978 buildings), good dust containment practices during any sanding or prep work protect your crew and the building occupants.
Fire Safety with Solvent-Based Products
Oil-based paints, lacquers, stains, and many specialty coatings contain flammable solvents. On-site storage and use of these products requires:
- Proper storage in approved flammable liquid cabinets, away from ignition sources
- No smoking within 20 feet of application or storage areas
- Fire extinguishers rated for Class B (flammable liquid) fires within 50 feet of the work area
- Disposal of rags soaked with oil-based products in self-closing metal containers. Oily rags left in a pile will spontaneously combust. This isn’t a myth; it happens regularly on construction sites.
Include fire safety requirements in your subcontract scope for painting. If your painting sub is using solvent-based products, they need to follow these precautions and you need to verify compliance during your regular site safety walks.
Painting Coordination on Multi-Phase and Occupied Projects
Not every painting job is straightforward new construction where you control the entire building. Renovation projects, tenant improvement work, and phased construction all add coordination challenges that can make or break your painting schedule.
Occupied Building Considerations
When you’re painting in or around an occupied building, whether it’s a tenant improvement in a working office or an addition on an occupied home, you’re dealing with constraints that don’t exist on new construction:
Odor and fume management. Even low-VOC paints have some odor, and building occupants will complain. Negative air pressure in the work zone (using exhaust fans vented to the outside) keeps fumes from migrating into occupied spaces. Seal off the work zone from occupied areas with poly sheeting and tape.
Noise and schedule restrictions. Spraying is louder than you’d think, especially with airless sprayers. Many occupied building contracts restrict noisy work to specific hours. Rolling and brushing may be required instead of spraying in noise-sensitive areas, which changes your productivity calculations and your bid.
Protection of occupant property. Overspray, dust, and paint drips don’t stay in the work zone unless you make them stay. Full floor-to-ceiling containment, covered walkways for shared hallways, and clean-room entry/exit procedures keep paint where it belongs and prevent damage claims.
Access coordination. On occupied renovation projects, you may only have access to certain rooms or floors at certain times. The painting schedule needs to flex around the occupant’s schedule, not the other way around. Build this into your project timeline from the start so your painting sub isn’t surprised when they show up and half the work area is unavailable.
Phased Construction Sequencing
On phased projects where you’re building and handing over sections of a building sequentially, painting becomes a rolling operation rather than a single campaign:
- Phase 1 might be getting finish paint while Phase 2 is still in framing
- Touch-up in Phase 1 continues while Phase 3 is getting primer
- Color selections may change between phases as the owner sees finished spaces and adjusts their preferences
This requires a painting sub who can handle multiple small mobilizations rather than one continuous stay on the job. Some painting contractors prefer large, single-phase projects and will price phased work at a premium because of the mobilization costs. Factor this into your budgeting.
Keep meticulous records of which phases have been painted, which colors went where, and which batch numbers were used. When the owner wants Phase 4 to match Phase 1, you need to know the exact product and formula. Managing this kind of detail across a long project timeline is where having solid project management tools pays for itself many times over.
Coordinating with Flooring and Finish Trades
The age-old question: does painting happen before or after flooring? The answer depends on the type of flooring and your protection strategy.
Paint before hard flooring (tile, hardwood, LVP). On most projects, it makes sense to do wall painting before finish flooring goes in. You don’t have to worry about drips on the finished floor, and the flooring trade can do their baseboards and transitions after walls are painted. The downside is that the flooring installation may scuff or damage wall paint near the floor line, requiring touch-up.
Paint after carpet. Carpet installation generates dust and fiber that sticks to wet paint. If carpet is the finish floor, get painting done well in advance, let everything cure, then install carpet. Protect painted walls near the floor with cardboard or kraft paper during carpet installation.
Coordinate with cabinet and countertop installation. Kitchen and bathroom painting should be complete before cabinets go in, because painting behind and above installed cabinets is a nightmare. But the wall area behind upper cabinets technically doesn’t need finish paint if the cabinets cover it completely. Discuss this with your painting sub and the owner to see if there’s a cost savings by excluding hidden surfaces.
The sequencing decisions you make here ripple through every other trade on the project. Document your plan in your schedule and communicate it to every sub involved so there are no surprises when trades overlap.
Putting It All Together: A Phased Painting Schedule
Let’s walk through what a realistic painting schedule looks like on a mid-size project, say a 4,000-square-foot custom home. This gives you a template to adapt for your own jobs.
Weeks 1-2: Exterior Primer and First Coat
Assuming the building envelope is complete and weather cooperates, start exterior painting first. Exterior work is weather-dependent, so getting it done early gives you a buffer for rain days. Prime all exterior surfaces on days 1 and 2, then apply the first finish coat on days 3 and 4. Let it cure over the weekend.
Week 2: Interior Primer
While the exterior first coat is curing, start interior primer. This assumes drywall finishing wrapped up the prior week and dust cleanup is done. A two-person crew can prime a 4,000-square-foot home in about 3 days.
Week 3: Exterior Second Coat and Interior First Finish Coat
The exterior crew comes back for the second coat while an interior crew starts the first finish coat on ceilings and walls. Running both crews simultaneously works here because they’re in completely separate spaces.
Week 4: Interior Trim Paint and Second Finish Coat
Trim gets painted or stained (first coat, at minimum) early in the week. Then the second finish coat goes on walls and ceilings mid-week. By the end of the week, all major painting is done.
Week 5-6: Touch-Up Window
Other finish trades are working now: countertops, flooring, fixtures, hardware. Damage happens. Budget two to three days for the painting crew to come back and do touch-ups after all finish trades are complete but before the final walk-through.
This schedule totals about 15 working days of active painting spread across 5 to 6 weeks. The gaps between active painting periods aren’t wasted time. They’re when other trades are working and paint is curing.
The key to making this work is keeping your schedule visible and updated. When the drywall crew runs three days late, you need to know immediately how that cascades into the painting schedule and whether it pushes your exterior window into a week with forecasted rain. That kind of cascading schedule management is exactly what tools like Projul are built for.
A few final tips from the field:
- Always keep two to three gallons of each color on-site through the end of the project for touch-ups. Label them clearly and store them in a temperature-controlled space.
- Get color approvals in writing before any paint goes on the wall. A “sample on the wall” approval with the owner’s signature saves you from repainting entire rooms because the color looked different on a tiny swatch.
- On commercial work, require your painting sub to submit product data sheets and confirm that all products meet the spec. Architects love to call out specific VOC limits, sheen levels, and manufacturer product lines. A substitution without approval can mean painting the whole building twice.
- If you’re running multiple projects, stagger your painting phases so you can share crews between jobs. Your painting sub will appreciate the steady work, and you’ll get priority scheduling in return.
Ready to stop guessing and start managing? Schedule a demo to see Projul in action.
Painting might not be the most glamorous trade on the job, but it’s the one that every owner notices first. A well-managed painting process protects your schedule, your budget, and your reputation. Get the sequencing right, keep your subs informed, and inspect the work at every stage. That’s the whole formula.
Frequently Asked Questions
When should exterior painting start relative to interior painting?
How many coats of paint does new construction typically require?
What temperature range is acceptable for exterior painting?
How do you prevent paint adhesion failures on new construction?
How far in advance should you schedule painting subcontractors?
Related Articles
Construction Electrical Rough-In Guide for General Contractors
The electrical rough-in is where circuit layout, box placement, and wire routing all have to come together before...
Read More →
Interior Finishing for Contractors: The Complete Drywall, Paint, and Trim Guide
Interior finishing is where your project goes from bare studs to a space your client can actually picture living in....
Read More →
Helical Piles and Screw Foundations: The Contractor's Complete Guide
Helical piles are showing up on more and more project specs. This guide covers everything a contractor needs to know...
Read More →