Residential Plumbing Rough-In Guide for Builders
Plumbing Rough-In Guide: Drain Slope, Venting, Pipe Sizing, and Inspection Prep for Residential Builds
The plumbing rough-in is one of the most inspection-sensitive phases of any residential build. Get it wrong and you are tearing open walls, cutting into floor joists, and burning money. Get it right and the inspector signs off in 15 minutes.
This guide covers everything you need to know about residential plumbing rough-in, from drain layout and slope calculations to venting rules, pipe sizing, and how to pass inspection the first time.
What Happens During the Plumbing Rough-In
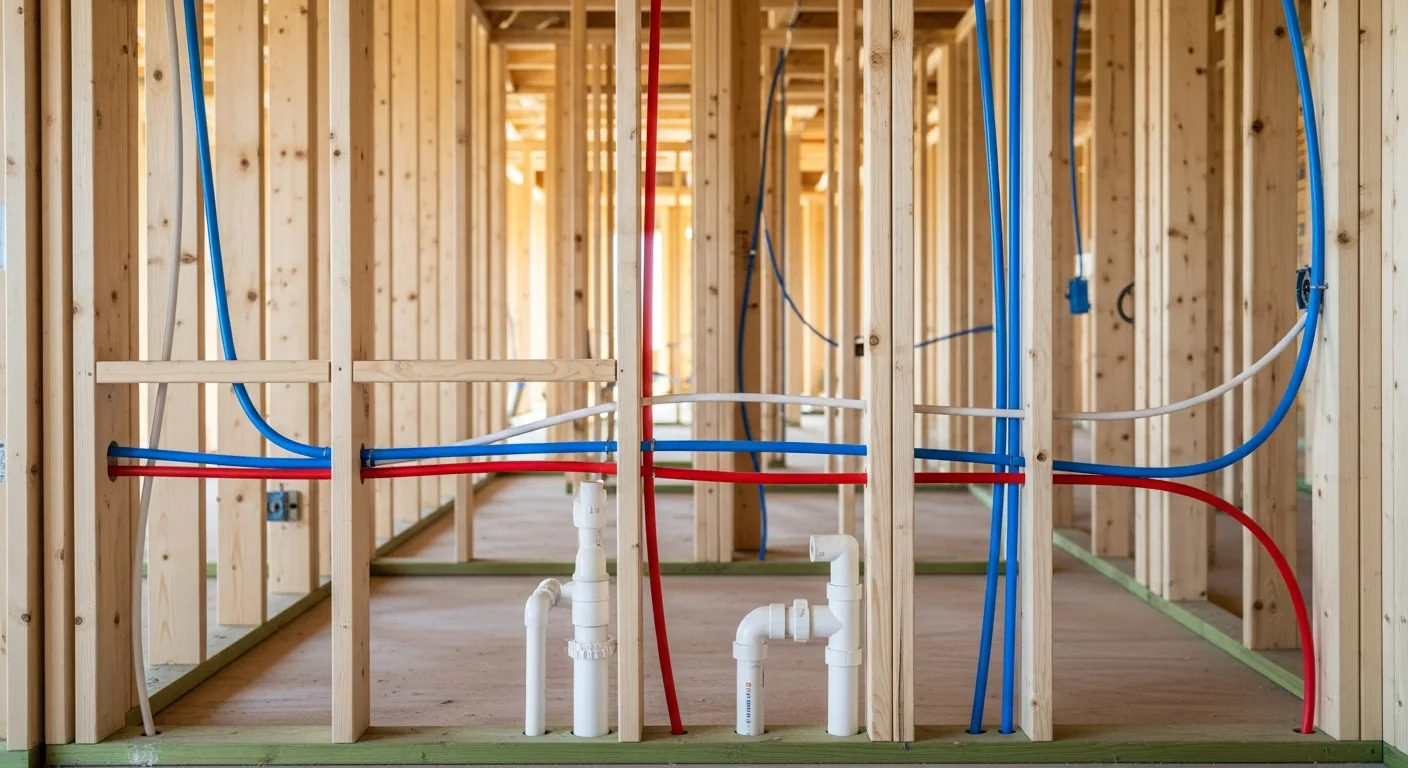
The rough-in is when you install all the drain, waste, and vent (DWV) piping, along with water supply lines, before the walls and ceilings are closed up. This happens after framing and before insulation and drywall.
Your rough-in work includes:
- Drain lines from each fixture to the main building drain
- Vent pipes that connect to the vent stack and exit through the roof
- Water supply lines (hot and cold) to each fixture location
- Stub-outs for future fixture connections
- Cleanouts at required locations
- Testing and inspection
Everything must be accessible for the inspector to see. Once it passes, it gets covered up and you will not see it again until something goes wrong.
Planning the DWV Layout
Good rough-in work starts with a good plan. Before you pick up a pipe, you need to know where every fixture lands and how the drains connect back to the main.
Start With the Toilet
The toilet drives the layout because it has the largest drain (3 or 4 inches) and the strictest placement rules. Set the toilet flange location first, then work the rest of the bathroom around it.
Standard toilet rough-in is 12 inches from the finished wall to the center of the flange. Some fixtures are 10 or 14 inches, so check the spec sheet for the specific toilet being installed.
Map Drain Routes
Sketch out your drain routing on the floor plan:
- Identify the main building drain exit point (where it leaves the foundation)
- Route the main trunk line from that point back through the building
- Branch off to each fixture group (bathrooms, kitchen, laundry)
- Size each branch based on fixture unit loading
- Plan for slope throughout the entire run
The shortest, straightest path with the fewest fittings is always the goal. Every bend, every connection is a potential clog point decades down the road.
Consider the Structure
Before you finalize your routing, check the framing plan:
- Floor joists. You can drill holes in the center third of the joist depth (for example, a 2x10 joist allows a hole up to 3 inches in the center). Notching the top or bottom is much more restrictive and can weaken the joist.
- Load-bearing walls. Avoid routing large drain lines through load-bearing walls when possible. If you must, work with the framer to add headers or use engineered solutions.
- Slab-on-grade. All underslab plumbing needs to be installed before the pour. Changes after the slab is down mean cutting and patching concrete, which is expensive.
Drain Slope: Getting It Right
Drain slope is one of the simplest concepts in plumbing, but it trips up a lot of people.
The Rules
- Pipes 3 inches and smaller: 1/4 inch fall per foot of run
- Pipes 4 inches and larger: 1/8 inch fall per foot (though 1/4 inch is also acceptable)
That is the minimum slope. You can go steeper in some cases, but there is an upper limit too.
Why Too Much Slope Is a Problem
This is the one that surprises people. If you slope a drain too steeply (more than 1/2 inch per foot for small pipes), the water outruns the solids. The liquid flows away quickly, leaving waste sitting in the pipe without enough water to push it along. Over time, this leads to buildup and blockages.
How to Measure Slope
Use a torpedo level with a slope vial, or a digital level that reads in inches per foot. For long runs, a laser level is more accurate.
Here is the math: if you have a 20-foot run of 2-inch pipe, you need 5 inches of fall (20 feet x 1/4 inch = 5 inches). Make sure you have enough vertical space in the floor or ceiling cavity to accommodate that drop.
Maintaining Slope Through Fittings
When your drain line changes direction, you need to maintain slope through the fittings. A 90-degree turn in a horizontal drain should use two 45-degree elbows (or a long-sweep 90) rather than a short-radius 90. Short-radius 90s are for vent lines, not drains.
Venting: The Most Misunderstood Part of Plumbing
If drains are the highways, vents are the air traffic control. Without proper venting, drains gurgle, traps get siphoned, and sewer gas enters the building. Venting is also where most rough-in inspections fail.
What Vents Do
Every plumbing fixture has a trap (that curved section of pipe filled with water). The trap blocks sewer gas from entering the living space. Vents allow air into the drain system so that water flowing through the pipes does not create enough suction to pull the water out of those traps.
Think of it like putting your thumb over a straw filled with water. The water stays in the straw because no air can get in above it. Remove your thumb (add a vent) and the water flows freely.
Types of Vents
Individual vent. Each fixture gets its own vent pipe that connects back to the vent stack. This is the simplest and most reliable method.
Common vent. Two fixtures on opposite sides of a wall share a single vent. The most common example is back-to-back bathroom sinks.
Wet vent. A section of pipe serves as both a drain for one fixture and a vent for another. For example, a 2-inch lavatory drain can serve as a wet vent for a downstream bathtub. The pipe must be oversized to handle both functions.
Circuit vent. Used when you have a battery of fixtures (like a row of sinks in a commercial restroom). One vent serves multiple fixtures connected to a horizontal branch.
Air Admittance Valve (AAV). A mechanical device that allows air in but prevents sewer gas from escaping. Not accepted in all jurisdictions and usually not permitted as the only vent in a system. Check your local code.
Vent Sizing and Distance
The distance from a fixture’s trap to its vent is critical. If the vent is too far away, the drain flow can siphon the trap before air reaches it.
Maximum trap-to-vent distances (per IPC):
| Pipe Size | Max Distance to Vent |
|---|---|
| 1-1/4” | 5 feet |
| 1-1/2” | 6 feet |
| 2” | 8 feet |
| 3” | 12 feet |
| 4” | 16 feet |
These distances assume 1/4 inch per foot slope. If you cannot meet these distances, you need to add a relief vent or revent.
Vent Pipe Rules
- Vents must slope upward toward the vent stack or roof penetration (minimum 1/4 inch per foot toward the stack) so condensation drains back to the drain system
- Horizontal vent sections must be at least 6 inches above the fixture’s flood level rim
- The vent stack must extend through the roof at least 6 inches above the roofline (12 inches in snow regions)
- Vent terminations must be at least 10 feet from any operable window or air intake
Pipe Sizing by Fixture Units
The International Plumbing Code uses fixture units (FU) to size drain and vent pipes. Each fixture type has an assigned FU value based on how much water it discharges.
Common Fixture Unit Values
| Fixture | FU Value |
|---|---|
| Lavatory | 1 |
| Bathtub/shower | 2 |
| Kitchen sink | 2 |
| Dishwasher | 2 |
| Clothes washer | 2 |
| Toilet (1.6 GPF) | 3 |
| Floor drain | 2 |
Sizing the Drain Pipe
Add up the fixture units for each branch, then size the pipe:
| Pipe Size | Max FU (Horizontal Branch) |
|---|---|
| 1-1/2” | 3 |
| 2” | 6 |
| 3” | 20 |
| 4” | 160 |
A full bathroom (toilet at 3 FU + tub at 2 FU + lav at 1 FU = 6 FU) can run on a 3-inch branch. A half bath (toilet at 3 FU + lav at 1 FU = 4 FU) also requires 3 inches because of the toilet.
Sizing Water Supply Lines
Water supply sizing is based on fixture unit demand and available pressure. For a typical single-family home:
- Main service: 3/4 inch or 1 inch (depending on number of fixtures and distance from the meter)
- Branch lines: 1/2 inch to individual fixtures
- Shower and tub: 1/2 inch minimum, but 3/4 inch gives better flow
- Toilets: 3/8 inch supply stop is standard
- Water heater: Match the inlet/outlet size (usually 3/4 inch)
If the house has more than 3.5 bathrooms or long supply runs, bump the main to 1 inch.
Choosing Your Pipe Materials
DWV Pipe
- PVC (Schedule 40). The standard for residential DWV. Lightweight, easy to cut and glue, and inexpensive. Use PVC primer and cement for joints.
- ABS. Common in some regions (especially Western US and Canada). No primer needed, just ABS cement. Cannot be mixed with PVC without a transition fitting.
- Cast iron. Still used in some areas for noise reduction (cast iron is much quieter than plastic). Required below grade in some jurisdictions. Heavy and more expensive to install.
Supply Pipe
- PEX. The dominant supply pipe for new residential construction. Flexible, freeze-resistant, and fast to install. Available in red (hot), blue (cold), and white. Connections are made with crimp rings, clamp rings, or expansion fittings.
- Copper. Still used and required by some codes. More expensive and time-consuming to install (requires soldering or press fittings), but has a long track record.
- CPVC. A rigid plastic option that is glued like PVC. Less common than PEX but still used in some markets.
Installing the Rough-In: Step by Step
Step 1: Set the Main Drain and Building Sewer
Start at the lowest point and work upward. Set the main building drain at the correct slope from the foundation exit to the first fixture connection. If you are on a slab, the underslab work happens before the concrete pour.
Step 2: Install Toilet Flanges
Set toilet flanges at the correct height. The top of the flange should sit on top of the finished floor. Since you are roughing in before tile or flooring, you may need to set the flange at the anticipated finished floor height.
Step 3: Run Branch Drains
Connect each fixture group back to the main drain. Maintain slope throughout, using long-sweep fittings for direction changes. Install cleanouts at the base of each stack, at every change of direction greater than 45 degrees, and at code-required intervals (usually every 100 feet of horizontal run, or every change of direction).
Step 4: Install Vent Piping
Run vents from each fixture (or group of fixtures) up to the vent stack or through the roof. Make sure horizontal vent sections are above the flood level rim of the highest fixture they serve.
Step 5: Run Water Supply Lines
Install hot and cold supply lines to each fixture. Support PEX every 32 inches on horizontal runs and every 10 feet on vertical runs (check your local code for specific requirements). Leave stub-outs long enough for the finish plumber to make connections.
Step 6: Secure and Support All Piping
Use proper hangers and supports. Nothing should be resting on the ground, sagging between joists, or rubbing against framing. Plastic pipe expands and contracts with temperature, so use supports that allow for movement.
Step 7: Install Fire Caulking and Sleeve Where Required
Pipes passing through fire-rated assemblies need fire caulking or listed firestop systems. Your inspector will check this.
Preparing for Inspection
Pre-Inspection Checklist
Before you call for inspection, walk the entire system and check:
- All joints are properly cemented/connected (no dry fits left)
- Slope is correct on every drain run
- All vents are connected and routed correctly
- Cleanouts are installed at required locations
- Pipes are properly supported and secured
- Correct fittings are used (no short-radius 90s on horizontal drains)
- Toilet flanges are at the correct height and centered
- No pipe is touching ductwork, electrical, or other incompatible materials
- All penetrations through fire-rated assemblies are firestopped
- Test caps or plugs are installed and ready for pressure testing
The Pressure Test
Most inspectors require one of two tests:
Water test. Fill the entire DWV system with water by plugging the lowest opening and filling from the highest vent. The water level must hold for at least 15 minutes with no visible drop. This test is thorough but messy if you have a leak.
Air test. Plug all openings and pressurize the system to 5 psi. Hold for 15 minutes with no pressure drop. This is faster and less messy than a water test, but some jurisdictions do not accept it.
Have your test caps, plugs, and pressure gauge ready before the inspector arrives. Nothing wastes time like scrambling for a missing plug while the inspector is standing there.
Coordinating With Other Trades
The plumbing rough-in does not happen in a vacuum. You are sharing the building with HVAC, electrical, and framing crews, and conflicts happen constantly.
Common Conflicts
- HVAC ducts and plumbing drains competing for the same joist bays. The trade that gets there first usually wins. Coordinate early.
- Electrical panels located where your main drain needs to run. Talk to the electrician before either of you starts.
- Structural members that are already drilled or notched beyond their limits. Work with the framer and engineer if you need a hole in a critical member.
Using a project management tool like Projul helps you coordinate schedules and avoid these conflicts. When every trade can see the project timeline and communicate in one place, you spend less time fixing problems and more time doing productive work.
Common Rough-In Mistakes
Wrong fitting selection. Using a sanitary tee on its back (horizontally) instead of a wye with a 45-degree bend. Sanitary tees are for vertical-to-horizontal connections only.
Forgetting the vent. Every trap needs a vent. Skipping one because “it is close enough to another vent” does not fly with most inspectors.
Incorrect slope. Eyeballing slope instead of measuring it. Buy a good level and check every run.
Under-sizing the main drain. Add up all your fixture units and size the building drain correctly. Undersizing leads to slow drains and backups once the house is occupied.
Not accounting for finished floor height. If the finished floor will be 3/4 inch higher than the subfloor (tile, for example), your toilet flange needs to be set at that height now.
Poor support. Pipes that sag between supports lose their slope. Follow the manufacturer’s support spacing requirements.
Keeping Your Plumbing Jobs on Track
Plumbing rough-in involves a lot of moving parts, from material ordering to trade coordination to inspection scheduling. If you are running multiple residential projects, keeping all of that in your head or on paper gets old fast.
Projul gives you a central place to manage schedules, track material costs, communicate with your crew, and log inspection results. When the rough-in passes, you can document it with photos and move straight to the next phase without missing a beat.
If you are growing a plumbing business and need better job tracking, check out Projul’s pricing or book a demo to see how it works for mechanical contractors.
Frequently Asked Questions
What is the correct drain slope for residential plumbing?
How far can a toilet be from the main vent stack?
What size drain pipe do I need for a bathroom group?
Do I need to pressure test the plumbing rough-in?
What is a wet vent and when can I use one?
How do I rough in plumbing for a kitchen island sink?
What is the most common reason plumbing rough-in inspections fail?
How do I plan a plumbing rough-in to keep costs down?
Related Articles

Concrete Tilt-Up Construction: A Contractor's Complete Field Guide
Tilt-up construction accounts for roughly 15 percent of all industrial and commercial buildings in North America. This...
Read More →
How to Implement Construction Software Without Losing Your Mind
Most construction software rollouts fail. Not because the software is bad, but because the rollout was rushed. Here are...
Read More →
How Selections Can Pay for Themselves in Three Easy Steps
Most contractors lose thousands each year on wrong material orders, slow client decisions, and missed upsell chances....
Read More →