Roof Truss Design and Installation Guide (2026)
Roof Truss Design and Installation Guide for Contractors
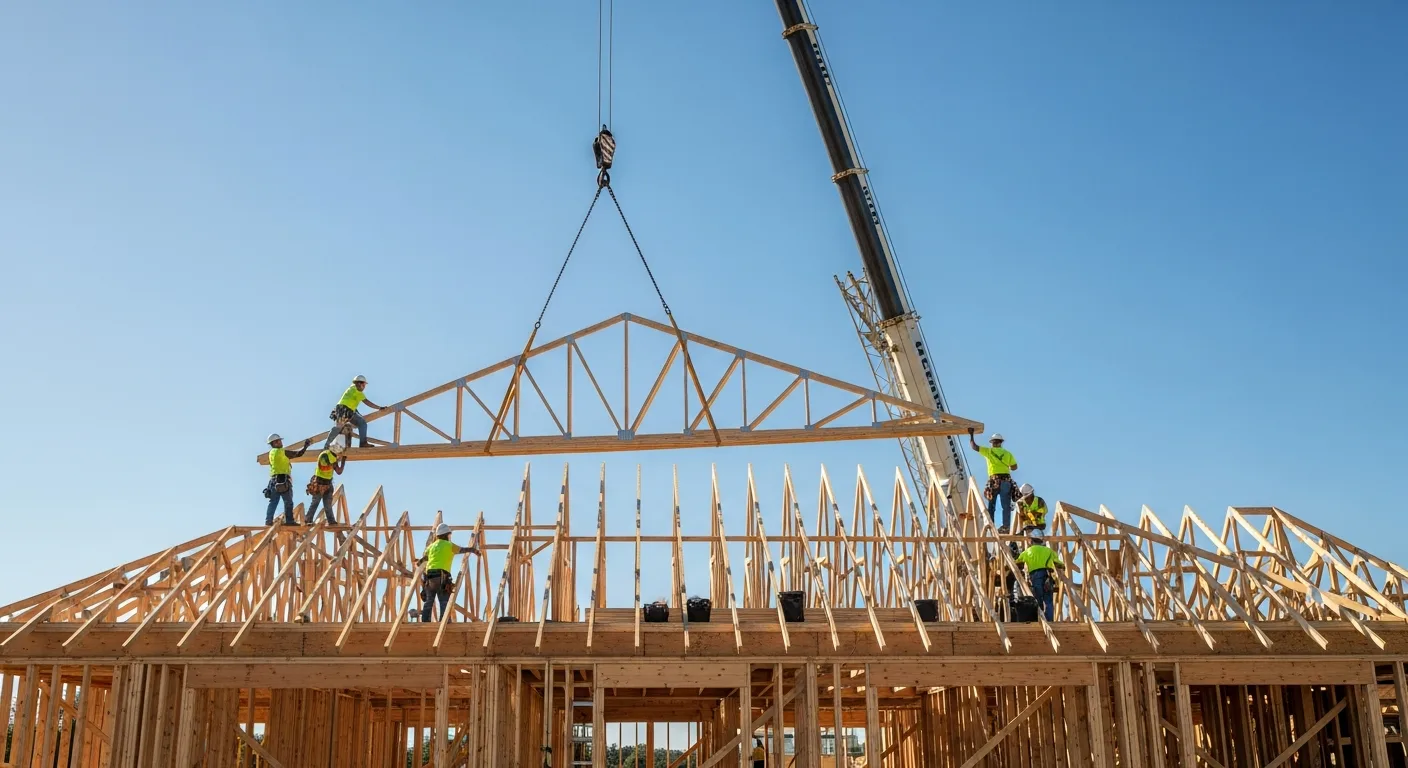
If you have been framing roofs for any length of time, you know that trusses changed the game for production housing. Instead of stick-framing every rafter, ridge board, and ceiling joist on site, you get a pre-engineered component delivered on a truck and set in place with a crane. But trusses are not just “plug and play.” Getting them right takes planning, coordination, and a solid understanding of structural principles.
This guide covers the truss types you will encounter on residential and commercial jobs, the engineering behind them, proper bracing methods, and the installation practices that keep your crew safe and your builds on schedule.
Why Roof Trusses Beat Stick Framing on Most Jobs
Stick framing has its place. Custom homes with complex roof geometry, cathedral ceilings, and exposed timber work often call for conventional rafter framing. But for production builders, multi-family projects, and most standard commercial buildings, trusses win on speed, cost, and consistency.
A truss manufacturer can produce a complete roof package in their shop, engineer it to meet local codes, and deliver it to your site ready to set. Your framing crew goes from spending three or four days cutting and assembling rafters to setting the entire roof structure in a single day.
That speed advantage translates directly to your bottom line. Fewer labor hours on the roof means lower costs per unit and faster cycle times. If you are tracking job costs in a system like Projul, you will see the difference clearly when you compare framing labor on truss jobs versus stick-built projects.
Common Roof Truss Types and When to Use Each
King Post Truss
The simplest truss design. One vertical web connects the peak of the top chords to the center of the bottom chord. Good for spans up to about 26 feet. You see these on small additions, garages, and simple gable roofs.
Queen Post Truss
Similar to the king post but with two vertical webs instead of one, creating an open panel in the center. Handles longer spans than the king post and works well when you need some usable attic space between the verticals.
Fink Truss
The workhorse of residential construction. The web members form a “W” pattern that distributes loads efficiently. Fink trusses handle spans from 24 to about 40 feet and work for standard gable roofs with typical dead and live loads. If you are building tract homes, you are setting Fink trusses every day.
Howe Truss
The web pattern is essentially the inverse of the Fink, with verticals and diagonals oriented differently. Howe trusses perform well under heavy uniform loads and are common in commercial and agricultural buildings.
Scissor Truss
When the architect wants a vaulted or cathedral ceiling without stick-framing it, scissor trusses are the answer. The bottom chord slopes upward from each bearing point, creating the vaulted profile inside. The trade-off is that scissor trusses generate horizontal thrust at the bearing points, so the connection details need to account for that outward push.
Attic Truss (Room-in-Attic)
These trusses create usable living space within the roof structure. The bottom chord panel in the center section is designed to carry floor loads, and the web configuration leaves an open rectangular space. Attic trusses are heavier and more expensive than standard trusses, but they eliminate the need for a full second floor structure on bonus room designs.
Hip Truss System
Hip roofs require a set of trusses that decrease in height from the standard trusses to the hip corner. The system includes a girder truss (or hip girder) that carries the loads from the decreasing jack trusses. Hip truss systems require careful coordination between the truss designer and the framing crew because the sequence and connection details matter.
Parallel Chord Truss (Flat Truss)
Used for flat or low-slope roofs on commercial buildings. The top and bottom chords run parallel, and the web members connect them in a triangulated pattern. These are common on strip malls, warehouses, and multi-story commercial projects.
The Engineering Side: What Contractors Need to Know
You do not need to be an engineer to install trusses, but you absolutely need to understand the basics of how they work and what the engineering drawings tell you.
Load Types
Every truss design accounts for several load categories:
Dead load is the weight of the truss itself, sheathing, roofing material, insulation, drywall ceiling, and any permanently attached equipment like HVAC units. Standard residential dead loads run 10 to 15 pounds per square foot (psf) for the top chord and 5 to 10 psf for the bottom chord.
Live load covers temporary forces like workers on the roof during construction, maintenance access, and in some code interpretations, light storage in the attic. Typical residential roof live loads are 20 psf, though some jurisdictions reduce this for steeper pitches.
Snow load varies dramatically by location. A project in Phoenix might have zero snow load while a job in Buffalo could require 40 psf or more. The truss engineer uses ground snow load data from ASCE 7 and applies roof geometry factors to calculate the design snow load.
Wind load is increasingly critical as building codes tighten requirements in hurricane and high-wind zones. Wind creates both positive pressure (pushing on the windward side) and negative pressure (suction on the leeward side and roof surface). The truss-to-wall connections must resist wind uplift forces, which can be substantial in coastal areas.
Reading Truss Drawings
Every truss package comes with sealed engineering drawings. Each sheet shows:
- The truss profile with all member sizes and grades
- Span, pitch, and overhang dimensions
- Design loads (dead, live, snow, wind)
- Bearing locations and required bearing widths
- Connector plate sizes and locations
- Maximum deflection ratios
- Bracing requirements
- Special notes about handling and installation
Do not throw these drawings in a pile and ignore them. Your building inspector will want to see them, and your crew needs the bearing and bracing information to install the trusses correctly.
Bearing Points and Load Paths
Trusses transfer roof loads down to the bearing walls or beams below. The truss drawing specifies the bearing locations and required bearing width (typically 3.5 inches minimum on wood walls). Getting the bearing points wrong means the loads do not follow the intended path, and you end up with cracked drywall, sagging ceilings, or worse.
If your floor plan has an interior bearing wall that supports a truss, make sure that wall is framed and in the right location before the trusses arrive. A wall that is off by even two inches from the truss bearing point creates problems.
Bracing: The Part Most Crews Get Wrong
Truss bracing is the single biggest safety and quality issue in truss installation. The Building Component Safety Information (BCSI) guide, published jointly by the Truss Plate Institute (TPI) and the Structural Building Components Association (SBCA), is the industry standard for bracing. If you do not have a copy, get one. It should be on every job site where trusses are being set.
Temporary Bracing During Installation
Temporary bracing keeps trusses stable while you are setting them. Without it, trusses can domino, and that is not a figure of speech. Crews have been killed when a row of unbraced trusses collapsed like dominoes.
Ground bracing anchors the first truss to the ground or to the floor structure. Use at least two diagonal braces from the top chord down to stakes or the floor deck. The first truss must be plumb and stable before you set the second one.
Lateral bracing runs along the top chord, perpendicular to the trusses. Install continuous 2x4 lateral braces within 12 inches of the ridge and at intervals along the top chord as specified in the BCSI guide. These keep the trusses from tipping over.
Diagonal bracing runs at approximately 45 degrees from the top chord lateral brace down to the bottom chord or to the floor. Diagonal braces prevent the row of trusses from racking sideways as a group.
Bottom chord lateral restraint runs perpendicular to the trusses along the bottom chord. This prevents the bottom chord from buckling laterally under compression, which can happen when wind loads or unbalanced snow loads put the bottom chord in compression.
Permanent Bracing
Permanent bracing remains in place for the life of the building. The truss engineer specifies permanent bracing on the drawings, and it typically includes:
- Continuous lateral bracing on web members at specified locations
- Diagonal bracing in the plane of specific web members
- Bottom chord lateral restraints at specified intervals
Sheathing the roof with plywood or OSB provides lateral bracing for the top chord once it is properly nailed. But until the sheathing is complete, the temporary bracing must stay in place.
Installation Best Practices
Pre-Delivery Preparation
Before the truss truck shows up, make sure your site is ready:
Check the walls. All bearing walls should be framed, plumb, straight, and at the correct height. Use a string line to check straightness. Bowed walls create problems when you try to set trusses at consistent spacing.
Verify dimensions. Measure the building at the truss bearing points and compare to the truss drawings. If the building is three inches wider than the truss span, you have a problem. Catch it before the crane shows up, not after.
Plan the crane placement. The crane needs solid ground, adequate reach, and enough room to swing. Walk the site with the crane operator before delivery day to identify the setup position and any overhead obstructions like power lines.
Stage the bracing material. Have your 2x4 brace stock, stakes, nails, and hardware ready. Running to the lumber yard for bracing material while the crane is on the clock burns money.
Setting Day
Safety first. Everyone on the crew needs to understand the setting sequence and their role. Designate who is guiding the truss from the ground, who is on the walls receiving it, and who is handling the bracing. Hard hats and fall protection are mandatory.
Set the gable end truss first (or the first truss per your setting plan). Plumb it carefully and secure it with ground braces. Everything that follows references off this first truss, so take the time to get it right.
Maintain spacing. Use a marked layout stick or pre-marked top plates to keep trusses at the correct spacing. It is easy to lose track of layout when you are moving fast with a crane, and incorrect spacing shows up later when you try to sheath or install ceiling drywall.
Install bracing as you go. Do not set all the trusses and then come back to brace them. Install lateral and diagonal bracing every six to eight trusses as you work down the building. The BCSI guide provides specific requirements based on truss span and height.
Check plumb continuously. Use a level on every third or fourth truss to verify plumb. Trusses that lean create sheathing problems and can affect the load path.
Connection Details
Truss to wall connections vary by wind zone and building code requirements. In low-wind areas, toenailing may be acceptable for simple connections. In moderate to high-wind zones, you will need hurricane ties or engineered metal connectors rated for the specified uplift forces.
Girder truss connections require special hardware. When jack trusses or hip trusses bear on a girder truss, the connection must transfer the accumulated loads into the girder without crushing the girder’s top chord. Use the specified hangers or bearing blocks shown on the truss drawings.
Multi-ply girder trusses need proper fastening between the individual plies. The truss drawings specify the nailing pattern and bolt locations for multi-ply assemblies.
Common Problems and How to Avoid Them
Truss Uplift
Truss uplift is a seasonal movement where the bottom chord of the truss bows upward during winter months. It happens because the top chord is insulated (keeping it cold and dry) while the bottom chord sits in warm, humid attic air and absorbs moisture. The moisture expansion in the bottom chord pushes it upward, cracking the drywall at interior wall intersections.
Prevention: Use truss clips (also called partition clips) that allow the bottom chord to move independently of interior partition walls. Do not nail the bottom chord directly to non-bearing interior walls.
Damaged Trusses
Trusses get damaged during shipping, handling, and installation. Cracked chords, bent webs, and missing or displaced connector plates all compromise the structural capacity.
Rule of thumb: Do not use a damaged truss without getting a repair detail from the truss engineer. Never attempt a field repair by sistering lumber or adding plywood gussets without engineering approval. What looks like a minor crack might be in a critical stress location.
Improper Storage on Site
Trusses stored flat on the ground absorb moisture and can warp. Trusses stood on end without support can buckle or blow over in the wind.
Best practice: Store trusses on level blocking, supported at the bearing points and at the ridge, with the top chord up. Cover them if rain is expected but allow air circulation. Do not store them for extended periods; schedule delivery close to the setting date.
Tracking Truss Jobs with Project Management Software
Truss work involves coordination between the contractor, the truss manufacturer, the engineer, the crane company, and the framing crew. Keeping all of those moving parts organized is where construction project management software earns its keep.
With a tool like Projul, you can schedule the truss delivery, assign the crane rental, track the framing crew’s hours, and manage the material costs all in one place. When the truss package arrives with a price that is different from the quote, you catch it immediately because the budget is right in front of you.
If you are still managing truss jobs with spreadsheets and text messages, you are leaving money on the table. Check out Projul’s pricing to see how the cost compares to the profit leaks you are plugging.
When to Consider Steel Trusses
Wood trusses handle the majority of residential and light commercial work, but there are situations where steel trusses make more sense:
- Spans over 60 feet where wood trusses become impractical
- High fire rating requirements in commercial or industrial buildings
- Corrosive environments like swimming pool buildings or chemical storage
- Extremely heavy loads like rooftop mechanical equipment
Steel trusses cost more per unit but can eliminate the need for interior columns on long-span buildings, which may save money overall by maximizing usable floor space.
Code Requirements and Inspections
Building inspectors look for several things on truss installations:
- Sealed truss drawings available on site
- Trusses installed per the manufacturer’s placement plan
- Proper bearing at all specified bearing points
- Correct truss-to-wall connections (hurricane ties where required)
- Permanent bracing installed per the truss drawings
- No unauthorized field modifications
- No damaged trusses installed without engineer-approved repairs
Have the truss drawings organized and accessible when the inspector arrives. Disorganized paperwork slows down inspections and makes inspectors look harder for problems.
Estimating and Budgeting for Truss Packages
Getting the truss budget wrong is one of the fastest ways to blow your margins on a framing job. Trusses are not a commodity item you can price per linear foot and call it close enough. The cost of a truss package depends on the span, pitch, loading requirements, truss type mix, and local lumber market conditions. Two houses with the same square footage can have wildly different truss costs if one has a simple gable and the other has multiple hips, valleys, and a bonus room truss.
Getting Accurate Quotes
Start by sending the truss manufacturer a complete set of architectural plans, not just the roof plan. They need the floor plan to identify bearing walls, the building sections to verify plate heights, and the elevations to confirm the roof geometry. Sending incomplete drawings leads to incomplete quotes, which leads to change orders you did not expect.
Most truss manufacturers will provide a free engineering layout and quote. Take advantage of this. Get quotes from at least two manufacturers on any job over $10,000 in truss costs. Pricing varies more than you might expect between shops, especially when they have different lead times and production schedules.
When you review the quote, look beyond the unit price per truss. Check what is included: delivery, engineering, sealed drawings, temporary bracing hardware, and connector plates. Some manufacturers include everything in one number while others break it out. An apples-to-apples comparison requires understanding what each quote covers.
Tracking Costs Against Your Budget
Once you accept a quote, enter the number into your job costing system immediately. Do not wait until the invoice shows up. On truss day, things happen fast. The crane company adds an extra hour. The manufacturer delivers four replacement trusses for damaged units. The framing crew works overtime to finish setting before weather moves in. Each of those costs needs to land in the right job budget so you know your actual margins when the roof is done.
If you are running multiple jobs at once, tracking truss costs by project becomes critical. You cannot afford to have one project quietly absorbing costs that belong to another. Dedicated project tracking in a system like Projul keeps each job’s numbers clean and gives you real-time visibility into where you stand.
Common Budget Busters
Watch out for these truss-related cost surprises:
Design revisions after manufacturing starts. If the architect changes the roof after the trusses are in production, you are paying for the revised trusses plus potential restocking fees on the originals. Push hard to finalize the roof design before placing the truss order.
Site access problems on delivery day. Truss trucks are long. If your site cannot accommodate the delivery truck and the truck has to make multiple trips or wait for access, you are paying for that time. Walk the delivery route before you schedule.
Crane downtime. Crane rental is typically billed by the hour with a minimum. If your walls are not ready, your bracing material is not staged, or your crew is not there on time, the crane sits and the meter runs. A good rule is to have everything ready an hour before the crane’s scheduled arrival.
Incorrect wall heights or dimensions. If the building does not match the truss drawings, you are either reworking the walls or ordering new trusses. Measure twice, order once.
Crane Logistics and Coordination for Truss Day
Setting trusses by hand is possible on small jobs with short-span trusses, but on anything over about 30 feet of span, you need a crane. And crane day is one of those moments where planning either pays off big or costs you dearly.
Choosing the Right Crane
Crane selection depends on the building footprint, the truss weight, the required reach, and the site conditions. For most single-story residential work, a 30-ton hydraulic truck crane handles the job. Two-story homes or commercial buildings with longer spans may need a 50-ton or larger crane.
Talk to the crane company about the heaviest truss in your package and the maximum reach they will need. Girder trusses and attic trusses are significantly heavier than standard trusses and may dictate the crane size even if the reach is modest. The crane operator needs this information to confirm the right machine and to build the lift plan.
Site Preparation for the Crane
The crane needs firm, level ground to set up. If your site has soft soil, fresh fill, or slopes, the crane may need mats or outrigger pads. Discuss this with the crane company ahead of time. A crane that cannot fully extend its outriggers cannot lift at full capacity, and the operator will rightfully refuse to make picks that exceed the reduced capacity.
Check for overhead power lines. The crane boom must maintain minimum clearance distances from energized lines (typically 10 to 20 feet depending on voltage). If power lines cross the crane’s swing path, contact the utility company about de-energizing or relocating the lines before truss day. This takes time to arrange, so do not leave it for the last minute.
Clear the area around the building of materials, equipment, and debris that could interfere with the crane’s swing. The operator needs to rotate freely to pick trusses from the delivery truck or staging area and set them on the building.
The Setting Sequence
Plan the setting sequence before the crane arrives. Generally, you start at one end of the building with the gable truss and work toward the other end. Hip roof sections require a different approach where you set the girder trusses first, then fill in with the jack trusses.
Talk through the sequence with your foreman and the crane operator. Everyone should know which truss comes off the truck in what order, where it goes on the building, and how the bracing will be installed as you go. A ten-minute pre-setting meeting saves hours of confusion once the crane starts swinging.
Weather Considerations
Wind is the biggest weather factor for truss setting. Trusses are tall, light, and flat, which means they catch wind like a sail. Most crane operators will shut down when sustained winds exceed 20 to 25 mph, and for good reason. A truss swinging in the wind is nearly impossible to control and puts everyone at risk.
Check the weather forecast for the full day, not just the morning. If wind is expected to pick up in the afternoon, start early. If the forecast is marginal, have a backup date planned so the crane company can reschedule without a long delay.
Rain is less of an issue for the actual setting, but wet top plates are slippery and wet trusses are heavier. If rain is expected, consider whether it is worth the safety trade-off.
Multi-Story and Complex Roof Framing with Trusses
Simple gable roofs on single-story houses are the bread and butter of truss installation. But plenty of projects involve multiple roof planes, intersecting ridges, different plate heights, and two or three stories. These complex roof systems require a different level of planning and execution.
Stacked Truss Systems
On multi-story buildings, you often have floor trusses on the upper levels and roof trusses on top. The floor trusses need to be set, sheathed, and sometimes loaded with material before the roof trusses go on. Coordinate the delivery of floor trusses and roof trusses to match your framing sequence. Getting a load of roof trusses when you are still two weeks from needing them creates a storage headache on a tight site.
The bearing connections between floor trusses and the wall system below them are just as critical as the roof truss connections. Make sure the floor truss bearing points align with studs or headers in the wall below, and use the specified hardware.
Intersecting Roof Planes
When two roof sections meet at different angles or heights, the framing gets complicated. Valley conditions, where two roof planes slope toward each other, require either valley trusses designed specifically for that intersection or a valley rafter system that works with the adjacent trusses.
The truss manufacturer’s layout should show how to frame these intersections, but in practice, the framing crew needs experience reading these details and translating them into actual framing. If your crew is new to complex roof systems, spend extra time reviewing the truss layout before setting day. Better to ask the truss manufacturer’s tech support a question ahead of time than to figure it out 30 feet in the air with the crane running.
Girder Truss and Carrier Systems
Girder trusses are the heavy lifters in a truss roof system. They carry loads from other trusses and transfer them to bearing points below. A hip girder, for example, might support a dozen jack trusses that decrease in height as they approach the hip corner. That concentrated load makes the girder truss one of the most critical elements in the roof.
Girder trusses are typically multi-ply, meaning two or three individual trusses bolted or nailed together. The fastening pattern between plies is engineered and specified on the drawings. Do not assume a standard nailing pattern is adequate. Use the exact fastener type, size, and spacing called out by the engineer.
When setting girder trusses, pay attention to the bearing pocket or saddle detail where the carried trusses connect. The hardware at these connections transfers significant loads, and incorrect installation can lead to localized crushing or connection failure under full load.
Managing Complexity with Better Scheduling
Complex roof systems add days to your framing schedule. If you have a production schedule that assumes every house frames in the same number of days, complex roofs will blow that timeline. Build the complexity into your project scheduling from the start. Flag the complex units in your schedule, allocate more crew hours, and communicate the timeline to the trades that follow you.
Nothing frustrates a roofing sub more than showing up to sheath a roof that is only half set. And nothing frustrates your GC more than a framing delay that cascades through the rest of the schedule. Accurate scheduling prevents both.
Safety on Truss Jobs: What Your Crew Needs to Know
Truss installation is one of the highest-risk activities in residential and light commercial construction. Falls, struck-by incidents, and truss collapses account for serious injuries and fatalities every year. If you are running a framing crew, safety is not a nice-to-have. It is the difference between going home at the end of the day and not.
Fall Protection
OSHA requires fall protection at six feet in construction. On truss jobs, that means your crew members working on top of walls or walking on trusses need either guardrails, safety nets, or personal fall arrest systems. In practice, most truss crews use harnesses with retractable lanyards tied off to an engineered anchor point.
The challenge is that during truss setting, the structure is constantly changing. The anchor points available at the start of the day are different from the ones available at the end. Plan your fall protection strategy as part of your setting sequence. Know where your crew will tie off at each stage and make sure the anchor points are rated for fall arrest loads.
Struck-By Hazards
Trusses being swung by a crane are a struck-by hazard for everyone on the ground and on the walls. Tag lines help control the truss as it swings, but they are not foolproof. Keep non-essential personnel out of the swing radius. Make sure the crew members guiding the truss into position have a clear escape path if the truss swings unexpectedly.
Never stand directly under a suspended load. This seems obvious, but in the flow of a fast-paced setting day, people get complacent. The foreman’s job is to watch for these situations and stop the work when someone is in a dangerous position.
Truss Collapse Prevention
Unbraced trusses are inherently unstable. A single truss standing on a wall without lateral support will fall over in a light breeze. Multiple unbraced trusses can collapse as a group, creating a domino effect that brings down everything in its path.
The BCSI guide exists specifically to prevent this. Follow it. Install temporary bracing on the first truss before releasing it from the crane. Add lateral and diagonal bracing at the specified intervals as you set additional trusses. Do not take shortcuts because the crew wants to move faster. The five minutes you save by skipping a brace is not worth the risk.
Toolbox Talks and Crew Training
Before every truss-setting day, hold a toolbox talk that covers the specific hazards of the day’s work. Review the setting sequence, the bracing plan, the fall protection plan, and the emergency procedures. Make sure every crew member knows their role and understands the signals used to communicate with the crane operator.
If you have newer crew members who have not set trusses before, pair them with experienced hands. Truss setting is not the place for on-the-job learning without supervision. The pace is fast, the loads are heavy, and the margin for error is thin.
Document your toolbox talks and keep the records. If OSHA shows up or if there is an incident, you need to show that you trained your crew on the hazards. A system like Projul’s daily logs and documentation features makes it easy to record these talks and attach them to the specific project.
Getting Started with Better Roof Framing
Whether you are a production builder setting 50 trusses a day or a custom contractor handling complex hip and valley systems, understanding truss design and installation principles makes your jobs run smoother and safer.
Invest the time to study the BCSI guide. Make sure your crew leaders understand bracing requirements. And use project management tools that help you coordinate the moving parts of truss day without relying on memory and phone calls.
Good roof framing starts with good planning. The trusses are only as good as the preparation, coordination, and craftsmanship that goes into setting them.
Frequently Asked Questions
What are the most common roof truss types used in residential construction?
How far can a standard roof truss span without intermediate support?
Do I need an engineer to design roof trusses?
What is the proper spacing for roof trusses?
How do you brace roof trusses during installation?
Can you modify a roof truss after it's manufactured?
What causes roof truss uplift and how do you prevent it?
How long does it take to set roof trusses on a typical house?
Related Articles

Concrete Tilt-Up Construction: A Contractor's Complete Field Guide
Tilt-up construction accounts for roughly 15 percent of all industrial and commercial buildings in North America. This...
Read More →
How to Implement Construction Software Without Losing Your Mind
Most construction software rollouts fail. Not because the software is bad, but because the rollout was rushed. Here are...
Read More →
How Selections Can Pay for Themselves in Three Easy Steps
Most contractors lose thousands each year on wrong material orders, slow client decisions, and missed upsell chances....
Read More →