Construction Soil Testing Guide for GCs
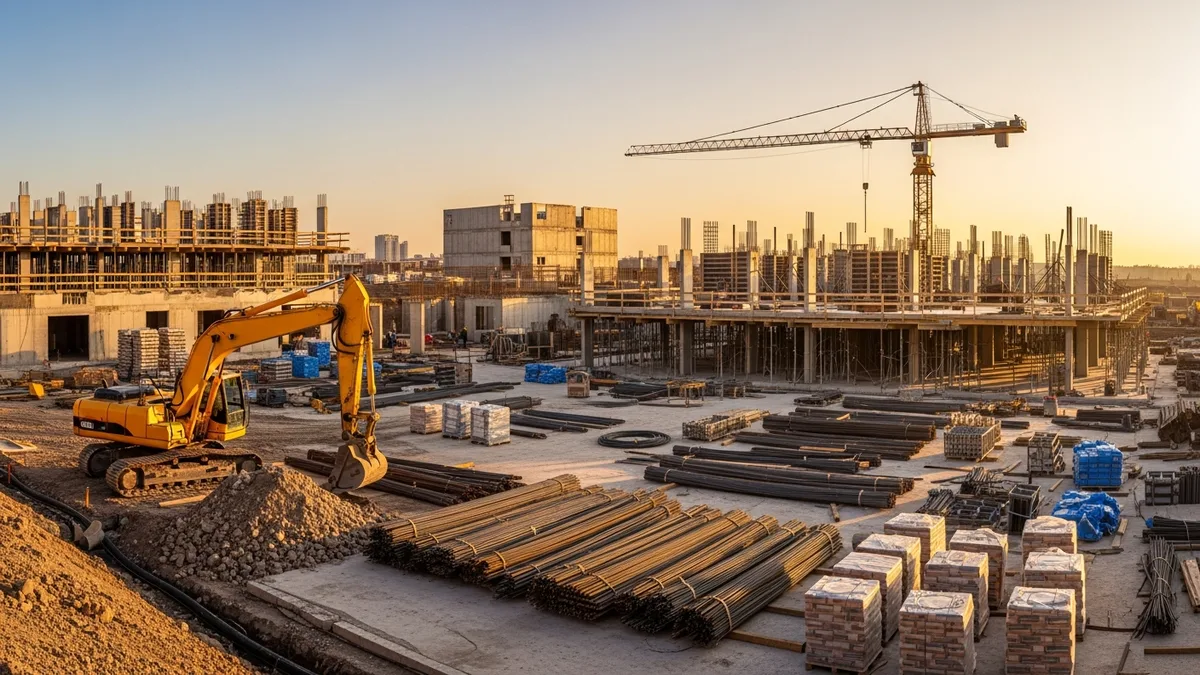
You have probably heard the saying that every building is only as good as what it sits on. That is not just something old-timers say to sound wise. It is a fact that shows up in cracked slabs, settling footers, and six-figure change orders when somebody skipped the soil work.
If you have been in the GC game for any length of time, you have seen what happens when a project moves forward without proper soil testing. Maybe you inherited a job where the foundation design was based on assumptions instead of data. Maybe you watched a footer sink three inches because nobody checked for soft clay at depth. Either way, the lesson sticks with you.
This guide breaks down what you actually need to know about construction soil testing and geotechnical reports. Not the textbook version. The version that matters when you are standing on a job site trying to figure out if your foundation plan is going to hold up.
Why Soil Testing Matters More Than Most GCs Think
Here is the honest truth: a lot of general contractors treat soil testing as a box to check. The building department requires a geotech report, so you get one. But if that is all you are doing with it, you are leaving money and risk management on the table.
Soil testing tells you what is actually underneath your building pad. Not what the guy who developed the lot next door found. Not what the county soil survey says in general terms. What is actually there, at your specific location, at the depths that matter for your project.
The bearing capacity of the soil determines what kind of foundation you can build and how deep you need to go. The moisture content and plasticity of the soil tell you whether you are dealing with expansive clays that will move seasonally. The groundwater level tells you if you need dewatering, waterproofing, or a completely different excavation approach.
All of this feeds directly into your pre-construction planning. If you do not have solid soil data before you finalize your bid, you are guessing. And guessing on foundation conditions is one of the fastest ways to blow a budget.
Think about it from a numbers perspective. A basic geotech investigation might cost $2,000 to $5,000 on a residential or light commercial job. Compare that to discovering bad soil after you have already mobilized, excavated, and poured footers. Now you are talking about redesigns, structural engineer fees, removal of what you already placed, and a foundation system that could cost two or three times what you originally estimated. The math is simple.
What Happens During a Geotechnical Investigation
If you have never been on site during a soil boring, it is worth watching at least once. Understanding the process helps you read the report with more confidence.
A geotechnical investigation typically starts with a drilling rig showing up to your site and advancing borings at locations specified by the geotechnical engineer. The number and depth of borings depend on the size of the project, the building footprint, and what the engineer already knows (or suspects) about the local geology.
Boring and Sampling
The drill rig pushes or drives a hollow sampler into the ground at regular intervals, usually every 2.5 or 5 feet. The most common method is the Standard Penetration Test (SPT), where a 140-pound hammer drops 30 inches to drive the sampler. The number of blows it takes to advance the sampler 12 inches is called the N-value, and this is one of the most important numbers in the entire report.
High N-values mean dense or stiff soil. Low N-values mean loose or soft material. If you see N-values in the single digits at shallow depths, pay attention. That is telling you the soil does not have much strength, and your foundation design needs to account for it.
The samples pulled from each boring get sealed, labeled, and sent to a lab for testing. Common lab tests include:
- Moisture content: How much water is in the soil right now
- Atterberg limits: The liquid limit and plastic limit, which tell you how the soil behaves as moisture changes
- Grain size analysis: What the soil is actually made of (sand, silt, clay, gravel)
- Unconfined compressive strength: How much load the soil can take before it fails
- Swell/consolidation tests: Whether the soil will expand when wet or compress under load over time
Groundwater Observations
During drilling, the crew notes if and when they hit water. They will also often leave a monitoring well or open borehole for 24 hours to check where the water table stabilizes. This matters for excavation planning, stormwater management, and long-term foundation performance.
If groundwater is shallow, you may need to plan for dewatering during construction, design a waterproof foundation system, or adjust your grading plan. None of that is something you want to figure out after you have already started digging.
How to Read a Geotechnical Report (Without a PhD)
The geotech report lands on your desk and it is 40 pages of technical language, boring logs, lab data, and engineering recommendations. Most GCs flip to the recommendations section and skip the rest. That works most of the time, but knowing how to read the full report makes you better at your job.
The Boring Logs
These are the core of the report. Each boring log shows what was found at every depth: soil type, color, moisture, consistency, and the SPT N-values. Read them like a story that starts at the surface and goes down.
Look for changes. If the top 5 feet is stiff clay with N-values of 15 to 20, but then you hit a layer of loose sand with N-values of 4 to 6, that soft layer is going to affect your foundation. The engineer will address it in the recommendations, but you should understand why they are recommending what they are recommending.
Soil Classification
Geotechnical reports use the Unified Soil Classification System (USCS). You do not need to memorize every symbol, but knowing the basics helps:
- GW, GP: Gravels (generally good bearing material)
- SW, SP: Sands (usually decent, watch for loose conditions)
- CL, CH: Clays (CL is low plasticity, CH is high plasticity and more problematic)
- ML, MH: Silts (can be tricky, especially when wet)
- OL, OH, PT: Organic soils and peat (almost always need to be removed)
If you see CH (high plasticity clay) in your boring logs, that is expansive soil. Your foundation design needs to account for seasonal movement, and your concrete approach needs to match the engineer’s recommendations.
The Recommendations Section
This is where the geotechnical engineer earns their fee. The recommendations section typically covers:
- Allowable bearing capacity: The maximum pressure the soil can support (measured in pounds per square foot). This number directly determines your footer size.
- Foundation type: Spread footers, drilled piers, mat slabs, or driven piles. The engineer recommends what works for your soil conditions.
- Minimum footing depth: How deep footers need to go to reach adequate bearing material and get below the frost line.
- Fill and compaction requirements: If the site needs fill, what type of material to use and what compaction standards to hit (usually 95% of Modified Proctor).
- Drainage and moisture considerations: Any special requirements for keeping water away from the foundation.
- Seismic site class: If you are in a seismic zone, the soil determines your site class (A through F), which affects structural design.
Read this section carefully and make sure your structural engineer has a copy before they finalize the foundation drawings. If the geotech recommends drilled piers to 15 feet but your structural drawings show spread footers at 3 feet, somebody missed something.
Red Flags in Soil Reports That Should Make You Pause
Not every soil report is a green light. Some reports contain findings that should change how you approach the entire project. Here are the red flags that experienced GCs watch for.
Highly Expansive Soils
When the plasticity index (PI) is above 35 or the report calls out “high swell potential,” you are dealing with soil that will move. A lot. Foundations on expansive soil need to be designed to either move with the soil (post-tensioned slabs) or bypass it entirely (piers drilled to stable material below the active zone).
If you are doing land development in areas known for expansive clays (parts of Texas, Colorado, the Carolinas, and many others), build this into your planning from day one. Do not wait for the report to tell you what you should already suspect.
Fill of Unknown Origin
If the boring logs show fill material and the report says “fill of unknown origin” or “uncontrolled fill,” that is a problem. You do not know what is in there, how it was placed, or whether it was compacted. The typical recommendation is to remove it and replace it with engineered fill, compacted in lifts and tested. That adds cost and time.
On redevelopment sites, old fill can contain debris, organic material, or even contaminated soil. If the report hints at any of this, get clarity before you price the job.
High Groundwater
Groundwater within a few feet of your foundation elevation complicates everything. You will likely need dewatering during construction, which means pumps, discharge permits, and monitoring. The long-term design may require waterproofing membranes, drainage systems, or even a structural slab designed to resist hydrostatic pressure.
Check the groundwater observations in the report and compare them to your planned excavation depth. If they are close, talk to the geotech engineer about seasonal fluctuations. The water table during a dry summer boring may be several feet higher in spring.
Organic Layers or Peat
Organic soils compress over time under load. You cannot build on them. If the borings find organic layers at foundation depth, those layers need to be removed and replaced. On sites with deep organic deposits, this can mean significant over-excavation or switching to a deep foundation system.
Variable Conditions Across the Site
If boring number one shows stiff clay all the way down but boring number three (50 feet away) shows loose sand over soft clay, you have variable conditions. This is common on sites near old stream channels, fill areas, or geological transitions. Variable conditions mean your foundation design may need to change across the building footprint, and your excavation quantities are less predictable.
Document these findings with photos and field notes as you excavate. Comparing what you actually find to what the report predicted helps you catch problems early and supports any claims if conditions differ from the report.
How Soil Testing Affects Your Bid and Schedule
Soil conditions ripple through every part of your estimate and schedule. If you are not accounting for the geotech findings in your numbers, you are setting yourself up for problems.
Estimating Impact
The geotechnical report directly affects several line items in your bid:
- Excavation: Depth, method (machine vs. rock removal), and whether you need shoring or dewatering
- Foundation costs: Footer size, pier depth, slab thickness, and reinforcement
- Fill and grading: Whether you need to import material, the type of fill required, and testing during placement
- Concrete: Mix design, volume, and any special requirements for sulfate resistance or other soil-related factors
- Waterproofing: Below-grade waterproofing systems if groundwater is a factor
- Schedule: Additional time for soil removal, deep foundations, dewatering, or compaction testing
Curious what other contractors think? Check out Projul reviews from real users.
Your estimating process should include a line-by-line review of the geotech report against your takeoff. If the report recommends over-excavation and replacement of 3 feet of unsuitable material across the building footprint, that is a lot of dirt to move and a lot of engineered fill to place and test. Those costs add up fast.
For GCs who self-perform site work, the soil report is your playbook. For those who sub out the foundation and site work, make sure your subs have a copy of the report and are pricing accordingly. A foundation sub who bids without reading the geotech is a problem waiting to happen.
Schedule Considerations
Soil conditions affect your schedule in ways that are not always obvious:
- Pier drilling in rocky soil takes longer than in clay. If the geotech shows rock at shallow depth, your pier sub needs to price for rock sockets, and you need to plan for the extra time.
- Dewatering needs to start before excavation and continue until the foundation is backfilled and can resist water pressure. That is a duration activity, not just a cost.
- Compaction testing during fill placement adds time at every lift. If the spec requires testing every lift at a certain frequency, build those holds into your schedule.
- Waiting for lab results on soil samples taken during construction can hold up the next phase. Know the turnaround time for your testing lab and plan accordingly.
Change Order Protection
One of the biggest benefits of having a solid geotech report before you bid is change order protection. If the report says bearing capacity is 2,000 PSF and you price your footers accordingly, but then field conditions show soft soil requiring deeper excavation or a different foundation, that is a changed condition. The report becomes your baseline for what was known at bid time.
Conversely, if you bid a project without a geotech report and then discover bad soil, you are in a much weaker position to claim a change. The owner or architect can argue that soil investigation was your responsibility or that you should have anticipated the conditions. Always include a geotech contingency in your bid if a report does not exist at bid time, and make it clear in your proposal that your pricing assumes normal soil conditions.
Practical Tips for GCs Working With Geotechnical Engineers
The relationship between a GC and the geotech engineer can either save you money or cost you. Here is how to make it work.
Get Involved Early
Do not wait for the geotech report to show up in the bid documents. If you are on a design-build project or involved in pre-construction planning, push for the geotech investigation to happen early. The sooner you have real soil data, the sooner the design team can make informed decisions about foundation type, floor elevations, and site grading.
If you are bidding a project and no geotech report is included in the bid package, ask for one. If the owner will not provide one, note it as an exclusion in your bid and include an allowance for soil-related contingencies. Do not absorb that risk silently.
Ask Questions
Geotech engineers expect GCs to have questions. If the report recommends drilled piers to 20 feet but your pier sub says they have never gone that deep in this area, call the engineer and ask why. Maybe there is a specific weak layer they are trying to get past. Maybe there is flexibility in the recommendation. You will not know unless you ask.
Good questions to ask your geotech engineer:
- What is the worst-case scenario for soil conditions on this site?
- Are there seasonal groundwater fluctuations we should plan for?
- Can we use on-site material as structural fill, or do we need to import?
- What compaction testing frequency do you recommend during fill placement?
- Are there any contamination concerns based on the site history or your findings?
Coordinate Field Verification
The geotech report is based on conditions found at specific boring locations on specific dates. Actual conditions across the entire site may vary. During excavation, have your geotech engineer visit the site to verify that what you are finding matches what the report predicted.
Most geotech firms offer construction observation services where an engineer or technician visits during excavation, fill placement, and foundation construction to verify conditions and perform field testing. This is not just a nice-to-have. On many projects, the building department requires it.
Keep detailed records of what you encounter during excavation. Take photos of soil conditions at bearing elevation before you pour footers. If conditions differ from the report, document it immediately and notify the geotech engineer before proceeding. Using a system that keeps your project photos and documents organized and time-stamped makes this much easier when you need to reference something months later.
Know When to Push for Additional Testing
Sometimes the initial geotech investigation is not enough. If your building footprint is large but only two borings were done, there could be conditions between those borings that nobody knows about. If the borings were shallow but your design requires deep foundations, you need deeper data.
Do not be afraid to request additional borings or testing. The cost of a few extra borings is nothing compared to discovering unexpected conditions after construction has started. This is especially true on land development projects where you are grading large areas and conditions can change significantly across the site.
Soil Testing for Different Project Types: What Changes
Not every project needs the same level of geotechnical investigation. A custom home on a half-acre lot is a different animal than a three-story commercial building or a subdivision with 200 pads. Here is how soil testing requirements shift depending on what you are building.
Single-Family Residential
On most custom homes, you are looking at two to four borings, usually 15 to 25 feet deep. The geotech engineer wants to see what is happening below the footer depth and check for any problem layers that might settle under the weight of the structure. In areas with known expansive soils, the engineer may also run swell tests and recommend specific slab or pier designs.
For tract housing and subdivision work, the developer typically commissions a site-wide investigation with borings spread across the property. As a GC building individual homes, you should have access to the master geotech report and know which borings are closest to your specific lot. Do not assume that boring number 12 on the east side of the subdivision applies to lot 47 on the west side. Soil can change dramatically over short distances, especially near creek beds, old ponds, or areas that were previously graded.
Light Commercial (Retail, Offices, Restaurants)
Light commercial projects usually need more borings and deeper ones. A 10,000-square-foot retail building might have four to six borings going 25 to 40 feet deep, depending on the foundation loads and local geology. The geotech report for commercial work tends to include more detailed lab testing, pavement design recommendations for the parking lot, and specific guidance for floor slab construction.
Pay attention to the pavement section of the report. Your parking lot and drive lanes sit on the same soil as your building, and the geotech engineer will recommend a pavement section (subgrade prep, base course thickness, and asphalt or concrete thickness) based on the soil strength. If the subgrade has a low California Bearing Ratio (CBR), you are going to need a thicker section, and that costs more.
Multi-Story and Heavy Commercial
Once you get into multi-story buildings with significant column loads, the geotechnical investigation ramps up. Borings go deeper, sometimes 50 to 100 feet or more, to evaluate soil conditions well below the foundation. The engineer needs to check for compressible layers that could cause long-term settlement under sustained heavy loads.
These projects are more likely to require deep foundations like driven piles or drilled shafts. The geotech report will include pile capacity estimates, anticipated settlement calculations, and sometimes recommendations for load testing before production pile installation. If the report calls for a test pile program, build that into your schedule early because it takes time and the results may change the final pile design.
Site Work and Land Development
If you are doing land development work, which includes mass grading, utility installation, and pad preparation, the geotech report focuses on different things. Instead of just foundation design, the report addresses cut-and-fill balance, suitability of on-site material for use as fill, slope stability, and utility trench backfill requirements.
One thing that catches land development contractors off guard is the requirement for on-site material testing before it can be reused as structural fill. Just because you cut it from the hillside does not mean it meets the specs for fill under a building pad. If the material has too much clay, too many rocks over a certain size, or too much organic content, you may need to waste it and import suitable fill. That completely changes your earthwork quantities and costs.
Renovation and Addition Projects
When you are adding onto an existing building, soil testing gets interesting. You need to know what the original foundation is bearing on and whether the soil adjacent to the existing structure can support the new loads. If the addition has different foundation types or loads than the original building, differential settlement becomes a real concern.
On renovation work, access for a drill rig can be limited. The geotech engineer may need to use hand augers or small-track rigs to get into tight spaces. This costs more per boring, so plan for it. Also, if the existing building has a history of settlement or foundation cracks, the geotech investigation for the addition should evaluate what caused those problems so you do not repeat them.
Common Soil Testing Mistakes Contractors Make
After years of seeing projects go sideways because of soil issues, a pattern emerges. The same mistakes keep happening, and most of them are avoidable.
Mistake #1: Relying on the Neighbor’s Report
“The building next door had good soil, so we should be fine.” This thinking has led to more foundation failures than most people realize. Soil conditions can change significantly over 50 feet. An old stream channel, a buried debris pile, or a geological fault can create completely different conditions on adjacent parcels. Always get your own report for your specific building location.
Mistake #2: Skipping the Report on Small Projects
Some GCs skip the geotech report on smaller residential projects, either to save the owner money or because the local jurisdiction does not require one. This is a gamble. A $2,500 geotech investigation is cheap insurance against a $50,000 foundation repair. Even on a simple house, knowing what the soil looks like at depth gives you confidence in your foundation design and protects you from liability.
Mistake #3: Not Reading Past the Summary
The executive summary and recommendations are the most-read sections of any geotech report. But the details that can save your project are often buried in the boring logs and lab data. A soft layer at 12 feet might not make it into the summary if the engineer does not consider it critical for the recommended foundation type. But if your project changes and you end up going deeper, that soft layer matters.
Make it a habit to read the full boring logs. It takes 15 minutes and gives you a mental picture of what is underground at your site. When you are standing in the excavation and something looks different from what you expected, that mental picture helps you react quickly.
Mistake #4: Ignoring Seasonal Water Table Changes
A boring done in August during a dry spell may show groundwater at 20 feet. In April, after spring rains and snowmelt, that same water table might be at 8 feet. If your footer elevation is at 10 feet, you have a problem that did not exist when the borings were done.
Always ask the geotech engineer about seasonal groundwater fluctuations. If there is any doubt, request that monitoring wells be left in place and checked at different times of the year. This is especially important in areas with shallow aquifers or near bodies of water.
Mistake #5: Treating the Geotech Report as Optional Reading for Subs
Your foundation sub, your excavation sub, and your concrete sub all need to read the geotech report. Not just the summary. The full thing. If your pier driller does not know about the cobble layer at 14 feet, they are going to hit it with an auger designed for clay and lose half a day. If your excavation sub does not know about the perched water table at 6 feet, they are going to flood the hole and wonder why.
Share the report with every sub whose work touches the ground. Make it part of your project documentation package from the start.
Mistake #6: Not Getting a Phase I Environmental Along With the Geotech
On any site with previous development, especially commercial or industrial use, you should pair the geotechnical investigation with a Phase I Environmental Site Assessment. The geotech borings may reveal stained soil, unusual odors, or buried debris that suggests contamination. A Phase I evaluates the environmental history of the site and flags potential contamination before you start moving dirt.
Discovering contaminated soil during construction triggers a regulatory response that can shut your project down for weeks or months. If a Phase I identifies potential concerns, a Phase II investigation (which includes actual soil and groundwater sampling for contaminants) can be done at the same time as the geotech borings, saving mobilization costs.
Compaction Testing During Construction: What You Need to Know
The geotech report gets you started, but soil testing does not end when construction begins. Compaction testing during fill placement is one of the most critical quality control steps on any project with earthwork, and it is one of the most common sources of conflict between contractors and testing agencies.
Why Compaction Matters
When you place fill material, whether it is engineered fill for building pads or backfill around foundations, it needs to be compacted to a specific density. The standard is usually 95% of the Modified Proctor maximum dry density, though some specs call for 90% in non-structural areas or 98% under pavements.
If fill is not properly compacted, it settles. Sometimes a little, sometimes a lot. Settlement under a building pad cracks foundations. Settlement under a parking lot creates bird baths and pavement failures. Settlement around a utility line can break pipes and create voids that lead to sinkholes. None of that is something you want to deal with after the project is done.
How Compaction Testing Works
A technician from the testing agency comes to the site and runs a nuclear density gauge test (or a sand cone test, though that is less common these days) on the fill you have placed. The gauge measures the in-place density and moisture content of the soil. The technician compares those numbers to the Proctor curve for that specific material to determine if you have reached the required compaction percentage.
If you pass, the technician marks the test location and moves to the next one. If you fail, you need to rework the area. That usually means adding water (if the soil is too dry), aerating (if it is too wet), or running more passes with the compactor. Then you get retested.
Managing the Testing Process
Here is where the practical side comes in. Compaction testing can slow your project to a crawl if you do not manage it well. A few tips from the field:
- Know the testing frequency in your spec. Most specs require one test per lift per a certain area (for example, one test per 2,500 square feet per lift). Know this number and plan your fill placement to match.
- Keep lifts consistent. Most specs call for 8-inch loose lifts (about 6 inches after compaction). If you dump a 2-foot pile and try to compact it, you will fail. The bottom of the lift will not reach density.
- Moisture control is everything. Soil compacts best at or near its optimum moisture content, which is shown on the Proctor curve. Too dry and it will not compact. Too wet and it turns to mud under the roller. Water trucks and disc harrows are your friends.
- Schedule the testing agency in advance. Do not call the lab at 7 AM and expect a technician by 8. Most testing firms need at least 24-hour notice, and during busy seasons, you may need to schedule a week ahead. Factor this into your project scheduling.
- Do not compact when it is raining. This seems obvious, but the temptation to “get a few more lifts in” before a storm is real. Wet soil does not compact properly, and you will fail the tests. Worse, you may need to remove and replace the material you just placed.
- Keep test reports organized. Every compaction test generates a report with the location, elevation, test results, and pass/fail determination. These reports are part of your project record and will be reviewed by the building inspector, the owner’s representative, and the geotech engineer. A system that keeps all your project documentation in one place saves you from scrambling when somebody asks for test number 47 from three weeks ago.
When Tests Fail
Failed compaction tests are not the end of the world, but they need to be dealt with promptly. The typical process is:
- The technician marks the failed area on a site map
- You rework the material (adjust moisture, re-compact)
- The technician retests
- If it passes, you move on. If it fails again, you may need to remove and replace the material
The cost of retesting is usually on you, not the owner. Build a reasonable allowance for retest fees into your earthwork budget. If you are placing a lot of fill, some failures are inevitable. The goal is to minimize them through good moisture control and consistent lift thickness.
Regional Soil Challenges Every GC Should Understand
Soil is not the same everywhere, and experienced GCs know that what works in one region can be a disaster in another. Here is a quick rundown of the soil challenges that are most common in different parts of the country, and what they mean for your projects.
Expansive Clays (Texas, Colorado, Parts of the Southeast)
The clays in north-central Texas, along the Colorado Front Range, and in parts of the Carolinas and Virginia are some of the most problematic soils in the country. These clays have high plasticity indexes, which means they swell significantly when they absorb water and shrink when they dry out. This seasonal movement can exert enormous pressure on foundations, cracking slabs, bowing basement walls, and lifting footers.
If you work in these areas, you already know the drill: post-tensioned slabs, drilled piers to stable bearing, moisture barriers, and careful drainage design around the perimeter. The geotech report for these sites will focus heavily on the swell potential and moisture content of the clay, and the recommendations will be specific to managing that movement.
One thing that is often overlooked is landscaping and drainage after construction. A perfectly designed foundation on expansive clay can still have problems if the owner plants trees too close to the building (roots pull moisture from the soil, causing shrinkage) or if the grading allows water to pond against the foundation (causing swell). Make sure the owner understands this, and put it in writing.
Frost-Susceptible Soils (Northern States, Midwest)
In cold climates, frost heave is a real concern. Silty soils are the worst offenders because they have enough fine particles to wick water upward through capillary action but enough void space for ice lenses to form. When ice lenses grow, they push the soil (and anything sitting on it) upward.
Foundation footers need to be below the frost line, which ranges from 36 inches in the mid-Atlantic to 60 inches or more in northern Minnesota and the Dakotas. The geotech report will specify the frost depth and may recommend insulated foundations or frost-protected shallow foundations as alternatives to deep footers.
For site work in cold climates, timing matters. Earthwork done in late fall may be sitting exposed through the winter. Frozen soil cannot be properly compacted, and fill placed on frozen subgrade will settle when the frost comes out in spring. Plan your earthwork schedule to avoid these problems or be prepared for the cost of frost protection measures.
Loose Sands and Liquefaction (Coastal Areas, River Valleys)
Sandy soils along coastlines and in river floodplains can be loose and saturated, creating conditions where liquefaction is possible during seismic events. Liquefaction is when saturated, loose sand loses its strength during shaking and essentially behaves like a liquid. Foundations, pipelines, and pavements can sink, tilt, or float during a liquefaction event.
If you are building in a seismic zone with loose, saturated sands, the geotech report will evaluate liquefaction potential and recommend mitigation measures. These might include ground improvement techniques like vibro-compaction, stone columns, or deep soil mixing. On smaller projects, the solution may be deep foundations that bypass the liquefiable layer.
Even outside of seismic zones, loose sands can be problematic. They have low bearing capacity in their natural state and may need densification or over-excavation and replacement. Dewatering is often required for excavation in sandy soils because water flows freely through them.
Organic Soils and Peat (Great Lakes, Northeast, Pacific Northwest)
Areas with high water tables, former wetlands, or glacial geology often have layers of organic soil or peat. These materials are highly compressible and will settle significantly under load, sometimes over a period of years. You cannot compact organic soil to a usable density, and building on it without addressing it will result in ongoing settlement.
The typical approach is removal and replacement if the organic layer is shallow (a few feet). For deeper deposits, the options get more expensive: surcharging (placing a heavy load on the soil for months or years to force consolidation before building), ground improvement, or deep foundations. On land development projects in these areas, the earthwork budget can be dominated by organic removal costs.
Karst Terrain (Florida, Kentucky, Missouri, Parts of Pennsylvania)
Karst geology is formed by the dissolution of soluble rock, usually limestone, creating underground voids, sinkholes, and irregular bedrock surfaces. Building on karst terrain requires extra geotechnical attention because there may be voids or soft zones below the site that could collapse under the weight of a structure.
Geotechnical investigations in karst areas often include more borings at closer spacing to map the rock surface and identify potential void zones. Ground-penetrating radar (GPR) may supplement traditional borings to detect subsurface anomalies. Foundation recommendations in karst terrain often call for grouting voids, compaction grouting, or deep foundations bearing on competent rock below the zone of potential sinkhole activity.
If you are working in karst country and the geotech report mentions “pinnacled rock surface” or “potential for void development,” take it seriously. Sinkhole collapses during construction are rare but not unheard of, and they are catastrophic when they happen.
Bringing It All Together
Soil testing is not glamorous. Nobody gets into construction because they love reading boring logs. But the GCs who take geotechnical data seriously are the ones who bid accurately, avoid surprises, and finish projects without foundation-related headaches.
Here is the short version of what to remember:
- Get the geotech report before you bid. If one does not exist, flag it and protect yourself.
- Read the full report, not just the recommendations. Understanding the boring logs and lab data makes you a better builder.
- Watch for red flags. Expansive clays, uncontrolled fill, high groundwater, and variable conditions all demand attention and budget adjustments.
- Build soil findings into your estimate and schedule. Every recommendation in the report has a cost and time impact.
- Work with your geotech engineer, not around them. They are a resource, and a good one can save you from expensive mistakes.
- Document everything in the field. Conditions may differ from the report, and your records are your protection.
If you are looking for a better way to keep your projects organized from pre-construction through closeout, including tracking soil reports, field photos, and all the documentation that comes with site work, take a look at what Projul can do for your crew. It is built by construction people, for construction people.
Book a quick demo to see how Projul handles this for real contractors.
The ground under your building is not something you can fix cheaply after the fact. Do the homework up front, read the report carefully, and build with confidence that your foundation is sitting on exactly what you think it is sitting on.
Frequently Asked Questions
How much does a geotechnical soil test cost for a construction project?
When should a general contractor order soil testing?
What is the difference between a soil test and a geotechnical report?
Can you build on expansive clay soil?
Who is responsible for ordering the geotechnical report on a construction project?
Related Articles
Construction Electrical Rough-In Guide for General Contractors
The electrical rough-in is where circuit layout, box placement, and wire routing all have to come together before...
Read More →
Interior Finishing for Contractors: The Complete Drywall, Paint, and Trim Guide
Interior finishing is where your project goes from bare studs to a space your client can actually picture living in....
Read More →
Helical Piles and Screw Foundations: The Contractor's Complete Guide
Helical piles are showing up on more and more project specs. This guide covers everything a contractor needs to know...
Read More →