Solar Panel Roof Mounting Guide for Contractors: Racking, Flashing, Structural Load, and Electrical Tie-In | Projul
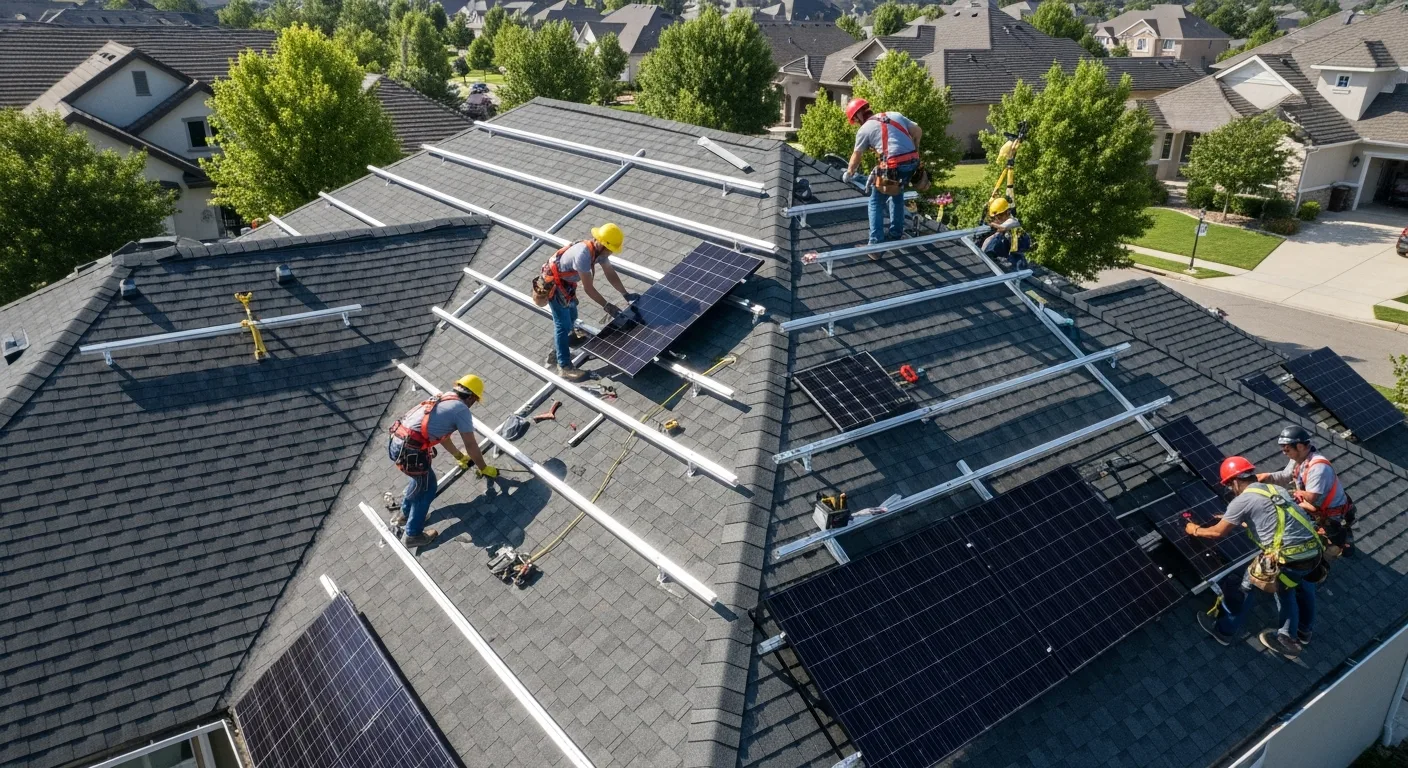
Solar Panel Roof Mounting: What Contractors Need to Know
Residential solar installation has grown from a niche specialty into a mainstream construction service. Whether you are a roofing contractor adding solar to your offerings, an electrician expanding into renewable energy, or a general contractor managing solar subcontractors, understanding how solar panels mount to roofs is essential.
The work sits at the intersection of roofing, structural engineering, and electrical. Getting any one of those wrong creates problems that range from roof leaks to fire hazards to failed inspections. This guide covers the full process: roof assessment, racking systems, flashing and waterproofing, structural load considerations, electrical tie-in, and the permitting maze that comes with every solar project.
Roof Assessment: Before You Design the Array
Roof Condition
Never install solar panels on a roof that is near the end of its life. Panels last 25 to 30 years. If the roof has 5 years left, the homeowner will pay to remove the panels, replace the roof, and reinstall the panels. That is a terrible experience for everyone.
Inspect the roof for:
- Shingle condition: Curling, cracking, granule loss, or missing shingles
- Decking integrity: Soft spots that indicate rot or delamination
- Flashing condition: Around vents, chimneys, and valleys
- Structural issues: Sagging ridgelines, visible deflection, or truss damage
- Existing penetrations: Vents, skylights, and satellite dishes that affect layout
If the roof needs replacement within the next 10 years, recommend doing it before the solar installation. Some contractors offer combined roof-and-solar packages, which is a smart way to capture both jobs.
Roof Orientation and Tilt
In the Northern Hemisphere, south-facing roofs produce the most solar energy. West-facing roofs produce well during afternoon peak demand, which can be more valuable in markets with time-of-use electricity rates. East-facing roofs produce their peak in the morning. North-facing roofs produce the least and are generally avoided unless the pitch is very low.
Roof pitch affects production. The optimal tilt angle roughly equals the site’s latitude. For most of the continental United States, that is between 25 and 40 degrees. Pitches outside this range still work; the production loss is modest.
Shading Analysis
Shade is the enemy of solar production. A single shaded panel can drag down an entire string in a series-wired system. Conduct a shading analysis using tools like a Solar Pathfinder, Solmetric SunEye, or satellite-based software like Aurora or Helioscope.
Identify shading sources:
- Trees (current and future growth)
- Adjacent buildings
- Chimneys and roof vents on the same roof
- Parapet walls on flat roofs
Design the array to avoid shaded areas, or specify microinverters or DC optimizers that mitigate the effects of partial shading.
Available Roof Area
Residential panels are typically about 65 by 39 inches (roughly 17.5 square feet each). A 6kW system uses about 15 panels and needs approximately 270 square feet of usable roof space. Fire code setback requirements reduce the usable area further.
Most jurisdictions require setbacks of 18 inches to 3 feet from the ridge, eaves, and rake edges for firefighter access. Some require a clear pathway along the ridge from one end of the roof to the other. Check your local fire code and AHJ requirements before finalizing the layout.
Racking Systems
Rail-Based Systems
Rail-based racking is the most common approach for residential pitched roofs. It consists of:
- Roof attachments (mounts): Bolted through the roof deck into rafters or trusses
- Flashing: Waterproofing at each attachment point
- Rails: Aluminum extrusions that run horizontally across the roof, connecting the attachment points
- Clamps: Mid-clamps (between panels) and end-clamps (at the array edges) that secure panels to the rails
Rails come in different profiles from various manufacturers (IronRidge, Unirac, SnapNrack, and others). Most are designed for specific panel frame thicknesses, so verify compatibility before ordering.
Advantages: Well-proven, adjustable, works on most roof types, easy to level on uneven roofs.
Disadvantages: More hardware and labor than rail-less systems, slightly higher material cost.
Rail-Less Systems
Rail-less racking eliminates the horizontal rails. Panels attach directly to individual roof mounts using brackets that connect to the panel frames. Each panel mounts independently.
Advantages: Less material, faster installation, lower profile on the roof, lighter weight.
Disadvantages: Less forgiving of uneven roof surfaces, fewer adjustment options, each panel needs precise mount placement.
Ballasted Systems (Flat Roofs)
On flat or very low-slope roofs, ballasted systems use concrete blocks or other weights to hold the racking in place without any roof penetrations. The panels sit on tilted frames (usually 10 to 15 degrees) weighted down by the ballast.
Advantages: No roof penetrations mean no leak risk from mounting holes. Faster installation.
Disadvantages: Heavy (adds 3 to 5 additional pounds per square foot of ballast), requires structural verification, panels can shift in high winds if not properly ballasted, limited to flat or near-flat roofs.
Ground Mounts
When the roof is not suitable (wrong orientation, too much shade, not structurally adequate, or not enough area), ground-mounted arrays are the alternative. Ground mounts use driven posts or concrete footings with aluminum or steel racking.
Ground mounts are outside the scope of this article but are worth mentioning because they solve roof problems that have no good on-roof solution.
Roof Attachments and Flashing
This is where roofing skill matters most. Every attachment point is a roof penetration, and every penetration is a potential leak.
Composition Shingle Roofs
The standard attachment method for asphalt shingle roofs:
- Locate the rafter or truss. Use a stud finder, measure from known points, or probe through the sheathing from the attic. Attachments must go into structural framing, not just sheathing.
- Slide the flashing under the shingle course above the attachment point. The flashing sits on top of the shingles below. This creates a shingle-over-flashing-over-shingle waterproofing layer, the same principle as step flashing at a wall.
- Drill the pilot hole through the flashing and sheathing into the rafter.
- Apply roofing sealant to the base of the lag bolt and around the hole.
- Drive the lag bolt (typically 5/16-inch diameter, 3 to 4 inches long) through the flashing and into the rafter. Torque to the manufacturer’s specification.
- Seal the top of the bolt with additional sealant.
The flashing is the critical waterproofing element. Sealant alone, without flashing, will fail over time as it degrades from UV exposure and thermal cycling. Always use flashing.
Metal Roofs
Metal roofs use clamps that grip the standing seams or exposed fastener ribs without any penetrations. S-5! and similar brands make clamps for nearly every metal roof profile.
For standing seam roofs, the clamps slide onto the seam and tighten with set screws. No holes, no sealant, no flashing needed. This is the cleanest and most waterproof mounting method available.
For exposed fastener (screw-down) metal roofs, brackets bolt through the panel into the purlins below, similar to composition shingle mounts but with metal-specific hardware and sealant.
Tile Roofs
Tile roofs are the most challenging surface for solar mounting. Concrete and clay tiles crack easily, and the underlayment beneath them is the actual waterproofing layer, not the tiles themselves.
Common approaches:
- Comp shingle replacement: Remove tiles at each attachment point, replace with a flat piece of composition shingle, install a standard flashing mount, then reinstall surrounding tiles. This is the most common method.
- Tile hooks: Specialized hooks that slide under the tile and hook over the batten beneath. The tile sits back down on top of the hook, and the hook extends above the tile surface to connect to the racking. Requires grinding a channel in the tile above to sit flat.
- Tile replacement mounts: Metal tile-shaped pieces that replace individual tiles at each mount location. The mount is integrated into the metal tile.
All tile roof methods are slower and more expensive than shingle work. Budget extra time and labor.
Flat Roofs (Non-Ballasted)
When a ballasted system is too heavy for the structure, flat roof mounts penetrate the membrane (TPO, EPDM, PVC, or modified bitumen) and attach to the structural deck or framing below.
These penetrations must be sealed with manufacturer-compatible patches. A TPO penetration needs a TPO-welded patch, not just sealant. An EPDM penetration needs an EPDM patch with appropriate adhesive. Using the wrong patch material on a single-ply membrane voids the roof warranty.
Structural Load Assessment
Dead Load Calculation
Solar panels, racking, and hardware add dead load (permanent weight) to the roof structure. A typical residential system adds 2.5 to 4 pounds per square foot (psf).
Most residential roofs are designed for:
- 10 psf dead load (roofing materials)
- 20 psf live load (maintenance, snow, etc.)
Adding 3 to 4 psf of solar brings the dead load to about 14 psf, well within the design capacity of a code-compliant roof. But older homes, modified structures, or roofs in heavy snow areas may not have adequate reserve capacity.
When Engineering Is Required
Most AHJs require one of the following for the structural portion of a solar permit:
- Prescriptive compliance: The racking manufacturer provides standardized structural calculations and span tables. If the installation falls within those parameters, no site-specific engineering is needed.
- Structural letter or worksheet: A licensed engineer reviews the plans, roof framing details, and loading and provides a stamped letter confirming adequacy.
- Full structural engineering: Required for older buildings, unusual framing, heavy snow loads, or high wind zones.
Check your local requirements before starting design. Engineering adds $500 to $1,500 to the project cost and 1 to 3 weeks of lead time.
Wind Load Considerations
Solar panels create both downward and uplift forces on the roof during high winds. Panels near the edges and corners of the roof experience the highest wind loads. Racking manufacturers provide wind load calculations based on the building height, roof pitch, panel tilt, and local wind speed requirements (from ASCE 7).
In high-wind zones (coastal areas, hurricane zones), the attachment hardware may need to be upgraded, and the number of attachment points per panel may increase.
Electrical System Design
DC Wiring
Panels produce direct current (DC) electricity. The panels connect in series (positive to negative) to form strings. Each string produces voltage equal to the sum of the individual panel voltages.
For example, 10 panels rated at 40V each produce a string voltage of 400V DC. This is high enough to be lethal, so proper wire management, conduit, and labeling are critical.
DC wiring from the roof runs through conduit to the inverter location (typically near the main electrical panel). Use PV-rated wire (USE-2 or PV Wire) that is rated for sunlight exposure and the expected voltage and amperage.
Inverters
The inverter converts DC from the panels to AC (alternating current) that matches the grid. Three main types:
String Inverters: A single box (wall-mounted, usually near the main panel) handles the entire array or a section of it. All panels in a string must have similar orientation and shading conditions because the string is limited by its weakest panel.
Cost: $0.10 to $0.20 per watt. Lifespan: 10 to 15 years (will likely need replacement once during the panel warranty period).
Microinverters: A small inverter behind each panel converts DC to AC at the panel level. Each panel operates independently, so shading or soiling on one panel does not affect the others.
Cost: $0.25 to $0.40 per watt. Lifespan: 25 years (matched to panel warranty). Brands: Enphase is the dominant residential microinverter manufacturer.
DC Optimizers with String Inverter: A hybrid approach. DC optimizers behind each panel maximize individual panel output, then feed optimized DC to a central string inverter. This provides panel-level optimization at a cost between microinverters and pure string inverters.
Cost: $0.15 to $0.30 per watt. SolarEdge is the primary manufacturer.
Grid Interconnection
Connecting a solar system to the utility grid requires:
- Interconnection application: Filed with the utility before installation begins in most jurisdictions.
- Net meter: The utility installs a bidirectional meter that tracks both consumption and export.
- Rapid shutdown: NEC 2017 and later requires rapid shutdown capability, meaning the system must reduce conductor voltage to safe levels within 30 seconds of initiating shutdown. Module-level electronics (microinverters or DC optimizers) inherently comply. String inverter systems need additional rapid shutdown hardware on the roof.
- Anti-islanding: The inverter must shut down automatically when grid power is lost to protect utility workers. All grid-tied inverters include this function.
Main Panel Upgrade
The solar system connects to the main electrical panel via a dedicated breaker. The NEC 120% rule governs the maximum size of the solar breaker relative to the panel’s bus rating.
For a 200A panel with a 200A main breaker, the maximum solar breaker is 40A (200A x 120% = 240A total, minus the 200A main = 40A for solar). If the solar system requires a larger breaker, the panel needs to be upgraded or a line-side tap (supply-side connection) must be used.
Many older homes have 100A or 150A panels that need upgrading for solar. Budget for this early in the project.
Permitting and Inspections
Building Permit
Covers the structural mounting of the racking system. Requires a site plan, roof plan showing panel layout and setbacks, structural calculations or engineering, and equipment specifications.
Electrical Permit
Covers the DC wiring, inverter installation, and AC interconnection. Requires a single-line electrical diagram, equipment specifications, and wire sizing calculations.
Utility Interconnection
Not a permit but a required approval. The utility reviews the system size and location to ensure it is compatible with the local distribution grid. In some areas this is a rubber stamp; in others it takes weeks.
Fire Code Compliance
Fire setbacks vary by jurisdiction. The International Fire Code requires setbacks from ridges, eaves, valleys, and hips for firefighter access. California has additional requirements. Check your local fire marshal’s requirements.
Inspections
Most jurisdictions require at least two inspections:
- Rough electrical: Before the system is energized, inspecting wiring, conduit, grounding, and equipment mounting.
- Final: After the system is complete, verifying everything matches the permit drawings and the system operates correctly.
Some areas combine these into a single inspection. Others add a structural inspection of the roof attachments.
Common Solar Installation Mistakes
Attaching to Sheathing Instead of Framing
Lag bolts into OSB or plywood sheathing alone will pull out under wind load. Every attachment must hit a rafter or truss member. Miss the rafter and you have a hole in the roof that does nothing structurally. Fill it, seal it, and try again.
Skipping Flashing
Sealant-only attachment points leak within 3 to 5 years. Always use proper flashing at every penetration. This is non-negotiable.
Ignoring Rapid Shutdown Requirements
NEC 2017+ requires module-level rapid shutdown. String inverter systems installed without rapid shutdown devices will fail inspection in jurisdictions that have adopted NEC 2017 or later. Verify your local code adoption before specifying equipment.
Poor Wire Management
Loose DC wires on a roof get chewed by squirrels, abraded by wind, and degraded by UV. Use conduit or manufacturer-approved wire clips attached to the racking. Keep all wiring neat, secured, and protected.
Not Accounting for Future Roof Work
If the roof will need replacement in 10 to 15 years, plan the solar layout so panels can be removed and reinstalled efficiently. Document the mounting locations, torque specs, and wiring layout so the removal crew has the information they need.
Managing Solar Projects
Solar installation projects have more moving parts than most residential construction work. Between site surveys, engineering, permit applications, utility paperwork, material procurement, roof work, electrical work, inspections, and utility sign-off, there are a dozen points where something can stall the project.
Projul helps solar contractors keep every phase organized. Schedule your site survey, track permit status, manage material orders, assign roof and electrical crews, and log inspection results all in one place. When the homeowner asks for a project update, you have the answer without digging through emails and texts.
For solar contractors scaling up their operations, solid project tracking is the difference between running 5 jobs a month and running 20. Check out Projul’s pricing or schedule a demo to see how it fits your solar business.
Final Thoughts
Solar panel roof mounting sits at the intersection of roofing, structural work, and electrical. Doing it well requires competence in all three, plus the patience to work through permitting and utility requirements that vary by jurisdiction.
The market for residential solar continues to grow, and contractors who can deliver clean, code-compliant installations have plenty of work ahead. Take the time to learn the details, use quality hardware, flash every penetration properly, and keep your projects organized. That is how you build a solar installation business that lasts.
Frequently Asked Questions
How much weight do solar panels add to a roof?
Can you install solar panels on any type of roof?
Do solar panel installations require a structural engineer?
What roof pitch is best for solar panels?
How do you prevent roof leaks around solar panel mounts?
What electrical permits are needed for residential solar?
What is the difference between string inverters and microinverters?
How do contractors manage solar installation projects efficiently?
Related Articles

BIM Clash Detection: How to Catch Conflicts Before They Cost You on the Jobsite
BIM Clash Detection: How to Catch Conflicts Before They Cost You on the Jobsite Every contractor has a story about the...
Read More →
Asphalt Paving and Compaction Guide: Mix Types, Laydown Temperatures, and Quality Testing
Asphalt paving looks straightforward from a distance. A truck dumps material, the paver lays it down, and rollers...
Read More →
Construction Jobsite Wi-Fi & Connectivity Guide: Setting Up Reliable Internet in the Field
A practical guide to getting reliable internet on construction job sites. Learn about cellular hotspots, mesh networks,...
Read More →