Staircase Building Code Guide for Contractors (2026)
Staircase Construction: The Codes, Dimensions, and Details That Matter
Staircases are one of the most code-intensive elements in residential construction. Every dimension is regulated: riser height, tread depth, width, headroom, handrail height, baluster spacing, and landing size. Get any of those wrong and you fail inspection, or worse, you build a staircase that someone falls on.
The math is not complicated, but the precision required is higher than most framing work. A 3/8-inch error that nobody would notice in a wall frame becomes a tripping hazard on a staircase. And because stairs are one of the most visible features in a home, the finish quality matters as much as the code compliance.
This guide covers staircase construction from the contractor’s perspective: code requirements, stringer layout, framing, railing systems, and the mistakes that lead to failed inspections and expensive rework.
Understanding the Code Requirements
The International Residential Code (IRC) Chapter R311.7 covers stairways. Most states and municipalities adopt the IRC with local amendments, so always verify your local code. The dimensions below are IRC standards, but your jurisdiction may be stricter.
Riser Height
- Maximum: 7-3/4 inches
- Consistency: The tallest riser and the shortest riser in a flight cannot differ by more than 3/8 inch
- Measured: Vertically from the top of one tread to the top of the next tread
The consistency requirement is the one that catches contractors. If your total rise calculation is off, or if the subfloor thickness changes between floors, your risers will be inconsistent and the inspector will flag it.
Tread Depth
- Minimum: 10 inches
- Measured: Horizontally from the nosing of one tread to the nosing of the tread above
- Nosing: Required when the tread depth is less than 11 inches. Nosing must project 3/4 inch to 1-1/4 inches beyond the riser face. Nosing radius must not exceed 9/16 inch.
- Consistency: The deepest and shallowest treads in a flight cannot differ by more than 3/8 inch
Stairway Width
- Minimum clear width: 36 inches below the handrail
- Handrail projection: Handrails can project up to 4.5 inches from each side into the required width
- Measured at and below handrail height, not at the stringer or wall level
Headroom
- Minimum: 6 feet 8 inches (80 inches)
- Measured: Vertically from a line connecting the tread nosings to any overhead obstruction
- Applies: To the entire walking surface width, not just the centerline
Landings
- Required: At the top and bottom of every staircase
- Minimum depth: 36 inches in the direction of travel
- Minimum width: Not less than the stairway width
- Maximum vertical rise per flight: 12 feet (after which an intermediate landing is required)
Handrails
- Required: On at least one side of stairs with four or more risers
- Height: 34 to 38 inches, measured vertically from the tread nosing
- Graspability: The handrail profile must be graspable. Round handrails must be 1-1/4 to 2 inches in diameter. Non-round profiles must have a graspable finger recess on both sides.
- Continuity: Handrails must be continuous for the full length of the flight. They may not have interruptions at newel posts (the handrail must connect through or around the newel).
- Returns: Handrails must return to the wall or terminate in a newel post. Open-ended handrails are a code violation and a hazard (sleeves and bags catch on them).
- Extensions: The handrail must extend horizontally at least 12 inches beyond the top riser and at an angle equal to the stair slope for a horizontal distance equal to one tread depth beyond the bottom riser.
Guardrails
- Required: On open sides of stairs and landings more than 30 inches above the floor or grade below
- Height: 36 inches minimum on stairs (measured from the tread nosing). Many jurisdictions require 42 inches on landings and balconies.
- Baluster spacing: A 4-inch sphere cannot pass through any opening in the guardrail assembly. This limits baluster spacing to approximately 4 inches on center, depending on baluster size.
- Triangle opening: The triangular opening formed by the riser, tread, and bottom rail cannot allow a 6-inch sphere to pass through
Calculating the Staircase Layout
Measuring Total Rise
Total rise is the vertical distance from the finished floor at the bottom of the stairs to the finished floor at the top. This measurement must account for the finish floor material on both levels.
Here is where mistakes happen: the framer measures from subfloor to subfloor, but the bottom floor gets 3/4-inch hardwood and the top floor gets 3/8-inch tile. That difference changes the total rise and throws off the riser calculations.
Measure total rise from finished floor to finished floor. If finish flooring is not installed yet, find out what it will be and add those thicknesses to your subfloor measurements.
Calculating Number of Risers
Divide the total rise by your target riser height. Most builders aim for 7 to 7.5 inches per riser, which feels comfortable and stays well within the 7-3/4-inch maximum.
Example:
- Total rise: 108 inches (9 feet, floor to floor)
- Target riser height: 7.2 inches
- Number of risers: 108 / 7.2 = 15 risers
- Exact riser height: 108 / 15 = 7.200 inches
If the division does not come out clean, adjust the number of risers up or down by one and recalculate until you get a riser height that is within code and feels right.
Calculating Total Run
Total run is the horizontal distance the staircase covers. It equals the number of treads multiplied by the tread depth. Remember: the number of treads is always one less than the number of risers (because the top floor is the last “tread”).
Example:
- 15 risers = 14 treads
- Tread depth: 10 inches
- Total run: 14 x 10 = 140 inches (11 feet 8 inches)
This tells you how much horizontal floor space the staircase needs. If you do not have that much room, you need to adjust the design: steeper risers (up to the code maximum), a landing with a turn, or a different staircase configuration.
The Riser-Tread Relationship
There is a comfort rule that experienced stair builders follow: the sum of one riser height and one tread depth should equal approximately 17 to 18 inches. This ratio produces stairs that feel natural to walk on.
- 7.2-inch riser + 10-inch tread = 17.2 inches (comfortable)
- 7.75-inch riser + 10-inch tread = 17.75 inches (acceptable)
- 8-inch riser + 10-inch tread = 18 inches (at the maximum riser height, still feels okay)
Stairs that violate this ratio feel either too steep (high riser, shallow tread) or too flat (short riser, deep tread). Both are uncomfortable and can cause trips.
Stringer Layout and Cutting
Stringer Types
Cut (sawtooth) stringers: The most common type for residential stairs. A 2x12 with triangular notches cut to create the riser and tread steps. The tread boards sit on the horizontal cuts and the risers attach to the vertical cuts.
Closed (housed) stringers: A solid board with routed grooves that accept the treads and risers. These are used for finish stairs where the stringer is visible and you want a clean look. They require a router jig and precise work.
Steel stringers: Prefabricated or custom-welded steel stair frames. Common in commercial work and increasingly used in modern residential designs with open riser stairs.
Laying Out a Cut Stringer
You need a framing square, a set of stair gauges (brass clamps that attach to the square), and a 2x12 that is straight, clear, and free of large knots at the cut locations.
-
Set the stair gauges on the framing square: one at the riser height on the tongue (narrow blade) and one at the tread depth on the body (wide blade).
-
Position the square on the 2x12 with both gauges touching the top edge of the board.
-
Mark the first riser and tread. Slide the square along the board and repeat for each step. You will mark the same number of tread-and-riser patterns as there are risers in the staircase.
-
Adjust the bottom riser by subtracting the tread thickness. This is called “dropping the stringer.” If your tread boards are 1 inch thick, cut 1 inch off the bottom of the first riser. Without this adjustment, the first step will be one tread-thickness taller than the others because the tread board adds height at every step except the bottom one.
-
Cut the notches with a circular saw, stopping short of the inside corners. Finish the corners with a handsaw or reciprocating saw. Do not overcut the inside corners with a circular saw because this weakens the stringer at the stress points.
Stringer Strength
After cutting, the remaining solid wood at the narrowest point (the throat) of the stringer must be at least 3.5 inches for a 2x12. Less than that and the stringer does not have enough structural capacity.
For wide staircases (over 36 inches), add a center stringer to prevent tread bounce. Standard practice is one stringer per 16 inches of width, with a minimum of three stringers for any staircase over 30 inches wide.
Installing Stringers
Stringers attach at the top to the upper floor framing (rim joist or header) using a metal hanger, ledger, or direct fastening. At the bottom, they bear on the lower floor. For a concrete slab, install a pressure-treated bottom plate and anchor the stringers to it.
Make sure all stringers are level across the treads and plumb on the risers. Even small inconsistencies between stringers cause treads to rock and create squeaks over time.
Framing the Stairwell Opening
The floor above needs an opening large enough for the staircase plus adequate headroom clearance. This is where the 80-inch headroom requirement dictates the opening size.
Sizing the Opening
For a straight-run staircase, the stairwell opening length depends on the total run and the headroom requirement. Walk the stair layout from the bottom and mark the point where an average person’s head would hit the floor framing above. The opening must extend at least to that point.
For a 9-foot ceiling with standard framing, a straight-run staircase typically needs a stairwell opening of about 10 to 12 feet long. Measure and calculate rather than guessing because insufficient headroom is a common and expensive problem to fix after framing.
Headers and Trimmers
The stairwell opening is framed with doubled headers at each end and doubled trimmers along the sides. Headers carry the load of the interrupted joists and transfer it to the trimmer joists, which carry it to the bearing walls or beams below.
For openings wider than 6 feet, the headers may need to be engineered (LVL or steel) depending on the span, load, and joist direction. Consult the structural plans or get engineering for large openings.
Use joist hangers rated for the load at every header-to-trimmer connection. This is structural framing, and the connections need to be solid.
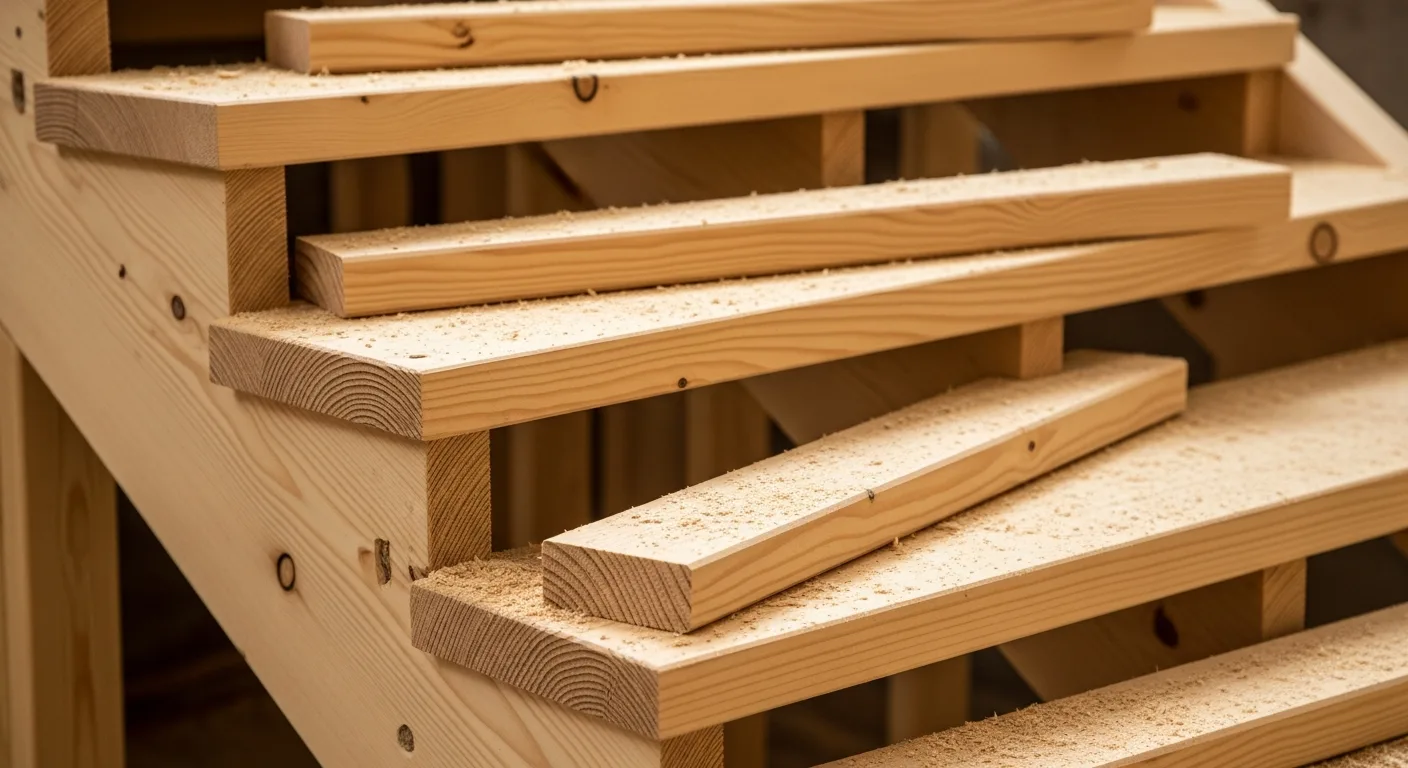
Tread and Riser Installation
Material Selection
Treads:
- Framing-grade lumber (pine, fir) for carpeted stairs
- Hardwood (oak, maple, hickory) for exposed finish stairs
- Engineered wood or LVL stair treads for dimensional stability
- Prefinished treads (red oak or white oak) for fast installation without on-site finishing
Risers:
- 3/4-inch plywood or MDF for painted or carpeted risers
- Matching hardwood for finish stairs
- Open risers (no riser board) are allowed by code only when the opening does not permit a 4-inch sphere to pass through. This typically limits open-riser stairs to a maximum 4-inch gap, which requires very specific riser-tread geometry.
Installation Tips
- Glue and fasten every tread and riser. Construction adhesive (PL Premium or similar) along every contact surface eliminates squeaks. Nails or screws alone will loosen over time.
- Set risers tight to the tread above and behind the tread below. Gaps at the riser-to-tread joint look sloppy and collect dirt.
- Install treads from the bottom up so you can stand on the completed treads as you work.
- Check for level and consistent overhang (nosing) at every tread. Inconsistent nosing is visible and can be a code issue.
Handrail and Guardrail Systems
Post Installation
Newel posts (the large posts at the top and bottom of a rail run and at turns) need to be solid. They take lateral forces from people leaning, grabbing, and bumping. A loose newel post fails inspection and erodes customer confidence.
Methods for securing newel posts:
- Bolt through the floor: A threaded rod or lag bolt runs from the base of the newel through the subfloor and is secured with a nut and washer from below.
- Newel post fasteners: Hardware like the FastenMaster TimberLok or dedicated newel post anchors that draw the post tight to the framing.
- Blocking: Install solid blocking between floor joists directly below the newel location. The post fastens through the subfloor into the blocking.
Never rely on finish nails or toenailing to secure a newel post. Those connections loosen within months of regular use.
Baluster Layout
Balusters must be spaced so a 4-inch sphere cannot pass between them. With standard 1-1/4-inch square balusters, the maximum clear space between balusters is 4 inches (just under, to account for tolerance), which puts them at about 5-1/4 inches on center.
Lay out balusters evenly across each section. Uneven spacing is visually obvious and unprofessional, even if every gap is under 4 inches.
Handrail Profiles
The handrail must be graspable. This means a shape that a person can wrap their fingers around securely. Round handrails between 1-1/4 and 2 inches in diameter comply. Non-round profiles must have a finger recess that allows a grip.
Flat-topped 2x4 or 2x6 “rails” do not meet the graspability requirement. They are acceptable as guardrails (the barrier at the top of balusters) but a separate graspable handrail must be attached at the correct height.
Common Staircase Code Violations
Inconsistent Risers
The 3/8-inch tolerance is tight. If the finish floor thickness changes between levels, or if the framer does not account for the finish flooring at all, the first or last riser ends up a different height than the rest. Inspectors catch this every time, and it is a real tripping hazard.
Insufficient Headroom
Headroom violations are expensive to fix because they usually require modifying the stairwell opening, which means cutting floor joists, adding headers, and reframing. Measure headroom during the design phase and size the opening accordingly.
Missing or Non-Compliant Handrails
Handrails that do not extend beyond the top and bottom risers, handrails that are not continuous, handrails that are not graspable, and handrails at the wrong height are all common violations. Read the code requirements carefully and verify compliance before calling for inspection.
Baluster Spacing Too Wide
The 4-inch sphere test is absolute. If a sphere can pass through any opening in the guardrail assembly, it fails. This includes the triangular opening between the tread, riser, and bottom rail, which many builders forget to check.
No Landing or Undersized Landing
Every staircase needs a landing at top and bottom. The landing must be at least 36 inches deep and as wide as the staircase. A door at the top of stairs that opens over the landing is acceptable only if there is still 36 inches of depth beyond the door swing.
Winder Treads That Do Not Comply
Winder treads (pie-shaped treads at turns) have their own code requirements. The tread depth at the walk line (12 inches from the narrow side) must be at least 10 inches, and the narrow end must be at least 6 inches. Winder stairs that do not meet these minimums are a common rejection.
Staircase Types and When to Use Them
Straight Run
The simplest and most common configuration. One flight from bottom to top with no turns. Requires the most horizontal floor space but is the easiest to build and the most comfortable to walk on.
L-Shaped
A straight run with a 90-degree turn at a landing. Saves floor space compared to a straight run and breaks up a tall flight into two shorter flights. The landing adds cost but improves safety and comfort on long runs.
U-Shaped (Switchback)
Two parallel flights connected by a 180-degree turn at a landing. Very space-efficient and common in two-story homes with compact floor plans. Requires careful framing at the turn and adequate headroom clearance for the lower flight beneath the upper one.
Spiral
Spiral staircases use a central pole with pie-shaped treads radiating outward. The IRC has specific requirements for spiral stairs: minimum 26-inch clear width, 6-foot 6-inch minimum headroom, and tread depth of at least 7.5 inches at a point 12 inches from the narrow end. Spiral stairs are code-compliant as a primary staircase only if they meet these requirements. Many prefabricated spiral stairs do not meet residential code for primary use and are limited to secondary access (lofts, basements).
Commercial vs Residential Staircase Code Differences (IBC vs IRC)
If you do both commercial and residential work, understanding the difference between the International Building Code (IBC) and the International Residential Code (IRC) on staircases is critical. The two codes overlap in some areas but diverge sharply in others. Building a residential staircase to commercial standards wastes money. Building a commercial staircase to residential standards fails inspection.
Width Requirements
- IRC (residential): Minimum 36 inches clear width below the handrail.
- IBC (commercial): Minimum 44 inches clear width for most occupancies. If the staircase serves fewer than 50 occupants, 36 inches is allowed. But for most commercial buildings, plan for 44 inches or wider.
The wider commercial requirement accounts for higher traffic volume and the need for two people to pass on the stairs during an emergency evacuation.
Riser and Tread Dimensions
- IRC: Maximum 7-3/4 inch riser, minimum 10-inch tread depth.
- IBC: Maximum 7-inch riser, minimum 11-inch tread depth.
Commercial stairs are shallower and deeper than residential stairs. This makes them more comfortable for high-traffic use and easier for people with mobility limitations. If you are used to building residential stairs at 7.5-inch risers, switching to a 7-inch maximum on a commercial job changes your stringer layout and total run calculations.
Handrail Requirements
- IRC: Handrail required on at least one side for stairs with four or more risers.
- IBC: Handrails required on BOTH sides for stairs wider than 44 inches. For stairs 44 inches or narrower, at least one handrail. Intermediate handrails are required when the stairway is wider than 60 inches.
Guardrail Height
- IRC: 36 inches minimum on stair guardrails.
- IBC: 42 inches minimum on stair guardrails. This is a significant difference. A guardrail that passes residential inspection at 36 inches fails commercial inspection.
Headroom
- IRC: 80 inches (6 feet 8 inches) minimum.
- IBC: 80 inches minimum. Same requirement, but commercial stairs often have more overhead obstructions (ductwork, sprinkler pipes, structural beams) that eat into headroom. Coordinate with MEP trades early.
Landings
- IRC: 36-inch minimum landing depth.
- IBC: Landing depth must be at least equal to the stair width, but not required to exceed 48 inches. For a 44-inch-wide commercial staircase, the landing must be at least 44 inches deep.
Enclosure Requirements
- IRC: No enclosure required for interior residential stairs.
- IBC: Exit stairways in commercial buildings must be enclosed in fire-rated construction (1-hour or 2-hour depending on the number of stories served). Doors into stair enclosures must be fire-rated and self-closing. This adds significant cost and coordination to commercial staircase construction.
Quick Summary Table
Here is the practical takeaway for crews who switch between residential and commercial:
- Commercial stairs are wider, shallower, and have taller guardrails
- Commercial stairs need handrails on both sides if over 44 inches wide
- Commercial stairways need fire-rated enclosures
- Commercial staircase landings must match the stair width
- Do not use IRC dimensions on an IBC project or vice versa
ADA Staircase Requirements Contractors Miss
The Americans with Disabilities Act (ADA) has its own staircase requirements that go beyond the IBC. These are the ones contractors miss most often, leading to failed inspections and costly rework on commercial projects.
Uniform Riser Heights and Tread Depths
ADA Section 504 requires that all steps on a flight have uniform riser heights and uniform tread depths. This is similar to the IBC 3/8-inch tolerance rule, but ADA compliance officers tend to check more carefully. Any noticeable inconsistency can trigger a complaint and remediation.
Stair Nosings
ADA requires that stair nosings meet specific profile requirements:
- Nosings must not project more than 1-1/2 inches beyond the riser face
- The underside of the nosing must not be abrupt. It needs a radius, bevel, or angled profile so it does not catch the toe of someone with a shuffling gait
- The radius of curvature at the leading edge of the tread cannot exceed 1/2 inch
- Risers must be solid. Open risers are NOT allowed on ADA-compliant stairs. This trips up contractors who design open-riser stairs for aesthetic reasons on commercial projects.
Handrail Extensions
ADA is more specific than the IBC about handrail extensions:
- At the top of a flight: The handrail must extend horizontally at least 12 inches beyond the top riser
- At the bottom of a flight: The handrail must extend at a slope equal to the stair for a horizontal distance equal to one tread depth beyond the bottom riser, then continue horizontally for at least 12 inches
Many contractors install handrails that end right at the top and bottom risers. This fails ADA. The extensions give people with mobility challenges something to hold onto as they transition from level walking to stair climbing.
Handrail Graspability
ADA requires handrails with a circular cross section between 1-1/4 and 2 inches in diameter. Non-circular handrails must have a perimeter between 4 and 6-1/4 inches with a maximum cross section of 2-1/4 inches.
The most common ADA handrail violation is using a decorative profile that looks great but is too large or too flat to grip securely. If a person with limited hand strength cannot wrap their fingers around it, it does not comply.
Visual Contrast at Nosings
While not always enforced by building inspectors (it falls under ADA accessibility rather than building code), best practice is to provide visual contrast at the leading edge of each tread. This helps people with low vision identify the edge of each step. A contrasting color strip, abrasive nosing tape, or different material at the nosing edge all work.
No Protruding Objects
ADA Section 307 limits protruding objects along accessible routes, including stairways. Anything mounted on the wall of a stairway enclosure (fire extinguisher cabinets, signage, AED boxes) must not protrude more than 4 inches into the circulation path if mounted between 27 and 80 inches above the floor. This catches contractors who install wall-mounted items in stairwells without checking the protrusion limits.
Common ADA Staircase Failures
Here are the ADA violations that come up repeatedly on commercial job inspections:
- Handrails that end without the required 12-inch horizontal extension
- Open risers on stairs that serve accessible routes
- Nosings that are too abrupt (sharp square edges instead of beveled or radiused)
- Handrails that are not graspable (too large, too flat, or decorative profiles)
- Inconsistent riser heights between flights in the same stairway
- Protruding objects in the stairwell enclosure
Fix these during construction and you avoid the much more expensive process of remediating them after occupancy.
Staircase Inspection Red Flags and How to Pass the First Time
Failed staircase inspections are expensive. Not because of the fix itself (usually), but because of the cascade: the drywall crew gets pushed back, the painter misses their window, the flooring installer has to reschedule, and the whole project timeline shifts. Here is how to pass the first time.
Before You Call for Inspection: The Self-Check
Do your own inspection before the official one. Walk the staircase with a tape measure, a level, and the approved drawings. Check every item on this list:
Risers:
- Measure every riser height. Write them down. The tallest minus the shortest must be 3/8 inch or less.
- Pay special attention to the first and last riser in each flight. These are where finish floor thickness causes problems.
- If finish flooring is not installed yet, verify that the riser heights will be correct AFTER flooring goes down on both levels.
Treads:
- Measure every tread depth from nosing to nosing. Same 3/8-inch tolerance applies.
- Check nosing projection. Should be 3/4 to 1-1/4 inches if tread depth is under 11 inches.
- Verify nosing profile is rounded or beveled per code (no sharp square edges).
Width:
- Measure clear width below the handrail. Must meet the minimum for your code (36 inches IRC, 44 inches IBC for most commercial).
- Account for handrail projection on both sides.
Headroom:
- Measure headroom at the most restricted point (usually where the stairwell header crosses over the lower treads).
- Must be 80 inches minimum from the nosing line to any obstruction.
Handrails:
- Height between 34 and 38 inches from tread nosing to top of handrail.
- Continuous for the full flight length (no breaks at newel posts unless the rail wraps around).
- Required extensions at top and bottom.
- Returns to the wall or newel post at termination points.
- Graspable profile (1-1/4 to 2 inches diameter for round rails).
Guardrails:
- Height meets code minimum (36 inches residential, 42 inches commercial).
- 4-inch sphere test at all baluster openings.
- 6-inch sphere test at the triangular opening between tread, riser, and bottom rail.
Landings:
- Present at top and bottom of every flight.
- Minimum 36 inches deep (or stair width, whichever is greater on commercial).
- Door swing does not reduce landing to less than required depth.
Structural:
- Stringers are properly fastened at top and bottom.
- Stringer throat depth is adequate (3.5 inches minimum for 2x12 cut stringers).
- Center stringer present for wide stairs.
- All connections use appropriate hardware (hangers, bolts, not just toenails).
Red Flags That Trigger Closer Scrutiny
Inspectors develop patterns. When they see one of these red flags, they look harder at everything else:
- Visible gaps between risers and treads. This signals sloppy work and makes the inspector wonder what else was done poorly.
- Handrails that wobble. A loose handrail is the most visible sign of a bad stair installation. The inspector will grab every handrail and shake it.
- Uneven nosing overhang. If the nosing sticks out 1 inch on one tread and 3/4 inch on the next, the inspector notices.
- Inconsistent baluster spacing. Even if every gap is under 4 inches, wildly uneven spacing looks amateur and invites a closer measurement.
- Missing or incomplete blocking. If the inspector can see into the wall framing and there is no blocking where grab bars or handrail brackets are mounted, they will flag it.
The Finish Floor Problem
This deserves its own section because it causes more failed staircase inspections than anything else. Here is the scenario:
The framer builds the staircase based on subfloor-to-subfloor measurements. The first floor gets 3/4-inch hardwood. The second floor gets 1/2-inch engineered hardwood. Nobody told the framer, or the framer forgot to ask. Now the first riser is 3/4 inch too tall and the last riser is 1/2 inch too short. The inspector measures, finds a 1-1/4-inch variance between the tallest and shortest risers, and fails the staircase.
The fix is communication. Before you cut a single stringer, confirm the finish floor material and thickness on EVERY level the staircase touches. Write it on the stringer. Write it on the wall. Put it in your project management system. Make it impossible to miss.
What to Do If You Fail
If the inspector flags a violation:
- Do not argue on site. Ask for the specific code section and the measurement that failed.
- Assess whether the fix is structural (stringer modification, riser rebuild) or cosmetic (nosing adjustment, handrail extension).
- Fix it completely. Do not try to get a marginal measurement to pass on reinspection. Fix it so it is clearly within tolerance.
- Call for reinspection only after you have verified every measurement yourself.
Spiral and Curved Staircase Code Considerations
Spiral and curved staircases add complexity to code compliance. They look great in the right setting, but the code requirements are more specific and more commonly violated than straight-run stairs.
Spiral Staircases Under IRC
The IRC allows spiral staircases as the primary means of egress only if they meet these requirements:
- Minimum clear width: 26 inches measured at and below the handrail
- Minimum headroom: 6 feet 6 inches (78 inches). Note this is 2 inches LESS than the standard 80-inch requirement for regular stairs.
- Tread depth at the walk line: At least 7-1/2 inches measured at a point 12 inches from the narrow end of the tread
- Maximum riser height: Same 7-3/4 inches as regular stairs
- Handrail height: 34 to 38 inches measured from the tread nosing
Many prefabricated spiral staircase kits do NOT meet these requirements out of the box. The tread depth at the walk line is the most common failure point. Before you order a prefab spiral staircase, verify the tread depth at 12 inches from the narrow end. If it is under 7-1/2 inches, it cannot serve as the primary staircase in a home.
Spiral Staircases Under IBC (Commercial)
The IBC is more restrictive with spiral stairs. In most commercial occupancies, spiral staircases are not allowed as a required means of egress at all. They may be used as convenience stairs (connecting two floors within the same tenant space) but not as exit stairs.
If a spiral staircase is used in a commercial setting, it must meet the IBC stair requirements for tread depth, riser height, width, and handrails. Given the geometry, this usually means a larger-diameter spiral than what works in residential.
Curved Staircases
Curved (or helical) staircases follow a gradual arc and are different from spiral stairs. They are wider, have a larger radius, and generally provide a more comfortable walking experience.
Code requirements for curved stairs:
- Tread depth: Measured at the walk line, which the code defines as 12 inches from the narrower end of the tread. Must meet the same minimum as regular stairs (10 inches IRC, 11 inches IBC).
- Minimum tread depth at the narrow end: 6 inches (some jurisdictions require more).
- Riser height and consistency: Same requirements as regular stairs.
- Width, headroom, and handrails: Same as regular stairs.
Building Curved Stairs: Practical Tips
Curved staircases are among the most complex elements in residential construction. Here is what matters from a practical standpoint:
- Stringer fabrication: Curved stringers are typically built from laminated layers of plywood or solid wood bent to the radius. This is skilled work. If you do not have experience building curved stringers, subcontract to a specialty stair builder.
- Layout precision: The tread depth changes as you move from the inside to the outside of the curve. You need to verify code compliance at the walk line (12 inches from the narrow end) for every single tread. One tread that is 1/4 inch too shallow at the walk line fails the whole staircase.
- Handrail bending: Curved handrails are either laminated and bent on site (using a form) or ordered from a specialty supplier. CNC-machined curved handrails are increasingly available and provide very consistent results.
- Cost: Curved staircases typically cost 3 to 5 times more than a straight-run staircase of the same rise. Budget accordingly and make sure the client understands the cost before you start.
Winder Stairs as an Alternative
Winder stairs (with pie-shaped treads at turns) are sometimes used instead of curved stairs to save space. They are simpler to build but still have specific code requirements:
- Tread depth at the walk line (12 inches from the narrow side) must be at least 10 inches
- Tread depth at the narrow end must be at least 6 inches
- All winder treads in a turn must have uniform dimensions
Winder stairs are allowed by the IRC for residential construction. The IBC allows them in limited circumstances. Check your local code before designing a winder staircase on a commercial project.
Managing Staircase Projects
Staircase construction touches multiple trades: framing, finish carpentry, possibly iron work for railings, and painting or staining. The sequence matters because the rough framing has to be right before the finish work starts, and finish flooring thickness affects the stringer calculations.
Keeping track of measurements, materials, subcontractor schedules, and inspection timing is where project management tools help. With Projul, you can document the total rise measurement, log the stringer layout calculations, schedule the framing inspection, and track the finish carpentry phase all in one place.
When a homeowner asks why the staircase is not done yet, you can show them the timeline: framing passed inspection Tuesday, hardwood treads arrive Thursday, finish carpenter is scheduled Friday. That level of communication turns a frustrated client into a patient one.
For contractors who build stairs regularly, tracking your labor hours and material costs per staircase helps you estimate future jobs more accurately. Check out Projul’s pricing to see how it fits your operation.
Final Thoughts
Staircase construction demands precision that most other framing work does not. The codes are specific, the tolerances are tight, and the consequences of sloppy work include failed inspections, expensive rework, and serious safety hazards.
Take the time to measure accurately, calculate carefully, and verify code compliance at every stage. Cut your stringers with care, check your riser consistency, and install handrails that actually meet the graspability and height requirements. The extra attention to detail on a staircase is what separates a professional contractor from one who is guessing.
Build it right, document your work, and track your costs. That is how you deliver a staircase that passes inspection, looks good, and keeps people safe for decades.
Frequently Asked Questions
What is the maximum riser height allowed by building code?
What is the minimum tread depth for residential stairs?
How wide does a residential staircase need to be?
What are the railing height requirements for stairs?
When is a landing required on a staircase?
How do you calculate the number of risers for a staircase?
What is the minimum headroom clearance for stairs?
How do contractors avoid staircase callbacks and code violations?
Related Articles

How to Implement Construction Software Without Losing Your Mind
Most construction software rollouts fail. Not because the software is bad, but because the rollout was rushed. Here are...
Read More →
How Selections Can Pay for Themselves in Three Easy Steps
Most contractors lose thousands each year on wrong material orders, slow client decisions, and missed upsell chances....
Read More →
3 Free Concrete Estimate Templates for Every Pour Type (2026)
Three ready-to-use concrete estimate templates with realistic line items, material costs, labor rates, and markup...
Read More →