Standing Seam Metal Roofing Guide: Panels, Clips, Flashing, and Thermal Movement | Projul
Standing Seam Metal Roofing: A Contractor’s Field Guide
Standing seam metal roofing has moved from commercial buildings and barns into the mainstream residential market. Homeowners want it for the longevity, clean lines, and energy efficiency. Insurance companies like it because it handles wind, hail, and fire better than asphalt shingles. And for contractors, it is a higher-margin product that requires real skill to install correctly.
But standing seam is not forgiving. Every detail matters. A misplaced clip, a poorly executed flashing transition, or ignoring thermal movement will show up as leaks, oil-canning, or panel failures. This guide covers the core knowledge you need to install standing seam roofing that performs and looks right for decades.
Panel Profiles and Materials
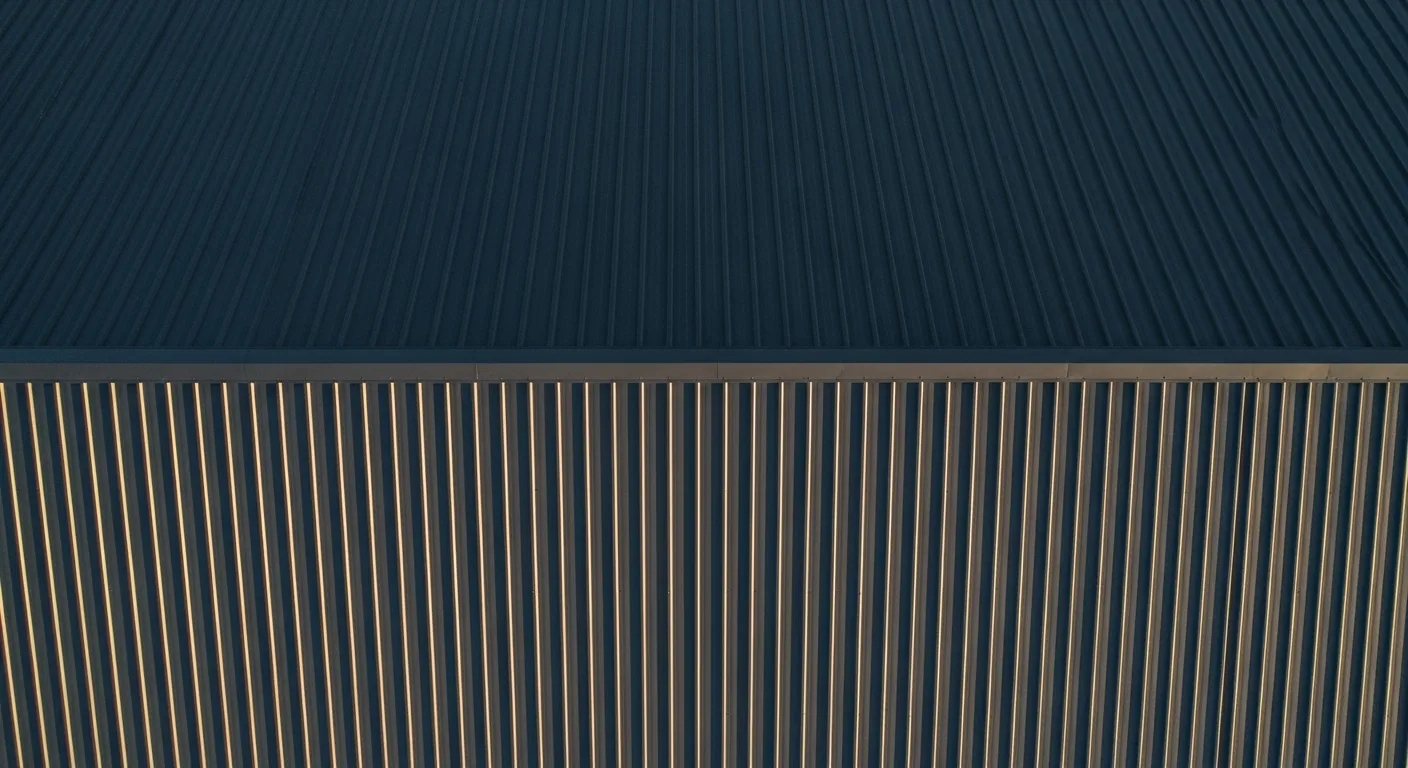
Snap-Lock Panels
Snap-lock is the most common profile for residential standing seam roofing. The panels have a raised male leg on one side and a corresponding female receiver on the other. During installation, you simply snap the male leg into the female receiver of the adjacent panel by pressing down or tapping with a rubber mallet.
Snap-lock advantages:
- Faster installation since no seaming machine is needed
- Lower labor cost
- Suitable for most residential applications on roofs with 3:12 pitch or greater
Snap-lock limitations:
- Not suitable for low-slope roofs (under 3:12) due to the less watertight seam
- Seam height is typically 1 to 1.5 inches, which provides less structural stiffness than a taller mechanically seamed profile
Mechanically Seamed Panels
Mechanically seamed panels require a powered or hand-operated seaming machine that folds the male and female legs together after installation. Seams can be single-fold (90 degrees) or double-fold (180 degrees).
Double-lock (180-degree fold) seams are the industry standard for:
- Low-slope applications (down to 1/2:12)
- High-wind zones
- Areas with heavy snow loads
- Any application where maximum weather resistance is needed
The trade-off is slower installation and the need for a seaming machine (which costs several thousand dollars or can be rented). However, the resulting seam is significantly more weather-resistant.
Panel Width and Seam Height
Standard panel widths range from 12 to 18 inches, with 16 inches being the most common. Wider panels cover more area per piece but are more prone to oil-canning. Narrower panels reduce oil-canning visibility but increase labor.
Seam heights typically range from 1 inch to 2 inches. Taller seams add structural rigidity, improve performance in standing water conditions (which should not happen on a properly pitched roof, but reality is messy), and create a more pronounced shadow line.
Metal Choices
Galvalume-coated steel (AZ55): The workhorse of the industry. Steel substrate coated with an aluminum-zinc alloy for corrosion resistance, then painted with a PVDF (Kynar 500) fluoropolymer coating for color retention and UV resistance. 24-gauge is standard for residential. Expected lifespan: 40 to 60 years with painted finish, depending on environment.
Aluminum: Lighter than steel (about one-third the weight), naturally corrosion-resistant, and a good choice for coastal environments where salt air eats steel. It is softer and more prone to denting and oil-canning. 0.032-inch thickness is typical for residential. Aluminum also expands roughly twice as much as steel with temperature changes, so clip and detail design must account for this.
Copper and zinc: Premium materials with natural patina finishes. They cost significantly more but offer unmatched longevity (100+ years for copper). These are specialty products that require specific soldering and joining techniques different from steel and aluminum.
Understanding Thermal Movement
Metal moves. A lot. Ignoring thermal expansion and contraction is the number one cause of standing seam roof failures. Here is what you need to know.
How Much Does It Move?
Steel expands at roughly 0.0000065 inches per inch per degree Fahrenheit. In practical terms:
- A 20-foot steel panel on a roof that sees a 150-degree temperature swing (from -10 degrees in winter to 140 degrees surface temperature in summer sun) will grow and shrink about 1/4 inch in length.
- A 40-foot panel in the same conditions moves about 1/2 inch.
- Aluminum moves about twice as much as steel.
That 1/4 inch may not sound like much, but if the panel is pinned at both ends with no room to move, that force will buckle the panel, rip out fasteners, or cause loud popping and banging noises as the metal fights its constraints.
Fixed Points and Float Points
Every standing seam panel needs exactly one fixed point and the rest of the attachment points need to float. The fixed point anchors the panel to the structure at one location (typically near the ridge or at mid-panel, depending on the system and panel length). All other clips are designed to allow the panel to slide through them as it expands and contracts.
- Fixed clips lock the panel in position. The clip is fastened to the deck, and the panel is locked to the clip with no movement allowed.
- Floating clips are fastened to the deck, but the panel can slide through the clip. The slot in the clip allows a specific amount of movement (usually 1/2 inch to 1 inch of travel, depending on the clip).
Selecting the right clip type and placement is critical. The manufacturer’s installation manual will specify where fixed and floating clips go based on panel length, material, and expected temperature range.
Eave and Ridge Details
The eave (bottom) and ridge (top) of the panel are where thermal movement is most visible. The panel must be free to slide at the eave or ridge (or both, depending on where the fixed point is). Eave trim and ridge caps are designed to allow this movement while still shedding water.
A common beginner mistake is to face-fasten the panel at the eave or through the ridge cap, effectively pinning the panel at both ends. This leads to buckling, oil-canning, and fastener tearout.
Clip Systems and Attachment
Standing seam panels are attached to the roof structure with clips, not with screws through the panel face. This concealed fastener system is what gives standing seam its clean appearance and allows thermal movement. It also means the roof has no exposed fastener holes that can leak.
Clip Spacing
Clip spacing depends on wind load, panel profile, and the manufacturer’s engineering tables. Typical residential clip spacing is 24 inches on center for 24-gauge steel panels. In high-wind zones (above 120 mph design speed), spacing may decrease to 12 or 16 inches.
Clips should be placed at every purlin or framing member when installed over open framing, or at the specified spacing over solid deck.
Clip Installation
Fasten clips to the deck or framing with appropriate screws. For solid wood or plywood deck, use #10 or #12 wood screws. For steel purlins, use self-drilling metal screws. Each clip typically takes 2 to 3 screws.
Make sure the clip is oriented correctly (they are not symmetrical) and positioned straight along the panel line. A crooked clip will fight the panel and can cause waviness in the installed panel.
Panel Engagement
For snap-lock panels, set the panel so the male leg sits into the clip, then snap the adjacent panel’s female receiver over the male leg and clip. For mechanically seamed panels, both panel legs and the clip are folded together by the seaming machine.
Always test the engagement before seaming an entire roof. Run the seaming machine on a test section and inspect the seam for consistent fold and proper clip engagement.
Deck and Underlayment
Deck Options
Solid deck (plywood or OSB): Standard for residential standing seam. Minimum 7/16-inch OSB or 1/2-inch plywood, though 5/8-inch or 3/4-inch is preferred for a flatter surface and better screw holding. The deck must be flat. Humps, dips, and uneven panel joints in the sheathing will telegraph through the metal and show as waviness.
Open framing (purlins): Common in agricultural, commercial, and some residential applications. Purlins are typically 2x4s or metal Z-purlins spaced 24 inches on center. Open framing requires stiffer panels or closer clip spacing to prevent panel deflection between supports.
Underlayment
Install underlayment over the solid deck before setting panels. Use a high-temperature synthetic underlayment designed for metal roofing. Standard asphalt felt can stick to the underside of metal panels in heat, creating noise and potentially damaging the panel coating.
In cold climates, apply ice and water shield membrane at eaves (typically 2 feet past the interior wall line), in valleys, and around penetrations per local code. Ice and water shield under metal roofing should be a high-temperature formulation to withstand the heat that metal panels generate.
Flashing Details
Flashing is where standing seam jobs succeed or fail. The panels themselves rarely leak. It is the transitions, penetrations, and terminations that let water in.
Eave Flashing
The eave trim is the first piece installed. It wraps over the fascia board or drip edge and provides a clean termination for the panel bottoms. The panel slides over (or into) the eave trim and is free to move with thermal expansion. A hemmed edge on the panel bottom hooks into the eave trim to prevent wind uplift at the eave.
Ridge Flashing
The ridge cap covers the panel terminations at the peak. It can be a vented ridge (allowing attic ventilation) or a solid cap with closure strips to block wind-driven rain and insects. The cap must not restrict panel movement. Typically, the cap is fastened to one slope and laps over the other, or is fastened with slotted holes.
Valley Flashing
Open valleys with a wide metal valley pan are the most reliable for standing seam roofs. The panels terminate at the valley edge with a hem or clip, and the valley pan extends well under the panels on both sides. W-valley profiles with a center rib direct water flow and prevent crossover between slopes.
Wall and Headwall Flashing
Where the roof meets a wall (either a sidewall running parallel to the slope or a headwall running perpendicular), step flashing or continuous counter-flashing is needed:
- Sidewall: Install step flashing pieces woven with each panel, or run a continuous Z-flashing tucked behind the siding and overlapping the panel seams.
- Headwall: A continuous counter-flashing regletted into the wall overlaps a base flashing that extends 4+ inches onto the roof panels. Allow clearance for panel movement under the base flashing.
Pipe and Penetration Flashing
Minimize roof penetrations on standing seam metal roofs. Every hole is a potential leak point. Where penetrations are unavoidable (plumbing vents, exhaust fans), use metal roof boots specifically designed for standing seam panels. These boots have a base flashing that slides under the panel seam and a flexible collar that seals around the pipe.
HVAC curbs, skylights, and other large penetrations need custom-fabricated crickets and curb flashings. These are usually made in the shop from the same material as the roof panels.
Common Problems and Solutions
Oil-Canning
Oil-canning is the waviness visible in the flat pan area of metal panels. Causes include:
- Uneven or bowed deck
- Panels that were not straight when installed
- Over-tightened clips restricting movement
- Wide panels in a smooth (no striations) profile
- Residual stress from the roll-forming process
Solutions:
- Ensure the deck is flat within 1/8 inch over 10 feet
- Use panels with pencil ribs (striations) to break up the flat area
- Use narrower panels (12 inch instead of 16 or 18 inch)
- Verify clip installation and thermal movement allowance
- Accept that some minor oil-canning is inherent to metal panels and set expectations with the homeowner before installation
Leaks at Flashings
If a standing seam roof leaks, check the flashings first. Common culprits:
- Sealant failure at endlaps or flashing overlaps
- Improper headwall or sidewall flashing
- Pipe boot failures from UV degradation
- Insufficient overlap at valley flashings
- Ridge cap not properly sealed or ventilated
Noise
Metal roofs can be noisy during rain and thermal cycling. Solid deck with underlayment reduces rain noise significantly compared to open framing. Thermal popping (the “ticking” sound as panels expand and contract) is minimized with proper clip systems that allow smooth, gradual movement instead of sudden releases.
Managing Roofing Projects
Metal roofing jobs involve material lead times (custom panel orders can take weeks), weather-dependent scheduling, and coordination between the framing crew, roofer, and whoever handles gutters and trim. Material waste is low compared to other roofing types, but a miscalculated panel length order can delay the job significantly since panels are made to order.
Projul’s job management features help you track panel orders, schedule installation windows around weather forecasts, and coordinate your crews across multiple roofing jobs. Your team can log progress from the roof and you can see real-time updates from the office.
Interested in how it works? Check pricing or schedule a demo to see the platform.
Summary
Standing seam metal roofing is a premium product that demands premium installation. Get the details right and you will have a roof that outlasts the mortgage. Get them wrong and you will be back on that roof chasing leaks and fixing oil-canning complaints.
Focus on these fundamentals: choose the right panel profile for the slope, use the correct clip system and placement for thermal movement, install flashings with care and proper overlaps, and never pin a panel at both ends. The rest is craftsmanship and experience, and both improve with every job you complete.
Frequently Asked Questions
What is the minimum roof pitch for standing seam metal roofing?
How much does a standing seam metal roof expand and contract?
What is the difference between snap-lock and mechanically seamed panels?
What causes oil-canning in standing seam panels?
Do standing seam metal roofs need underlayment?
How do you flash a standing seam roof at a wall transition?
Can you walk on a standing seam metal roof?
What gauge metal is best for standing seam residential roofing?
Related Articles

BIM Clash Detection: How to Catch Conflicts Before They Cost You on the Jobsite
BIM Clash Detection: How to Catch Conflicts Before They Cost You on the Jobsite Every contractor has a story about the...
Read More →
Asphalt Paving and Compaction Guide: Mix Types, Laydown Temperatures, and Quality Testing
Asphalt paving looks straightforward from a distance. A truck dumps material, the paver lays it down, and rollers...
Read More →
Construction Jobsite Wi-Fi & Connectivity Guide: Setting Up Reliable Internet in the Field
A practical guide to getting reliable internet on construction job sites. Learn about cellular hotspots, mesh networks,...
Read More →