Steel Joist and Metal Building Erection Guide
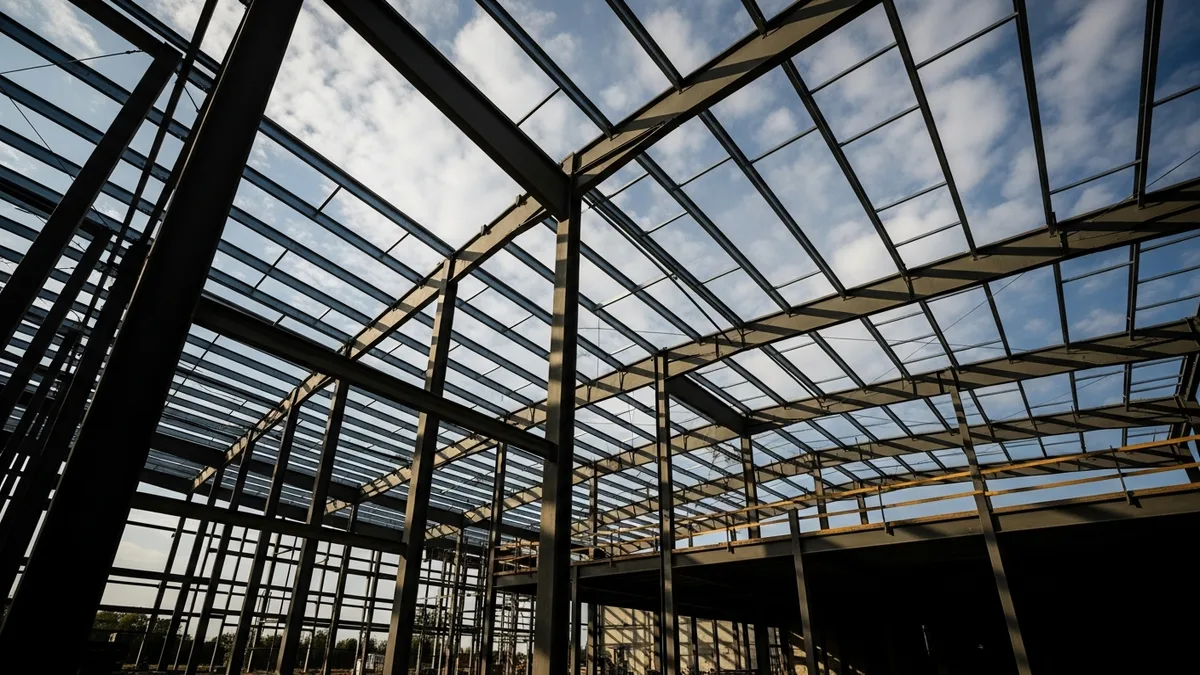
If you have ever watched a metal building go up, you know it can look deceptively simple. A few rigid frames, some purlins and girts, a stack of steel joists, and suddenly you have a building. But anyone who has actually run one of these jobs knows the reality is a lot more involved than it looks from the road.
Steel joist installation and metal building erection sit in a sweet spot where speed meets risk. The materials are lighter than structural steel, the connections are simpler, and the pace is faster. That also means mistakes happen faster, and a single missed bridging connection or an out-of-plumb frame can turn a straightforward job into a serious problem.
This guide covers what you actually need to know to plan, sequence, and manage steel joist and metal building erection projects. If you are planning a smaller project like a contractor shop building, many of the same principles apply at a reduced scale. Whether you are a GC running the whole show or a specialty contractor handling the erection package, the fundamentals here will keep your crew safe and your project on track.
Understanding Steel Joists and Pre-Engineered Metal Building Systems
Before we get into the field work, let’s make sure we are all speaking the same language. Steel joists and pre-engineered metal buildings (PEMBs) overlap in a lot of projects, but they are not the same thing.
Steel joists are open-web, lightweight trusses manufactured to SJI (Steel Joist Institute) standards. They come in three main flavors: K-series for standard roof and floor loads, LH-series (longspan) for heavier loads and longer spans, and DLH-series (deep longspan) for the biggest spans you will see in warehouses, distribution centers, and aircraft hangars. Joists sit on top of structural steel beams or bearing walls, and they support roof deck, floor deck, or both.
Pre-engineered metal buildings are complete structural systems designed and fabricated by a single manufacturer. The package includes rigid frames (the main structural columns and rafters), secondary framing (purlins, girts, eave struts), wall and roof panels, trim, and all the hardware. Many PEMBs also include steel joists as part of the roof system, especially on wider buildings where bar joists replace conventional purlins.
The key difference for the contractor is this: with a PEMB, the manufacturer’s engineering department has already designed every connection, every member size, and every bracing requirement. Your job is to follow the erection drawings exactly. With standalone steel joist projects on conventional steel frames, you are working from the structural engineer’s drawings, and there is more coordination between trades.
Either way, the erection sequence matters more than most contractors realize. Getting it wrong does not just slow you down. It can put your crew in danger. If you are managing complex builds like these, having solid construction project management software in place is not optional. It is the backbone of keeping everything coordinated.
Pre-Erection Planning and Coordination
Read real contractor reviews and see why Projul carries a 4.9/5 on G2.
The work that happens before a single joist leaves the ground determines whether your erection goes smoothly or turns into a mess. Here is what you need to nail down during preconstruction.
Delivery and staging. Steel joists ship in bundles, and they take up space. A typical tractor-trailer carries about 40,000 pounds of joists, and you may need multiple loads. Metal building packages arrive on flatbeds with frames, panels, and hardware spread across several trucks. You need a staging plan that accounts for offloading sequence, storage layout, and the crane’s reach from its setup position. Joists stored on site should be stacked on dunnage, banded, and blocked to prevent rolling.
Foundation and anchor bolt verification. Before any steel goes up, verify every anchor bolt location, elevation, and projection against the erection drawings. On metal buildings, the column base plate patterns are manufacturer-specific, and even a half-inch deviation can create headaches. Survey the anchor bolts independently, and do it early enough that you have time to fix problems before the steel arrives. A solid construction estimating process should account for this verification step as a line item so it does not get skipped.
Erection plan review. OSHA requires a site-specific erection plan for steel joist work under 1926.757. This plan should cover the sequence of erection, bridging installation requirements, fall protection methods, and crane placement. For PEMBs, the manufacturer provides an erection manual that covers frame raising sequence, temporary bracing, and panel installation order. Read it. The number of contractors who skip the manufacturer’s manual and then call the tech support line mid-erection is staggering.
Crane and equipment planning. Determine your crane requirements based on the heaviest and farthest picks. On metal buildings, the rigid frames are usually the heaviest lifts. On joist jobs, the longest joists and any heavy mechanical units going on the roof will drive your crane sizing. A detailed lift plan, including crane setup locations, swing radius, and ground bearing pressure, keeps you from finding out on erection day that your crane cannot reach the far bay.
Crew qualifications. Every worker involved in steel joist or metal building erection needs to be trained on the specific hazards of the work. That means fall protection, connector procedures, and an understanding of the bridging and bracing sequence. OSHA is very specific about who can work as a connector on steel erection, and the training requirements are outlined in Subpart R. Build your crew scheduling around qualified ironworkers and do not plug gaps with laborers who have not been trained.
Steel Joist Erection Sequencing and Bridging
This is where the rubber meets the road. Steel joist erection has a very specific sequence dictated by safety and structural stability, and cutting corners here is how people get hurt.
Step 1: Verify bearing conditions. Before you set the first joist, confirm that the bearing seats are welded or bolted to the supporting steel, that the bearing surfaces are level, and that the support structure is plumbed and braced. Joists landing on a beam that is out of level will not sit properly in the seats, and forcing them creates stress points.
Step 2: Set and stabilize the first joist. The first joist in any bay is the most vulnerable. It has no adjacent joist to brace against, so it must be stabilized immediately. Bolt it to the bearing seats and attach a minimum of one row of bridging before releasing the crane. Some erectors use temporary guy wires or hand lines to hold the first joist plumb while the connections are made.
Step 3: Install bridging progressively. This is the critical safety step. As each subsequent joist is set, bridging must be installed between it and the previously stabilized joist before the crane releases. SJI and OSHA both require that all rows of bridging be installed before any construction loads (deck, mechanical units, workers) are placed on the joists. The bridging diagonal and horizontal members must be fully connected at both ends. Tack welding is not acceptable as a permanent connection, but field bolting is common during erection.
The bridging sequence is not just a safety rule. It is structural. An unbridged joist can roll laterally under surprisingly small loads. A worker walking on the top chord of an unbridged joist can cause it to collapse. This has killed people. Do not let your crew get ahead of the bridging installers.
Step 4: Install joist girders. If your project includes joist girders (heavy trusses that support the joists), these typically go up first in the erection sequence because they form the primary support grid. The same bridging rules apply to joist girders, with additional requirements for temporary support at panel points during erection.
Step 5: Deck installation. Once all joists and bridging are in place and inspected, the steel deck goes on. Deck provides the final lateral bracing for the joist system, but it cannot be relied upon until it is fully welded or fastened per the structural drawings. Track this sequencing in your construction scheduling software so inspections and deck delivery align with the erection pace.
Metal Building Erection: Frame Raising to Closeout
Erecting a pre-engineered metal building follows the manufacturer’s sequence, but the general approach is consistent across most PEMB systems.
Rigid frame erection. The first endwall or rigid frame sets the tone for the entire building. It must be plumbed, leveled, and temporarily braced before you move to the next frame. Most manufacturers require a minimum of two bays of temporary cable bracing (X-bracing) before releasing the crane from the first frame. The rigid frames are typically shipped in two pieces (columns and rafters) that bolt together at the knee and ridge connections.
When raising rigid frames, the columns are typically set first and temporarily braced, then the rafters are lifted into place and bolted at the knee. The ridge connection between opposing rafters is made at height. This is heavy, precise work, and the crane operator needs to be experienced with steel erection. Some contractors are now exploring construction exoskeletons to reduce physical strain on workers handling repetitive overhead tasks during erection. If a frame gets away from you, it can domino into adjacent bays.
Secondary framing. Once the rigid frames are up and braced, the purlins (roof) and girts (walls) are installed. These C or Z-shaped members bolt to the frames using manufacturer-supplied clips. Purlin and girt installation is faster than frame raising, but spacing accuracy matters because the panels are designed to land on specific fastening lines.
On wider buildings where steel joists replace purlins in the roof system, the joist erection sequence described above applies. The joists bear on the rigid frame rafters and must be bridged per SJI standards.
Panel installation. Roof and wall panels go on after all structural and secondary framing is complete and inspected. Panel installation is its own trade skill. Proper lap direction, sealant placement, fastener patterns, and trim detailing all affect the building’s weather tightness and appearance. Most metal building warranties require installation per the manufacturer’s guidelines, so deviating from the manual can void your warranty and leave you holding the bag on leaks.
Accessories and closeout. Doors, windows, louvers, gutters, downspouts, and ridge ventilation get installed last. These are the details that make or break the finished product. Budget adequate time for trim and accessories because they always take longer than the schedule suggests. Managing a clean subcontractor coordination process here prevents the usual finger-pointing when multiple trades are finishing out the building.
Safety Compliance and OSHA Requirements
Steel erection work is one of the most regulated activities in construction, and for good reason. Falls, struck-by incidents, and structural collapses during erection account for a disproportionate share of construction fatalities.
OSHA Subpart R (1926.750-761) governs steel erection, including joist installation. Key requirements include:
- A site-specific erection plan addressing the sequence and method of erection
- Fall protection for workers at heights above 15 feet (not 6 feet, as in general industry, but specific to steel erection connectors)
- Controlled decking zones (CDZs) where workers can operate without conventional fall protection under strict conditions
- Column stability requirements, including four anchor bolts per column minimum
- Bridging installation requirements that prohibit loading joists before bridging is complete
- Training requirements for connectors, signalpersons, and riggers
Fall protection specifics. Connectors working between 15 and 30 feet must have one method of fall protection available (personal fall arrest, positioning device, or safety net). Above 30 feet, fall protection must be in use. The controlled decking zone exception allows trained deckers to work without fall protection only within a very narrow set of conditions outlined in 1926.760.
Crane operations. Every lift during steel erection is a critical lift. The crane operator must be NCCCO certified, the rigging must be inspected daily, and the lift plan must account for wind, ground conditions, and load charts. A thorough safety management plan should cover all of these requirements and establish clear stop-work authority for anyone on site who sees an unsafe condition.
Daily safety briefings. Before each shift, the erection foreman should brief the crew on the day’s sequence, crane operations, weather conditions, and any hazards specific to that day’s work. These are not check-the-box meetings. They are the single best opportunity to catch problems before they become incidents. Document your safety meetings and keep them in your project files. If OSHA compliance feels like a burden, remember that the alternative is a lot worse.
PPE requirements. Hard hats, safety glasses, high-visibility vests, steel-toed boots, and gloves are the baseline. Workers at height need properly fitted harnesses inspected before each use. Connectors need tool lanyards to prevent dropped objects. The erection contractor should have a written PPE policy that covers every role on the crew.
Managing the Project: Scheduling, Costs, and Communication
Getting the iron in the air is only half the battle. Managing the project around the erection is what separates good contractors from the ones who lose money on every metal building job.
Scheduling around lead times. Steel joist lead times run 6 to 12 weeks from release to ship. Metal building packages run 8 to 16 weeks depending on the manufacturer and time of year. These lead times are not negotiable, and they start from the date the manufacturer receives approved drawings and a release to fabricate. Build your master schedule backward from the required erection date, and pad the fabrication window because delays happen. Your scheduling methods need to account for this procurement phase explicitly, not just the field work.
Cost tracking. Steel erection projects have a few cost drivers that can get away from you. Crane rental is usually the biggest variable. A 100-ton crane running $15,000 to $25,000 per week adds up fast if erection takes longer than planned. Weather days, re-work from fabrication errors, and scope changes all extend crane time. Track your crane hours daily and compare them against your budget. If you are falling behind, figure out why before you burn through your contingency.
Material waste on metal buildings is typically low because everything is pre-cut and pre-punched, but damaged panels, missing hardware, and fabrication errors generate change orders back to the manufacturer. Document every discrepancy at delivery with photos and written notes. A good budget tracking system catches these overruns before they surprise you at the end of the job.
Communication between trades. On a typical metal building project, you are coordinating the concrete contractor (foundations), the erection crew, the panel installers, electricians, plumbers, and HVAC subs. The erection crew drives the critical path, so every other trade revolves around their progress. Daily updates from the erection foreman to the project manager are not optional. Use your project management platform to push schedule updates to all subs so they can adjust their mobilization dates in real time.
Quality control checkpoints. Build inspection holds into your schedule at these stages: anchor bolt survey (before erection), frame plumb and alignment (after each bay), bridging completion (before deck), deck fastening (before rooftop loads), and final panel and trim (before closeout). Catching a frame that is a quarter-inch out of plumb before the purlins go on is a 30-minute fix. Catching it after the roof panels are installed is a nightmare.
Documentation. Keep daily erection logs that record pieces set, connections completed, bridging installed, weather conditions, crew size, crane hours, and any safety incidents or near-misses. These logs protect you during disputes, support your payment applications, and provide a record for warranty claims. A solid daily reporting habit, backed by construction project management tools, turns your field data into an asset instead of a liability.
Common Mistakes and How to Avoid Them
After watching hundreds of steel joist and metal building jobs, certain mistakes keep showing up. Here are the ones that cost contractors the most time and money.
Skipping the anchor bolt survey. This is the most preventable problem in metal building erection, and it happens constantly. A column base plate that does not line up with the anchor bolts means field modifications, delays, and sometimes re-pouring concrete. Survey every bolt before the steel shows up. Period.
Getting ahead of bridging. The pressure to keep the crane moving and set joists as fast as possible leads crews to skip ahead of the bridging installers. This is a life-safety issue. One unbridged joist rolling can take out an entire bay and anyone standing on it. Enforce the bridging sequence religiously. If it means the crane waits 20 minutes, the crane waits 20 minutes.
Ignoring the erection manual. Every PEMB manufacturer provides an erection manual specific to your building. It covers frame raising sequence, bracing requirements, panel lap directions, fastener types, and sealant locations. When contractors deviate from the manual, they void warranties and create leak problems that haunt the building owner for years. Read the manual, follow the manual.
Underestimating trim and accessories. The structural erection of a metal building typically takes 40 to 50 percent of the total erection time. The other 50 to 60 percent is panels, trim, doors, windows, and accessories. Contractors who bid the erection based on frame-raising speed get crushed on the back end when trim work drags on for weeks.
Poor weather planning. Steel erection stops in high winds, lightning, and heavy rain. Most crane operators will not swing loads in sustained winds above 25 to 30 mph. Metal building panel installation is also wind-sensitive because large panels act like sails. Build weather days into your schedule based on historical data for your region. If you are erecting in tornado alley in April, plan for lost days.
Not documenting delivery discrepancies. When the steel arrives on site, inspect every piece against the shipping list. Photograph any damage, missing items, or fabrication errors before you sign the delivery ticket. If you sign clean and discover problems later, the manufacturer will push back on replacement costs. Protect yourself with documentation from day one.
Want to see this in action? Get a live demo of Projul and find out how it fits your workflow.
Weather, Seasonal Factors, and Site Conditions That Affect Erection
Every experienced erection foreman has stories about weather killing a schedule. But weather is just one piece of the site conditions puzzle. Understanding how your environment affects steel erection work helps you plan smarter and avoid blowing through contingency days in the first week.
Wind is the number one enemy. Steel joists act like big flat sails when they are being lifted, and metal building panels are even worse. A 40-foot roof panel in a 20 mph crosswind generates enough force to pull a rigger off balance or swing the load into standing steel. Most crane operators follow a hard stop at 25 to 30 mph sustained winds, but gusty conditions below that threshold can be just as dangerous. Monitor hourly forecasts, not just daily ones. A calm morning can turn into a 35 mph afternoon in a lot of parts of the country.
Temperature extremes matter. In cold weather, steel becomes more brittle, and bolted connections are harder to make because the steel contracts. Workers in heavy gloves lose dexterity, which slows connection work and increases the chance of dropped hardware. In extreme heat, fatigue sets in faster, dehydration becomes a real risk, and thermal expansion can change fit-up tolerances on long members. Plan your most demanding work for the cooler parts of the day during summer months, and in winter, schedule morning warm-up time into your daily production rates.
Ground conditions under the crane. Your crane is only as stable as the ground it sits on. Soft soils, recent rain, underground utilities, and filled areas can all compromise crane stability. A 100-ton crane exerts enormous ground pressure through its outrigger pads, and if one pad sinks, the whole crane goes out of level. Require a geotechnical assessment of crane setup locations on any job where the soil is questionable. Timber mats or steel crane pads are standard practice on soft sites, but they need to be sized correctly by someone who understands the loads.
Staging area logistics. A cramped site changes everything about your erection plan. If you cannot stage all the steel on site at once, you need to coordinate just-in-time deliveries that match the erection sequence. That means tight communication with the fabricator and the trucking company, and a staging plan that puts the right pieces in the right order. Nothing kills production like having your crane wait while a forklift digs through a pile of bundled joists to find the ones you need next.
Existing structures and overhead hazards. On renovation or expansion projects, you may be erecting steel next to an occupied building or under power lines. These constraints require additional planning for crane swing radius, boom clearance, and load paths. Power line proximity triggers OSHA requirements for minimum clearance distances that vary by voltage, and the electric utility may need to de-energize or shield the lines. Factor this coordination time into your schedule because utility companies do not move on your timeline.
Dust and debris control. In dry climates or on sites with loose fill, dust can reduce visibility for crane operators and signalpersons. Welding and cutting operations during erection generate sparks that pose a fire risk on sites with dry vegetation or combustible materials nearby. Keep a water truck or hose available for dust suppression, and have fire extinguishers staged at every welding location. These sound basic, but they are the items that get skipped when the crew is focused on setting iron.
Crane Selection, Rigging, and Lift Planning for Steel Erection
The crane is the heartbeat of any steel erection job. When the crane is working, the project moves. When it is sitting, you are burning money. Getting crane selection and lift planning right is one of the highest-value activities in your preconstruction process.
Matching the crane to the job. Crane selection depends on three things: the heaviest pick, the longest reach required, and the available setup positions. A 60-ton hydraulic truck crane might handle most metal building frames, but if you have one rigid frame that weighs 12,000 pounds at 80 feet of radius, you might need a 100-ton machine. Check the crane’s load chart at the actual radius and boom length you will be using, not just the maximum capacity. Capacity drops fast as radius increases, and picking a crane based on its name-plate rating is a rookie mistake that gets people killed.
Crawler vs. hydraulic truck crane. Crawler cranes can pick and carry loads, which is useful on larger buildings where you need to move steel from staging to setting position. They do well on soft ground because their tracks distribute weight over a large area. Hydraulic truck cranes set up faster, cost less per day, and are better for smaller buildings where the crane can reach the entire structure from one or two setup positions. On mid-size metal building jobs in the 10,000 to 30,000 square foot range, a hydraulic truck crane with a good operator is usually the most cost-effective option.
Rigging hardware and inspection. Every piece of rigging used on steel erection must be inspected before each shift. Slings, shackles, chokers, and spreader bars all have rated capacities that must exceed the load being lifted. For steel joists, a common rigging method is a two-point pick using nylon slings or wire rope chokers at the quarter points of the joist. Never rig a joist from a single point at the center, as this allows the joist to fold at the top chord and collapse. For rigid frames, the manufacturer’s erection manual specifies lifting points, and deviating from those points can overstress the frame during the lift.
Critical lift planning. Any lift where the load exceeds 75 percent of the crane’s rated capacity at the given radius is considered a critical lift, and it requires a written lift plan reviewed by a qualified person. In practice, most steel erection lifts are not critical by this definition, but treating every lift with the same level of planning discipline keeps complacency from creeping in. Your lift plan should include the load weight, rigging weight, crane configuration, boom length, radius, and a comparison to the load chart. Factor in wind loads on the lifted piece, because a 6,000-pound rigid frame rafter with 800 square feet of surface area generates hundreds of pounds of wind force in even moderate conditions.
Multi-crane operations. On larger buildings, you may use two cranes working simultaneously in different bays. This doubles your production rate but introduces new hazards. The cranes must never swing loads over each other’s work areas, the signalpersons must be on dedicated channels, and there must be a clear division of the building into zones for each crane. One lift director should oversee both cranes and have authority to stop either one. Multi-crane operations are worth the cost on big jobs, but they require more planning and more experienced personnel.
Crane access and egress. Plan how the crane gets into position and how it gets out after erection is complete. On tight commercial sites, the crane may need to back in or approach from a specific direction due to overhead obstructions or adjacent buildings. After the building is enclosed, the crane might be trapped inside the footprint if you did not plan its exit path. This sounds obvious, but it happens more often than anyone in the industry wants to admit. Incorporate your crane movements into the overall project schedule so other site work does not block access routes.
Connections, Welding, and Bolting in the Field
The quality of your field connections determines the long-term structural performance of the building. A joist that is tack-welded to its seat instead of fully welded will eventually crack and fail. A frame knee bolt that is not properly tensioned will loosen over time and allow the frame to drift. Connection quality is where craftsmanship meets engineering, and cutting corners here always comes back to bite you.
Bolted connections on metal buildings. Most PEMB connections use high-strength bolts (A325 or A490) in bearing-type connections. The manufacturer’s erection drawings specify bolt size, grade, and the number of bolts at each connection. Install all bolts at a connection before tightening any of them to full tension. This allows the members to be adjusted for alignment before the connection is locked in. Tightening sequence matters on multi-bolt connections. Start with the bolts nearest the center of the group and work outward to distribute the clamping force evenly.
Snug-tight vs. fully tensioned. Not every bolt in a metal building needs to be fully tensioned. The manufacturer’s drawings will indicate which connections require pretensioned bolts and which can be snug-tight (the tightness achieved by a few impacts of an impact wrench or the full effort of a worker with a spud wrench). Pretensioned connections are typically required at moment frames, crane runway connections, and bracing connections. Snug-tight is acceptable for secondary framing and panel clips on most buildings. Know the difference, because over-tightening snug-tight connections wastes time, and under-tightening pretensioned connections is a structural deficiency.
Welded connections on steel joists. Steel joists are typically welded to their bearing seats in the field. SJI standards require a minimum 1/8-inch fillet weld on each side of the joist bearing seat to the support steel. The welder must be qualified per AWS D1.1, and the welds must be visually inspected at minimum. On critical connections or projects with enhanced quality requirements, the structural engineer may specify magnetic particle or ultrasonic inspection of field welds. Keep your welders’ certification cards on site and make sure they are current. An uncertified welder making structural connections is a code violation that can shut your job down.
Joist seat attachment details. The joist bearing seats (the steel plates welded to the bottom chord at each end) rest on the support steel and must be welded or bolted per the structural drawings. On wide-flange beams, the seat typically welds directly to the top flange. On tube steel or HSS columns, a cap plate or seat angle is usually provided. Make sure the seat contact area is clean, dry, and free of paint, galvanizing, or debris before welding. A weld made over paint or scale looks fine from the outside but has zero structural value.
Erection bolts vs. permanent bolts. During erection, temporary erection bolts (often referred to as drift pins or erection pins) are used to hold connections together while the structure is aligned and plumbed. These are not permanent fasteners. Once the structure is in its final position, all erection bolts must be replaced with the permanent bolts specified on the drawings. It is common for erection bolts to get left in place accidentally, so build a connection inspection into your quality control process before the structure gets enclosed and those connections become inaccessible.
Touch-up painting and corrosion protection. Field connections disrupt the shop primer on steel members. Every weld, bolt hole, and area of abrasion must be touched up with primer or paint per the project specifications. On exterior-exposed connections or buildings in corrosive environments (coastal, chemical processing), this touch-up is especially important. Rust does not take long to start on bare steel, and once it gets under the primer, it spreads. Carry touch-up paint that matches the shop primer on every metal building job and make it part of the daily punch list.
Scaling Your Metal Building Operation With Repeatable Systems
Once you have completed a few steel joist or metal building erection projects, patterns emerge. The same planning steps, the same safety requirements, the same coordination headaches show up on every job. The contractors who grow their metal building business are the ones who turn those patterns into systems instead of reinventing the wheel every time.
Standardize your preconstruction checklist. Create a checklist that covers every step from contract signing through mobilization. Anchor bolt survey, erection plan review, crane selection, crew assignment, delivery coordination, staging layout, fall protection plan, and permit verification should all be on it. When every project manager on your team uses the same checklist, the quality of your preconstruction work stops depending on who is running the job. If you use Projul’s project management features, you can template these checklists so they auto-populate on every new metal building project.
Build a preferred crane vendor relationship. Crane availability drives your erection schedule more than almost any other factor. If you wait until two weeks before erection to book a crane, you will pay a premium and get whatever is available instead of what you need. Build relationships with two or three crane companies, give them advance notice of your upcoming projects, and negotiate rates based on volume. A contractor who gives a crane company 60 days notice and consistent work gets better rates and better service than one who calls in a panic every time.
Invest in your erection crew. Good ironworkers are hard to find and harder to keep. The ones who understand joist bridging sequences, can read erection drawings, and work safely at height are worth paying well. Cross-train your crew members so you have backup connectors, backup riggers, and backup signalpersons. A single injury or resignation should not shut down your erection capability. Track crew certifications, training dates, and qualification records so you always know who is cleared to work in each role.
Track production rates by building type. After each project, record how many pieces were set per day, how many crane hours were used per bay, and what your total labor hours per square foot came to. Over time, this data becomes your most accurate estimating tool. You will know that a 60-foot clear span rigid frame building at 10,000 square feet takes your crew 12 working days to erect, and you can bid accordingly with confidence. This kind of historical data, stored in your project management system, is worth more than any rule-of-thumb estimating guide.
Document lessons learned. At the end of every metal building job, spend 30 minutes with your foreman and project manager to capture what went well and what went wrong. Were there fabrication errors? Did the crane size work out? Were there safety near-misses? What would you do differently? Write it down and store it where your whole team can access it. The companies that learn from every project compound their knowledge over time, while the ones that skip this step keep making the same mistakes year after year.
Expand your service offerings incrementally. If you are currently subbing out panel installation or insulation, consider bringing those trades in-house as your volume grows. Each trade you control reduces coordination complexity and increases your margin on the total building package. Start by hiring one or two experienced panel installers and running them alongside your erection crew. As they prove out, build the team. The same applies to concrete foundations, electrical rough-in, and mechanical support installation. The more of the building scope you can self-perform, the more control you have over the schedule and the profit.
Running a steel joist or metal building erection project is a test of planning, coordination, and discipline. The work moves fast, the stakes are high, and the margin for error is thin. But when you nail the planning, enforce the safety protocols, and stay on top of the daily management, these jobs can be some of the most profitable and satisfying projects in your portfolio. The right tools and processes turn a complex erection job into a repeatable system, and that is how you scale a contracting business.
Frequently Asked Questions
How long does it take to erect a pre-engineered metal building?
What is the difference between steel joists and structural steel beams?
Do I need a PE-stamped erection plan for steel joist installation?
What is bridging and why is it critical during joist erection?
Can I erect a metal building without a crane?
Related Articles
Construction Electrical Rough-In Guide for General Contractors
The electrical rough-in is where circuit layout, box placement, and wire routing all have to come together before...
Read More →
Interior Finishing for Contractors: The Complete Drywall, Paint, and Trim Guide
Interior finishing is where your project goes from bare studs to a space your client can actually picture living in....
Read More →
Helical Piles and Screw Foundations: The Contractor's Complete Guide
Helical piles are showing up on more and more project specs. This guide covers everything a contractor needs to know...
Read More →