Stone Veneer Installation Guide for Contractors
Natural and Manufactured Stone Veneer Installation Guide: Substrate Prep, Lath, Mortar, and Flashing
Stone veneer is one of the most popular exterior and interior finishes in residential and light commercial construction. When installed correctly, it looks great and lasts decades. When installed poorly, it cracks, falls off, and lets water into the wall assembly.
This guide covers the full installation process for both natural and manufactured stone veneer, from substrate preparation through final grouting. We will focus on what actually matters on the job site and where things typically go wrong.
Natural vs. Manufactured Stone Veneer
Before you start, you need to understand what you are working with because the two products handle differently.
Natural Stone Veneer
Natural stone veneer is quarried stone that has been cut to a thin profile, typically 3/4 inch to 1-1/4 inches thick. Common stone types include limestone, sandstone, slate, quartzite, and fieldstone.
Advantages:
- Authentic look with natural color variation
- Extremely durable
- Does not fade over time
- Higher perceived value
Challenges:
- Heavier than manufactured (typically 13 to 25 lbs per square foot)
- More difficult to cut and shape
- Higher material cost
- Requires more skill to install due to irregular shapes
Manufactured Stone Veneer (MSV)
Manufactured veneer is cast from molds taken from natural stone, then colored with iron oxide pigments. When done well, it is hard to tell apart from the real thing at a distance.
Advantages:
- Lighter weight (typically 8 to 12 lbs per square foot)
- Easier to cut with a standard masonry saw or score and snap
- Consistent sizing makes layout easier
- Corner pieces are pre-formed
- Less expensive
Challenges:
- Can fade in direct sunlight over many years
- Lower perceived value if the client knows the difference
- Quality varies significantly between manufacturers
- Casting defects can create adhesion problems
For the rest of this guide, the installation process is largely the same for both products. We will note where the differences matter.
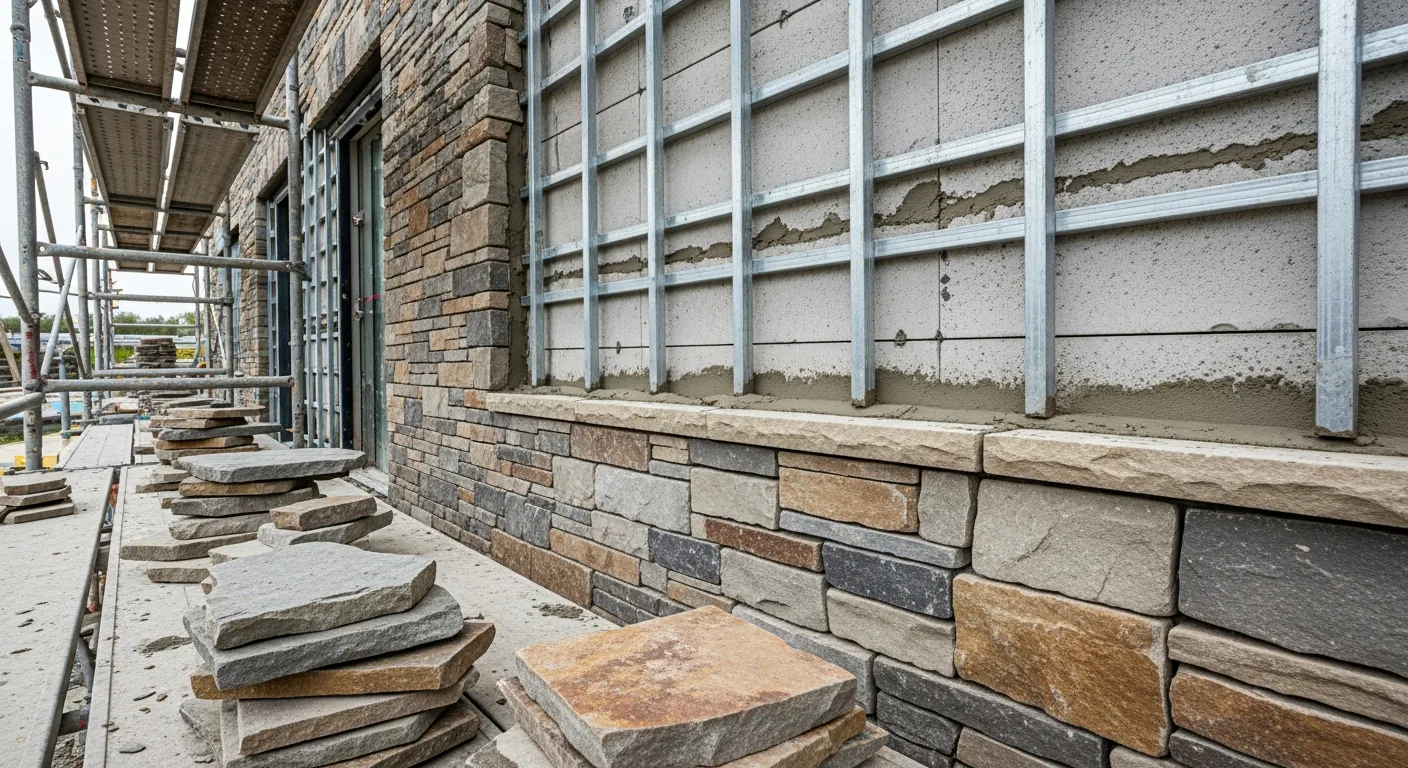
Substrate Preparation
This is where most stone veneer failures start. Bad substrate prep leads to poor adhesion, water intrusion, and stones falling off the wall. Take this phase seriously.
Wood-Frame Walls (Most Residential Construction)
For stone veneer over wood-frame walls with sheathing (OSB or plywood), the assembly from inside out should be:
- Framing and sheathing
- Weather-resistive barrier (WRB). Two layers of Grade D building paper (30-minute rated) or one layer of code-approved house wrap. The Masonry Veneer Manufacturers Association (MVMA) and most manufacturers require two layers of WRB. This is not optional.
- Metal lath
- Scratch coat
- Stone veneer
Why Two Layers of WRB?
Stone veneer is not waterproof. Water gets behind it through mortar joints, cracks, and capillary action. The WRB is what actually keeps your wall dry. Two layers provide redundancy because the scratch coat bonds to the lath and can tear a single layer of house wrap.
The first layer goes directly over the sheathing. The second layer goes over the first. Both layers must be lapped shingle-style (upper courses overlap lower courses by at least 4 inches).
Concrete and Masonry Substrates
Stone veneer can be applied directly to clean concrete, concrete block, or brick without lath. The surface must be:
- Clean (no paint, sealers, or form release agents)
- Sound (no spalling, loose material, or crumbling mortar)
- Roughened if smooth (acid etch or mechanical scarification)
If the concrete surface is smooth and hard, apply a bonding agent or a dash coat (thin splatter coat of mortar) before the scratch coat.
Substrates to Avoid
Do not install stone veneer over:
- Painted surfaces (scrape and clean first)
- Vinyl or aluminum siding (must be removed)
- EIFS without manufacturer approval
- Drywall or greenboard (interior applications need cement board or comparable substrate)
- Foam insulation boards directly (need mechanical attachment through to the framing)
Installing Metal Lath
Lath Selection
Use expanded metal lath, minimum 2.5 lbs per square yard, galvanized or stainless steel. Self-furring lath (with dimples that hold it off the substrate) is preferred because it creates a gap for the scratch coat to wrap around the lath wires.
If using flat (non-furring) lath, install furring nails or use self-furring fasteners to create a 1/4-inch gap between the lath and the WRB.
Lath Installation
- Orientation. Install lath with the cups (the raised dimples) facing away from the wall so mortar can key behind the lath.
- Fasteners. Galvanized roofing nails or screws, minimum 1 inch penetration into studs. Space fasteners 6 inches on center vertically and horizontally, hitting studs.
- Overlap. Lap sheets at least 1 inch on edges and 2 inches at ends. Stagger end joints so they do not line up between courses.
- Corners. Wrap lath around inside and outside corners at least 4 inches. Use pre-formed corner lath for a cleaner result.
- Openings. Cut lath neatly around windows and doors. Do not leave sharp edges exposed.
Common Lath Mistakes
- Not hitting studs. Lath attached only to sheathing will pull away under the weight of the mortar and stone.
- Wrong side out. If the cups face the wall, there is no gap for mortar to key behind the lath.
- Insufficient overlap. Gaps in the lath coverage create weak spots in the scratch coat.
The Scratch Coat
The scratch coat is a base layer of mortar applied over the lath. It provides a uniform bonding surface for the stone.
Mix
Use a Type S or Type N mortar mix (or the manufacturer’s specified mix). Many contractors use a pre-mixed scratch coat product for consistency. The mix should be stiff enough to hang on the wall without slumping but wet enough to work easily.
Application
- Trowel or spray the mortar onto the lath, pressing it firmly through the mesh so it wraps around the lath wires
- Build up to approximately 1/2 to 3/4 inch thick
- While the mortar is still wet, score the surface with horizontal lines using a notched trowel or scarifier. These grooves give the setting mortar something to grab
- Let the scratch coat cure for at least 24 to 48 hours before setting stone
- Keep the scratch coat damp during curing (mist with water in hot or dry conditions)
Critical Detail
Do not let the scratch coat dry out too fast. Rapid drying causes cracking and poor hydration, which means weak mortar. In hot weather, shade the wall and mist regularly. In cold weather (below 40 degrees F), do not apply mortar at all unless you can maintain temperature above freezing for at least 24 hours.
Flashing and Moisture Management
Proper flashing is the difference between a stone veneer job that lasts 50 years and one that fails in 5. Water will get behind the stone. Your job is to make sure it gets back out.
Base of Wall (Weep Screed)
Install a weep screed or foundation flashing at the bottom of the stone veneer area. This serves two purposes:
- It provides a termination point for the lath and scratch coat
- It allows moisture that reaches the WRB to weep out at the base
The weep screed should sit at least 4 inches above grade (2 inches above hardscape). Stone should not extend below the weep screed or it will trap moisture.
Window and Door Head Flashing
Install metal or self-adhered membrane flashing above every window and door opening. The flashing must:
- Extend at least 4 inches beyond each side of the opening
- Slope outward so water drains over the face of the veneer
- Integrate with the WRB (upper WRB laps over the top of the flashing)
- Have end dams to prevent water from running off the sides
Roof-to-Wall Intersections
Where a roof meets a stone veneer wall, install kick-out flashing at the bottom of the intersection to direct water into the gutter. Without kick-out flashing, water runs behind the veneer and into the wall cavity. This is one of the most common failure points in residential construction.
Sill Flashing
Window sills need flashing that slopes away from the window and extends past the face of the stone. Many inspectors and building science consultants consider this detail mandatory even when code does not explicitly require it.
Setting the Stone
Now the part everyone actually wants to do.
Layout Planning
Before you start mortaring, do a dry layout. Lay stones out on the ground or a table to plan your pattern:
- Mix stones from multiple pallets or boxes. Color can vary between batches. Mixing ensures a natural, blended appearance.
- Alternate sizes. Avoid placing similarly sized stones next to each other. Vary large and small pieces for a natural look.
- Corner stones first. Plan your corners and work inward. Corner stones are the most visible and set the visual standard.
- Check for fit. Cut and shape stones as needed before applying mortar. Measure twice, cut once applies here.
Mortar Application
Dampen the scratch coat. Mist the wall section you are about to work on with water. A dry scratch coat will suck the moisture out of your setting mortar before it can bond properly. The wall should be damp but not dripping.
Butter the back of each stone. Apply a 1/2-inch layer of mortar to the back of the stone using a trowel. Press it on firmly, covering at least 90% of the back surface. Incomplete mortar coverage is a primary cause of stones falling off.
Press and hold. Press the stone firmly against the wall with a slight twisting motion to squeeze out excess mortar and maximize contact. Hold it for a few seconds until it stays in place.
Work from the bottom up. Start at the base and work your way up. This lets lower stones support upper stones while the mortar sets.
Joint Width
For most manufactured stone, maintain 1/2-inch mortar joints. Natural stone may have tighter or wider joints depending on the product and the desired look. Whatever joint width you choose, keep it consistent across the wall.
Grouting the Joints
After the stones are set and the mortar has firmed up (usually 24 hours), fill the joints with mortar using a grout bag. Overfill slightly, then tool the joints with a jointing tool to compact the mortar and create a consistent profile.
Tooling is important. It compresses the mortar and creates a smooth surface that sheds water. Untooled joints are rough and absorb water, which accelerates deterioration.
Cleaning
After the mortar has set but before it fully cures, brush the stone faces with a stiff bristle brush (not wire) to remove mortar smears. Do not use acid on manufactured stone because it will damage the pigments. Natural stone can usually tolerate a diluted muriatic acid wash, but test an inconspicuous area first.
Common Installation Mistakes
Skipping the WRB. Stone veneer over bare sheathing will eventually fail from moisture damage. Two layers of WRB are required, not optional.
Setting on a dry scratch coat. This is the number one cause of stone falling off. Dampen the wall before you start setting.
Incomplete back butter. Every stone needs at least 90% mortar coverage on the back. Spots with no mortar are spots where the stone is not bonded.
No flashing. Without proper flashing at the base, windows, and roof intersections, water gets trapped behind the veneer and causes rot, mold, and freeze damage.
Stone below grade. Stone veneer touching the ground wicks moisture up through capillary action. Maintain the 4-inch clearance above grade.
Mortar application in extreme temperatures. Below 40 degrees F or above 100 degrees F, mortar does not cure properly. Plan your installation around the weather.
Not mixing stones from different boxes. Especially with manufactured stone, color varies between batches. Mixing avoids blotchy patterns.
Interior Stone Veneer
Stone veneer is also popular for interior accent walls, fireplaces, and kitchen backsplashes. The installation is simpler because you do not need WRB or flashing.
Interior Substrates
- Cement board (Durock, Hardiebacker). The best interior substrate. Screw to studs and tape joints with alkali-resistant mesh tape and thin-set.
- Concrete or masonry. Apply directly with a scratch coat or bonding agent.
- Drywall. Not recommended for heavy stone. Light manufactured veneer (under 15 lbs per square foot) may be acceptable with proper adhesive, but check the manufacturer’s guidelines. Most will not warrant installation over drywall.
For fireplace surrounds, use cement board rated for the temperatures involved. Check clearances to combustibles per the fireplace manufacturer and local code.
Estimating and Bidding Stone Veneer Jobs
Stone veneer jobs involve several cost components:
- Material (stone, corners, mortar, lath, WRB, flashing). Corner pieces cost more per linear foot than flat pieces. Estimate corner footage separately.
- Prep labor (WRB, lath, scratch coat). This is often underestimated. On a typical residential job, prep takes almost as long as stone setting.
- Setting labor. Experienced setters can cover 30 to 60 square feet per day depending on stone type and wall complexity. Heights requiring scaffolding slow things down.
- Cutting and waste. Budget 5 to 10% waste for manufactured stone, 10 to 15% for natural stone.
- Scaffolding. Gable ends and second-story walls require scaffolding, which adds cost and time.
Track your actual costs against your estimates so you can refine your pricing over time. Projul’s job costing features let you log labor hours and material costs as the work happens, giving you real data to work from on the next bid.
Managing Stone Veneer Projects
Stone veneer work requires coordination with framing (sheathing and WRB), roofing (flashing at roof-wall intersections), and window installation (head and sill flashing). Missing any of these coordination points leads to rework.
Projul helps you manage the schedule, coordinate with other trades, and document your work with progress photos. When the GC asks for a status update, you can pull it up on your phone instead of making a call from the scaffold.
Whether you are a specialty masonry sub or a GC managing the whole project, keeping your stone veneer jobs organized pays off. Check out Projul’s pricing or book a demo to see how it works for your operation.
Frequently Asked Questions
What is the difference between natural stone veneer and manufactured stone veneer?
Does stone veneer need a footing or ledge for support?
What type of lath do I use for stone veneer?
Can stone veneer be installed directly over concrete block or poured concrete?
How thick should the mortar bed be for stone veneer?
What causes stone veneer to fall off a wall?
How do I flash stone veneer at windows, doors, and the base of the wall?
How much does stone veneer installation cost?
Related Articles

Concrete Tilt-Up Construction: A Contractor's Complete Field Guide
Tilt-up construction accounts for roughly 15 percent of all industrial and commercial buildings in North America. This...
Read More →
How to Implement Construction Software Without Losing Your Mind
Most construction software rollouts fail. Not because the software is bad, but because the rollout was rushed. Here are...
Read More →
How Selections Can Pay for Themselves in Three Easy Steps
Most contractors lose thousands each year on wrong material orders, slow client decisions, and missed upsell chances....
Read More →