Structural Concrete Repair Guide: Spalling, Delamination, and Strengthening | Projul
Structural Concrete Repair Guide: Spalling, Delamination, and Strengthening
Concrete is tough, but it is not permanent. Every year, contractors across the country face deteriorating parking garages, crumbling bridge decks, spalling columns, and cracked building foundations that need structural repair. If you are bidding or performing concrete repair work, you need to understand the failure modes, the repair methods, and the engineering considerations that separate a lasting repair from one that fails in five years.
This guide covers the most common structural concrete issues you will encounter in the field, the repair techniques that actually work, and the practical considerations that affect your schedule and budget.
Understanding Why Concrete Fails
Before you can fix concrete, you need to understand why it is failing. Treating symptoms instead of root causes is the number one reason concrete repairs do not last.
Corrosion of Reinforcing Steel
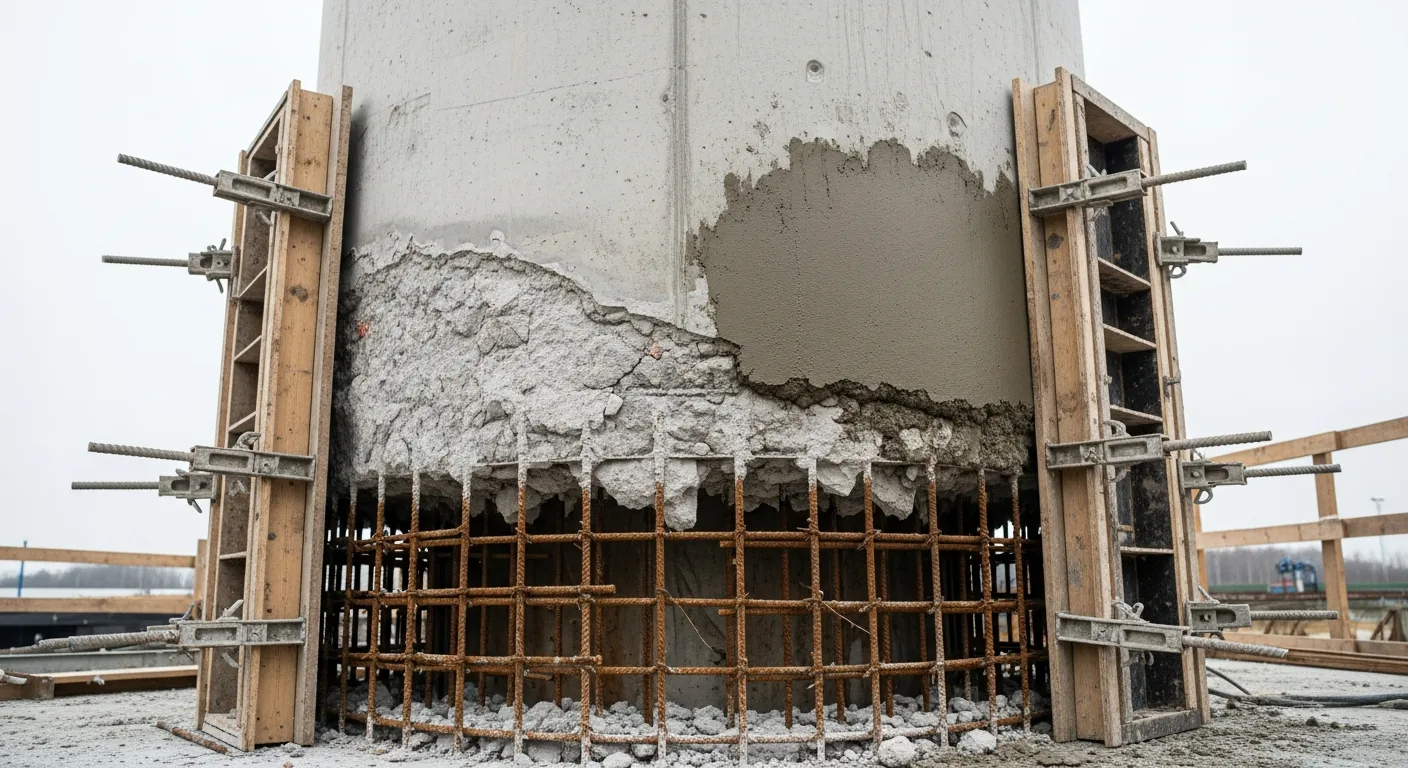
This is the single biggest cause of concrete deterioration in North America. When chlorides from deicing salts, coastal air, or contaminated aggregates reach the rebar, they break down the passive oxide layer that protects the steel. Once corrosion starts, the rust products expand to three to six times the original volume of the steel, creating enormous internal pressures that crack and spall the concrete cover.
Corrosion-driven damage is progressive. By the time you see a spall on the surface, the corrosion has usually spread well beyond the visible damage. A repair that only patches the visible spall without addressing the surrounding corroded areas will fail quickly as the adjacent concrete continues to deteriorate.
Freeze-Thaw Damage
Water expands about nine percent when it freezes. In concrete that is not properly air-entrained, this expansion creates internal cracking that accumulates over hundreds of freeze-thaw cycles. The concrete surface starts to scale and flake, and over time the damage works deeper into the section.
Air-entrained concrete resists freeze-thaw damage because the microscopic air bubbles provide relief space for the expanding water. When you see severe scaling on concrete that should have been air-entrained, it usually means the original mix design was wrong, the air content was lost during placement, or the surface was over-finished, sealing off the air voids near the surface.
Alkali-Silica Reaction (ASR)
ASR is a chemical reaction between the alkalis in Portland cement and certain reactive silica minerals in the aggregate. The reaction produces a gel that absorbs water and expands, creating internal cracking that shows up as map cracking (a random pattern of intersecting cracks) on the concrete surface.
ASR is tricky because the damage develops slowly over years or decades, and there is no reliable repair method that stops the reaction once it has started. Repair strategies for ASR-affected concrete focus on managing moisture, applying sealers to reduce water infiltration, and in severe cases, partial or full replacement.
Carbonation
Carbon dioxide from the atmosphere slowly penetrates concrete and reacts with the calcium hydroxide, lowering the pH of the concrete. When the carbonation front reaches the rebar depth, the low pH environment can no longer protect the steel from corrosion. Carbonation-induced corrosion is more common in older structures, especially those with low concrete cover over the reinforcement.
You can test for carbonation depth using phenolphthalein indicator. Spray it on a freshly broken concrete surface; it turns pink where the concrete is still alkaline (pH above about 9) and stays clear where carbonation has occurred.
Condition Assessment: Figure Out What You Are Dealing With
A proper condition assessment before you start repair work saves you from underbidding the job, missing hidden damage, and selecting the wrong repair method.
Visual Survey
Walk the entire structure and document every visible defect: cracks (noting width, length, and pattern), spalls, delaminations, efflorescence, staining, exposed rebar, and signs of water infiltration. Photograph everything and mark locations on a drawing.
Sounding Survey
Use a chain drag on horizontal surfaces or a hammer on vertical surfaces and soffits to identify delaminated areas. A delamination is a horizontal crack plane within the concrete, usually at or near the rebar depth, where the concrete has separated but has not yet spalled off. Delaminated areas produce a distinctly hollow sound compared to sound concrete.
Mark delaminated areas with paint and measure the total area. On a parking garage repair project, the delaminated area is often two to three times larger than the visible spall area. This is critical for accurate bidding.
Concrete Testing
For significant repair projects, the engineer will typically specify some or all of the following tests:
Chloride content testing at various depths to determine how far chlorides have penetrated and whether the rebar depth is contaminated. If chloride levels at the rebar are above the corrosion threshold (typically 1.0 to 1.5 pounds per cubic yard of concrete), that area needs full-depth repair even if it looks fine on the surface.
Compressive strength cores to verify the existing concrete quality and help the engineer select compatible repair materials.
Petrographic analysis to identify the cause of deterioration, check for ASR, and evaluate the air void system.
Half-cell potential mapping to identify areas of active corrosion that have not yet produced visible damage.
Ground-penetrating radar (GPR) to map rebar locations, concrete cover depth, and internal voids without drilling.
Repair Methods: Matching the Fix to the Problem
Partial-Depth Concrete Repair (Patching)
This is the bread-and-butter method for repairing spalls and delaminations where the damage does not extend through the full depth of the member.
Step 1: Saw cut the perimeter. Cut a clean edge around the repair area at least three-quarter inch deep. Square or slightly undercut edges, never feathered edges. Feathered edges fail quickly because the thin section has no strength.
Step 2: Remove deteriorated concrete. Use a chipping hammer to remove all unsound concrete down to solid material. At the rebar level, remove concrete behind corroded bars to provide at least three-quarter inch clearance all around for the repair material to bond.
Step 3: Clean and prepare rebar. Remove all loose rust from the exposed rebar by sandblasting or mechanical cleaning to near-white metal (SSPC-SP10). If you have lost more than 25 percent of the bar cross-section, the engineer needs to evaluate whether supplemental reinforcement is required.
Step 4: Apply bonding agent (if required). Some repair materials require a bonding slurry or primer on the existing concrete substrate. Others bond directly to a saturated surface-dry (SSD) substrate. Follow the material manufacturer’s instructions exactly.
Step 5: Place repair material. For vertical and overhead repairs, use a trowel-grade cementitious repair mortar that will not sag. For horizontal repairs, you can use pourable or flowable repair materials. Build the repair to the original surface profile.
Step 6: Cure the repair. Cementitious repair materials need proper curing just like regular concrete. Mist, wet burlap, or curing compound per the product data sheet.
Full-Depth Concrete Repair
When damage extends through the full thickness of the slab or member, you need a full-depth repair. This involves removing and replacing the concrete through the entire section, typically with new reinforcing steel tied to the existing bars.
Full-depth repairs are common on parking garage decks where both the top and bottom rebar mats are corroded, and in structural elements where fire or impact has compromised the entire cross section.
The key challenge with full-depth repairs is maintaining structural support during the work. Shoring the area above and below during concrete removal and until the repair material reaches design strength is essential. Never remove load-bearing concrete without proper shoring in place.
Epoxy Injection for Structural Crack Repair
Epoxy injection restores the tensile capacity across a crack by filling it with a structural adhesive that bonds the crack faces together. A properly injected crack is as strong as, or stronger than, the original concrete.
When to use it: Structural cracks in beams, columns, walls, and foundations where you need to restore the member’s original capacity. Also effective for stopping water leaks through cracks.
The process:
- Clean the crack surface and remove any loose material.
- Install injection ports (surface-mounted or drilled) at intervals along the crack, typically every six to twelve inches depending on crack width and depth.
- Seal the crack surface between ports with an epoxy paste to prevent the injection resin from leaking out.
- Inject epoxy starting at the lowest port (for vertical cracks) or one end (for horizontal cracks) using a low-pressure pump.
- Inject until epoxy flows from the next port, then cap the injected port and move to the next one.
- Continue until the entire crack is filled.
Critical detail: The crack must be stable (not actively moving) before you inject it. If the crack is still propagating due to ongoing settlement or loading, the epoxy will crack again. Address the cause of the cracking first.
Carbon Fiber Reinforced Polymer (CFRP) Strengthening
Carbon fiber wraps and laminates are used to add structural capacity to existing concrete members without adding significant weight or dimension. This is a huge advantage over traditional repair methods like adding steel plates or encasing members in additional concrete.
Common applications:
Column wrapping increases the confinement of the concrete core, which increases both the axial load capacity and the ductility of the column. This is common in seismic retrofit work where older columns need more ductility to survive earthquake forces.
Beam strengthening with CFRP laminates bonded to the bottom (tension) face of the beam increases the flexural capacity. Unidirectional CFRP fabric can also be wrapped around the beam to increase shear capacity.
Slab strengthening with CFRP strips bonded to the bottom surface increases the load-carrying capacity of floor slabs that need to support heavier loads than originally designed.
The installation process:
- Prepare the concrete surface by grinding to remove laitance, coatings, and contamination. The surface must be sound concrete with adequate tensile bond strength (typically 200 psi minimum by pull-off test).
- Fill surface voids, bug holes, and irregularities with an epoxy paste to create a smooth bonding surface.
- Apply the epoxy primer coat to the prepared surface.
- Apply the saturating resin to the CFRP fabric (wet layup method) or apply adhesive to the pre-cured CFRP laminate.
- Press the CFRP into the resin using a roller to remove air voids and ensure full contact.
- Apply additional layers if required by the design, with proper orientation and overlap.
- Apply a protective topcoat if the CFRP will be exposed to UV light or physical damage.
Important notes: CFRP design and installation must be done under the direction of a licensed engineer per ACI 440.2R guidelines. The system is only as good as the bond to the concrete substrate, so surface preparation is critical. CFRP has poor fire resistance unless protected by a fire-rated coating or encasement.
Cathodic Protection
For structures with widespread corrosion where patching alone is not cost-effective, cathodic protection can stop the corrosion process electrochemically. The system makes the rebar the cathode in an electrochemical cell, which prevents the oxidation reaction that causes rust.
Impressed current systems use an external power supply and surface-mounted anodes (typically titanium mesh embedded in a concrete overlay or conductive coating). These are common on parking garages and bridge decks.
Sacrificial anode systems use zinc or other metals that corrode preferentially, protecting the steel rebar without an external power supply. These are simpler but may not be effective for heavily contaminated concrete.
Cathodic protection is a specialty discipline that requires an experienced corrosion engineer and ongoing monitoring and maintenance.
Material Selection: Getting the Right Repair Material
Choosing the wrong repair material is a common and expensive mistake. The repair material must be compatible with the existing concrete in several ways:
Compressive strength. The repair material should be similar in strength to the existing concrete. Using a repair mortar that is significantly stronger than the substrate can cause stress concentrations at the repair boundary that lead to cracking.
Modulus of elasticity. Materials with different stiffness values share load differently, which can cause the stiffer material to attract more stress and fail.
Thermal expansion. Materials that expand and contract at different rates will debond at the interface as temperatures change.
Shrinkage. All cementitious materials shrink as they cure. High-shrinkage repair materials pull away from the existing concrete, creating cracks at the repair boundary. Use low-shrinkage or shrinkage-compensating repair mortars.
Bond strength. The repair material must bond reliably to the prepared concrete substrate. Test the substrate with a pull-off adhesion test before committing to a repair material.
Project Management for Concrete Repair Work
Concrete repair projects have unique scheduling challenges. Material cure times, weather sensitivity, multi-phase access requirements (especially in occupied parking garages), and phased shoring sequences all need careful coordination.
Using project management software designed for construction helps you track the multiple phases and dependencies in a concrete repair project. With Projul, you can schedule each repair phase, track material deliveries, manage subcontractor coordination, and monitor costs against your bid in real time.
Repair projects are especially prone to scope changes as hidden damage is uncovered during the work. A good change order tracking system is essential for keeping the project profitable. Request a demo to see how Projul handles change orders and cost tracking for specialty contractors.
Quality Control and Documentation
Document every step of the repair process:
- Pre-repair condition photos with measurements
- Sounding survey results mapped on drawings
- Concrete testing reports
- Repair material product data sheets and batch numbers
- Surface preparation verification (pull-off tests)
- Repair placement photos showing rebar cleaning, material application, and finished repairs
- Cure time and temperature records
- Post-repair sounding to verify the repair is bonded
This documentation protects you if there is a warranty claim and demonstrates to the owner and engineer that the work was done properly.
Knowing When to Walk Away
Not every concrete repair project is worth bidding. If the structure has widespread ASR, extensive carbonation to the rebar depth, or systemic design deficiencies that caused the deterioration, the repairs may not be cost-effective. Sometimes the honest recommendation is partial or full replacement rather than throwing repair dollars at a structure that will continue to deteriorate.
Having the confidence to make that recommendation, backed by testing data and engineering judgment, builds your reputation as a contractor who puts the client’s interests first. That kind of trust is worth more than any single repair contract.
Wrapping Up
Structural concrete repair is skilled, technical work that rewards contractors who invest in training, quality materials, and proper methods. Understanding the science behind concrete deterioration, selecting the right repair approach, and executing with attention to detail sets your work apart from contractors who just slap mortar on a spall and move on.
If you are looking for better tools to manage your concrete repair projects, from bidding and scheduling to job costing and documentation, take a look at what Projul offers. Purpose-built project management for contractors who take their work seriously.
Frequently Asked Questions
What causes spalling in concrete structures?
How do you test for delamination in a concrete structure?
When should you use epoxy injection versus routing and sealing for crack repair?
How strong is a carbon fiber wrap compared to adding steel reinforcement?
Can you do structural concrete repairs in cold weather?
How long do structural concrete repairs last?
What certifications should a concrete repair contractor have?
How much does structural concrete repair cost per square foot?
Related Articles

BIM Clash Detection: How to Catch Conflicts Before They Cost You on the Jobsite
BIM Clash Detection: How to Catch Conflicts Before They Cost You on the Jobsite Every contractor has a story about the...
Read More →
Asphalt Paving and Compaction Guide: Mix Types, Laydown Temperatures, and Quality Testing
Asphalt paving looks straightforward from a distance. A truck dumps material, the paver lays it down, and rollers...
Read More →
Construction Jobsite Wi-Fi & Connectivity Guide: Setting Up Reliable Internet in the Field
A practical guide to getting reliable internet on construction job sites. Learn about cellular hotspots, mesh networks,...
Read More →