Temporary Fencing for Construction Sites Guide
Temporary fencing is one of those things you don’t think much about until you need it. Whether you’re keeping the public off your jobsite, meeting local permit requirements, or just trying to stop material theft overnight, the right fencing setup can save you a lot of headaches and a surprising amount of money.
I’ve seen contractors treat temp fencing as an afterthought, throwing up whatever panels they can find at the last minute. That approach usually leads to code violations, stolen materials, or worse, someone wandering onto an active site and getting hurt. None of those outcomes are cheap to deal with.
This guide breaks down everything you need to know about temporary fencing and barriers for construction projects, from picking the right type to getting it installed properly and keeping costs under control.
Types of Temporary Construction Fencing
Not all temp fencing is created equal. The type you need depends on your project scope, location, and what you’re trying to keep in or out. Here’s a rundown of the most common options.
Chain Link Panel Fencing
This is the workhorse of construction site fencing. Standard panels come in 6-foot and 8-foot heights, usually in 10- or 12-foot wide sections. They connect with clamps and sit in weighted bases (concrete blocks or steel feet) so you don’t have to dig post holes. Chain link panels are durable, reusable, and easy to reconfigure as your site layout changes through different project phases.
Best for: most general construction projects, commercial builds, residential subdivisions.
Plastic/Polymer Barrier Fencing
Lightweight orange or green mesh fencing attached to T-posts or rebar stakes. This is the cheapest option and the fastest to install, but it’s really only good for marking boundaries, not keeping anyone out. A determined person can step right over or through it. Think of it as a visual deterrent and boundary marker, not actual security.
Best for: marking excavation perimeters, delineating work zones within a larger site, low-risk rural projects.
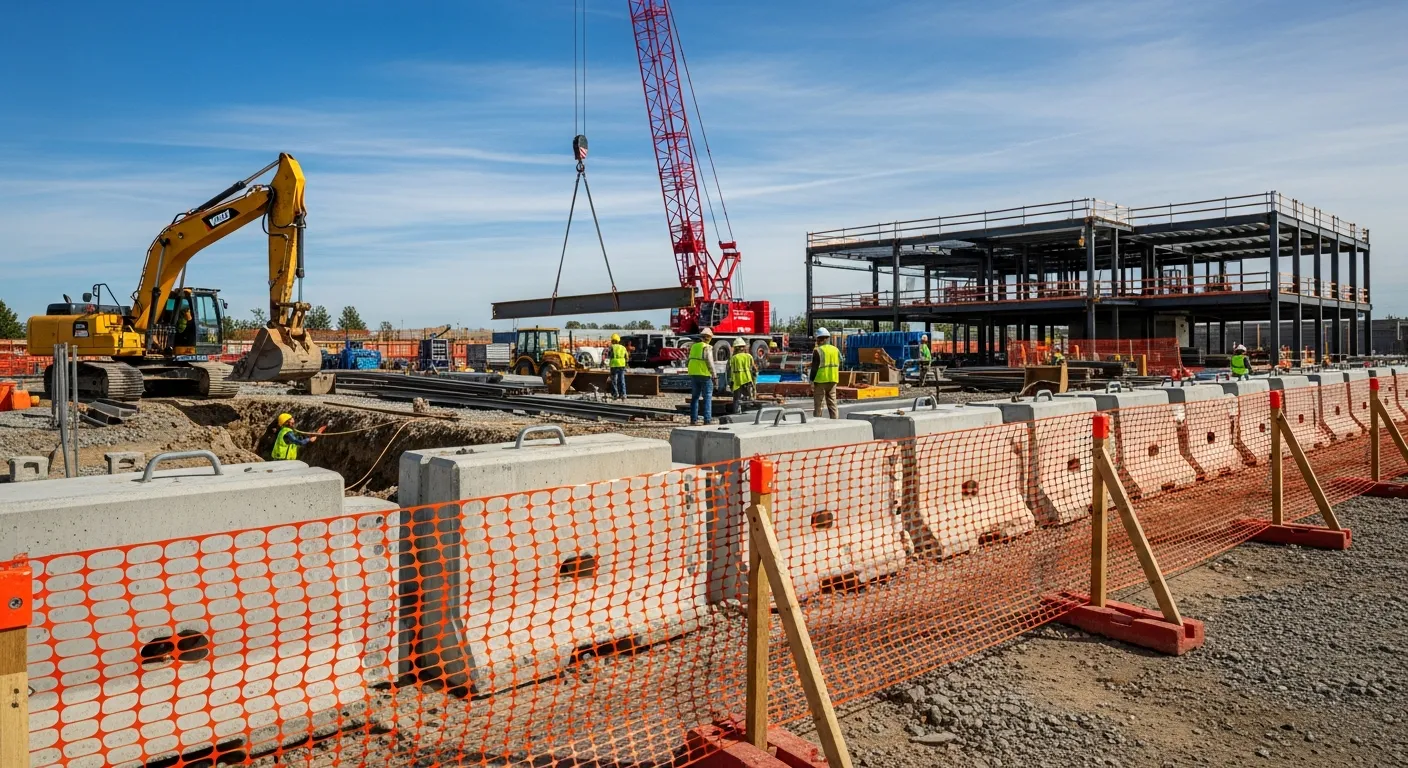
Concrete Jersey Barriers
These are the heavy hitters. Jersey barriers weigh 4,000 to 6,000 pounds each and provide serious vehicle and pedestrian control. You’ll see them on highway projects, urban construction, and anywhere you need to physically stop vehicles from entering your work zone. They require a crane or forklift to place, but once they’re down, they aren’t going anywhere.
Best for: roadwork, urban projects near traffic, sites requiring vehicle impact protection.
Water-Filled Barriers
Plastic barriers that you fill with water on-site. They’re lighter to transport than concrete (empty, they weigh around 50 pounds each) but provide reasonable impact resistance once filled. They come in bright colors for high visibility. The trade-off is they’re less durable than concrete and can crack in freezing temperatures if the water isn’t treated.
Best for: temporary traffic control, parking lot projects, events, situations where you need to move barriers frequently.
Hoarding (Solid Panel Fencing)
Plywood or composite panel walls, typically 8 feet tall, that completely block the view into your site. Hoarding is common on urban commercial projects where the city or property owner wants to screen the construction from public view. It’s more expensive to install and takes longer to set up than chain link, but it also provides wind protection and keeps dust from blowing onto neighboring properties.
Best for: urban commercial projects, sites adjacent to retail or restaurants, projects with strict dust control requirements.
Portable Crowd Control Barriers
Metal barricades (sometimes called bike rack barriers) that interlock to form a continuous fence line. These are lightweight, quick to set up, and easy to store. They won’t stop a vehicle, but they’ll direct pedestrian traffic away from your work zone.
Best for: sidewalk work, short-duration projects, pedestrian traffic management.
When Temporary Fencing Is Required
Understanding when you’re legally required to install temp fencing will keep you out of trouble with inspectors and protect you from liability claims. Here are the most common triggers.
Local Building Codes and Permits
Most cities require temporary fencing as a condition of your building permit. The specifics vary, but common requirements include fencing around any active construction site within city limits, 6-foot minimum height, self-closing and self-latching gates, and signage with contractor contact information. Some jurisdictions require you to submit a fencing plan as part of your permit application. Don’t skip this step. A stop-work order because your fencing doesn’t meet code is an expensive delay.
OSHA Requirements
OSHA doesn’t have a single “you must fence your site” rule, but several standards effectively require barriers in specific situations. Open excavations over 6 feet deep need physical barriers or guardrails. Floor openings and wall openings require protection. Scaffolding areas need to be barricaded from foot traffic below. Keeping up with OSHA compliance requirements is critical. Violations don’t just come with fines. They come with project shutdowns.
Contract and Insurance Requirements
Even when the law doesn’t explicitly require fencing, your general liability policy probably expects it. If someone gets hurt on your unfenced site, your insurer may deny the claim, arguing you didn’t take reasonable precautions. Review your construction business insurance policy carefully. Many contracts, especially on commercial and government work, include specific fencing requirements in the project specs.
Common Sense Situations
Beyond legal requirements, there are plenty of situations where fencing just makes sense: sites near schools or playgrounds, projects in high-theft areas, work involving hazardous materials, demolition projects with falling debris risk, and any time you have open trenches, pits, or other fall hazards. Your safety plan should address perimeter security for every project.
Installation Tips That Save Time and Money
Getting your temp fencing right the first time saves you from rework, code violations, and the frustration of chasing down panels that blew over in last night’s storm.
Plan Your Layout Before You Order
Walk the site perimeter with a wheel measure and sketch out your fencing plan. Account for gate locations (you’ll need at least two: one for vehicles, one for pedestrian access), corners (which need extra bracing), and any sections that need to accommodate utility access or material deliveries. Order 10% more panels than your measurement says you need. Damaged panels, awkward corners, and layout changes always eat into your inventory.
Get Your Base Right
The number one reason temp fencing fails is inadequate base support. On pavement, use concrete-filled tire bases or steel plate bases. On soil, you can drive posts, but make sure they’re at least 18 inches deep. For high-wind areas, sandbag the bases and add bracing every 40 to 50 feet. If your site is on a slope, stagger the panels rather than trying to follow the grade with one continuous run. Staggering prevents gaps at the bottom where the ground drops away.
Gates Matter More Than You Think
Your gates are the most-used and most-abused part of your fencing system. Invest in proper gate hardware: heavy-duty hinges, a reliable latch mechanism, and chains with padlocks for after-hours security. Self-closing hinges are required in many jurisdictions, and they’re worth installing even where they aren’t. A gate that stays open defeats the purpose of the entire fence. Position your vehicle gate so delivery trucks can pull in without blocking the street. Nothing annoys neighbors and city officials faster than a concrete truck backing up traffic because your gate is in the wrong spot.
Don’t Forget Signage
Most codes require specific signage on construction fencing: “No Trespassing,” contractor name and phone number, permit number, and in some cases, project description and timeline. Some jurisdictions also require signage in multiple languages. Post signs at every gate and at regular intervals along the fence line (every 100 feet is a good rule of thumb). Missing signage is a common and easily avoidable citation.
Plan for Phases
Your fencing layout will probably need to change as the project progresses. The excavation phase might need fencing in different locations than the framing phase. Build flexibility into your plan. Use panel fencing systems that are easy to reconfigure rather than driven posts that have to be pulled and reset. If you’re using construction scheduling software, add fencing reconfiguration as a task in your schedule so it doesn’t get forgotten.
Securing the Perimeter: Beyond Just Fencing
A fence is your first line of defense, but it’s not your only one. Jobsite theft costs the construction industry billions of dollars every year, and a determined thief can get through chain link fencing in seconds with a pair of bolt cutters. Here’s how to build a layered security approach.
Lighting
A well-lit site is a major theft deterrent. Install temporary lighting at all gates and along the perimeter, especially in corners and blind spots. Solar-powered construction lights have gotten cheap enough that there’s no good excuse to leave your site dark. Motion-activated lights are even better because they draw attention to anyone moving around after hours.
Camera Systems
Portable construction site cameras have come a long way. Battery-powered, cellular-connected units can be mounted on fence posts and monitored from your phone. Some systems include motion alerts and two-way audio so you can challenge trespassers remotely. The cameras pay for themselves if they prevent even one material theft.
Material Management
Lock up high-value materials and tools in a job box or shipping container every night. Don’t leave copper pipe, wire, or power tools sitting out in the open behind nothing but a chain link fence. Track your materials and equipment closely. Good jobsite organization habits make it obvious when something goes missing, which means you catch theft early instead of discovering it weeks later during inventory.
Access Control
Know who’s on your site and when. On larger projects, a sign-in sheet or digital check-in system at the gate keeps track of workers, delivery drivers, and visitors. This isn’t just about security. It’s also about accountability and knowing who was on site if something goes wrong. Managing access gets more complex when you have subcontractors on site, so establish clear protocols from day one.
Coordination with Local Authorities
Let the local police department know about your project, especially if it’s in a high-crime area. Many departments offer construction site patrols and can add your site to their regular rounds. Some cities even have dedicated construction crime units. A quick phone call at the start of the project can provide extra eyes on your site at no cost.
Cost Considerations and Budgeting for Temp Fencing
Temp fencing costs can sneak up on you if you don’t plan for them. Here’s a realistic breakdown of what to expect and how to keep costs manageable.
Rental vs. Purchase
For most contractors, renting is the way to go unless you’re running multiple projects simultaneously or you know you’ll need fencing for more than 8 to 10 months. Here’s the math:
Projul is trusted by 5,000+ contractors. See their reviews to find out why.
Renting chain link panels: $3 to $7 per linear foot per month (delivery, setup, and pickup usually included). A typical 500-linear-foot perimeter runs $1,500 to $3,500 per month.
Purchasing chain link panels: $15 to $40 per linear foot upfront. That same 500-foot perimeter costs $7,500 to $20,000 to buy outright. You break even on purchase vs. rental somewhere around the 6 to 10 month mark, depending on your local market.
If you buy, factor in storage and transportation costs between projects. Panels take up a lot of trailer space, and they get bent and damaged in storage. You’ll also need to invest in bases, clamps, and gate hardware.
Hidden Costs to Watch For
Delivery and pickup fees: Some rental companies include these, others charge $200 to $500 per trip. Ask upfront.
Damage charges: Rental companies charge for bent panels, missing clamps, and graffiti. Keep your panels in decent shape and document their condition at delivery.
Permit fees: Some cities charge a separate permit fee for construction fencing, typically $50 to $200.
Relocation costs: If you need to move fencing during the project, you’ll pay for it, either in rental company fees or your crew’s labor time. Build this into your project budget.
Privacy screening: Adding mesh privacy screen to chain link panels adds $1 to $3 per linear foot. Cities often require it on projects adjacent to residential areas.
Wind damage repairs: Privacy screening catches wind like a sail. In high-wind areas, you’ll spend more on bracing and may need to replace screening multiple times during a long project.
Putting It in Your Estimate
Temp fencing should be a line item in every project estimate, not buried in general conditions or overhead. Break it out so clients can see the cost and understand why it’s necessary. A typical fencing line item includes panel rental, delivery and pickup, gates and hardware, privacy screening (if required), signage, lighting, and any required permits.
For a standard commercial project with 600 linear feet of fenced perimeter and an 8-month duration, expect to budget $15,000 to $30,000 for fencing and related security measures. That’s a small price compared to the cost of a single liability claim or a major material theft.
Make sure your cost tracking system captures fencing expenses so you can refine your estimates on future projects. Contractors who track this closely almost always find that their initial temp fencing budgets were too low.
Common Mistakes and How to Avoid Them
After years of watching contractors deal with temp fencing issues, certain mistakes come up over and over. Here’s what to watch out for.
Mistake #1: Waiting Until the Last Minute
Don’t order your fencing the day before you break ground. Lead times for rental fencing can be 1 to 2 weeks during busy season, and longer if you need specialty items like hoarding or jersey barriers. Order early and schedule delivery as part of your mobilization plan.
Mistake #2: Ignoring Wind Loads
Chain link panels with privacy screening act like sails. If you don’t account for wind loads with proper bracing and weighted bases, you’ll be picking up toppled fencing after every storm. In high-wind areas, reduce the spacing between bases and add diagonal bracing at regular intervals.
Mistake #3: Skipping the Inspection
Many jurisdictions require a fencing inspection before you can begin work. It’s usually a quick check, but if you fail because your fence is too short, your gates don’t self-close, or you’re missing signage, you’ll lose a day or more. Know the requirements and meet them before the inspector shows up. Stay on top of all your construction safety inspections to avoid this kind of delay.
Mistake #4: Not Maintaining the Fence
Temp fencing takes a beating over the life of a project. Panels get knocked over by equipment, gates get damaged by trucks, and wind shreds privacy screening. Walk the fence line weekly and fix problems immediately. A damaged fence is worse than no fence in some ways because it signals that you don’t care about site security.
Mistake #5: Forgetting to Budget for Removal
At the end of the project, someone has to take down the fencing and haul it away. If you’re renting, the company handles pickup, but you still need to schedule it and make sure the site is accessible. If you purchased your fencing, you need labor and a trailer to pull it out. Don’t let fence removal become an afterthought that delays your project closeout.
Mistake #6: Using the Wrong Type for the Job
Plastic mesh fencing on a site that needs real security is a waste of money. Concrete barriers where chain link would do the job is overkill. Match the fencing type to the actual risks and requirements of your project. If you’re not sure what’s required, call the building department and ask. A five-minute phone call beats a failed inspection every time.
Temporary fencing might not be the most exciting part of running a construction project, but it’s one of those details that separates well-run operations from chaotic ones. Get it right, and it quietly does its job in the background, keeping people safe, materials secure, and inspectors happy. Get it wrong, and you’re dealing with stolen tools, stop-work orders, and liability exposure you didn’t need.
Try a live demo and see how Projul simplifies this for your team.
Take the time to plan your fencing, budget for it properly, and maintain it throughout the project. Your future self will thank you.
Frequently Asked Questions
How tall does temporary construction fencing need to be?
How much does temporary construction fencing cost per linear foot?
Is temporary fencing required on all construction sites?
Can I install temporary construction fencing myself or do I need a contractor?
How long can temporary construction fencing stay up?
Related Articles

Concrete Tilt-Up Construction: A Contractor's Complete Field Guide
Tilt-up construction accounts for roughly 15 percent of all industrial and commercial buildings in North America. This...
Read More →
How to Implement Construction Software Without Losing Your Mind
Most construction software rollouts fail. Not because the software is bad, but because the rollout was rushed. Here are...
Read More →
How Selections Can Pay for Themselves in Three Easy Steps
Most contractors lose thousands each year on wrong material orders, slow client decisions, and missed upsell chances....
Read More →