Thermal Bridging & Continuous Insulation Guide for Contractors | Projul
If you have ever pulled up a thermal image of a finished wall and seen bright stripes of heat bleeding right through the stud lines, you already know what thermal bridging looks like. What you might not know is how much money it costs your clients and how much liability it can create for your company when energy performance falls short of code requirements.
This guide is written for contractors who build walls, not for engineers who write papers about them. We will walk through the physics in plain language, show you where the problems hide, cover the code requirements you need to hit, and give you practical installation details so your crews can get continuous insulation right the first time.
What Thermal Bridging Actually Is and Why It Costs You Money
Every wall assembly has two types of materials in it: insulation that resists heat flow and framing that conducts it. When you fill a 2x6 stud bay with R-19 fiberglass batts, you get R-19 performance across the insulation. But the stud sitting right next to that batt only delivers about R-6.5 for the same thickness. Heat always takes the path of least resistance, and those studs are a highway.
In a typical wood-framed wall, studs, plates, headers, and cripples make up roughly 25 percent of the wall area. That means a quarter of your wall is performing at R-6.5 while three-quarters perform at R-19. The math on the whole assembly drops the effective R-value down to around R-14 or R-15. Your client paid for R-19 and got R-15. That is a 20 percent reduction in performance.
With steel framing, the situation gets worse. Steel conducts heat roughly 400 times faster than wood. A steel-framed 2x6 wall with R-19 cavity insulation can deliver an effective R-value as low as R-7 or R-8. That is a 60 percent loss. Your client is paying to heat the outdoors.
This is not a theoretical problem. It shows up in higher utility bills, comfort complaints, callback requests, and in cold climates, condensation inside the wall cavity that leads to mold and rot. If you are tracking your job costs properly, you will see these callbacks eating into your margins.
Where Thermal Bridges Hide in Real Buildings
Thermal bridges are not limited to stud bays. They show up everywhere framing or structural elements penetrate the insulation layer. Here is where your crews should be looking:
Wall assemblies. Studs get all the attention, but the top and bottom plates, window headers, jack studs, king studs, and corner framing all create thermal bridges. A typical window rough opening has six to eight extra framing members compared to a standard stud bay. Every one of them is a heat highway.
Rim joists and band boards. The rim joist at each floor level is one of the worst thermal bridges in residential construction. It sits right at the intersection of the floor system and the exterior wall, and it is often left with minimal insulation or none at all. Even when you stuff fiberglass in there, the wood rim joist itself bridges through.
Roof-to-wall connections. Where the roof truss or rafter meets the exterior wall, the insulation often gets compressed or interrupted. The heel height of the truss determines how much insulation you can fit at the eave, and in many older designs, the R-value drops to almost nothing right where the wall meets the roof.
Penetrations. Structural steel beams that extend through exterior walls, concrete balcony slabs that connect interior and exterior floors, shelf angles on masonry buildings, and even anchor bolts all create point or linear thermal bridges.
Foundation connections. Where the wood framing meets the concrete foundation is another common trouble spot. Concrete has an R-value of about R-1 per 8 inches. That sill plate connection is bleeding heat into the ground.
If you are managing commercial construction projects, the steel-and-concrete connections at balconies and parapets can account for up to 30 percent of total building heat loss. That is a number that will make any building owner sit up and pay attention.
Understanding Continuous Insulation and Code Requirements
Thousands of contractors have made the switch. See what they have to say.
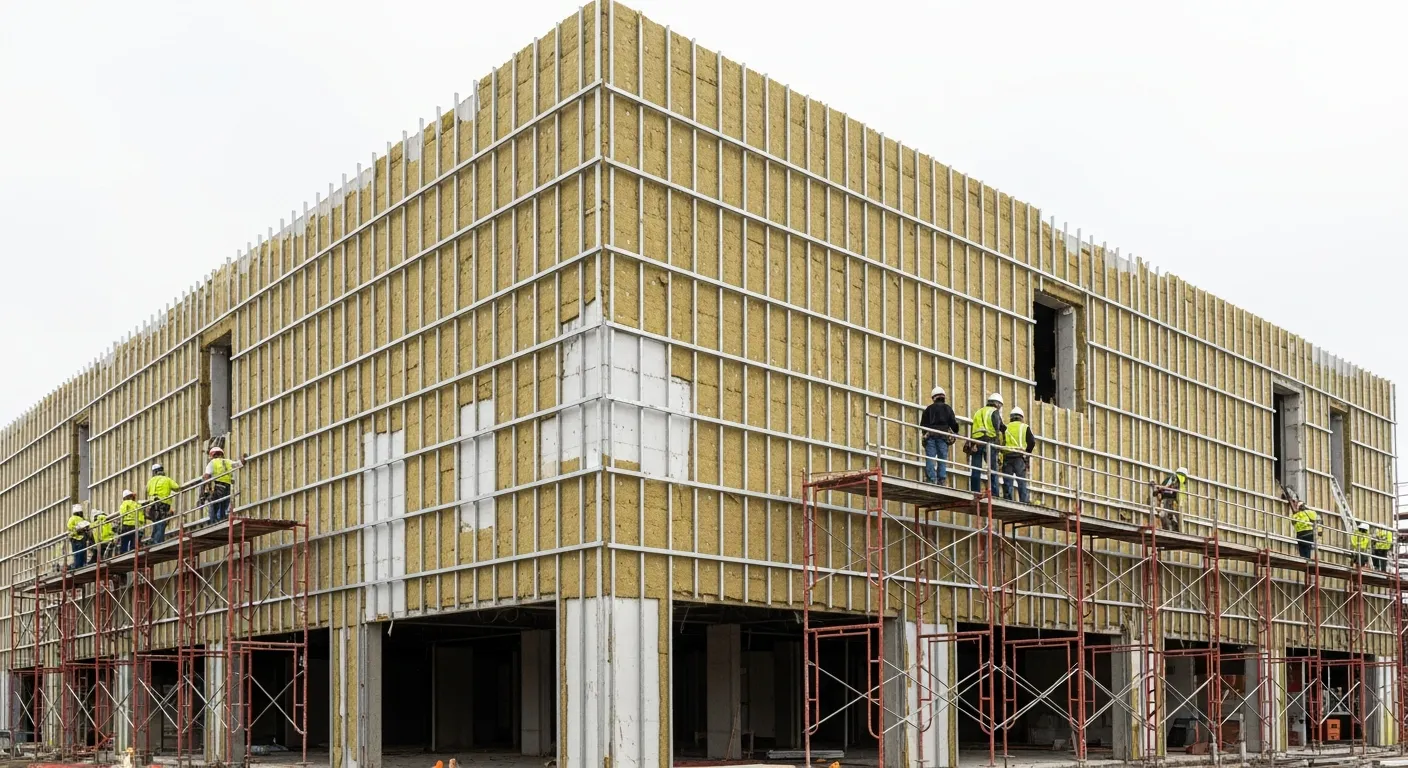
Continuous insulation (ci) is exactly what it sounds like: an unbroken layer of insulation that runs across the entire building envelope, including over the framing members. Instead of relying only on insulation stuffed between studs, you add a layer on the outside (or sometimes the inside) that covers everything, studs and all.
The International Energy Conservation Code (IECC) has been pushing continuous insulation requirements further with each update. The 2021 IECC requires continuous insulation on above-grade walls in Climate Zones 4 through 8 for residential construction and in most zones for commercial buildings. If you work anywhere with cold winters, which is most of the United States, you need to know how to install ci.
Here is a simplified breakdown of the 2021 IECC residential wall requirements:
- Climate Zones 1-3: Cavity insulation only is generally acceptable, though ci is always a good practice
- Climate Zone 4: R-5 ci or R-20 cavity (with some trade-off options)
- Climate Zone 5: R-5 ci plus R-20 cavity, or R-13 ci plus R-13 cavity
- Climate Zones 6-8: R-10 ci plus R-20 cavity, or higher combinations
Your local jurisdiction may have adopted an older or newer version of the IECC, and some states (like Washington and Vermont) have their own codes that exceed the IECC minimums. Always verify with your local building department before finalizing your wall assembly.
The key point for contractors: if you are bidding work and not accounting for continuous insulation in your estimates, you are either leaving money on the table or setting yourself up for a code compliance problem during inspection.
Continuous Insulation Materials and Wall Assembly Options
Choosing the right ci material depends on your climate, your wall type, your budget, and your moisture management strategy. Here are the main options and how they compare:
Extruded Polystyrene (XPS). R-5 per inch. Moisture resistant. The pink, blue, or green boards you see at every lumber yard. XPS works well in below-grade and high-moisture applications. The downside is that it is a vapor retarder, so you need to be careful about where you place it in the wall assembly to avoid trapping moisture. It also has a higher global warming potential than some alternatives, which matters on projects pursuing green certifications.
Expanded Polystyrene (EPS). R-3.8 to R-4.2 per inch. More vapor-open than XPS. Lower cost per R-value. EPS is a solid choice for many above-grade applications, especially in EIFS (exterior insulation and finish system) assemblies. It is lighter than XPS, which your crew will appreciate on large wall sections.
Polyisocyanurate (Polyiso). R-5.7 to R-6.5 per inch (at 75 degrees F). The highest R-value per inch of any common rigid foam. Polyiso is popular in commercial construction, especially on roofs. The catch is that its R-value drops in cold temperatures, performing closer to R-5 per inch at 25 degrees F. If you are building in Minnesota, that performance dip matters for your wall calculations.
Mineral Wool Boards. R-4.2 per inch. Non-combustible (huge advantage for fire-rated assemblies). Vapor-open, which makes moisture management simpler. Mineral wool also drains water that gets behind cladding, acting as a secondary drainage plane. The downsides are higher cost and heavier weight compared to foam boards.
For residential wood-frame construction, a common assembly that meets code in Climate Zone 5 looks like this: Drywall, vapor retarder (where required), 2x6 studs with R-20 cavity insulation, OSB or plywood sheathing, weather-resistant barrier, 1-inch polyiso or XPS (R-5 to R-6), furring strips for a rainscreen gap, and cladding.
For commercial steel-frame construction, the ci layer is even more critical because of the extreme conductivity of steel. A typical assembly might include: Interior finish, steel studs with cavity insulation, exterior sheathing, air and water barrier, 2 to 3 inches of mineral wool or polyiso ci, and cladding on a clip-and-rail system.
If you are working on projects that involve spray foam versus rigid insulation, you will want to understand how those choices interact with your continuous insulation strategy.
Installation Best Practices Your Crew Needs to Know
The best insulation spec in the world means nothing if the installation is sloppy. Here is what your field crews need to get right:
Joints and seams. Stagger the joints of ci boards like you would stagger brick courses. No through-joints from interior to exterior. If you are using two layers of ci, offset the joints between layers. Tape all seams with the manufacturer’s recommended tape, and make sure the tape sticks. Cold, dusty, or wet surfaces kill tape adhesion.
Fastener management. Every screw or nail that goes through ci is a mini thermal bridge. Use the minimum number of mechanical fasteners recommended by the manufacturer. Where possible, use insulation-specific fasteners with thermal breaks (plastic or fiberglass washers). For cladding attachment, clip-and-rail systems that minimize penetrations outperform face-screwed furring strips.
Window and door integration. This is where most ci installations fail. The ci must extend up to and connect with the window and door frames. Do not leave a gap of uninsulated framing at the rough opening. Use preformed insulation bucks or extend the ci into the rough opening to maintain the thermal break. Flash your windows to the air and water barrier layer, not just to the face of the ci.
Air sealing. Continuous insulation and continuous air barriers are not the same thing, but they work together. Rigid foam boards can function as your air barrier if you tape and seal every joint and seal the perimeter to the foundation, roof, and penetrations. Some contractors prefer a separate membrane air barrier behind the ci. Either approach works, but the air barrier must be continuous and inspectable.
Moisture management. In heating-dominated climates (Zones 4 and above), the ci layer needs to keep the interior face of the sheathing warm enough to prevent condensation. As a rule of thumb, at least one-third of the total wall R-value should be outboard of the sheathing in Zone 4, and at least 40 percent in Zones 5 and 6. Getting this ratio wrong leads to moisture accumulating inside the wall and eventually causing rot or mold.
Rainscreen gaps. If your cladding is anything other than masonry veneer (which has its own air gap), install furring strips over the ci to create a minimum 3/8-inch rainscreen gap. This gap allows drainage and drying behind the cladding and dramatically improves the moisture performance of the wall. It also gives you a straightforward surface to fasten cladding to.
Track all of these details in your project documentation. If you are using construction management software like Projul, you can create checklists for ci installation quality control and assign inspections to your field leads before the wall gets closed up.
Selling Continuous Insulation to Clients and Protecting Your Business
For residential remodelers and custom home builders, continuous insulation adds cost. There is no way around that. A 1-inch layer of polyiso over a 2,000-square-foot home costs roughly $1,500 to $3,000 in material and $2,000 to $4,000 in additional labor. But the conversation with your client should not focus on cost alone.
Energy savings. A properly insulated wall assembly with ci saves 15 to 30 percent on heating and cooling costs compared to the same wall without ci. For a home with $3,000 annual energy costs, that is $450 to $900 per year. The ci upgrade pays for itself in 4 to 8 years, and the building will stand for 50 to 100 years.
Comfort. Walls without thermal bridges have more uniform surface temperatures. That eliminates cold spots, reduces drafts near exterior walls, and makes the space feel comfortable at lower thermostat settings. Homeowners notice the difference, even if they cannot explain the science behind it.
Durability. Keeping the sheathing warm and dry extends the life of the wall assembly. Less condensation means less mold, less rot, and fewer warranty callbacks. Your profit margins stay healthier when you are not sending crews back to fix moisture damage two years after closing.
Code compliance. As energy codes get stricter, buildings without ci will fail inspection in more and more jurisdictions. Getting ahead of code changes means you are not scrambling to redesign wall assemblies mid-project. If you are keeping up with building code changes for 2026, you already know the direction things are heading.
Liability protection. If you build a wall that does not meet the energy code and the building inspector catches it, you are tearing off cladding and adding insulation at your expense. If the inspector does not catch it and the homeowner has comfort or moisture problems later, you are looking at a potential claim. Either way, doing it right the first time is cheaper.
When you sit down to estimate a project that requires or would benefit from continuous insulation, make sure your budgeting process accounts for the additional material, labor, and the longer cladding attachment details. Present it to the client as a standard part of building a quality structure, not as an optional upgrade. The code requires it in most places, the science supports it everywhere, and the building performs better with it.
See how Projul makes this easy. Schedule a free demo to get started.
Your crews might grumble about the extra steps the first few times. But once they have the process down, installing ci becomes routine. The key is training them on the details once, documenting the process, and holding the standard on every project. That is how you build a reputation for doing things right, and that reputation is what keeps the phone ringing.
Frequently Asked Questions
What is thermal bridging in construction?
How much energy loss does thermal bridging cause?
What is continuous insulation and why do contractors need to know about it?
Does continuous insulation replace cavity insulation?
What are the most common continuous insulation materials?
Related Articles

BIM Clash Detection: How to Catch Conflicts Before They Cost You on the Jobsite
BIM Clash Detection: How to Catch Conflicts Before They Cost You on the Jobsite Every contractor has a story about the...
Read More →
Asphalt Paving and Compaction Guide: Mix Types, Laydown Temperatures, and Quality Testing
Asphalt paving looks straightforward from a distance. A truck dumps material, the paver lays it down, and rollers...
Read More →
Construction Jobsite Wi-Fi & Connectivity Guide: Setting Up Reliable Internet in the Field
A practical guide to getting reliable internet on construction job sites. Learn about cellular hotspots, mesh networks,...
Read More →