Tile Setting and Thin-Set Guide for Contractors
Tile Setting Done Right: A Contractor’s Field Guide
Tile work separates the careful crews from the sloppy ones faster than almost any other finish trade. A bad tile job is impossible to hide. Every crooked line, hollow spot, and cracked grout joint is on display for the homeowner to see every single day. If you are running a tile crew or doing installs yourself, getting the fundamentals right is not optional.
This guide covers the real-world knowledge that matters on the job site: choosing the right thin-set for your substrate, prepping surfaces so they actually hold tile, planning layouts that look professional, and grouting joints that stay intact for years.
Choosing the Right Thin-Set Mortar
Thin-set selection is one of the most overlooked parts of a tile job. Guys grab whatever bag is on the shelf and wonder why tiles are falling off six months later. The mortar you pick has to match your tile type, substrate, and installation conditions.
Modified vs. Unmodified Thin-Set
Modified thin-set has latex or polymer additives mixed into the dry powder. These additives give the mortar better adhesion, more flexibility, and improved water resistance compared to basic unmodified thin-set.
Use modified thin-set for:
- Porcelain and large format tiles (lower absorption rates need the extra grab)
- Floor installations with anticipated movement or deflection
- Exterior applications where freeze-thaw cycles are a concern
- Shower walls and wet areas
Unmodified thin-set is straight Portland cement and sand. It cures through hydration and needs moisture to set properly. Some membrane manufacturers, like Schluter for their Ditra system, specifically require unmodified thin-set because it needs to cure through moisture exchange with the membrane. Using modified over Ditra can trap moisture and weaken the bond.
White vs. Gray Thin-Set
This is not just cosmetic. White thin-set matters when you are installing glass tile, light-colored natural stone, or any translucent material. Gray thin-set showing through the tile will change its appearance. For opaque porcelain or ceramic, gray is fine and usually a few dollars cheaper per bag.
Large and Heavy Tile (LHT) Thin-Set
When you are setting tiles larger than 15 inches on any side, or heavy stone slabs, step up to an LHT-rated thin-set. These mortars have higher bond strength and better sag resistance for wall applications. They also have extended open time so you can work with large tiles without the mortar skinning over before you get them set.
Rapid-Set Thin-Set
Rapid-set mortars cure in 3 to 6 hours instead of 24. They are useful for commercial work where the floor needs to be back in service quickly, or for bathroom remodels where the homeowner needs their only shower operational. The trade-off is less working time and higher material cost.
Substrate Preparation
More tile failures trace back to bad substrate prep than any other single cause. You can use the best thin-set and the most expensive tile on the market, and it will all fail if the surface underneath is not right.
Concrete Substrates
Concrete needs to be clean, structurally sound, and properly cured (at least 28 days for new pours). Here is your checklist:
- Flatness: Check with a 10-foot straightedge. Acceptable tolerance is 1/4 inch variation for tiles under 15 inches, and 1/8 inch for larger format tiles. Grind down high spots and fill low spots with a floor leveling compound.
- Moisture: Test with a calcium chloride test or relative humidity probe. Excess moisture will destroy the bond. Most thin-set manufacturers have maximum moisture limits in their technical data sheets.
- Contaminants: Remove any curing compounds, paint, oil, adhesive residue, or sealers. These create a bond breaker between the thin-set and concrete. Mechanical grinding or shot blasting works best.
- Surface profile: The concrete needs some texture for the thin-set to grab. A smooth, steel-troweled finish should be roughed up with a grinder or scarifier. CSP 3 to CSP 5 is the target.
Plywood and Wood Subfloors
Never set tile directly on plywood. Wood expands and contracts with humidity changes, and that movement will crack grout and break tile bonds. You need a layer between the wood and the tile:
- Cement backer board (CBU): 1/4 inch for walls, 1/2 inch for floors. Fasten with backer board screws every 8 inches, tape and thin-set all joints. The plywood underneath should be at least 3/4 inch exterior grade, and total floor assembly (plywood plus backer board) should hit at least 1-1/8 inch thickness.
- Uncoupling membranes: Products like Ditra, Strata Mat, or NobleSeal CIS go directly over plywood and absorb substrate movement so it does not transfer to the tile. Follow each manufacturer’s requirements for thin-set type and application.
- Deflection: The floor assembly needs to meet L/360 deflection requirements for ceramic and stone tile. If the floor bounces when you walk across it, add more support from below before tiling.
Shower and Wet Area Substrates
Shower installations get the most callbacks if done wrong. Moisture management is everything:
- Waterproof membrane: Every shower needs a waterproof layer behind the tile. Options include sheet membranes (Kerdi, GoBoard), liquid-applied membranes (RedGard, Hydroban), or foam board panels with integrated waterproofing.
- Shower pan: The floor of the shower needs a proper pre-slope to the drain, a waterproof pan liner or bonded membrane, and a final mortar bed or foam pan sloped at 1/4 inch per foot to the drain.
- Cement board in wet areas: If using cement backer board in a shower, remember that CBU is not waterproof by itself. You still need a membrane over it.
Wall Substrates
For wall tile in dry areas, you can set over painted drywall if the paint is well bonded and you skim the surface with a thin coat of thin-set first for better grip. In wet areas, use cement board or a waterproof backer, never paper-faced drywall. Greenboard (moisture-resistant drywall) is acceptable in damp areas like bathroom walls away from the shower, but not inside the shower enclosure.
Layout Planning
A good layout is what separates professional tile work from amateur installs. Before you open a single bag of thin-set, dry-lay your tile and plan every cut.
Start with the Focal Point
Identify the most visible area in the room. In a bathroom, it is usually the wall you see when you walk in. In a kitchen, it is the area you see from the main living space. Center your layout on that focal point so the eye lands on full tiles, and push cuts to less visible areas.
The Rule of Half
Never have a sliver cut along a wall or at a transition. If your layout results in cuts smaller than half a tile width, shift the entire layout by half a tile so the cuts at both ends are closer to equal. A 4-inch cut on each side looks far better than a full tile on one side and a 1-inch sliver on the other.
Check for Square
Do not assume any room is perfectly square. Snap chalk lines and check corners with a 3-4-5 triangle. If the room is out of square, decide where you want to show it (usually along a wall that will have base trim or a vanity covering the cut) and keep your tile lines straight and parallel to the focal wall.
Offset Patterns
Running bond (brick pattern) is the most common offset layout. For tiles larger than 12 inches on any side, limit the offset to 33% (one-third) instead of 50% (half). The reason: large tiles are rarely perfectly flat, and a 50% offset puts the edge of one tile right at the crown of the next tile, making lippage almost unavoidable.
Diagonal and Herringbone Layouts
These patterns look great but require more cuts and generate more waste. Plan for 15% to 20% extra material on diagonal layouts and up to 25% for herringbone. Snap clear reference lines at 45 degrees from your starting point and dry-lay enough tile to verify the pattern before committing.
Setting the Tile
With your substrate prepped and layout planned, here is how to put tile on the wall or floor so it stays there.
Mixing Thin-Set
Follow the bag instructions for water ratio. Mix with a drill and paddle until you have a smooth, peanut-butter-like consistency with no dry lumps. Let it slake (rest) for 10 minutes, then remix briefly without adding more water. The slake period lets the polymers fully activate.
Do not add more water to thin-set that has started to set up in the bucket. This is called “retempering” and it weakens the mortar. Mix smaller batches if you are working slowly.
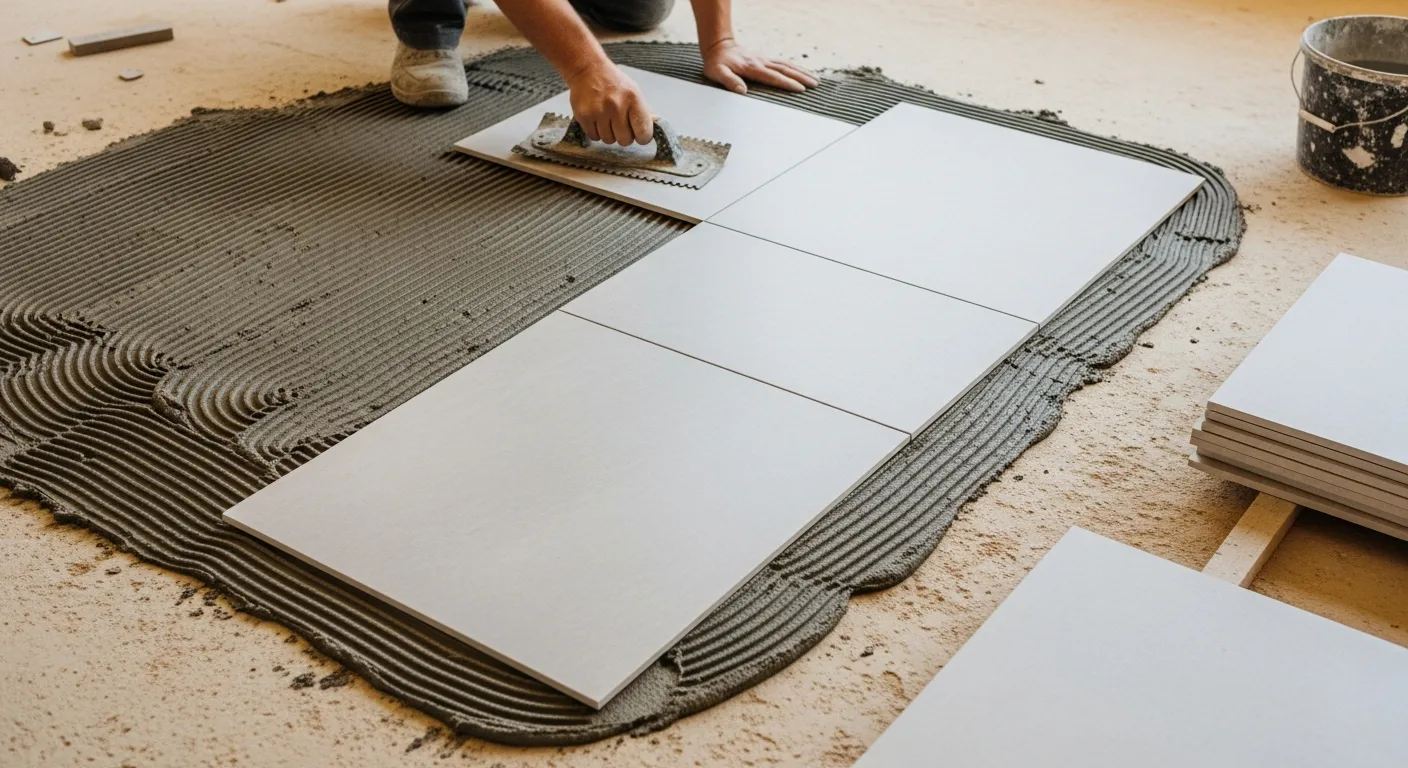
Troweling Technique
Spread thin-set with the flat side of the trowel first, pressing it into the substrate to create a bond coat. Then comb through it with the notched side, holding the trowel at a consistent 45-degree angle. Keep your trowel lines going in one direction, not swirling. Directional trowel lines make it easier to collapse the ridges when you set the tile, eliminating air pockets.
Trowel size matters. Here are general guidelines:
| Tile Size | Trowel Size |
|---|---|
| Mosaic to 4x4 | 1/4” x 1/4” V-notch |
| 4x4 to 8x8 | 1/4” x 3/8” square |
| 8x8 to 12x12 | 1/2” x 1/2” square |
| 12x12 to 16x16 | 1/2” x 1/2” square |
| 12x24 and larger | 1/2” x 1/2” or 3/4” x 3/4” square |
Back-Buttering
For any tile larger than 12x12, back-butter the tile in addition to troweling the substrate. Spread a thin, flat layer of thin-set on the back of the tile with the flat side of the trowel. This fills any voids in the tile back and dramatically improves coverage. For natural stone, back-buttering is mandatory because the backs are often uneven.
Pull a tile up periodically and check coverage. You want at least 80% coverage on floors and 95% on walls and wet areas. If you see bare spots or only the tips of trowel ridges transferred, your technique needs adjustment.
Using a Leveling System
Tile leveling clips and wedges are not a crutch. They are a professional tool that saves time and produces flatter results, especially on large format tile. Insert clips at each tile joint, push the wedge in to pull adjacent tiles flush, and remove the clips after the thin-set cures. The cost per square foot is minimal compared to the callback cost of a lippage complaint.
Working Time and Open Time
Thin-set has two time limits that matter:
- Pot life: How long the mixed mortar stays usable in the bucket. Usually 2 to 4 hours depending on the product and temperature.
- Open time: How long you can spread thin-set on the substrate before it skins over and will not bond. Usually 15 to 30 minutes. Test by touching the thin-set with your finger. If it does not transfer to your finger, it has skinned over and you need to scrape it off and apply fresh.
In hot, dry, or windy conditions, open time drops significantly. Work in smaller sections and mist the substrate lightly (not soaking wet) to extend working time.
Grouting
Grout fills the joints between tiles and gives the installation its finished look. Like thin-set, choosing the right grout and applying it correctly matters more than most people think.
Grout Types
Sanded grout: Contains fine sand for strength. Use for joints 1/8 inch and wider. The sand helps fill the joint without excessive shrinkage.
Unsanded grout: Smoother texture without sand particles. Use for joints narrower than 1/8 inch and for polished stone or glass tile where sand could scratch the surface.
Epoxy grout: Two-part system that is waterproof, stain-proof, and incredibly durable. It costs more and is harder to work with (shorter working time, requires special cleaning), but it performs far better in wet areas and high-traffic commercial spaces. Does not need sealing.
Grout Joint Width
Tile manufacturers specify minimum grout joint widths in their installation guidelines. Rectified (precision-cut) tiles can go as narrow as 1/16 inch, but most tiles need at least 1/8 inch. Wider joints (3/16 inch and up) are more forgiving of slight tile size variations and are easier to fill completely.
Do not skip grout joints to get a “seamless” look. Grout joints allow for slight tile size differences, provide space for movement, and make individual tile replacement possible without destroying adjacent tiles.
Grouting Technique
Wait until thin-set is fully cured (24 hours minimum). Mix grout to a thick, smooth consistency. Spread it diagonally across the tile joints with a rubber float, pressing firmly to pack the joints completely. Work in sections of about 10 to 15 square feet.
After spreading, hold the float at a 45-degree angle and scrape excess grout off the tile surface with diagonal strokes. Wait 15 to 20 minutes until a light haze forms, then wipe with a damp (not dripping) sponge using circular motions. Rinse the sponge frequently. Do a final wipe once the grout has firmed up to remove remaining haze.
Movement Joints and Caulk Lines
Where tile meets a wall, a different material (countertop, tub, shower pan), or a change in plane (wall to floor), use color-matched caulk instead of grout. These are movement joints, and rigid grout will crack at these transitions. Same goes for any joint wider than the maximum recommended by the grout manufacturer.
Managing Tile Projects with Better Tools
Tile work involves coordinating material orders, scheduling substrate prep and tile setting on different days, and tracking labor across multiple rooms or units. If you are still managing this on paper or with text messages, you are leaving money on the table.
Projul’s construction management features let you schedule each phase of a tile job, track material costs against your bid, and keep your crew updated in real time. You can assign substrate prep to one crew and tile setting to another, with automatic notifications when each phase is complete.
If you want to see how it works for your business, request a demo or check out pricing plans that fit crews of any size.
Final Tips from the Field
- Always buy 10 to 15% extra tile. Cuts, breakage, and future repairs eat into your count fast.
- Store tile flat and in a dry area. Tile stacked on edge can warp or chip.
- Read the technical data sheets. Every thin-set and grout product has specific requirements. Five minutes of reading prevents five hours of rework.
- Document your work. Take photos of waterproofing, substrate prep, and coverage checks before they get covered up. These protect you if there is ever a dispute.
- Temperature matters. Most thin-set and grout require installation temps between 50 and 100 degrees Fahrenheit. Working outside that range causes curing problems.
- Clean as you go. Dried thin-set on tile faces and in grout joints is a nightmare to remove. Wipe it up while it is fresh.
Tile installation is detail work, and the details are what make or break the job. Get your substrate right, choose the correct materials for the application, plan your layout before you start, and take the time to set and grout properly. Your callbacks will drop, your reviews will improve, and your tile jobs will be the ones that last.
Frequently Asked Questions
What is the difference between modified and unmodified thin-set?
How thick should thin-set be applied under tile?
Can you tile directly over plywood?
What trowel size should I use for 12x24 tile?
How long should thin-set cure before grouting?
What causes tile to pop off the wall?
Do I need to seal grout after installation?
How do I prevent lippage with large format tiles?
Related Articles

Concrete Tilt-Up Construction: A Contractor's Complete Field Guide
Tilt-up construction accounts for roughly 15 percent of all industrial and commercial buildings in North America. This...
Read More →
How to Implement Construction Software Without Losing Your Mind
Most construction software rollouts fail. Not because the software is bad, but because the rollout was rushed. Here are...
Read More →
How Selections Can Pay for Themselves in Three Easy Steps
Most contractors lose thousands each year on wrong material orders, slow client decisions, and missed upsell chances....
Read More →