Window and Door Framing Guide: Rough Openings, Flashing, and Installation | Projul
Getting window and door openings right during the framing stage is one of those things that either makes the rest of the job smooth or creates headaches that follow you through every trade that comes after. A rough opening that is out of square, too tight, or improperly flashed will cause problems at installation, problems with water intrusion, and problems when the homeowner calls you back six months later with a leak.
This guide walks through the entire process, from calculating rough opening sizes to framing the opening, installing flashing, and setting the window or door unit. If you frame residential or light commercial, this is the stuff that matters.
Understanding Rough Openings
A rough opening (RO) is the framed opening in the wall where the window or door unit will be installed. The RO is always larger than the actual unit to allow for shimming, leveling, and insulation around the perimeter.
How to Determine Rough Opening Size
Every window and door manufacturer publishes rough opening dimensions for their products. This is not something you guess at. Before you frame a single opening, you need to know the exact products being installed.
The general rules of thumb:
- Windows: Rough opening is typically 1/2 inch wider and 1/2 inch taller than the window unit. So a 36” x 48” window needs a 36-1/2” x 48-1/2” rough opening.
- Prehung doors: Rough opening is typically 2 inches wider and 2-1/2 inches taller than the door slab itself. A 36” x 80” door slab usually needs a 38” x 82-1/2” rough opening.
But these are guidelines, not gospel. Always check the manufacturer’s spec sheet for the specific product. Some manufacturers want more clearance, some want less. Vinyl windows often need a bit more room than wood or fiberglass because the frames flex.
Why Accuracy Matters
A rough opening that is too small means you are trimming framing lumber after the fact, which is a pain and can compromise the structural integrity of the header and jack stud assembly.
A rough opening that is too large means excessive shimming, poor support for the unit, and bigger gaps to insulate and seal. It also makes it harder to get the window or door plumb and level.
Off-square openings are the worst. If your rough opening is racked, the window or door will bind, not operate properly, and be nearly impossible to seal against air and water infiltration.
Framing Components
Every window and door rough opening uses the same basic framing elements. Understanding each one and its role is essential.
King Studs
King studs run the full height of the wall, from bottom plate to top plate, just like a regular wall stud. They form the outer edges of the rough opening and carry the normal wall loads. King studs are always full-length, never cut.
Jack Studs (Trimmer Studs)
Jack studs are cut shorter and nailed to the inside face of the king studs. They support the header directly. The top of the jack stud is cut to the exact height where the bottom of the header sits.
For standard 8-foot walls with a standard door height, jack studs are typically around 81 inches long (accounting for the bottom plate, door height, and clearance). For windows, the jack stud height depends on the header height, which is determined by the window size and placement.
Headers
The header spans the top of the opening and carries the load from above down through the jack studs. In load-bearing walls, the header is a critical structural element.
Common header construction:
- Doubled dimensional lumber: Two 2x pieces with 1/2-inch plywood sandwiched between them to bring the total thickness to 3-1/2 inches (matching the wall stud depth). Use 2x6, 2x8, 2x10, or 2x12 depending on span and load.
- LVL (laminated veneer lumber): Engineered lumber that handles longer spans and heavier loads. Sized by the engineer.
- Steel angle or channel: Used when the architect wants minimal header depth for design reasons, or when loads are heavy.
- Non-load-bearing walls: A single flat 2x4 or doubled 2x4 on edge is usually enough. It just keeps the drywall from cracking.
Sill Plate (Window Only)
For windows, the horizontal framing member at the bottom of the rough opening is the sill plate (sometimes called the rough sill). It is typically a single or doubled 2x member nailed between the jack studs at the proper height.
Cripple Studs
Cripple studs are short studs that maintain the regular stud spacing above the header (between header and top plate) and below the window sill (between sill plate and bottom plate). They keep the wall plane consistent for sheathing and drywall attachment.
Step-by-Step: Framing a Window Opening
Here is the process for framing a window rough opening in a standard 2x4 or 2x6 wall.
Step 1: Mark the Layout
On the bottom plate, mark the center of the window location from the plans. Then measure out half the rough opening width in each direction to mark the inside faces of the jack studs. Add 1-1/2 inches on each side for the jack studs themselves, then another 1-1/2 inches for the king studs.
Step 2: Cut and Install King Studs
Cut king studs to full wall height and nail them in place at the marked locations. These go in just like regular studs, face-nailed through the top and bottom plates.
Step 3: Determine Header Height
Calculate the header height based on the window size and desired placement. In most residential work, window heads are set at 6 feet 10 inches to align with door headers, creating a consistent line across the room. The bottom of the header sits at this height.
Step 4: Cut and Install Jack Studs
Measure from the top of the bottom plate to the bottom of the header. Cut jack studs to this length. Nail them to the inside face of each king stud with 10d or 16d nails, staggered every 12 to 16 inches.
Step 5: Build and Install the Header
Build the header to the correct size for the span and load. Nail it in place on top of the jack studs, flush with the outside edge of the wall. Face-nail through the king studs into the ends of the header.
Step 6: Install Cripple Studs Above the Header
Fill in cripple studs between the header and top plate at the regular stud spacing (16 or 24 inches on center). Toenail or use framing clips.
Step 7: Install the Sill Plate
Measure down from the bottom of the header by the rough opening height. Cut and install the rough sill between the jack studs at this location. Level it carefully.
Step 8: Install Cripple Studs Below the Sill
Fill in cripple studs between the sill plate and the bottom plate at regular spacing.
Step 9: Check for Square
Measure diagonals of the rough opening. They should be equal within 1/8 inch. If they are not, adjust before moving on. Fixing it now takes five minutes. Fixing it later takes much longer.
Step-by-Step: Framing a Door Opening
Door openings follow the same principles with a few differences.
No Sill Plate
Doors do not have a sill plate at the bottom. The bottom plate runs through the opening during framing and is cut out after the wall is raised and secured. This keeps the wall rigid during assembly and lifting.
Taller Jack Studs
Jack studs for doors run from the bottom plate to the header. For a standard 80-inch door with a prehung frame, the jack stud height is typically around 82-1/2 inches (measured from the subfloor or top of the bottom plate, depending on whether you plan to cut the plate out).
Double Jack Studs on Wide Openings
For door openings wider than 4 feet (like sliding glass doors or double French doors), double up the jack studs on each side. The extra jack studs provide more bearing area for the heavier header loads.
Cutting the Bottom Plate
After the wall is raised, plumbed, and secured, cut the bottom plate out of the door opening flush with the jack studs. Use a reciprocating saw and clean up the cut with a chisel. Do not cut it before the wall is up, or the wall will be weak at the opening during lifting.
Flashing Window and Door Openings
Flashing is where a lot of crews either get it right or create future water problems. Modern building codes and manufacturer warranties are very specific about flashing requirements, and inspectors are checking for it.
The Drainage Plane Concept
The wall assembly needs a continuous drainage plane that sheds water to the exterior. Windows and doors create holes in that drainage plane. Flashing integrates the window or door into the drainage plane so water that hits the opening gets directed back outside.
Think of it like shingles on a roof: everything overlaps so water flows down and out, never getting trapped behind a layer.
Sill Flashing
The sill is where most window leaks happen. Water runs down the wall, hits the top of the window, runs along the head flashing, drips to the jambs, runs down to the sill, and needs a clear path back outside.
- Cut self-adhesive flashing tape (like DuPont FlexWrap or Zip System tape) to extend 6 to 8 inches beyond the opening on each side.
- Apply it to the rough sill, folding it up onto the jack studs 3 to 4 inches on each side.
- At the corners, fold the tape carefully to create a watertight pocket. No wrinkles, no gaps.
- Some builders use a back dam (a small piece of sill material raised slightly at the back of the sill) to prevent water from running inward.
Jamb Flashing
After the sill flashing is in place, apply flashing tape to both jambs. The jamb flashing overlaps on top of the sill flashing. This layering ensures water on the jamb flashing runs down onto the sill flashing and out.
Head Flashing
Head flashing goes on last and overlaps the top of the jamb flashing. In many installations, the head flashing integrates with the weather-resistant barrier (house wrap) that will be applied to the wall sheathing.
House Wrap Integration
When the WRB (house wrap like Tyvek or felt paper) is installed:
- Cut the WRB at the opening in a modified I-cut
- Fold the side flaps into the opening and tape them to the jamb flashing
- The top flap of the WRB laps over the head flashing, not behind it
- The bottom of the WRB goes over the sill flashing on the exterior side
This creates continuous water management from the WRB to the window flashing to the sill pan and back outside.
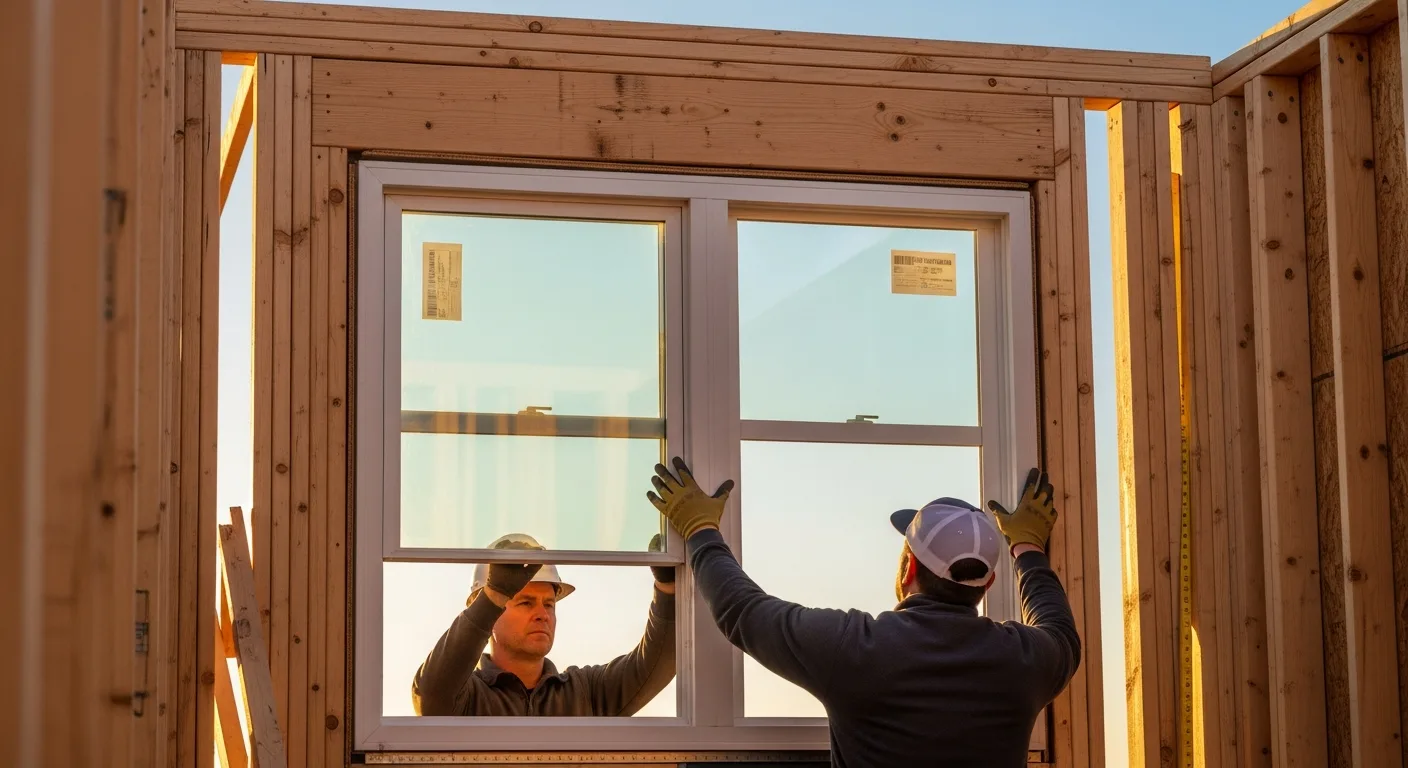
Installing the Window Unit
With the rough opening framed and flashed, you are ready to set the window.
Dry Fit First
Set the window in the opening without any sealant or fasteners first. Check:
- Does it fit the opening with consistent gaps on all sides?
- Is the opening square? (Check by seeing if the window sits flat and even)
- Can you shim it plumb and level within the available gap?
If something is off, fix it now. Do not try to force a window into a bad opening.
Apply Sealant
Run a bead of sealant (typically a high-quality polyurethane or silicone caulk) along the sill flashing where the window will sit. Do not run sealant across the entire bottom of the sill. Leave the lower corners open so any water that gets behind the window can weep out.
Set and Shim the Window
- Set the window on the sill, centering it in the opening.
- Shim the sill to get the window level. Check with a 4-foot level.
- Shim the jambs to plumb the window. Place shims at each fastener location and at the midpoint.
- Check that the window operates properly (opens, closes, locks) before driving fasteners.
Fasten the Window
Drive fasteners (typically screws or roofing nails) through the mounting flange or jamb into the framing. Follow the manufacturer’s fastener schedule. Do not overdrive fasteners, or you will distort the frame.
Insulate the Gap
Fill the gap between the window frame and the rough opening with low-expansion spray foam labeled for window and door use. Do not use standard expanding foam. It can generate enough pressure to bow the frame and make the window bind.
Alternatively, use loosely packed fiberglass batt insulation or backer rod with caulk. The goal is to fill the gap without putting pressure on the frame.
Final Flashing
Apply flashing tape over the mounting flange, following the same layering principles: bottom first, then sides, then top. The top piece always overlaps the side pieces.
Installing the Door Unit
Prehung door installation follows similar principles with a few additional considerations.
Check the Subfloor
The door sits on the subfloor (or directly on the slab), so the surface needs to be flat and level at the threshold. Any hump or dip will affect how the door hangs and closes.
Set the Door
- Apply sealant to the sill area for exterior doors.
- Set the door unit in the opening from the exterior side.
- Shim the hinge side first. Start with the top hinge, then the bottom, then the middle. Get the hinge jamb perfectly plumb.
- Check the gap between the door slab and the jamb (the reveal). It should be consistent at about 1/8 inch all the way around.
- Shim the strike side to match.
- Check operation: the door should swing freely, latch smoothly, and stay in any position you leave it (not swing open or closed on its own).
Fasten Through Shim Points
Drive screws through the jamb at each shim location. For exterior doors, replace at least one screw in each hinge with a 3-inch screw that reaches into the king stud for extra security.
Common Mistakes and How to Avoid Them
Framing Mistakes
- Not checking plans for window and door sizes before framing. Measure twice, frame once.
- Rough openings out of square. Always check diagonals.
- Undersized headers in load-bearing walls. This is a structural issue. Get it right.
- Forgetting to double jack studs on wide openings. Check code requirements for your span.
Flashing Mistakes
- Wrong layering order. Water flows down. Every layer must overlap the one below it.
- Gaps or wrinkles in tape. These are water entry points. Take the time to get clean adhesion.
- Sealing the bottom of the sill completely. Leave weep paths for water to exit.
- Skipping the sill pan. This is the single most important piece of window flashing.
Installation Mistakes
- Forcing a window into a bad opening. Fix the opening first.
- Using standard expanding foam. It will bow the frame. Use only low-expansion door and window foam.
- Overdriving fasteners. This distorts the frame and affects operation.
- Not checking operation before final fastening. Once the window or door is fully fastened and foamed, fixing operational issues is much harder.
Tracking Framing and Installation Work
Window and door installation involves coordination between multiple trades: framers, siding crews, trim carpenters, and sometimes the window supplier’s own installation team. Keeping track of what is installed, what is on order, and what needs inspection is a juggling act.
Construction management software like Projul helps you keep all of this organized. You can track each opening from framing through installation and inspection, manage material orders and delivery dates, and keep your crew schedule tight so the right people show up on the right day.
If you are running framing or window installation crews and want to see how Projul handles scheduling, job costing, and field communication, schedule a demo and take a look for yourself.
Building Code Considerations
A few code items to keep in mind for window and door framing and installation.
Egress Requirements
Bedrooms require at least one egress window with minimum dimensions: 5.7 square feet of opening area, 20 inches minimum width, 24 inches minimum height, and a maximum sill height of 44 inches from the floor. Frame your rough opening at the right height to meet these requirements.
Energy Code
Modern energy codes require specific U-factor and SHGC ratings for windows. These affect product selection, not framing, but you need to know what products are specified so you frame the correct rough opening sizes.
Structural Requirements
Header sizes, jack stud requirements, and lateral bracing around openings are all governed by code. In seismic zones, there may be additional requirements for holdowns and strapping at openings. Always follow the structural drawings.
Flashing and Moisture Management
The IRC (International Residential Code) has specific requirements for flashing at windows and doors. Section R703.8 covers flashing requirements. Many local jurisdictions have additional or more stringent requirements, especially in wet climates.
Final Thoughts
Window and door framing is one of those construction skills where precision during the rough work saves enormous amounts of time and trouble during the finish stages. A well-framed, properly flashed opening accepts the window or door unit cleanly, seals against water, and holds up for decades without issues.
Take the time to check manufacturer’s rough opening specs, frame square and plumb, flash in the correct layering order, and verify operation before you call the opening complete. Your future self (and the homeowner) will thank you.
Need help keeping your framing projects on schedule and on budget? Check out Projul’s pricing to find a plan that fits your operation.
Frequently Asked Questions
How much bigger should a rough opening be than the window or door?
What size header do I need for a window or door opening?
Do I need jack studs on both sides of a window opening?
What is the best flashing method for windows in new construction?
Can I use spray foam to insulate around windows and doors?
What is a sill pan and do I need one?
How do you frame a door opening in a load-bearing wall?
Should windows be shimmed from the sides or the bottom?
Related Articles

BIM Clash Detection: How to Catch Conflicts Before They Cost You on the Jobsite
BIM Clash Detection: How to Catch Conflicts Before They Cost You on the Jobsite Every contractor has a story about the...
Read More →
Asphalt Paving and Compaction Guide: Mix Types, Laydown Temperatures, and Quality Testing
Asphalt paving looks straightforward from a distance. A truck dumps material, the paver lays it down, and rollers...
Read More →
Construction Jobsite Wi-Fi & Connectivity Guide: Setting Up Reliable Internet in the Field
A practical guide to getting reliable internet on construction job sites. Learn about cellular hotspots, mesh networks,...
Read More →