Winter Construction Tips for Contractors
Winter hits different when you’ve got a project schedule to hold, subs lined up for the next three months, and an owner who doesn’t want to hear about weather delays. Every contractor in a cold climate knows the feeling. You check the forecast, see a week of single digits and snow, and start doing the math on what it costs you per day to sit idle.
Here’s the thing: winter doesn’t have to wreck your schedule. Plenty of crews work through the coldest months every single year. They do it because they plan for it, they adjust, and they don’t treat cold weather like some surprise that showed up uninvited. If you’re running projects in any state that sees real winter, this guide is for you. We’re going to cover the practical, field-tested stuff that keeps work moving when the mercury drops.
Plan Your Winter Schedule Before the First Frost
The biggest mistake contractors make with winter weather isn’t getting caught in a storm. It’s failing to plan for winter at all. If your schedule treats December through February the same as July, you’re setting yourself up to explain delays to your owner every other week.
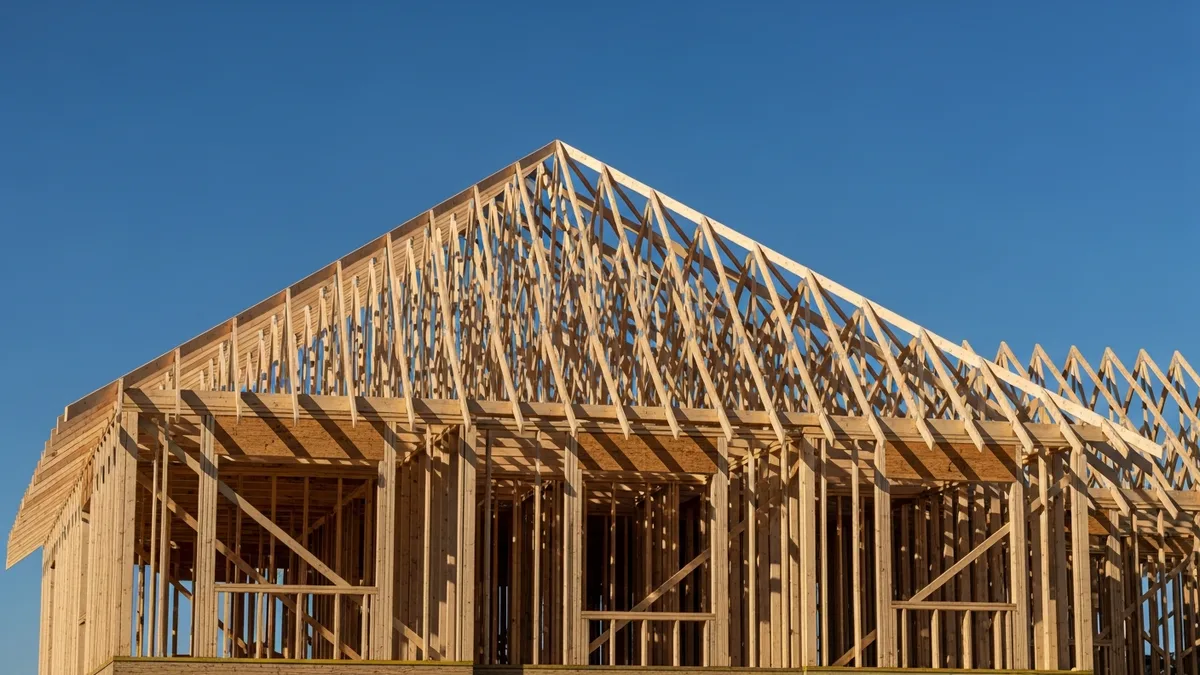
Start building your winter plan during preconstruction. Look at your project timeline and figure out which phases will land in cold months. Then ask yourself: what work can happen regardless of weather? Interior framing, mechanical rough-ins, drywall, paint, trim, electrical, plumbing. All of that can move forward if the building is dried in. Your goal is to get the shell closed before winter hits, so your crews can work inside while the weather does its worst outside.
If you can’t avoid exterior work during winter, build weather days into the baseline schedule. In the Midwest and Northeast, most experienced GCs add 1-2 weather days per week from December through March. That might feel aggressive, but it’s a lot better than promising a completion date you can’t hit. Your scheduling tools should make it easy to model these contingencies and shift tasks around when conditions change.
Sequence your work with weather in mind. Pull concrete and masonry work forward into fall if possible. If you have to pour in winter, schedule it during the warmest windows and have your protection plan ready. Push exterior painting, roofing, and site work to spring if the schedule allows. Think of your winter schedule as a puzzle where you’re constantly moving pieces around to keep productivity up.
One more thing: talk to your subs early. Let them know that winter scheduling means more short-notice changes. Get buy-in on flexible start dates and have backup tasks ready. A sub who shows up to find their work area snowed in and no backup plan is a sub who’s billing you for a wasted trip.
Cold Weather Concrete and Masonry: The Rules That Matter
If there’s one topic that separates experienced cold-weather contractors from everyone else, it’s concrete. Getting concrete right in winter is part science, part art, and part stubbornness. Do it wrong and you’re looking at low-strength slabs, surface scaling, and cracks that show up in spring. Do it right and your winter pours perform just as well as summer ones.
The American Concrete Institute (ACI 306) is your bible here. The short version: take protective measures when ambient temps are below 40°F, and don’t place concrete if temps are expected to drop below 25°F within 24 hours unless you have a solid protection plan.
Here’s what that protection plan looks like in practice:
Before the pour:
- Heat the subgrade. Frozen ground under your pour is a non-starter. Use ground thaw blankets or hydronic heaters to bring the subgrade above freezing at least 24 hours before placement.
- Order your concrete with hot water. Most batch plants will heat the mix water in winter. Ask for a mix temp of 50-65°F at delivery.
- Talk to your ready-mix supplier about accelerators and air entrainment. Calcium chloride accelerators speed up set time, and air entrainment protects against freeze-thaw cycles.
During the pour:
- Test the concrete temperature at the truck. If it arrives below 50°F, send it back.
- Keep your placement and finishing crews moving. The longer fresh concrete sits in cold air, the faster it loses heat.
- Don’t overwork the surface. Cold concrete bleeds slower, and finishing too early traps bleed water, which causes scaling.
After the pour:
- Cover immediately with insulated blankets. For slabs, two layers of insulated blankets on top of the concrete and one layer under the forms is standard.
- Monitor concrete temperature for at least 72 hours. Internal temps should stay above 50°F during initial curing.
- For walls and columns, heated enclosures are usually necessary. Think of it as building a temporary heated tent around your pour.
If you want to go deeper on mix design and placement techniques, check out our concrete basics guide for the fundamentals.
Masonry follows similar rules. Mortar won’t cure properly below 40°F. Use heated sand, hot water in the mix, and protect finished work with tarps and heaters. ASTM C270 and the Masonry Standards Joint Committee have specific cold weather guidelines worth reviewing.
Protecting Your Crew: Cold Weather Safety That Actually Works
Your crew is your most important asset, full stop. Cold stress injuries, including hypothermia, frostbite, and trench foot, are real dangers on winter job sites. OSHA doesn’t set a minimum temperature for outdoor work, but they absolutely require you to address cold stress as a recognized hazard under the General Duty Clause.
The wind chill factor is what actually hurts your people, not just the thermometer reading. A 20°F day with 25 mph winds feels like -3°F. At those levels, exposed skin can get frostbitten in under 30 minutes. Your safety plan needs specific cold weather protocols that kick in at defined thresholds.
Layering is everything. Train your crews on the three-layer system:
- Base layer: moisture-wicking material (not cotton) that pulls sweat away from skin
- Mid layer: insulating fleece or wool that traps body heat
- Outer layer: wind-resistant and waterproof shell that blocks the elements
Warm-up breaks are mandatory, not optional. Set a schedule: below 20°F, crews get a 10-minute warm-up break every hour. Below 0°F, make it every 45 minutes. Have a heated break area on site. This can be a job trailer, a heated tent, or even a running vehicle. Just give people somewhere to get out of the wind and warm their hands.
Watch for the signs. Supervisors need to know what cold stress looks like. Uncontrollable shivering, slurred speech, confusion, and loss of coordination are all red flags. If someone shows these symptoms, get them warm immediately. This isn’t a “tough it out” situation.
Adjust your work schedule. In extreme cold, consider starting later and ending earlier to take advantage of the warmest hours. A 9-to-3 schedule in January might get you more productive hours than an 7-to-5 schedule where the first two hours and last two hours are spent just trying to stay warm.
Keep extra gear on site. Gloves get wet. Boot liners soak through. Hand warmers run out. Have a supply of backup cold weather gear, dry gloves, extra liners, and hand warmers available. It’s cheap insurance against lost productivity and injuries.
Document your cold weather safety protocols and make them part of your daily toolbox talks during winter months. Use your daily logs to track weather conditions, crew hours, and any cold-related incidents. That documentation matters if you ever need to support a delay claim or respond to an OSHA inquiry.
Materials and Equipment: What Cold Does to Your Stuff
Cold weather doesn’t just affect your people. It affects everything on your job site. Materials behave differently in cold temps, and equipment that runs fine in August can become a headache in January. Knowing what to expect keeps you from getting blindsided.
Materials storage and handling:
- Adhesives and sealants: Most construction adhesives have minimum application temperatures, usually around 40°F. Below that, they won’t bond properly. Store them in heated areas and bring them to the work area right before use.
- Paint and coatings: Water-based products will freeze. Even oil-based coatings apply poorly in cold temps. Most manufacturers specify a minimum of 50°F for application and curing. Plan your painting for interior spaces during winter or wait for a warm stretch.
- Lumber and wood products: Cold wood is more brittle. Nailing in below-freezing temps can cause splits, especially near edges. Pre-drill when you can, and store lumber off the ground and under cover to prevent ice and snow absorption.
- Roofing materials: Asphalt shingles get brittle below 40°F and won’t seal properly. If you have to roof in cold weather, store bundles in a heated space and hand-seal each tab. Most roofing manufacturers void warranties for installations below their minimum temp specs.
- Pipe and plumbing: PVC becomes brittle in extreme cold. Use extra care when cutting and handling. Copper conducts cold aggressively, so insulate as you go rather than coming back later.
Equipment in cold weather:
Diesel engines are the obvious one. Below 20°F, you need block heaters, winter-grade diesel fuel (or anti-gel additives), and extra warm-up time. A frozen excavator at 7 AM sets your whole day back.
Hydraulic systems get sluggish in cold weather because the hydraulic fluid thickens. Let equipment idle and warm up before putting it under load. Trying to run cold hydraulics at full capacity can damage seals and pumps.
Battery-powered tools lose capacity in cold temps. Lithium-ion batteries can lose 20-40% of their charge capacity below freezing. Keep batteries in a warm space and swap them frequently. Bring more batteries than you think you need.
Compressed air systems collect moisture, and that moisture freezes in air lines during winter. Use inline dryers and drain your compressor tanks daily. A frozen air hose at the wrong moment shuts down your framing crew, your finish crew, and anyone else running pneumatic tools.
Thousands of contractors have made the switch. See what they have to say.
Plan your equipment maintenance schedule around winter demands. Check antifreeze levels, battery condition, tire pressure (cold drops PSI), and heating systems on all equipment before the season starts. Our site logistics guide covers more on keeping your equipment and material flow organized.
Weather Monitoring and Schedule Adjustments in Real Time
Checking the weather once a week isn’t enough during winter. You need a daily, sometimes hourly, awareness of what’s coming so you can make smart calls about crew deployment and task sequencing.
Set up a weather monitoring routine:
- Check a detailed 10-day forecast every morning during your project planning. Not just temperature, but wind speed, precipitation type, and overnight lows.
- Use weather apps that provide hourly breakdowns. Knowing that it’ll be 35°F at 10 AM but dropping to 22°F by 2 PM changes your whole pour schedule.
- For concrete pours, track the forecast for 72 hours after planned placement. You need to know that your protection plan will hold for the full curing window.
- Subscribe to weather alerts for your job site location. A surprise ice storm is a lot less surprising when you got the alert at 4 AM and already texted your super.
Our weather planning guide goes deeper on setting up a forecasting system that works for construction, not just checking if it’ll rain tomorrow.
Making the call: work or no work?
This is the hardest part. Every day you don’t work costs money. But putting crews in unsafe conditions or placing materials that won’t perform costs more. Here’s a framework that works:
- Green light (above 32°F, light wind, dry): Full operations. Run your normal schedule. Just make sure crews have proper cold weather PPE.
- Yellow light (20-32°F, moderate wind, light precip): Modified operations. Concrete and masonry need protection plans. Exterior work continues with extra safety measures. Warm-up breaks on schedule.
- Red light (below 20°F, high wind, heavy snow/ice): Interior work only. If you don’t have interior work available, it’s a weather day. Don’t risk it.
These thresholds will vary by region. A crew in Minnesota handles 15°F differently than a crew in North Carolina. Adjust for your team’s experience and equipment.
When weather kills your schedule:
Even the best plan takes hits. When weather pushes you off schedule, act fast:
- Reassess the critical path. What tasks actually affect your completion date? Focus your recovery effort there.
- Stack interior crews. If you have interior space available, consider running larger crews or double shifts to make up time on weather-independent tasks.
- Communicate with your owner immediately. Don’t wait until you’re three weeks behind to mention weather delays. Send weekly weather impact reports showing conditions, lost days, and your recovery plan.
- Document everything. If weather delays become a contract issue, your daily logs, weather records, and schedule updates are your evidence. Our guide on delay claims walks through what you need to protect yourself.
Budgeting for Winter: The Costs Nobody Talks About
Let’s talk money, because winter construction comes with costs that don’t show up in your summer estimating. If you’re not pricing winter work accurately, you’re leaving money on the table or, worse, eating costs that should be in the contract.
Direct winter costs to account for:
- Temporary heating: Propane or diesel heaters for enclosures, concrete protection, and warming areas. On a mid-size commercial project, temporary heating can run $2,000-$8,000 per month depending on the region and what you’re protecting.
- Snow removal: Someone has to clear the site, parking areas, and access roads. If you’re GC, that’s usually on you. Budget $500-$2,000 per event depending on site size.
- Insulated blankets and enclosures: Concrete blankets, poly sheeting, scaffold tarps, and temporary walls. These are consumables that need replacement throughout the season.
- Anti-icing chemicals and ground thaw: Pre-treating surfaces, melting ice on scaffolding and walkways, and thawing frozen ground all cost money.
- Extended equipment rental: When weather days stretch your schedule, your crane rental, scaffold rental, and equipment leases extend too. Those daily rates add up fast.
- Overtime and premium pay: Making up lost time often means weekend work or extended shifts during good weather windows. That’s time-and-a-half for most of your labor.
Productivity losses:
This is the big one. Studies from the Army Corps of Engineers and various construction research groups consistently show that productivity drops 10-15% when temps are between 20-32°F, and 20-30% when temps drop below 20°F. That’s not laziness. That’s the physical reality of working in bulky gloves, stopping for warm-up breaks, dealing with frozen materials, and working through icy surfaces.
Factor these productivity hits into your labor estimates. If you bid a winter project using summer production rates, you’re going to lose money. Period.
How to handle it contractually:
- Weather days: Define what constitutes a weather day in your contract. “Below 20°F at 7 AM” or “accumulating snowfall exceeding 2 inches” gives you clear, measurable triggers for excusable delay.
- Cost escalation for winter work: If the owner’s schedule pushes exterior work into winter months, the additional cost of winter protection should be a change order, not something you absorb.
- Weather contingency in the schedule: Include a specific number of weather days in your baseline schedule and document them clearly. This protects you during delay claim disputes.
Track your winter costs separately. Use job cost codes specifically for winter-related expenses. When the project wraps, you’ll have real data to inform your next winter bid. Too many contractors guess at winter costs because they never tracked them accurately on past projects.
Winter construction isn’t easy, but it’s absolutely doable when you plan for it. The contractors who thrive through cold months are the ones who treat winter as a known condition, not an unexpected obstacle. They build contingency into their schedules, protect their crews, plan their material and equipment needs around cold weather realities, and track the costs so they can bid accurately.
If you’re still managing your winter scheduling and daily documentation with spreadsheets and whiteboards, you’re making it harder than it needs to be. Projul’s scheduling and daily log tools give you real-time visibility into weather impacts, schedule changes, and field documentation, all in one place. Book a demo and see how it works before next winter hits.
Want to see this in action? Get a live demo of Projul and find out how it fits your workflow.
Stay warm out there.
Frequently Asked Questions
At what temperature should you stop concrete work?
How much does winter weather typically delay a construction project?
What PPE do construction workers need in cold weather?
Can you pour a foundation in winter?
How do you keep a construction schedule on track during winter?
Related Articles
Construction Electrical Rough-In Guide for General Contractors
The electrical rough-in is where circuit layout, box placement, and wire routing all have to come together before...
Read More →
Interior Finishing for Contractors: The Complete Drywall, Paint, and Trim Guide
Interior finishing is where your project goes from bare studs to a space your client can actually picture living in....
Read More →
Helical Piles and Screw Foundations: The Contractor's Complete Guide
Helical piles are showing up on more and more project specs. This guide covers everything a contractor needs to know...
Read More →