Basement Waterproofing Methods: Interior vs Exterior, Drain Tile, Sump Pumps, and Vapor Barriers | Projul
Water in a basement is one of the most common and frustrating problems in residential construction. It damages finishes, promotes mold growth, ruins stored belongings, and erodes the foundation itself over time. For contractors, waterproofing is one of those things that either works perfectly or fails spectacularly. There is not much middle ground.
The good news is that basement waterproofing is well-understood engineering. The methods are proven, the materials are reliable, and the physics are straightforward: keep water away from the foundation, and if it gets close, give it somewhere to go that is not inside the building.
This guide covers both exterior and interior waterproofing methods, drain tile systems, sump pumps, vapor barriers, and the mistakes that lead to wet basements.
Understanding Why Basements Get Wet
Before we talk about solutions, you need to understand the problem. Water gets into basements through four basic mechanisms.
Hydrostatic Pressure
When the soil around a foundation is saturated, the water exerts pressure against the walls and floor. Concrete is porous, and under enough pressure, water will push through the pores, through cracks, and through cold joints. Hydrostatic pressure is the number one cause of serious basement water problems.
Capillary Action
Water wicks through concrete the same way it wicks through a paper towel. Even without significant pressure, moisture moves through the concrete by capillary action, making walls and floors damp. This is more of a moisture problem than a water problem, but it still causes mold, musty odors, and finish damage.
Vapor Diffusion
Water vapor moves from areas of higher humidity to lower humidity. In most climates, the soil side of a foundation wall is at higher humidity than the interior. Water vapor diffuses through the concrete and into the basement, raising indoor humidity levels.
Surface Water Infiltration
This is the simplest cause and the easiest to fix. Rainwater runs toward the foundation because the grading slopes the wrong way, the gutters are missing or clogged, or downspouts discharge right next to the foundation. The water pools against the wall, finds a crack or gap, and flows in.
Exterior Waterproofing: The Gold Standard
Exterior waterproofing stops water on the outside of the wall before it ever touches the living space. For new construction, there is no good reason to skip it. For existing buildings, it is more expensive because it requires excavation, but it is the most effective method.
Dampproofing vs. Waterproofing
This distinction matters. A lot of builders and homeowners use these terms interchangeably, but they are different products with very different performance.
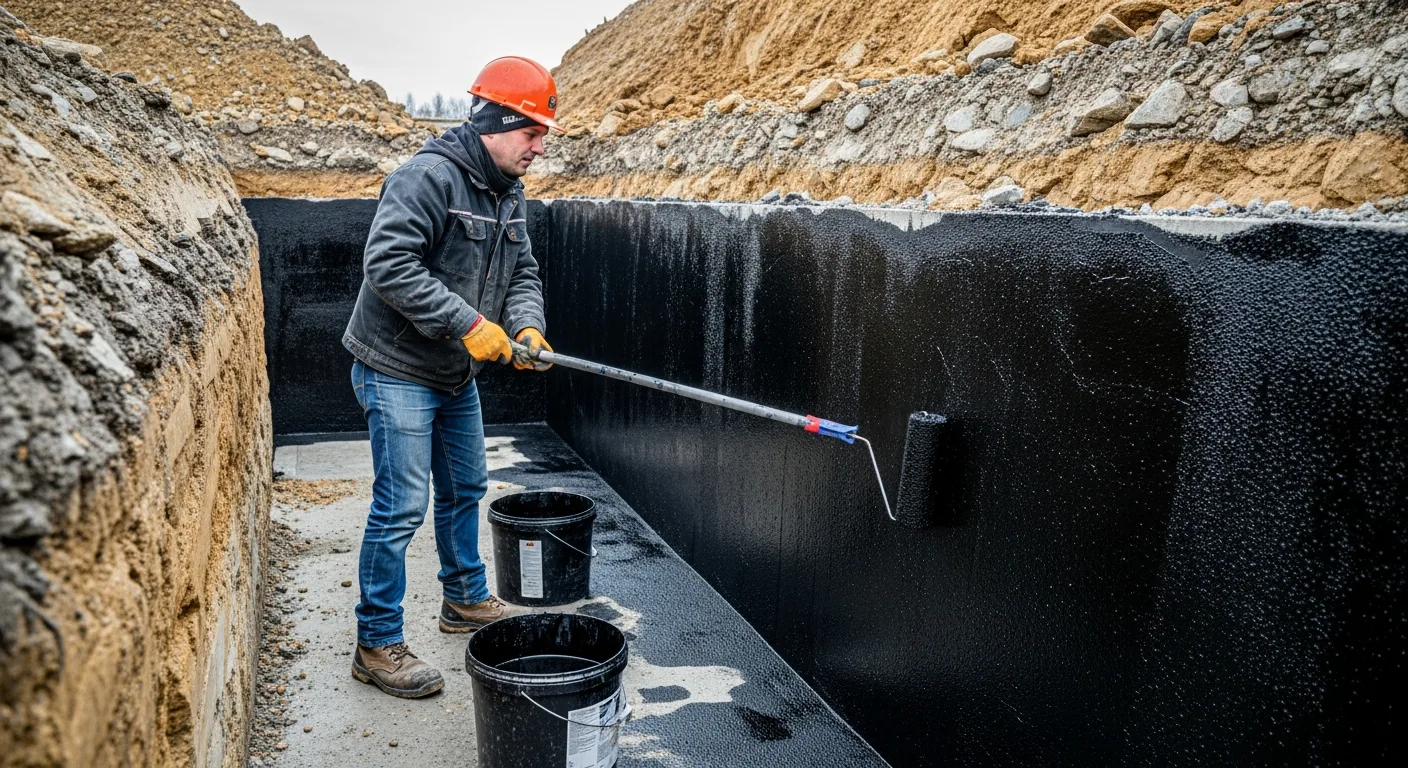
Dampproofing is a thin coat of asphalt-based material (the black stuff you see sprayed on foundation walls). It resists moisture from capillary action and minor soil dampness. It does NOT resist hydrostatic pressure. It is not elastic, so it cracks when the foundation settles. Most building codes require dampproofing as a minimum, but it is not waterproofing.
Waterproofing is a thicker, more durable membrane that bridges cracks, resists hydrostatic pressure, and remains flexible over time. It is applied as a sheet membrane, a spray-applied rubberized coating, or a peel-and-stick membrane.
If you are building a basement that will be finished as living space, spend the money on true waterproofing. The cost difference is small compared to the cost of tearing out a finished basement because the dampproofing failed.
Exterior Waterproofing Methods
Spray-Applied Rubberized Asphalt
This is one of the most common methods for new residential construction. A rubberized asphalt emulsion is sprayed onto the prepared foundation wall at 40 to 60 mils thickness. It cures into a flexible, seamless membrane.
Pros: Seamless application (no joints to fail), good crack-bridging ability, relatively fast to apply, moderate cost.
Cons: Requires dry conditions during application, quality depends heavily on proper mil thickness and coverage, UV-sensitive (must be covered with backfill promptly).
Sheet Membrane (Peel-and-Stick)
Self-adhering rubberized asphalt sheet membranes are applied to the foundation wall in overlapping courses. Seams are sealed with mastic or additional membrane strips.
Pros: Consistent thickness, high-quality membranes have excellent crack-bridging ability, less applicator-dependent than spray products.
Cons: More labor-intensive than spray application, seams are potential failure points if not properly lapped and sealed, higher material cost.
Bentonite Clay Panels
Sodium bentonite clay swells when it gets wet, creating a self-sealing waterproof barrier. It is supplied as panels, sheets, or loose granules that are applied to the foundation wall.
Pros: Self-healing (minor punctures seal themselves when the clay swells), effective against hydrostatic pressure, performs well below the water table.
Cons: Cannot be used where the clay would be constantly wet and unable to dry (it needs wet/dry cycles to function properly), not suitable for all soil types, requires careful backfill to avoid displacement.
Cementitious Coatings
Portland cement-based coatings mixed with waterproofing additives are applied to the positive (exterior) side of the foundation. They bond directly to the concrete and become part of the wall.
Pros: Easy to apply (brush or trowel), bonds permanently to concrete, not affected by UV.
Cons: Rigid (does not bridge cracks), not as effective against high hydrostatic pressure as membrane systems.
Exterior Drainage Board (Protection Board)
Regardless of which waterproofing method you use, install a drainage board (dimple mat or rigid insulation with drainage channels) over the membrane before backfilling. The drainage board does three things:
- Protects the membrane from damage during backfill
- Creates an air gap that allows water to drain down to the footing drain
- Reduces hydrostatic pressure against the membrane
This is cheap insurance. Backfilling directly against a membrane without protection is asking for punctures and tears.
Interior Waterproofing: Managing Water From Inside
Interior waterproofing does not actually stop water from entering the foundation. Instead, it captures water that comes through the wall or floor and routes it to a sump pit for removal. For existing homes where exterior excavation is impractical or too expensive, interior systems are the standard approach.
Interior Drain Tile (French Drain)
This is the backbone of any interior waterproofing system. The process:
- Break out the perimeter of the basement floor along the walls, creating a trench about 12 inches wide and deep enough to reach the bottom of the footing
- Lay perforated pipe (typically 4-inch Schedule 40 PVC or corrugated drainage pipe) in a bed of washed gravel along the base of the footing
- Route the pipe to a sump pit at the lowest point of the basement
- Backfill the trench with washed gravel to within a few inches of the floor surface
- Pour new concrete over the gravel to restore the floor
Some systems also include a wall flashing or membrane that directs water running down the interior face of the foundation wall into the drain tile channel.
Wall Drainage Systems
For walls that seep or weep, a dimple mat membrane is installed against the interior face of the foundation wall. The dimple mat creates an air gap that allows water to drain down the wall and into the drain tile at the floor. The membrane is then covered with a stud wall and drywall for finishing.
This approach does not stop water from coming through the wall. It accepts that the wall will be wet and simply manages where the water goes.
Crack Injection
For specific cracks in poured concrete foundations, injection is an effective repair. There are two main methods:
Epoxy injection: A rigid, structural repair that bonds the crack and restores the concrete’s load-bearing capacity. Best for structural cracks that have stopped moving.
Polyurethane injection: A flexible foam that fills the crack and expands to seal it. Better for non-structural cracks that may continue to move slightly. The foam remains flexible, so it can accommodate minor movement without re-cracking.
Crack injection is a targeted repair, not a whole-basement solution. It works great for individual cracks but does nothing for general seepage through porous concrete or cold joints.
Drain Tile Systems: Interior vs. Exterior
Drain tile (also called perimeter drain or footing drain) is the most critical component in any basement waterproofing system. It collects water and moves it away from the foundation before it can build pressure.
Exterior Drain Tile
Installed at the base of the footing on the exterior side during new construction. The pipe is laid in a bed of washed stone, wrapped in filter fabric to prevent clogging, and routed to a sump pit, storm sewer connection, or daylight outlet.
Best practice: The top of the pipe should be below the top of the footing. The pipe should slope at least 1/8 inch per foot toward the discharge point. Use rigid PVC pipe, not corrugated flex pipe, for long-term reliability.
Interior Drain Tile
Installed by breaking out the basement floor and laying pipe along the interior perimeter of the footing. This is the go-to retrofit solution because it does not require excavating around the entire foundation.
Key considerations:
- The drain tile must be below the slab level to capture water before it reaches the floor surface
- Use washed gravel (3/4-inch stone), not pea gravel, to ensure good drainage
- Filter fabric or a filter sock on the pipe prevents sediment from clogging the perforations
- The system must have adequate slope to the sump pit
Common Drain Tile Problems
- Clogged pipe: Soil particles, iron ochre (orange bacterial slime), or root intrusion block the perforations. Using filter fabric and cleanout access points helps prevent and address this.
- Inadequate slope: If the pipe does not slope consistently toward the sump, water pools in low spots instead of draining.
- Crushed pipe: Using thin-wall corrugated pipe that gets crushed by backfill or foot traffic. Use Schedule 40 PVC for durability.
- No cleanout access: Without cleanouts, you cannot flush or camera the line when problems arise.
Sump Pumps: Sizing, Selection, and Installation
The sump pump is the final piece of the waterproofing system. It takes the water collected by the drain tile and moves it away from the building.
Pump Types
Submersible pumps sit inside the sump pit, submerged in the water. They are quieter, cooler (water cools the motor), and less prone to overheating. This is the standard choice for most residential applications.
Pedestal pumps have the motor mounted above the pit on a shaft, with only the impeller in the water. They are louder but easier to service since the motor is accessible. Less common today but still used in some applications.
Sizing
Pump sizing depends on the volume of water the system needs to handle and the height the pump must push the water (called total dynamic head). For most residential applications:
- 1/3 HP pump: Handles light to moderate water conditions
- 1/2 HP pump: Suitable for most standard basements
- 3/4 to 1 HP pump: For high-water-table situations or large basements
The pump should cycle on and off, not run continuously. If it runs nonstop during rain events, it is undersized.
Battery Backup
A primary sump pump is useless during a power outage, which is exactly when heavy rainstorms are most likely. A battery backup sump pump is strongly recommended. It consists of:
- A deep-cycle marine battery or dedicated sump pump battery
- A backup pump (usually smaller than the primary)
- A charging system
- An alarm that signals when the backup activates
Water-powered backup pumps are another option where municipal water pressure is available. They use the venturi effect to pump water without electricity, though they waste significant water in the process.
Discharge
The discharge pipe must route water at least 10 feet from the foundation (further is better) to a point where it will not flow back toward the house. Common discharge options:
- Yard discharge: Pipe runs underground to a pop-up emitter in the yard
- Storm sewer connection: Where permitted by local code
- Dry well: A buried gravel pit that allows water to percolate into the soil away from the foundation
Never discharge a sump pump into the sanitary sewer. This is illegal in most jurisdictions and overloads the wastewater treatment system.
Sump Pit Requirements
- Size: Minimum 18-inch diameter, 24 inches deep (check local code)
- Cover: A sealed, airtight cover reduces radon entry and prevents objects from falling in
- Check valve: Install a check valve on the discharge line to prevent water from flowing back into the pit when the pump shuts off
Vapor Barriers and Moisture Control
Even with a functional drain tile and sump system, moisture vapor moving through concrete can cause problems in a finished basement. Vapor barriers control this moisture.
Under-Slab Vapor Barrier
A polyethylene vapor barrier (minimum 10 mil, preferably 15 to 20 mil) should be installed under every basement slab during new construction. It sits on top of the gravel base, below the concrete. This prevents soil moisture from wicking up through the slab by capillary action.
For existing slabs without a vapor barrier, a surface-applied epoxy moisture barrier or a dimple mat with a built-in vapor barrier can reduce moisture transmission from the slab.
Wall Vapor Barrier
For finished basements, managing vapor through the walls is critical to preventing mold behind the drywall. The approach depends on your climate zone:
- Cold climates (zones 5 and above): Install rigid foam insulation directly against the foundation wall (acts as both insulation and vapor retarder), then frame the stud wall in front of it. Do not install a polyethylene vapor barrier between the studs and drywall; the rigid foam handles the vapor control.
- Mixed climates (zones 3 and 4): Similar approach with rigid foam, but consult local code for specific vapor retarder requirements.
- Warm humid climates: Basement construction is less common, but if present, the vapor drive is often from inside to out. Consult a building science professional for your specific conditions.
Common Vapor Barrier Mistakes
- Trapping moisture between two vapor barriers. Putting poly on the exterior and poly on the interior of the wall assembly traps any moisture that gets in, creating a mold sandwich.
- Using fiberglass batts against concrete walls without a vapor barrier. The fiberglass gets damp, loses its R-value, and grows mold.
- Skipping the under-slab barrier. Moisture wicks through the slab and destroys flooring, especially carpet and hardwood.
Grading and Surface Water Management
The simplest and cheapest waterproofing measure is keeping surface water away from the foundation in the first place.
Grading
The ground should slope away from the foundation at a minimum of 6 inches in the first 10 feet. That is a 5 percent grade. Many wet basements can be traced to flat or negative grading that allows water to pool against the foundation.
Gutters and Downspouts
A 1,000-square-foot roof section generates about 600 gallons of water from one inch of rain. If that water dumps right next to the foundation, no amount of waterproofing will keep the basement dry.
Every downspout should discharge at least 4 feet from the foundation, with 6 to 10 feet being better. Use downspout extensions, underground drain pipes, or splash blocks to direct water away.
Window Wells
Below-grade windows need properly installed window wells with:
- Gravel fill (12 inches minimum depth) for drainage
- A drain at the bottom connected to the drain tile system or a separate drain to daylight
- A clear cover to reduce direct rain entry
Window well drains that are not connected to anything are a very common source of basement water problems.
Tracking Waterproofing Projects
Waterproofing work involves multiple trades, inspections at specific stages (before backfill, before slab pour), and documentation that matters years down the road when a warranty claim comes in.
Projul’s project management tools let you schedule each phase of the waterproofing work, document membrane application with timestamped photos, track inspection approvals, and store warranty information for your clients. When a homeowner calls three years later asking about their waterproofing warranty, you can pull up the complete project record in seconds.
Running waterproofing projects and ready to get organized? Check out Projul’s pricing or schedule a demo to see how it works.
Final Thoughts
Basement waterproofing is not glamorous work, but it is some of the most important work in residential construction. A dry basement is the foundation (literally) of a healthy, usable home. A wet basement is an ongoing headache for the homeowner and a liability for the contractor who built it.
For new construction, do it right the first time: proper exterior waterproofing membrane, drain tile at the footing, under-slab vapor barrier, and good grading. The cost is minimal compared to the total project budget, and it prevents problems that are far more expensive to fix after the fact.
For existing homes, interior drain tile and a quality sump pump system will manage most water problems effectively. Combine that with correcting the grading and gutter issues on the exterior, and you will have a dry basement.
Keep water away from the foundation, give it a path to drain when it gets close, and pump it out when it gets inside. That is the entire science of basement waterproofing.
Frequently Asked Questions
What is the difference between interior and exterior basement waterproofing?
How much does basement waterproofing cost?
What is drain tile and how does it work?
How does a sump pump work?
Do I need a vapor barrier on basement walls?
What causes basement water problems?
How long does exterior basement waterproofing last?
Can you waterproof a basement from the inside?
Related Articles

Construction Punch List Software Comparison Guide: What Actually Matters
Not all punch list software is built the same. This guide breaks down what construction companies should actually look...
Read More →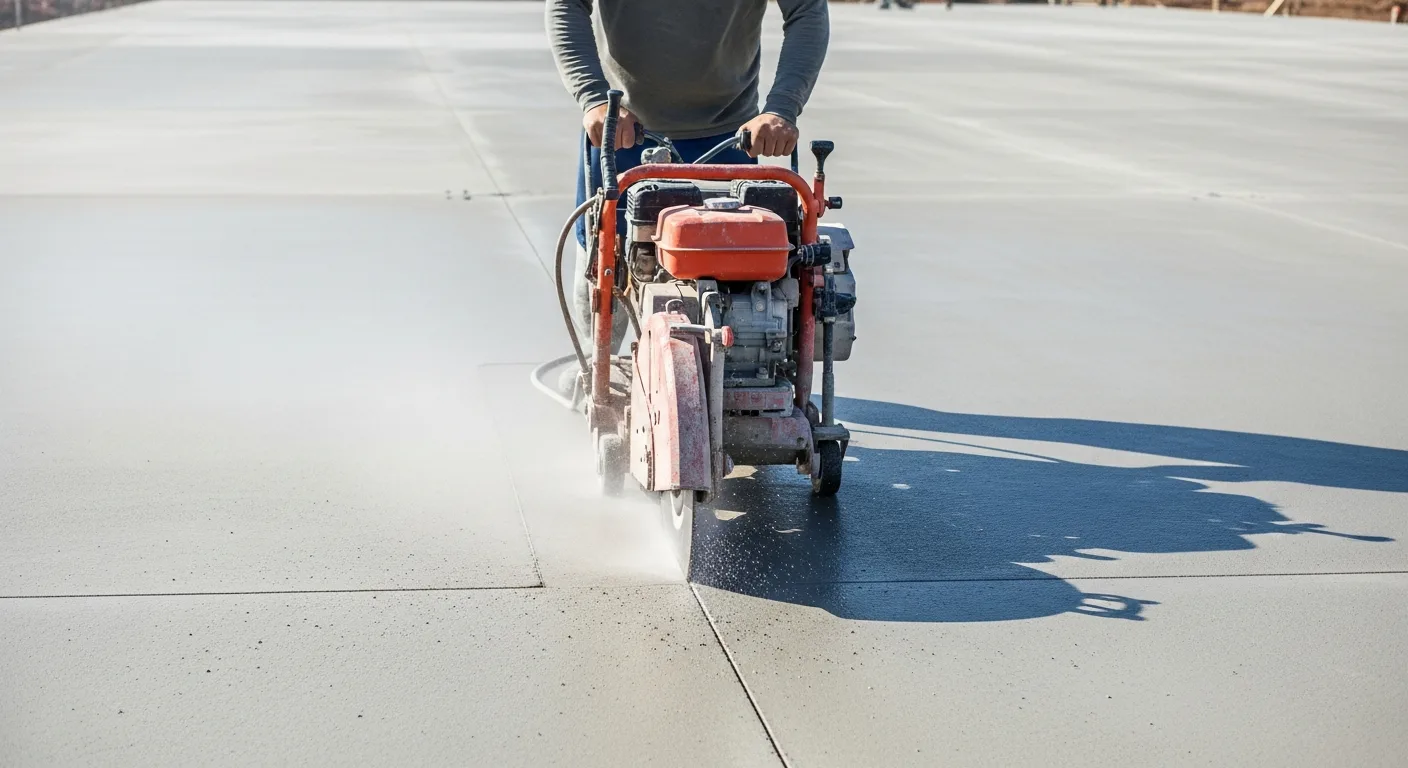
Concrete Saw Cutting Guide: Wet vs Dry, Blade Selection, Depth Control, and Joint Timing
Concrete saw cutting is one of those skills that separates a clean, professional slab from one that cracks in all the...
Read More →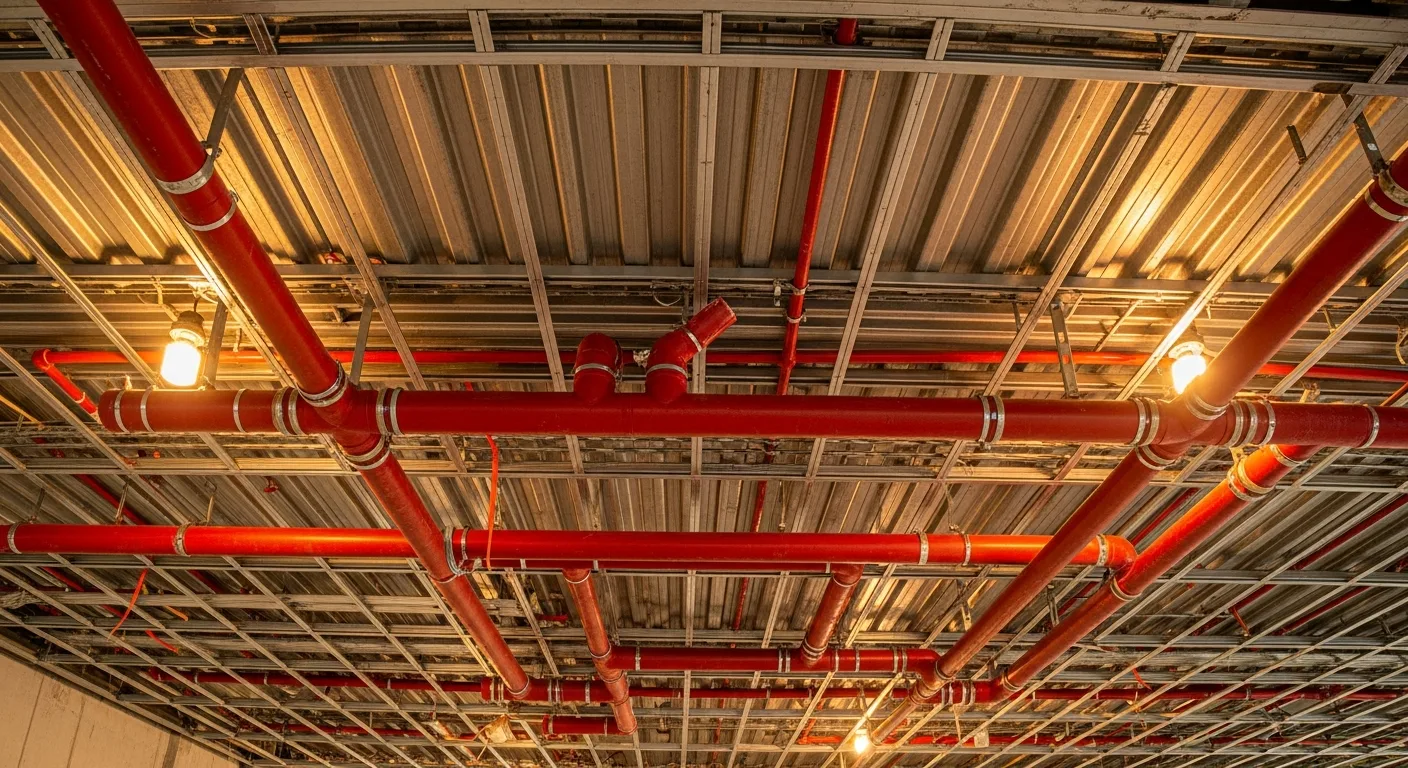
Fire Sprinkler System Installation: Wet vs Dry Systems, Pipe Sizing, and Code Requirements
Fire sprinkler systems are one of those building components that nobody thinks about until they are needed. But for...
Read More →