Construction Demolition Guide: Planning to Cleanup

Demolition looks simple from the outside. Knock it down, haul it away, start fresh. But any contractor who has actually run a demolition project knows the reality is far more complicated. Between permits, hazardous materials, safety requirements, and cost variables, a demolition project that is not properly planned can blow your budget and your timeline in a hurry.
This construction demolition guide walks through the practical steps you need to plan, permit, and safely execute demolition work. Whether you are handling a kitchen gut or bringing down a commercial structure, the fundamentals covered here will help you avoid the mistakes that cost contractors real money.
Types of Demolition: Selective, Interior, and Full Structural
Not all demolition is created equal. The scope of your demo work determines everything from your permitting requirements to your equipment needs and crew size. Understanding the differences upfront keeps you from over-scoping or under-planning the job.
Selective Demolition
Selective demolition is the most common type most residential and remodeling contractors deal with. You are removing specific elements (a wall, a section of flooring, cabinetry, a bathroom down to the studs) while leaving the surrounding structure intact.
This sounds straightforward, but selective demo actually requires more planning than people expect. You need to know exactly what is staying and what is going. You need to protect finishes, flooring, and fixtures that are not part of the scope. And you need to verify what is behind that wall before you open it up. Plumbing, electrical, HVAC, and structural elements hiding behind drywall have derailed more than a few “simple” demo days.
Before starting selective demolition:
- Review architectural and structural drawings if available
- Identify and mark all utilities running through the demo area
- Set up dust barriers and floor protection for adjacent spaces
- Confirm the structural implications of removing any load-bearing elements
Interior Demolition
Interior demolition takes selective demo a step further. You are stripping the building down to the shell, removing all interior finishes, partitions, ceilings, flooring, and MEP (mechanical, electrical, plumbing) systems. The exterior walls, roof, and structural frame stay in place.
This is common in commercial tenant improvements, adaptive reuse projects, and major renovations. Interior demo projects move faster than selective work because you are not worried about preserving specific elements. But they generate significantly more debris, require more equipment, and often trigger additional permit requirements.
Interior demo crews need to coordinate closely with the project timeline. Structural engineers may need to verify that removing interior walls will not compromise the building’s lateral support system. And if the building was constructed before 1980, you are almost certainly dealing with hazardous materials that need abatement before demo can begin.
Full Structural Demolition
Full structural demolition means the entire building comes down. This is the most complex and regulated type of demolition work. It requires detailed engineering plans, significant permitting, utility disconnections, environmental reviews, and often specialized heavy equipment.
Full demo projects typically involve:
- Engineering analysis of the structure and surrounding buildings
- Utility disconnection coordination with all service providers
- Traffic control and public safety planning
- Debris removal and recycling logistics
- Site grading and preparation for new construction
The sequencing of a full structural demolition matters enormously. Taking things apart in the wrong order creates safety hazards and can damage adjacent properties. Most jurisdictions require a detailed demolition plan reviewed by a structural engineer before issuing permits.
Permits and Regulations You Can’t Skip
Permitting is where demolition projects either start right or start sideways. Every municipality has its own requirements, and assuming you know the rules based on your last project in a different jurisdiction is a fast way to get a stop-work order.
What Most Jurisdictions Require
At a minimum, most cities and counties require:
- A demolition permit application with project scope and site plan
- Proof of utility disconnections (gas, electric, water, sewer, telecom)
- Notification to adjacent property owners (required in many areas)
- Asbestos inspection report (often required before permit issuance)
- Proof of insurance and contractor licensing
- A waste disposal plan identifying where debris will go
Some jurisdictions also require a rodent abatement plan (seriously), tree preservation review, historic review, and stormwater management during demolition. The requirements vary so much from one city to the next that the only reliable approach is to call the local building department and ask specifically what they need.
Timeline Considerations
Do not assume permits will come through quickly. Demolition permits can take anywhere from a few days to several weeks depending on the jurisdiction and the complexity of the project. If a historic review or environmental assessment is required, add additional weeks or even months.
Build permit lead time into your project schedule from the start. Telling a client the project will begin on a specific date before you have the permit in hand is a promise you may not be able to keep. Track permit status in your project management software so nothing falls through the cracks.
Consequences of Skipping Permits
Unpermitted demolition can result in:
- Fines ranging from hundreds to tens of thousands of dollars
- Stop-work orders that delay the entire project
- Requirements to rebuild what was demolished
- Liability exposure if someone is injured on an unpermitted job site
- Difficulty selling the property due to unpermitted work on record
It is never worth the risk. Get the permits. Every time.
Hazardous Materials: Asbestos, Lead, and Environmental Compliance
If the building was constructed before the mid-1980s, assume hazardous materials are present until proven otherwise. This is not optional caution. It is a legal and practical requirement that protects your crew, your clients, and your business.
Asbestos
Asbestos was used extensively in construction from the 1920s through the late 1970s. It shows up in floor tiles, pipe insulation, popcorn ceilings, roofing materials, siding, joint compound, and dozens of other building products. The material is not dangerous when left undisturbed, but demolition by definition disturbs everything.
Federal law (NESHAP, the National Emission Standards for Hazardous Air Pollutants) requires that a certified inspector survey the building for asbestos-containing materials before demolition begins. If asbestos is found, licensed abatement contractors must remove it before you can proceed with demolition.
The cost of asbestos abatement varies widely based on the material type, quantity, and location. Budget $5 to $20 per square foot for abatement work, and factor this into your demolition estimate from the beginning. Discovering asbestos mid-project after demo has started is far more expensive than identifying and addressing it upfront.
Lead Paint
Not sure if Projul is the right fit? Hear from contractors who use it every day.
Lead-based paint is present in most buildings constructed before 1978. The EPA’s Renovation, Repair, and Painting (RRP) Rule requires that contractors working in pre-1978 buildings be EPA-certified and follow specific lead-safe work practices.
For demolition projects, lead paint creates hazards during cutting, grinding, and debris handling. Dust and paint chips containing lead are serious health hazards, especially in enclosed spaces. Your crew needs proper PPE (respirators, not just dust masks), and debris containing lead paint may require special disposal.
Environmental Compliance
Beyond asbestos and lead, demolition projects may need to address:
- PCBs in caulking, light ballasts, and electrical equipment
- Mercury in thermostats, switches, and fluorescent lighting
- Refrigerants in HVAC systems (must be recovered, not released)
- Underground storage tanks
- Contaminated soil
Document everything. Take photos before, during, and after abatement and demolition work. Use a photo and document management system that timestamps and organizes project documentation automatically. If a regulatory question comes up months or years later, having organized documentation is your best defense.
Safety Planning for Demolition Projects
Demolition is one of the most hazardous activities in construction. OSHA reports that demolition work has a significantly higher injury and fatality rate than general construction. A solid safety plan is not just a regulatory checkbox. It is what keeps your crew going home at the end of the day.
Site-Specific Safety Plans
Every demolition project needs a site-specific safety plan. This is not a generic template you pull off the shelf. It should address the specific hazards of that particular project, including:
- Structural stability: How will the structure behave as you remove components? What is the collapse risk at each phase?
- Fall protection: What fall hazards exist and how will you address them? Guardrails, personal fall arrest systems, or controlled access zones?
- Utility hazards: Have all utilities been confirmed disconnected? Who verified, and when?
- Equipment operation: What heavy equipment will be used, and what are the exclusion zones around operating equipment?
- Dust and noise: What controls are in place for dust suppression and noise mitigation?
- Emergency procedures: Where is the nearest hospital? What is the evacuation plan? Who is the designated safety officer on site?
If your crew has not been through a thorough safety training program, get that handled before starting any demolition work. The stakes are too high to learn on the job.
Personal Protective Equipment
Demolition PPE requirements go beyond standard construction sites. At a minimum, your crew needs:
- Hard hats (always, no exceptions)
- Safety glasses or goggles
- Steel-toed boots
- High-visibility vests
- Hearing protection
- Respiratory protection appropriate to the hazards (dust, asbestos, lead, silica)
- Cut-resistant gloves
For specific tasks like torch cutting, working at heights, or operating heavy equipment, additional PPE requirements apply. Make PPE expectations clear in your safety plan and enforce them on site every day.
Daily Safety Briefings
Start every demolition day with a toolbox talk. Cover what work is happening that day, what hazards the crew should be aware of, and any changes from the previous day. Five minutes of communication in the morning prevents hours of problems in the afternoon.
Log these briefings in your daily logs. If an incident occurs, your documentation showing consistent daily safety communications is critical for your defense. It also creates a pattern of accountability that keeps your crew focused on working safely.
Public Safety
Demolition sites create hazards that extend beyond the property line. Falling debris, dust, noise, and heavy equipment traffic all affect neighboring properties and the general public. Your safety plan needs to address:
- Perimeter fencing and signage
- Debris netting and scaffolding protection for adjacent buildings
- Flaggers and traffic control for equipment entering and exiting the site
- Dust suppression (water trucks, misting systems)
- Noise restrictions and working hours
Neighbors will complain. Inspectors will visit. Having a solid public safety plan in place before they show up makes those interactions much smoother.
Estimating Demolition Costs Accurately
Demolition estimates are tricky because there are so many variables that can change the cost dramatically. A building that looks straightforward from the outside might be full of asbestos, have an unknown basement, or sit on contaminated soil. The contractors who estimate demolition well are the ones who do their homework before putting a number on paper.
Key Cost Factors
Your demolition estimate should account for:
Labor: Crew size and duration. Selective demolition is more labor-intensive per square foot than full structural demo because of the precision required. Factor in the skill level needed. Demo is not just unskilled labor, especially for selective work.
Equipment: What do you need to rent or bring to the site? Excavators, skid steers, dumpsters, dust suppression equipment, scaffolding, and shoring all add up. Get equipment quotes before finalizing your estimate.
Disposal: Dumpster rentals, hauling costs, and landfill tipping fees. These vary significantly by region. Recycling certain materials (concrete, metal, wood) can reduce disposal costs but adds sorting labor. Get current disposal pricing for your area.
Hazardous material abatement: If the building needs asbestos removal, lead abatement, or other environmental remediation, those costs can exceed the demolition itself. Always get abatement quotes before estimating the overall project.
Permits and fees: Permit costs, inspection fees, and any required bonds or deposits. These are easy to forget and can add thousands to the project cost.
Site restoration: Grading, filling, compaction, and erosion control after demolition. The client wants a clean, ready site when you are done, not a crater.
Avoiding Common Estimating Mistakes
The most common demolition estimating mistakes include:
- Not inspecting the building thoroughly before estimating
- Assuming no hazardous materials without testing
- Underestimating debris volume and disposal costs
- Forgetting to include utility disconnection costs
- Not accounting for weather delays in the schedule
- Failing to include site restoration in the scope
Use job costing tools to track actual costs against your estimates on every demolition project. Over time, your historical data becomes your most valuable estimating resource. If you know exactly what your last 10 interior demo projects cost per square foot, your next estimate will be far more accurate than any industry average.
Presenting the Estimate to Clients
Demolition estimates should be detailed enough that the client understands what they are paying for. Break costs into clear categories: labor, equipment, disposal, abatement, permits, and site restoration. Clients appreciate transparency, and a detailed estimate positions you as a professional who has thought through the project thoroughly.
Include a contingency line item of 10 to 15 percent. Demolition projects regularly uncover surprises once the walls open up. A contingency protects both you and your client from budget shock when the unexpected appears.
Tracking Demolition Progress With Project Management Software
A demolition project might move fast, but that does not mean you can skip tracking progress. In fact, the speed and complexity of demo work make real-time tracking even more important. When things go wrong on a demolition site, they go wrong quickly. The sooner you know about a problem, the less it costs to fix.
Why Spreadsheets Fall Short
Plenty of contractors still track demolition projects with spreadsheets, whiteboards, and text messages. It works until it does not. The problems with manual tracking on demolition projects include:
- Information is scattered across multiple places
- Updates do not happen in real time
- Photos are stuck on someone’s phone instead of organized by project
- Cost tracking lags behind actual spending
- No one knows the current status without calling the site
Construction project management software like Projul solves these problems by putting everything in one place that everyone can access from the field or the office.
Daily Logs That Actually Get Done
Daily logs are critical on demolition projects, but they only work if your crew actually fills them out. Paper logs get lost. Spreadsheet logs do not get updated until days later if at all.
With a mobile-friendly daily log system, your foreman can log progress, weather, crew hours, equipment usage, and any issues right from their phone at the end of each day. The information flows back to the office immediately, and you have a complete project record without chasing anyone down.
Detailed daily logs also protect you legally. If a dispute arises about what happened on a specific day, a timestamped daily log with photos is far more credible than someone’s memory.
Photo Documentation
Demolition projects should be documented with photos at every stage. Before demo begins, during each phase, and after completion. Photos serve multiple purposes:
- Documenting pre-existing conditions for liability protection
- Recording hazardous material locations and abatement work
- Showing progress to clients and stakeholders who are not on site
- Providing evidence for insurance claims or regulatory inquiries
- Creating a visual record that complements your daily logs
Organize photos by project and date so you can find what you need when you need it. Digging through a camera roll with thousands of unsorted photos is not a productive use of anyone’s time.
Cost Tracking in Real Time
Demolition costs can spiral if you are not watching them closely. When disposal costs exceed your estimate, you need to know that now, not when you reconcile at the end of the month. Real-time job costing lets you compare actual costs to your estimate at any point during the project.
Track labor hours, equipment rentals, disposal fees, and material costs as they happen. If you are running over budget in one category, you can adjust before the overrun becomes catastrophic. This is especially important for demolition projects with hazardous materials, where abatement costs can escalate quickly if the scope of contamination is larger than expected.
Keeping Everyone on the Same Page
Demolition projects involve multiple parties: your crew, subcontractors, abatement specialists, inspectors, utility companies, and the client. When information lives in one platform instead of scattered across emails, texts, and phone calls, coordination gets dramatically easier.
Schedule updates, inspection results, permit status, change orders, and daily progress all belong in one system. When the client calls asking for an update, you should be able to give them an accurate answer in under a minute, not promise to “check with the foreman and get back to you.”
Demolition Equipment: Choosing the Right Tools for the Job
The equipment you bring to a demolition site has a direct impact on how fast the work goes, how safe the crew stays, and how much the project costs. Picking the wrong equipment wastes time and money. Picking the right equipment for the scope of work is one of the things that separates experienced demo contractors from everyone else.
Hand Tools and Light Equipment
Not every demolition job calls for an excavator. Interior selective demo, residential gut jobs, and small commercial strip-outs often get done with hand tools and light equipment. Sledgehammers, reciprocating saws, pry bars, and rotary hammers handle most interior demo tasks. For flooring removal, a ride-on floor scraper can save your crew days of back-breaking work compared to doing it by hand.
The key with hand tools is having enough of the right ones on site. Running a four-person demo crew with two reciprocating saws means two people are standing around waiting. Small tool costs are negligible compared to labor costs, so equip every crew member properly.
Light equipment like skid steers with demolition attachments (breakers, grapples, buckets) bridge the gap between hand work and heavy equipment. They fit inside buildings, work in tight spaces, and can handle tasks like concrete breaking, wall removal, and debris loading that would take a hand crew significantly longer.
Heavy Equipment
Full structural demolition and large-scale interior demo require heavy equipment. The standard workhorse is a hydraulic excavator fitted with demolition attachments. Common attachments include:
- Hydraulic breakers for concrete and masonry
- Shears for cutting steel beams and columns
- Grapples for grabbing and sorting debris
- Crushers for processing concrete on site
- Wrecking balls (less common today but still used for certain applications)
Equipment size matters. An excavator that is too small for the structure will struggle and create safety hazards. One that is too large may not fit on the site or could damage adjacent improvements. Match the machine to the job, not the other way around.
For multi-story demolition, high-reach excavators with extended booms allow operators to work from ground level while demolishing upper floors. This is significantly safer than putting crew members on upper levels of a structure that is being taken apart.
Dust Suppression Equipment
Dust is one of the biggest nuisances and health hazards on a demolition site. Beyond the obvious respiratory concerns, uncontrolled dust triggers complaints from neighbors, draws attention from inspectors, and can violate air quality regulations.
Water trucks and misting cannons are the standard approach. Water trucks spray down work areas and debris piles to keep dust from going airborne. Misting cannons (sometimes called dust bosses or fog cannons) create a fine mist that captures airborne particles. For interior work, negative air machines with HEPA filters control dust within the building.
Factor dust suppression into your equipment plan and your estimate. Running a water truck on site for the duration of a structural demo adds real cost, but the alternative (fines, complaints, and crew health issues) costs more.
Renting vs. Owning
Most demolition contractors rent heavy equipment rather than owning it, and for good reason. Demo projects vary widely in scope, and the equipment you need for a house teardown is different from what you need for a commercial strip-out. Renting gives you flexibility to match equipment to each job without carrying the overhead of ownership, insurance, maintenance, and storage.
That said, if you run demolition projects consistently, owning core equipment like a skid steer and a mid-size excavator can make financial sense. Track your rental costs across projects using your job costing data and compare them to ownership costs over time. The numbers will tell you when it makes sense to buy.
Debris Management, Recycling, and Waste Disposal
Debris is the unglamorous reality of every demolition project. How you handle it affects your costs, your schedule, your environmental compliance, and increasingly, your ability to win bids. Clients, especially on commercial and government projects, are paying more attention to recycling and waste diversion rates than ever before.
Estimating Debris Volume
One of the most common mistakes on demolition estimates is underestimating how much debris a building generates. A general rule of thumb: buildings produce roughly one cubic yard of debris per 100 square feet of floor area, but this varies significantly based on construction type. A wood-frame house generates less debris per square foot than a concrete and masonry commercial building.
Underestimating debris means you run out of dumpsters mid-project, scramble to arrange additional hauling, and eat costs you did not budget for. Better to overestimate slightly and return unused dumpsters than to be caught short.
Sorting and Recycling
Construction and demolition waste makes up a huge percentage of what goes into landfills in the United States. Many municipalities now require minimum recycling rates on demolition projects, and some will not issue permits without a waste management plan that includes recycling.
Common recyclable demolition materials include:
- Concrete and masonry: Can be crushed and reused as aggregate or fill. Some projects crush concrete on site, which eliminates hauling costs entirely.
- Metals: Steel, copper, aluminum, and other metals have real salvage value. On large projects, metal recycling can offset a meaningful portion of your disposal costs.
- Wood: Clean, unpainted wood can be chipped for mulch or biomass. Painted or treated wood typically goes to landfill.
- Asphalt: Recyclable into new asphalt paving material.
- Drywall: Gypsum can be recycled, but contamination (paint, tape, screws) reduces the recycling value.
- Roofing materials: Asphalt shingles can be recycled into road base in many areas.
Setting up sorting areas on the demolition site takes space and labor, but it reduces disposal costs and keeps you compliant with waste diversion requirements. Use separate containers or designated areas for each material stream, and make sure your crew knows which materials go where.
Disposal Logistics
Dumpster management is a scheduling exercise. You need containers on site when your crew is generating debris, and you need them hauled and replaced before they overflow. On a fast-moving demo project, this means coordinating with your hauling company daily.
Tipping fees at landfills and transfer stations vary by material and by region. Clean concrete might cost $10 per ton to dispose of at a recycling facility, while mixed demolition debris could cost $50 to $80 per ton at a landfill. Knowing your local disposal rates and factoring them accurately into your estimates is critical for maintaining margins.
For projects with hazardous materials, contaminated debris requires special handling and disposal at licensed facilities. The costs are significantly higher than standard disposal, and the paperwork requirements are extensive. Keep all manifests and disposal receipts organized in your project file. Regulatory agencies can request this documentation years after the project is complete.
Illegal Dumping: Not Worth the Risk
It should go without saying, but illegal dumping of demolition debris carries severe penalties including fines, criminal charges, and loss of your contractor’s license. Beyond the legal consequences, it damages your reputation in ways that are almost impossible to recover from. Spend the money on proper disposal. It is part of the cost of doing the work.
Managing Demolition Subcontractors and Specialty Crews
Most demolition projects involve more than just your own crew. Abatement contractors, hauling companies, utility companies, structural engineers, and environmental consultants all play roles at various points in the project. How well you coordinate these moving parts determines whether the project runs smoothly or turns into a scheduling disaster.
Building Your Subcontractor Network
If you run demolition projects regularly, you need reliable subcontractors you can call on consistently. The subs you want are the ones who show up when they say they will, do the work correctly, and communicate when something changes. That sounds basic, but anyone who has been in this business knows how rare that combination actually is.
Build relationships with:
- Abatement contractors: Licensed asbestos and lead abatement firms. You need at least two or three you can rely on, because their schedules fill up fast. Waiting on abatement is one of the most common causes of demolition project delays.
- Hauling companies: Reliable debris hauling with enough truck and dumpster capacity to keep up with your production. A hauling company that cannot get you a dumpster swap within 24 hours will slow your project down.
- Utility companies: Develop contacts at your local gas, electric, water, and telecom providers. Utility disconnections often take longer than expected, and having a direct contact who can check on the status of your disconnect order saves time.
- Environmental consultants: For asbestos surveys, soil testing, and environmental compliance documentation. You want someone responsive who can turn around reports quickly so your permits do not stall.
- Structural engineers: For pre-demolition assessments, demolition plans, and any mid-project questions that come up about structural stability.
Keep your subcontractor information organized and up to date. Phone numbers, insurance certificates, license numbers, and past project performance should all be easy to find when you need them. A good contractor management workflow keeps vendor details and project history where you can actually use them.
Scheduling Coordination
The biggest challenge with managing multiple subs on a demolition project is sequencing. Abatement has to happen before demo. Utility disconnections have to happen before either. The structural engineer’s report has to be done before you can finalize the demolition plan. Each of these dependencies has its own timeline, and a delay in one pushes everything else back.
Map out your project sequence with realistic lead times for each activity. Do not assume the abatement contractor can start next week. Do not assume the utility company will disconnect service in three days. Build in buffer time for the activities that have the most uncertainty, and communicate the schedule clearly to every subcontractor involved.
When schedules change (and they will), update everyone immediately. A hauling company that shows up on the wrong day because nobody told them about the schedule change is going to charge you for the wasted trip. An abatement crew that arrives to find utilities still connected is going to leave and reschedule, costing you days.
Use your scheduling tools to keep the timeline visible to everyone who needs to see it. When the abatement contractor can check the schedule from their phone and see that the utility disconnection is confirmed, they show up with confidence. That kind of coordination does not happen through text messages and phone tag.
Documentation and Insurance
Before any subcontractor sets foot on your demolition site, verify their insurance and licensing. This is not a suggestion. It is basic risk management that protects your business.
Require at a minimum:
- General liability insurance with adequate limits
- Workers’ compensation insurance
- Any specialty licenses required for their work (abatement licenses, hauling permits)
- Certificate of insurance naming your company as additional insured
Keep copies of all sub insurance certificates in your project file. If an incident occurs and a sub’s insurance has lapsed, you could be on the hook. Check expiration dates and set reminders to request updated certificates before they expire.
For abatement work specifically, get copies of all air monitoring reports, waste manifests, and clearance documentation. This paperwork is your proof that hazardous materials were properly handled. Store it somewhere you can find it years from now, because that is when someone will ask for it. A document management system that keeps project records organized and searchable beats a filing cabinet full of folders you will never dig through.
Common Demolition Mistakes and How to Avoid Them
Every experienced demolition contractor has a story about a project that went sideways. Sometimes it was their fault, sometimes it was someone else’s, and sometimes it was just bad luck. But many of the most expensive demolition mistakes are entirely preventable with better planning and discipline. Here are the ones that come up again and again.
Skipping the Pre-Demolition Survey
Walking a building before you estimate or plan the demolition is not optional. Yet contractors skip this step more often than you would think, especially on projects that seem simple or familiar. Every building has surprises. Hidden asbestos in unexpected places. A structural element that is not on the drawings. A basement or crawlspace nobody mentioned. Plumbing or electrical running through areas you planned to demo with heavy equipment.
A thorough pre-demolition survey includes:
- Walking every accessible area of the building
- Reviewing all available drawings and plans
- Noting the construction type, materials, and condition
- Identifying potential hazardous materials
- Assessing access for equipment and debris removal
- Documenting everything with photos and notes
The hour or two you spend on a proper survey saves days of dealing with surprises during the project. Build this into your standard process for every demolition bid.
Underestimating the Timeline
Demolition timelines get compressed from both ends. Clients want it done yesterday, and contractors are optimistic about how fast the work will go. The result is a schedule that has no room for the inevitable delays: weather, permit holdups, abatement taking longer than expected, equipment breakdowns, or discovering conditions that were not in the original scope.
Pad your timeline. If you think the demo will take five days, schedule seven. If the permit is supposed to take two weeks, plan for three. Your clients will be much happier with a project that finishes “early” than one that blows past the deadline.
Poor Communication with the Client
Clients who are not kept in the loop get anxious, and anxious clients start making phone calls, showing up on site unannounced, and questioning every decision. The fix is simple: communicate proactively. Send regular updates, share photos of progress, and let them know immediately when something changes.
Most client frustration on demolition projects comes not from actual problems but from feeling left out of what is happening. A weekly progress update with photos and a brief summary of what happened and what is coming next keeps the client informed and confident. Use your project management platform to give clients visibility into progress without requiring you to manually send updates every few days.
Not Tracking Costs Until It Is Too Late
Demolition cost overruns are common, and they are almost always worse when the contractor does not realize they are over budget until the project is finished. By then, there is nothing you can do about it. The margin is gone.
Track costs as they happen, not after the fact. When you know on day three that disposal costs are running 20% over your estimate, you can adjust. Maybe you push harder on recycling to reduce landfill costs. Maybe you have a conversation with the client about the extra dumpster hauls. But you can only make those adjustments if you have real-time visibility into where the money is going.
This is where construction-specific software earns its keep. General accounting software tells you what happened last month. Job costing tools built for contractors tell you what is happening right now, which is the only time you can actually do something about it.
Ignoring Neighbor Relations
Demolition is loud, dusty, and disruptive. Your neighbors did not ask for any of it, and they can make your life miserable if you do not manage the relationship. Complaints to the city, calls to inspectors, social media posts about the terrible contractor next door: all of these create problems that take time and energy to deal with.
Before demolition starts, knock on the neighbors’ doors. Introduce yourself, explain what is happening, give them a rough timeline, and leave a phone number they can call if there is a problem. This five-minute conversation prevents most neighbor complaints. People are far more tolerant of disruption when they know what to expect and feel like someone is being respectful of their situation.
During the project, be a good neighbor. Start at reasonable hours. Control your dust. Keep the street clean. If something goes wrong (a piece of debris lands in their yard, dust covers their car), own it immediately and make it right. The goodwill you build with neighboring property owners pays dividends, especially if you work in the same area regularly.
Wrapping Up
Demolition work rewards preparation and punishes shortcuts. The contractors who do it well invest time in planning, get their permits squared away, test for hazardous materials, build serious safety plans, estimate with real data, and track everything as the project progresses.
This construction demolition guide covers the fundamentals, but every project has its own unique challenges. The common thread is that the more organized and disciplined your approach, the fewer surprises you will face and the more profitable the work becomes.
Ready to stop guessing and start managing? Schedule a demo to see Projul in action.
If you are looking for a better way to manage demolition projects from daily logs to job costing to photo documentation, take a look at Projul and see how contractors are keeping their projects on track.
Frequently Asked Questions
Do I need a permit for demolition work?
How much does demolition cost per square foot?
What is the difference between selective demolition and full demolition?
How do I handle asbestos during demolition?
What software do contractors use to track demolition projects?
Related Articles

Construction Team Meetings: A Practical Guide to Meetings That Actually Get Results
Most construction team meetings waste time. Here's how to run weekly check-ins, safety meetings, kickoffs, and...
Read More →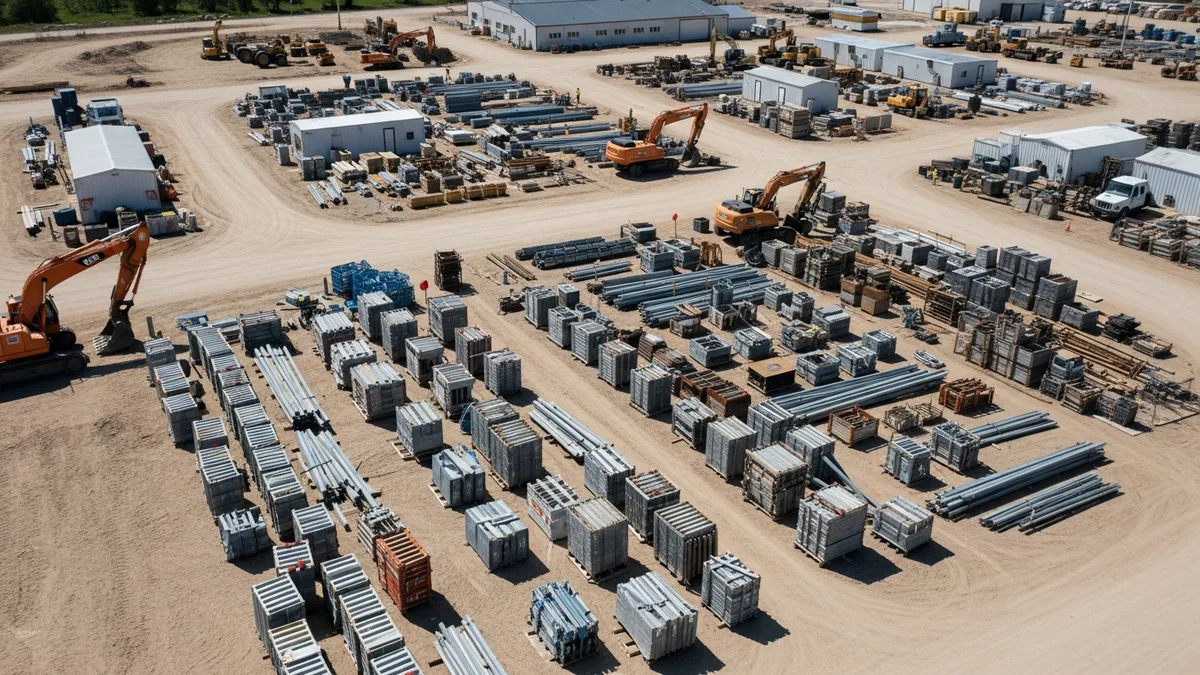
Project Management for Small Contractors: You Don't Need Enterprise Software
You don't need a 50-person company to benefit from project management. Even a 5-person crew loses money without a...
Read More →
Free Construction Schedule Template
A solid construction schedule keeps your jobs on track, your crews busy, and your clients happy. Grab our free...
Read More →