Construction Equipment Tracking Guide
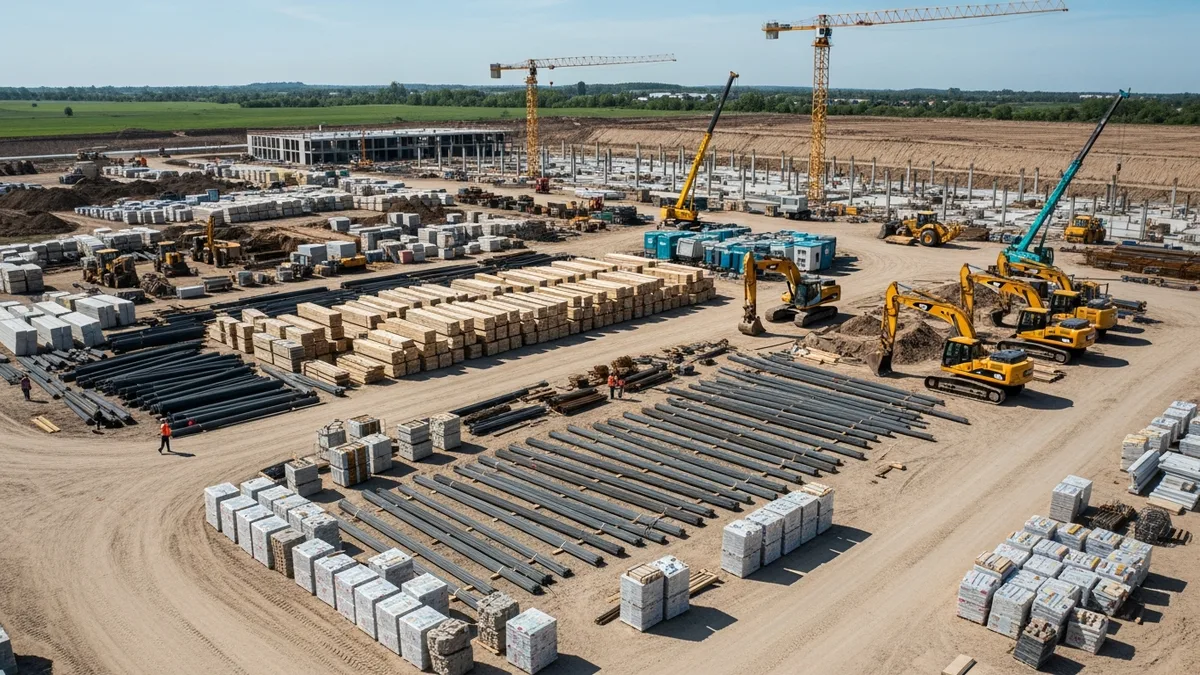
Every contractor has a version of the same story. A $3,000 laser level disappears from a jobsite. A generator walks off over a weekend. A crew shows up Monday morning and the concrete saw they need is sitting on a different project across town. Nobody knows who had it last.
These aren’t rare events. They happen constantly in construction, and the financial damage adds up fast. The National Equipment Register estimates that between $300 million and $1 billion in construction equipment gets stolen every year in the U.S. alone. And that number doesn’t even account for the tools that aren’t stolen, just lost, misplaced, or sitting idle on the wrong jobsite because nobody’s tracking them.
Construction equipment tracking is the difference between knowing where your assets are and hoping they show up when you need them. If you’ve been relying on memory, spreadsheets, or the honor system, this guide will walk you through building a real system that keeps your tools accounted for and your money where it belongs.
The Hidden Cost of Lost and Mismanaged Equipment
The obvious cost is replacement. When a tool disappears, you buy another one. But the real damage goes deeper than the receipt from the supply house.
Downtime kills productivity. When a crew can’t find the equipment they need, they stop working. Or they drive across town to grab it from another site. Either way, you’re paying labor hours for zero production. If a four-person crew loses an hour waiting on a missing piece of equipment, that’s four billable hours gone. At $50 per hour loaded cost, that’s $200 for one incident. Multiply that across a week or a month and it gets ugly fast.
Duplicate purchases are invisible waste. When nobody knows what you already own or where it is, people buy things you already have. How many tape measures, levels, and extension cords does your company own right now? If you can’t answer that confidently, you’ve almost certainly bought duplicates you didn’t need.
Rental costs spike without tracking. Renting equipment you already own because you can’t locate it is one of the most frustrating expenses in construction. A contractor who rents a plate compactor for $150 a day while their own unit sits forgotten in the back of a trailer is literally paying twice.
Insurance claims get complicated. When equipment gets stolen and you can’t provide serial numbers, purchase dates, or proof of ownership, your insurance claim gets a lot harder to process. Some claims get denied entirely because the contractor couldn’t document what they lost.
Job costing becomes guesswork. If you don’t know which equipment is on which job, you can’t accurately calculate what each project actually costs to run. That throws off your job costing numbers and makes it impossible to bid future work with confidence. Equipment is often one of the most undertracked categories in construction overhead, and it quietly eats into margins on every project.
Manual vs Digital Equipment Tracking Methods
Contractors have been tracking equipment since long before software existed. Some of those manual methods still work. Most don’t scale.
The Clipboard and Spreadsheet Approach
The simplest version is a checkout sheet. Equipment lives in a central location, usually a shop or well-organized yard, and crews sign items out when they take them to a jobsite. A spreadsheet tracks what went where and when it came back.
This works for very small operations. If you’ve got one crew and a handful of power tools, a clipboard on the wall gets the job done. The problem is that it depends entirely on people remembering to write things down. And in construction, where the pace is fast and people are focused on production, that just doesn’t happen consistently.
Spreadsheets are a step up but still fall apart at scale. They don’t update in real time, they require someone to manually enter data, and they’re only as accurate as the last person who touched them. When you’ve got equipment spread across five or ten jobsites, a spreadsheet becomes a fiction.
Barcode and QR Code Systems
A mid-range solution is tagging equipment with barcodes or QR codes. Crew members scan a tag with their phone when they pick up or drop off a piece of equipment. The scan logs the item, the person, and the location automatically.
This removes the “forgot to write it down” problem. Scanning is fast enough that people actually do it. The downside is that it still requires the human step of scanning, and it only tells you where something was at the time of the last scan, not where it is right now.
GPS and Bluetooth Tracking
For high-value equipment, GPS trackers provide real-time location data. You can see exactly where a piece of equipment is at any moment, get alerts when it leaves a geofenced area, and pull movement history. GPS works great for heavy equipment, vehicles, trailers, and generators.
Bluetooth tags like AirTags or Tile are cheaper and work well for smaller tools within a limited range. They won’t give you cross-city tracking, but they’re useful for finding things within a jobsite or shop.
The Right Mix
Most contractors end up using a combination. GPS for the expensive stuff, QR codes for mid-range tools, and a solid inventory list for the small items. The key is that everything feeds into one system so you have a single place to look when you need to find something.
What to Track: Beyond Just Location
Knowing where a piece of equipment is matters, but it’s only one data point. A good construction equipment tracking system captures the full picture.
Asset identity. Make, model, serial number, purchase date, and purchase price. This is your baseline. Every piece of equipment over a certain dollar threshold should have a record with this information. You’ll need it for insurance, taxes, depreciation, and resale.
Assignment history. Which jobsite is it on? Who checked it out? When did it move? A clear chain of custody means you can always answer the question “who had it last?” That alone reduces loss and improves accountability.
Condition and hours. Is it working properly? How many hours are on it? Tracking condition over time tells you when something is about to fail before it fails on a jobsite and shuts down production. This is where your daily logs become valuable. When crews note equipment condition in their end-of-day reports, you build a real-time picture of your fleet’s health.
Maintenance records. Oil changes, blade replacements, calibration dates, warranty information, and repair history. These records extend the life of your equipment, keep you compliant with safety requirements, and protect your resale value.
Documentation and photos. Photos of equipment condition at checkout and return create an indisputable record. When something comes back damaged, you know exactly when the damage happened and who was responsible. A solid photos and document management system makes this easy to maintain without creating extra work for your crews.
Cost data. What does it cost to own and operate each piece of equipment? Purchase price, depreciation, fuel, maintenance, insurance, and storage all factor in. This data feeds directly into your job costs and helps you decide when to repair vs replace.
Building an Equipment Management System That Works
A tracking system that nobody uses is worse than no system at all because it gives you false confidence. The goal is to build something simple enough that crews actually follow it.
Start With an Inventory
Before you can track anything, you need to know what you own. This sounds obvious, but most contractors have never done a complete equipment inventory. Walk every jobsite, every truck, every trailer, every shop shelf. Document everything above your chosen threshold. For most contractors, that’s anything over $100 to $250 in value.
Give every item a unique identifier. This can be an asset tag number, a QR code, or simply a numbering system. The format doesn’t matter as long as it’s consistent and permanent.
Define Your Process
Keep the checkout and return process as frictionless as possible. If it takes more than 30 seconds, people will skip it. Scanning a QR code with a phone is about the right level of effort. Filling out a form with six fields is too much.
Decide who is responsible for tracking at each level. On a jobsite, the foreman should own equipment accountability. At the company level, someone in the office needs to review the equipment log regularly and follow up on items that haven’t been returned or moved in a while.
Choose Your Tools
Your tracking system should live inside the software you’re already using for project management. Bolting on a separate standalone tool creates one more login, one more app, and one more thing for people to ignore.
If your project management platform already handles daily logs, job costing, and document management, adding equipment tracking into that same workflow is the path of least resistance. Your crews are already logging into the system every day. Putting equipment tracking in the same place means they’ll actually use it.
Enforce Accountability
A system without consequences is just a suggestion. Make equipment accountability part of your jobsite expectations. If a tool goes missing from a site and the foreman can’t account for it, that’s a conversation that needs to happen.
Some contractors build equipment responsibility into their employment agreements or subcontractor contracts. Others use a simple deposit system for high-value items. Whatever approach you choose, make sure people know that equipment tracking is a real expectation, not a nice-to-have.
Review and Adjust
Run an equipment audit at least quarterly. Compare your tracking system against what’s physically on each jobsite and in your shop. There will be discrepancies, especially early on. Each audit tightens the system.
Look at utilization data too. If you own a piece of equipment that’s been sitting idle for three months, you should probably sell it or rent it out. Idle equipment is dead money.
Maintenance Schedules That Prevent Downtime
Tracking equipment isn’t just about knowing where things are. It’s about keeping them running. Unplanned equipment failures cost far more than the repair itself because they shut down production and throw your schedule off.
Preventive vs Reactive Maintenance
Reactive maintenance means you fix things when they break. It’s the default approach for most small to mid-size contractors, and it’s expensive. A generator that fails on a jobsite doesn’t just cost you the repair. It costs you the crew standing around, the delay to the schedule, and potentially a penalty if you miss a deadline.
Preventive maintenance means you service equipment on a schedule based on hours of use, calendar intervals, or manufacturer recommendations. Oil changes, filter replacements, belt inspections, blade sharpening, and calibration checks all happen before something fails.
The math is simple. A $200 scheduled service that prevents a $2,000 emergency repair plus $1,500 in lost productivity is a 10x return. Every time.
Building a Maintenance Calendar
Thousands of contractors have made the switch. See what they have to say.
For each piece of tracked equipment, set up a maintenance schedule based on the manufacturer’s guidelines. Most equipment manuals specify service intervals by hours of operation or calendar time.
Your schedule should include:
- Daily checks. Fluid levels, visible damage, safety equipment, and basic function tests. Crews should do this every morning as part of jobsite setup.
- Weekly or biweekly service. Cleaning, lubrication, tire pressure, and minor adjustments.
- Monthly or quarterly service. Oil changes, filter replacements, belt inspections, and calibration.
- Annual or major service. Deep inspections, component replacement, and professional servicing.
Log every maintenance event. When you sell or trade equipment, a complete maintenance history significantly increases its value. It also protects you in warranty disputes.
Tying Maintenance to Daily Operations
The easiest way to keep maintenance on track is to tie it into the daily reporting your crews are already doing. If your foremen are filling out daily logs at the end of each shift, adding an equipment condition check takes 30 seconds and gives you real data on fleet health.
When a crew member notes that a saw is vibrating more than usual or a compressor is running hot, that’s an early warning. Acting on those notes before something breaks is how you avoid the $5,000 emergency repair that comes with a side of schedule delay.
How Job Costing Software Connects Equipment Costs to Projects
This is where equipment tracking pays for itself. When you know exactly which equipment is on which job and for how long, you can assign those costs accurately. And accurate job costing is what separates contractors who make money from contractors who think they make money.
The Equipment Cost Problem
Most contractors handle equipment costs in one of two ways, and both are wrong.
The first approach is to ignore equipment costs at the job level entirely. They treat equipment as a general overhead expense and spread it across all jobs equally. This means your easy residential remodel subsidizes your equipment-heavy commercial job, and you never see it.
The second approach is to track only rental equipment because it shows up as a line item on an invoice. Owned equipment gets overlooked because there’s no invoice to process. But owned equipment still costs money. Depreciation, fuel, maintenance, insurance, and storage are all real costs that should be allocated to the jobs that use the equipment.
Assigning Equipment Costs to Jobs
A proper job costing system lets you assign equipment costs to specific projects. Here’s how that works in practice:
Owned equipment gets an internal rate. Calculate the total cost of ownership for each piece of equipment (depreciation, maintenance, fuel, insurance) and divide it by the expected hours of use per year. That gives you an hourly rate. When that equipment goes to a jobsite, you charge it to the job at that internal rate.
For example, if your skid steer costs $15,000 per year to own and operate and you expect to use it 1,000 hours per year, your internal rate is $15 per hour. If it spends 40 hours on Job A, that job gets charged $600 for skid steer use.
Rental equipment goes directly to the job. This is straightforward. The rental invoice gets coded to the specific project that used it.
Small tools and consumables get a percentage allocation. You’re not going to track every drill bit and saw blade to a specific job. Instead, calculate your annual small tool expense and allocate it as a percentage of labor hours or job revenue.
Why This Matters for Bidding
When you have accurate equipment cost data from past jobs, you can bid future work with confidence. You know exactly what it costs to run a certain type of job because your numbers are based on real data, not estimates.
A contractor who knows their excavation work runs $45 per hour in equipment costs can price a new job accurately. A contractor who guesses at equipment costs will either underbid (and lose money) or overbid (and lose the job).
This is the real payoff of construction equipment tracking. It’s not just about preventing theft or reducing loss, although those matter. It’s about building a data set that makes every future bid more accurate and every job more profitable.
If you’re not sure what a proper job costing setup looks like or what it would cost to get started, check out the pricing for a system that ties equipment, labor, and materials together in one place.
Try a live demo and see how Projul simplifies this for your team.
Frequently Asked Questions
What is the best way to track construction equipment?
The best approach combines methods based on equipment value. Use GPS trackers for high-value items like heavy equipment, vehicles, and generators. Use QR code or barcode tags for mid-range power tools. And maintain a simple inventory list for small tools and consumables. Everything should feed into a single system so you have one place to check when you need to find something.
How much does equipment loss actually cost a construction company?
It varies by company size, but most contractors underestimate it significantly. Beyond the direct replacement cost, you’re paying for downtime while crews wait for replacement equipment, duplicate purchases when people can’t find what you already own, and inflated rental costs when you rent something you could have used from your own fleet. For a mid-size contractor, untracked equipment losses can easily run $10,000 to $50,000 per year.
Should I use GPS trackers on all my construction equipment?
Not necessarily. GPS trackers make financial sense for equipment worth $1,000 or more, where the cost of the tracker ($15 to $40 per month) is justified by the value of the asset. For smaller tools, QR code scanning or a simple checkout system is more cost-effective. The goal is to match the tracking investment to the value of what you’re protecting.
How often should I audit my equipment inventory?
At minimum, do a full physical audit quarterly. Compare what your tracking system says you have against what’s actually on each jobsite and in your shop. Many contractors also do a quick spot-check monthly, picking a random jobsite and verifying that the equipment listed as being there is actually present. The more often you audit early on, the faster your system becomes accurate and trusted.
How do I get my crews to actually use an equipment tracking system?
Keep it simple. If the process takes more than 30 seconds, people won’t do it. Scanning a QR code with a phone is about the right level of effort. Build it into the tools they’re already using for daily logs and job reporting so it’s not a separate step. And make accountability real. When equipment goes missing and the last person who had it can’t explain what happened, that needs to be a real conversation. People take tracking seriously when they know someone is actually looking at the data.
Frequently Asked Questions
How much does lost and stolen equipment actually cost contractors?
What's the best way to track construction equipment across multiple jobsites?
Are GPS trackers worth it for construction tools and equipment?
How do I get my crew to actually check tools in and out?
Should I assign tools to individual workers or keep a shared pool?
Related Articles
Construction Team Meetings: A Practical Guide to Meetings That Actually Get Results
Most construction team meetings waste time. Here's how to run weekly check-ins, safety meetings, kickoffs, and...
Read More →
Project Management for Small Contractors: You Don't Need Enterprise Software
You don't need a 50-person company to benefit from project management. Even a 5-person crew loses money without a...
Read More →
Free Construction Schedule Template
A solid construction schedule keeps your jobs on track, your crews busy, and your clients happy. Grab our free...
Read More →