Construction Fall Protection Guide for GCs
Falls kill more construction workers than any other hazard. Year after year, OSHA’s “Fatal Four” list puts falls at the top, and the numbers are not getting better fast enough. In 2024, falls accounted for roughly 36% of all construction fatalities. That is not a statistic you read and move on from. Those are people who went to work and did not come home.
As a general contractor, fall protection is your problem whether your own crews are on the roof or a sub’s framing crew is working the second floor. You set the tone on site. If your fall protection program is loose, sloppy, or nonexistent, somebody is going to get hurt. And when they do, OSHA is going to look at you first.
This guide covers what GCs actually need to understand about fall protection, from the equipment your crews should be wearing to the plans you should have written down before anyone sets foot on a ladder. If you have not already built a solid safety plan for your jobs, now is the time.
Why Fall Protection Is the GC’s Responsibility
There is a common misconception floating around jobsites: “My subs handle their own safety.” Technically, yes, each employer is responsible for their employees under OSHA. But here is the reality. When OSHA shows up after an incident, they are not just looking at the sub. They are looking at the GC who controlled the site, set the schedule, and had the authority to enforce safety rules.
Under OSHA’s multi-employer worksite policy, a GC can be cited as a “controlling employer” even if it was a subcontractor’s worker who fell. If you had the ability to prevent the hazard and did not, that citation has your name on it. And the fines are not small. OSHA penalties for serious violations now exceed $16,000 per instance, and willful violations can hit $163,000 or more.
Beyond the fines, think about what a fall does to your project. Work stops. An investigation starts. Your insurance premiums jump. Your EMR climbs, and suddenly you are losing bids because your safety record looks like a liability. One bad fall can cost a GC hundreds of thousands of dollars in direct and indirect costs.
The smart move is treating fall protection like it is your responsibility from day one, because it is. Build it into your pre-construction planning, your subcontractor agreements, and your daily site management. If you are already tracking daily activities with daily logs, add fall protection checks to that routine. Document everything.
Understanding the OSHA Fall Protection Standard
OSHA’s fall protection requirements for construction live primarily in 29 CFR 1926 Subpart M. If you have not read it cover to cover at least once, you should. But here is the practical summary of what matters most on your jobsites.
The 6-Foot Rule
In construction, fall protection is required whenever a worker is exposed to a fall of 6 feet or more to a lower level. That includes work on roofs, scaffolds, near floor holes, at leading edges, on steep slopes, and dozens of other situations. Six feet is not that high. Stand on a standard A-frame ladder and you are already there.
The Three Options
OSHA gives you three primary ways to protect workers from falls:
- Guardrail systems - Physical barriers that prevent workers from reaching an edge
- Safety net systems - Nets installed below the work area to catch falling workers
- Personal fall arrest systems (PFAS) - Harnesses, lanyards, and anchor points that stop a fall in progress
Each system has specific requirements for strength, installation, and use. You do not get to just pick whichever is cheapest. The system has to be appropriate for the work being performed.
Controlled Access Zones and Fall Protection Plans
For certain types of leading-edge work where conventional fall protection is not feasible, OSHA allows a written fall protection plan as an alternative. This is not a loophole. It requires documentation from a qualified person explaining why conventional methods will not work and what alternative measures are in place. Inspectors look at these closely.
If your crews are doing roofing work, the rules get even more specific. Low-slope roofs, steep-slope roofs, and work near roof edges all have their own requirements. Check our roofing project management guide for more on managing those jobs safely.
For a broader look at staying on the right side of OSHA across all your operations, our OSHA compliance guide covers the essentials.
Use Systems: Getting Them Right
Personal fall arrest systems are the most common fall protection method on construction sites, and they are also the most commonly screwed up. A put to work is not a magic safety blanket. It only works if every component is selected correctly, inspected regularly, used properly, and connected to an adequate anchor point.
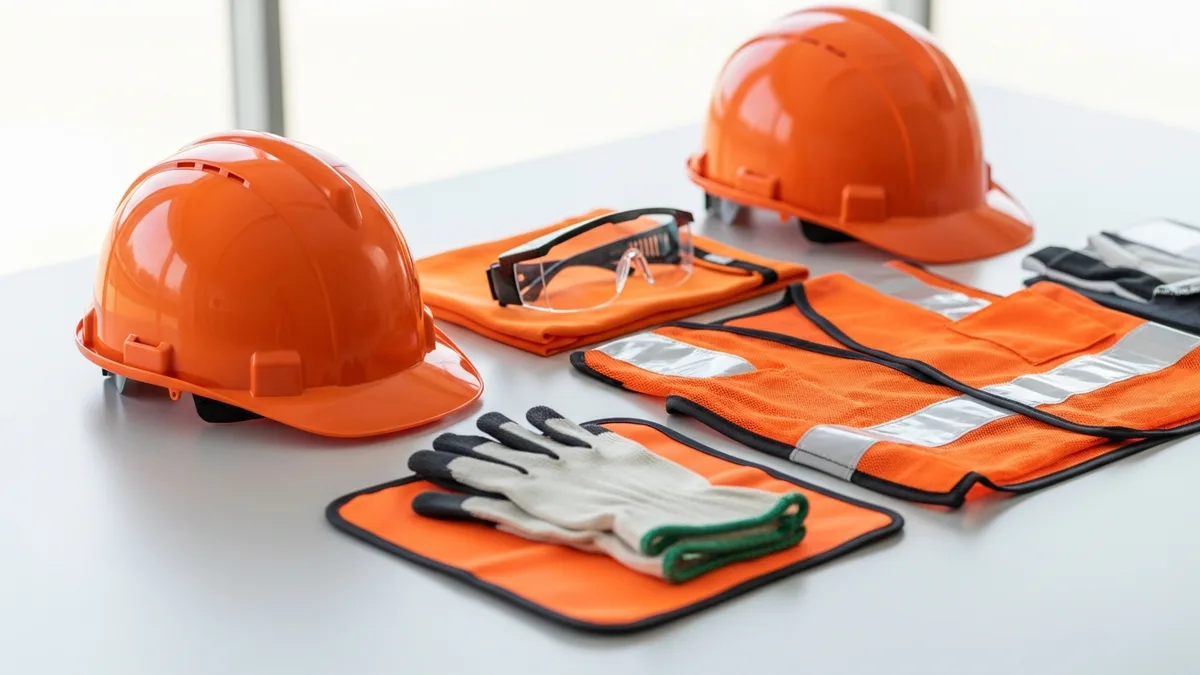
Components of a Personal Fall Arrest System
A complete PFAS has three parts:
- Full-body put to work - The only body support device allowed in a PFAS (body belts are not permitted for fall arrest)
- Connecting device - A lanyard, self-retracting lifeline (SRL), or combination that links the tap into to the anchor
- Anchor point - A secure point of attachment capable of supporting 5,000 pounds per attached worker, or designed by a qualified person as part of a complete system
Each piece matters. A $200 put to work connected to a $300 SRL means nothing if the anchor point is a 2x4 screwed into rotten decking.
Sizing and Fit
A tap into that does not fit properly will not perform in a fall. Worse, a loose use can cause serious injury during fall arrest as the body shifts inside the straps. Every worker needs to be trained on how to put on and adjust their specific tap into model. The dorsal D-ring (the connection point on the back) should sit between the shoulder blades. Leg straps should be snug but allow a flat hand to slide between the strap and the leg. Chest straps should be centered on the chest.
Contractors across the country trust Projul to run their businesses. Read their reviews.
One size does not fit all. Stock multiple sizes and make sure workers are wearing the right one.
Inspection
Harnesses need to be inspected before every single use. Workers should check for frayed webbing, damaged stitching, cracked or bent hardware, corrosion, and any signs of chemical or heat damage. Lanyards and SRLs need the same treatment.
Here is the part a lot of crews skip: documentation. Every formal inspection should be recorded with the date, inspector name, equipment serial number, and findings. Use your photos and documents system to snap pictures of inspection tags and keep records organized. When OSHA asks for your inspection history, “we check them every morning” without proof is not going to cut it.
After a Fall
Any tap into, lanyard, or SRL that has been involved in arresting a fall must be removed from service immediately. Period. Even if it looks fine. The forces involved in stopping a fall can cause internal damage to webbing and hardware that is not visible. Tag it, pull it off the site, and destroy it or return it to the manufacturer for evaluation.
Free Fall Distance and Swing Falls
Two concepts that trip up even experienced crews:
Free fall distance is how far a worker falls before the arrest system begins to engage. OSHA limits this to 6 feet. If your lanyard is 6 feet long and your anchor is at foot level, the math does not work. The worker could fall 6 feet of lanyard plus body height before the system engages, slamming them into a lower level.
Swing falls happen when a worker is not directly below their anchor point. If they fall, they swing like a pendulum toward the point directly below the anchor, potentially hitting structures, equipment, or the ground off to the side. Planning anchor point locations to minimize swing fall potential is critical and often overlooked.
Guardrails: The First Line of Defense
If harnesses are the most common fall protection, guardrails should be the most common. They are passive, meaning they do not require the worker to do anything. No buckling in, no connecting to an anchor. The guardrail is just there, doing its job.
When to Use Guardrails
Guardrails are your go-to for protecting edges and openings where workers are performing tasks. Think perimeter edges of raised floors during framing, openings in floors or roofs, ramps, runways, and walkways. Anywhere a worker could walk or stumble to an unprotected edge, a guardrail should be your first consideration.
OSHA Guardrail Requirements
The standard is specific:
- Top rail height must be 42 inches, plus or minus 3 inches, above the walking/working surface
- Mid rail must be installed at a height midway between the top rail and the walking surface
- The guardrail system must withstand 200 pounds of force applied in any outward or downward direction at any point along the top rail
- Toeboards are required where objects could fall on workers below (at least 3.5 inches tall)
These are minimums. On a busy site with heavy equipment moving near edges, you might want something more substantial.
Common Guardrail Mistakes
The biggest mistake GCs make with guardrails is treating them as optional or temporary. Crews remove guardrail sections “for just a minute” to move materials and never put them back. Or guardrails go up during framing but come down before the building is fully enclosed, leaving workers exposed during subsequent trades.
Other common problems:
- Using guardrails that are too flimsy (cable rails that deflect too far under load)
- Failing to install mid rails (the top rail alone is not compliant)
- Leaving gaps at corners or where guardrail sections meet
- Not installing guardrails around floor openings and stairwells during construction
Make guardrail installation and maintenance a checklist item on your daily walk-throughs. If a section is down, find out why and get it back up before work continues in that area.
Guardrails on Scaffolding
Scaffolding has its own set of guardrail requirements under Subpart L. If your jobs involve scaffolding, take a look at our scaffolding safety guide for the specifics. The short version: guardrails are required on all open sides and ends of scaffold platforms more than 10 feet above the ground.
Writing a Fall Protection Plan That Actually Works
Every job should have a site-specific fall protection plan. Not a generic template you downloaded five years ago and never updated. A real plan that addresses the actual hazards on the actual site where actual people are working.
What Goes in the Plan
A solid fall protection plan includes:
-
Site assessment - Walk the site and identify every location where fall hazards exist or will exist during construction. Include heights, edge conditions, floor openings, roof work, steel erection, and anything else relevant.
-
Protection methods by task - For each identified hazard, document which fall protection method will be used. Be specific. “Workers will use harnesses” is not good enough. “Workers installing trusses on Building B will use personal fall arrest systems with SRLs connected to engineered anchor points on the ridge beam, installed per manufacturer specifications” is what you are after.
-
Equipment specifications - List the specific equipment required, including use models, lanyard types, anchor point ratings, and guardrail systems. Include manufacturer information and inspection intervals.
-
Rescue procedures - This is the part most plans miss entirely. What happens after someone falls and is suspended in their tap into? Suspension trauma can become life-threatening within minutes. Your plan must include a rescue procedure that can be executed quickly with the equipment and personnel on site. “Call 911” is not a rescue plan.
-
Training requirements - Who needs training, on what, and how often. Document completed training with dates and trainer credentials.
-
Competent person designation - OSHA requires a “competent person” for fall protection, meaning someone who can identify fall hazards and has the authority to take corrective action. Name this person in the plan.
-
Inspection schedules - When and how equipment will be inspected, and who is responsible.
Making the Plan a Living Document
Here is where most GCs fail. They write a plan, file it, and never look at it again. Conditions on a construction site change constantly. New floors go up. Roof work starts. A sub brings in a crew that was not part of the original planning. The fall protection plan needs to evolve with the project.
Build plan reviews into your project schedule. Every time a new phase starts or a new sub mobilizes, revisit the fall protection plan. Update it and communicate the changes to everyone on site.
If your team is already using a system for daily logs, tie fall protection updates into that workflow. Note changes in conditions, new hazards identified, and any corrective actions taken. This creates a paper trail that protects you and, more importantly, keeps people safe.
Training, Documentation, and Building a Culture That Takes Falls Seriously
You can have the best harnesses money can buy and guardrails built like Fort Knox. None of it matters if your crews do not know how to use the equipment, do not understand the hazards, and do not care about following the rules.
Training Requirements
OSHA requires that every worker exposed to fall hazards be trained by a competent person. Training must cover:
- The nature of fall hazards on the site
- Correct procedures for installing, inspecting, and using fall protection systems
- The role of each employee in the fall protection plan
- Correct procedures for handling and storing equipment
Training must be documented. Keep records of who was trained, when, what was covered, and who conducted the training. Retraining is required when conditions change, new equipment is introduced, or a worker demonstrates that previous training was not effective.
Building a real training program takes effort, but it pays off in fewer incidents, lower insurance costs, and better OSHA audit outcomes. Our construction training program guide goes deeper on setting up training that sticks.
Documentation Is Your Best Defense
When something goes wrong, and on a long enough timeline something always does, your documentation is what separates a defensible position from a catastrophic one. You need records of:
- Fall protection plans (site-specific, current, signed)
- Training records for every worker on site
- Equipment inspection logs with dates and serial numbers
- Daily site safety observations and corrective actions
- Toolbox talks and safety meeting attendance
- Subcontractor safety agreements and compliance audits
Keep this organized and accessible. Digital tools beat paper filing cabinets every time. When an OSHA inspector asks for your use inspection records from three months ago, you want to pull them up in seconds, not dig through a box of crumpled forms in the job trailer.
Using a project management platform with built-in photo and document storage makes this dramatically easier. Snap a photo of an inspection tag, a completed guardrail installation, or a training session. It is timestamped, geotagged, and searchable. That is the kind of documentation that holds up.
Changing the Culture
The hardest part of fall protection is not the equipment or the paperwork. It is getting grown adults who have been doing this work for 20 years to actually wear their put to work, tie off every time, and speak up when they see something unsafe.
Culture change starts at the top. If the GC’s superintendent is walking a roof edge without fall protection, every worker on that site gets the message that safety is optional. Lead by example. Enforce the rules consistently. Do not let “the good guys” skip fall protection because they are experienced. Experience does not make you immune to gravity.
Recognize and reward safe behavior. Make it easy to report hazards without fear of retaliation. And when someone does violate the fall protection plan, address it immediately and document the corrective action.
The Business Case
If the moral argument does not move you, consider the numbers. The average cost of a fall-related workers’ comp claim exceeds $47,000. Fatality cases can reach millions in wrongful death settlements. Your EMR goes up, your insurance costs go up, and your ability to win bids goes down.
Investing in proper fall protection, good equipment, thorough training, and rigorous documentation, is one of the smartest business decisions a GC can make. It keeps your people safe, your projects on schedule, and your company in business.
If you are ready to get your safety documentation and project management tightened up, take a look at what Projul can do for your crew. Managing fall protection is a lot easier when your daily logs, photos, and documents all live in one place.
Fall protection is not complicated, but it demands consistency. Every site, every day, every worker. The equipment exists. The standards are clear. The plans are not hard to write. What separates the GCs with clean safety records from the ones dealing with OSHA citations and worse is simply the discipline to do it right, every single time.
Ready to stop guessing and start managing? Schedule a demo to see Projul in action.
Your crew is counting on you to make that call. Do not let them down.
Frequently Asked Questions
At what height is fall protection required on construction sites?
What are the three main types of fall protection systems in construction?
How often do fall protection harnesses need to be inspected?
Who is responsible for fall protection on a construction site with multiple subcontractors?
What should be included in a construction fall protection plan?
Related Articles

Construction Fire Watch: When You Need One and How to Run It Right
Fire watch is one of those requirements that catches GCs off guard until an inspector shows up or, worse, a fire breaks...
Read More →
Construction Emergency Response Plans: A Contractor's Complete Guide
Every construction site needs a solid emergency response plan before the first shovel hits dirt. This guide walks you...
Read More →
Construction Heat Illness Prevention: How to Keep Your Crews Safe When Temperatures Climb
Heat illness kills more construction workers than any other weather event. Here's what every contractor needs to know...
Read More →