Flooring Installation Management for GCs

Flooring installation sits at the tail end of nearly every construction project. That positioning makes it both straightforward and surprisingly tricky to manage. On paper, you’re just laying down a finished surface. In practice, you’re dealing with moisture readings, acclimation windows, subfloor prep that should have happened weeks ago, and a client who wants to move in yesterday.
If you’ve been running projects for any length of time, you already know that flooring problems almost never start with the flooring installer. They start upstream. A slab that wasn’t properly cured. Drywall dust that nobody cleaned up. An HVAC system that wasn’t running when the hardwood showed up. By the time your flooring sub walks in, every shortcut and delay from the previous months is sitting right there on the subfloor waiting for them.
This guide breaks down what GCs actually need to think about when managing flooring installations across tile, hardwood, carpet, and LVP. Not the sales pitch version. The version that keeps your projects on schedule and your callbacks to a minimum.
Understanding the Four Major Flooring Types and Their Quirks
Every flooring material has its own personality on a job site, and treating them all the same is a fast way to generate warranty claims. Here’s what matters for each one from a project management perspective.
Tile (ceramic, porcelain, natural stone) is the most labor-intensive flooring to install. Your tile crew needs a flat, clean subfloor. On concrete, that usually means grinding down high spots and filling low spots with self-leveler. On wood subfloors, you’re looking at cement board or an uncoupling membrane like Ditra. The install itself involves thinset application, tile setting, overnight cure times, and then grouting with another cure period after that. A bathroom might take 2 to 3 days. A large commercial lobby could take weeks. And that’s before you factor in the pattern layouts and cut work around penetrations.
Tile is heavy, so your material handling plan matters. A pallet of porcelain tile can weigh over 2,000 pounds, and it needs to be stored flat and dry. If your building has weight restrictions on upper floors, plan your staging carefully.
Hardwood is the prima donna of flooring materials. It needs acclimation time in the actual space where it’s being installed, typically 3 to 7 days with HVAC running at normal conditions. The moisture content of both the wood and the subfloor has to be within the manufacturer’s specified range, or you’re looking at cupping, gapping, or buckling down the road. And when it does fail, everyone points at the GC, not the wood.
Nail-down hardwood on wood subfloors is the traditional method and still the most common in residential. Glue-down on concrete is standard for commercial and multi-family. Floating installations work for engineered hardwood but have limitations on span and transition details. Your flooring sub will have strong opinions about which method to use, and you should listen to them.
Luxury Vinyl Plank (LVP) has taken over a huge chunk of the market in the last decade, and for good reason. It’s more forgiving than hardwood on moisture, faster to install, and handles temperature swings better than most materials. But “more forgiving” doesn’t mean “bulletproof.” LVP still needs a flat subfloor (most manufacturers spec 3/16 inch over 10 feet), and it can telegraph imperfections from below. Glue-down LVP is more stable but slower. Click-lock floating LVP goes in fast but needs proper expansion gaps at every wall and transition.
One thing that catches GCs off guard with LVP: it’s sensitive to direct sunlight and heat. In spaces with large south-facing windows, you can get expansion issues if the surface temperature gets too high. Make sure your client knows this before selections are finalized, not after the floor starts peaking at the seams.
Carpet is the simplest to install and the easiest to damage. That’s why it always goes last. Carpet installation is relatively quick. A good crew can knock out a 2,000-square-foot home in a day. But they need the space completely clean, all other trades done, and the HVAC running. Tack strips go down first, then pad, then carpet. Seam placement matters a lot for appearance, so make sure your installer does a site walk before cutting day.
The biggest management headache with carpet isn’t the install itself. It’s protecting it after installation. If you have any trades working in a carpeted space after install, you need to require shoe covers and floor protection. One muddy boot print in a master bedroom closet will cost you a re-stretch or replacement.
Subfloor Prep: The Part Nobody Wants to Pay For
Here’s the uncomfortable truth about flooring: the most important work happens before a single tile, plank, or carpet fiber touches the floor. Subfloor preparation is where flooring projects succeed or fail, and it’s consistently the most underestimated line item in construction budgets.
On new construction with concrete slabs, moisture is your biggest concern. Fresh concrete takes a long time to dry. The old rule of thumb is one month per inch of thickness, but that varies wildly based on mix design, ambient conditions, and whether a vapor barrier was placed under the slab. You need actual moisture testing, not guesswork. The two standard methods are calcium chloride tests (ASTM F1869) and relative humidity probe tests (ASTM F2170). Most flooring manufacturers require RH testing now, and they want readings below 75% to 80% depending on the product.
If your slab is too wet and the schedule can’t wait, you have options. Moisture mitigation systems like epoxy coatings or sheet membranes can bring readings into acceptable range. But they add cost and time, and they need to be compatible with both the slab and the flooring adhesive. Get your flooring sub involved in that decision early.
On wood-framed construction, flatness is usually the bigger issue. Subfloors built from OSB or plywood over joists will have variation. Seams between panels create ridges. Joists that aren’t perfectly level create humps and valleys. For tile, you need the subfloor flat to 1/4 inch over 10 feet. For hardwood and LVP, 3/16 inch over 10 feet is common. Carpet is more forgiving, but major humps will still telegraph through and annoy your client.
Self-leveling compound is the standard fix for flatness issues on both concrete and wood subfloors. It’s not cheap, and it adds a day to the schedule for cure time. But it’s far cheaper than pulling up flooring and doing it again after the fact.
One more thing on subfloor prep: make sure your drywall and painting subs clean up after themselves. Drywall dust and paint splatters on a subfloor can compromise adhesive bond. A quick sweep isn’t enough. You need the floor scraped, swept, and sometimes even primed before flooring work starts. Build that cleanup into your scope of work for the preceding trades, or budget for a dedicated cleaning crew before flooring begins.
Scheduling Flooring in the Construction Sequence
Curious what other contractors think? Check out Projul reviews from real users.
Getting the timing right on flooring installation means understanding where it fits in the overall project sequence and what conditions need to be met before your flooring crew shows up. This is where a solid scheduling system pays for itself.
The general rule is simple: flooring goes in after all overhead and wall work is complete, and before final trim. That means:
- HVAC, plumbing, and electrical rough-ins are done and inspected
- Drywall is hung, taped, mudded, and sanded
- Painting is finished (at least the walls and ceiling; base coat on trim is fine)
- Cabinets are set (for kitchens and baths where flooring butts to cabinet bases)
- The space is broom-clean and climate-controlled
Tile is the one exception that sometimes moves earlier in the sequence. In bathrooms especially, tile often goes in before vanities and toilets since those fixtures sit on top of the tile. Kitchen backsplash tile obviously waits until after cabinets and countertops. Coordinate closely with your tile sub on sequencing since they may need multiple trips for different areas of the project.
For hardwood, the acclimation clock starts when material arrives on site and the space is at living conditions. You can’t stack hardwood in a garage that’s 40 degrees and call it acclimated. The HVAC needs to be running and the space needs to be within the temperature and humidity range the manufacturer specifies. Build those acclimation days into your schedule as a specific task, not just a mental note.
LVP is more flexible on timing, but it still needs a climate-controlled space and a prepped subfloor. The nice thing about LVP is that it installs fast and can often be walked on immediately, which helps when you’re trying to get trim carpenters back in quickly.
Carpet, as mentioned, is dead last. Schedule it after all painting touch-ups, after all other flooring is in, and ideally just before or during the final punch list phase. Every day between carpet install and client move-in is a day something could stain or damage it.
When you’re managing multiple flooring types on the same project (tile in baths, hardwood in living areas, carpet in bedrooms), you’re essentially coordinating three or four different subs with different timelines. That’s where your subcontractor management skills really get tested. Map out each flooring type’s prep requirements, lead times, and install durations separately, then layer them into your master schedule.
Material Procurement and Lead Times
Flooring materials can have some of the longest and most unpredictable lead times on a project. Custom tile from overseas? Eight to twelve weeks. Specialty hardwood species? Six to ten weeks. Even “stock” LVP at a big box store can suddenly go on backorder with no warning.
The key is ordering early and ordering right. As soon as your client finalizes flooring selections, get those orders placed. Don’t wait until the space is ready for install. You want materials on site (or at least in a warehouse) well before your install window opens. This is basic procurement management, but it’s surprising how many projects get tripped up by flooring lead times.
A few procurement tips specific to flooring:
Always order extra. The industry standard is 10% overage for straight-lay patterns and 15% or more for diagonal or herringbone layouts. Complex tile patterns with multiple sizes need even more. That extra material covers cuts, waste, breakage during install, and gives the client a small reserve for future repairs. Trying to reorder a specific dye lot of carpet or a production run of tile six months later is a nightmare. The color won’t match.
Verify quantities against actual field measurements, not plan takeoffs. Walls are never perfectly where the plans say they are. Closets get added. Room dimensions change. Send your flooring sub or a dedicated measurer to the site after framing is complete to get real numbers. Your estimating tools can give you a solid starting point from plans, but field-verify before placing final orders. If you need a template for pricing flooring jobs, check out our free flooring estimate template.
Inspect materials on delivery. Open boxes and check for color consistency, damage, and correct product. Tile especially can vary between production lots. If half your tile is from lot A and half from lot B, you might see visible color differences once it’s on the wall or floor. Catch that before install day, not during.
Store materials properly on site. Hardwood needs to acclimate in the install space, so plan for that staging area. Tile and LVP should be stored flat, dry, and at reasonable temperatures. Carpet rolls need to be kept clean and dry. If your job site doesn’t have secure, climate-controlled storage, arrange for off-site warehousing and stage deliveries in phases.
Quality Control During and After Install
Flooring quality issues are some of the most visible and most expensive problems on a construction project. A cracked tile, a squeaky hardwood plank, or a carpet seam that’s coming apart will catch your client’s eye immediately. And unlike a minor paint imperfection, flooring fixes usually mean tearing something out and starting over.
Prevention starts with your pre-install checklist. Before any flooring sub starts work, verify:
- Subfloor moisture readings are documented and within spec
- Subfloor flatness has been checked and corrected as needed
- The space is clean, dry, and climate-controlled
- All other trades are done in that area (no one coming back to drill through the floor)
- Materials have been acclimated per manufacturer requirements
- The layout has been reviewed and approved (especially for tile patterns and hardwood direction)
During installation, spot-check the work regularly. For tile, look at lippage (edges of adjacent tiles that don’t line up), grout joint consistency, and cuts around penetrations. For hardwood, listen for squeaks (which usually indicate subfloor issues, not flooring issues) and check that the expansion gap at walls is consistent. For LVP, verify that click joints are fully engaged and that the pattern isn’t repeating visibly. For carpet, check seam locations and stretch quality by pressing your foot firmly and looking for wrinkles.
Your quality control process should include documenting the installation conditions. Record the temperature, relative humidity, subfloor moisture readings, and acclimation dates. If a warranty claim comes up two years from now, that documentation is your defense. Without it, the manufacturer will deny the claim and your client will be looking at you.
Post-install protection is just as important as the install itself. Once flooring is down, it needs to stay protected until the project is complete. For hard surfaces (tile, hardwood, LVP), use ram board or similar heavy paper protection taped at the seams. For carpet, use adhesive-backed carpet film. Make it a job site rule that protection goes down immediately after installation and stays down until final clean. Include this requirement in your subcontractor agreements and enforce it.
Common flooring callbacks and how to prevent them:
- Tile cracking: Usually caused by subfloor movement or insufficient thinset coverage. Require 95% coverage on all floor tile using back-buttering for large-format tiles.
- Hardwood gaps or cupping: Almost always moisture-related. Proper acclimation and moisture testing prevent this.
- LVP peaking at seams: Caused by insufficient expansion gaps or direct sun exposure creating excessive heat. Verify gaps at every wall and transition.
- Carpet seams showing: Poor seam sealing or seam placement in high-traffic areas. Review seam layout before install and require hot-melt seam tape.
- Squeaky floors under any material: This is a subfloor issue. Screws back into joists before flooring install will usually fix it. Much cheaper than pulling up finished flooring later.
Coordinating With Your Client on Selections and Expectations
Flooring is one of the most personal choices a homeowner or tenant makes on a project. They’ll spend hours picking the perfect shade of gray LVP or debating between 3/4-inch solid oak and 1/2-inch engineered. That’s fine. What’s not fine is when those decisions happen late, change frequently, or come with unrealistic expectations about performance and timeline.
As a GC, your job is to set clear deadlines for flooring selections and educate your client on what each choice means for the project schedule and budget. Create a selection deadline that’s tied to your procurement timeline. If hardwood needs to be ordered 8 weeks before install and you need 5 days for acclimation, your client needs to finalize that selection at least 9 to 10 weeks before the planned install date. Put that deadline in writing and explain the consequences of missing it.
Have honest conversations about material performance. Clients who choose solid hardwood in a kitchen need to understand that it will dent, scratch, and react to spills differently than tile or LVP. Clients who pick light-colored carpet for a high-traffic area need to know what they’re signing up for. Those conversations are easier to have before installation than after, when they’re calling you about the scratch from their dining chair.
Transitions between different flooring types are another common source of client dissatisfaction. Where tile meets hardwood, where LVP meets carpet, those transition strips and thresholds need to be discussed during the selection phase. Show your client samples of transition options. Let them choose the profile and finish. A client who’s surprised by a metal transition strip in their doorway will blame you for not asking.
Document all selections with product names, SKU numbers, colors, and quantities. Get written approval before ordering. When changes happen (and they will), document the change order with any schedule and cost impacts. This is basic project management, but flooring selections seem to generate more changes than almost any other finish category.
Finally, set expectations about the final days of the project. Flooring installation creates dust (especially tile cutting), noise, and restricted access. Let your client know which areas will be off-limits during installation and for how long after. Hardwood finishes, whether site-applied or factory-coated, need cure time before furniture placement. LVP and carpet can handle furniture sooner, but still need protection during the move-in process.
If you want to get a clearer picture of how construction management software can help you keep all of these moving pieces in order, from scheduling to procurement to sub coordination, book a demo with Projul and see how other GCs are running their flooring and finish phases without the chaos.
See how Projul makes this easy. Schedule a free demo to get started.
Managing flooring installation well isn’t about knowing how to lay tile or stretch carpet. That’s your sub’s job. Your job is making sure the conditions are right, the materials are there, the schedule makes sense, and everyone knows what’s expected. Get those pieces in place, and flooring becomes one of the smoothest phases on the project instead of the one that holds up your certificate of occupancy.
Frequently Asked Questions
What order should flooring be installed in a new construction project?
How long does hardwood flooring need to acclimate before installation?
Can you install flooring before painting is finished?
What subfloor moisture levels are acceptable for flooring installation?
How do GCs handle flooring material lead times on tight schedules?
Related Articles

Construction Septic System Installation: What Every GC Needs to Know
Septic systems on rural builds bring unique scheduling, permitting, and soil challenges that can wreck your timeline if...
Read More →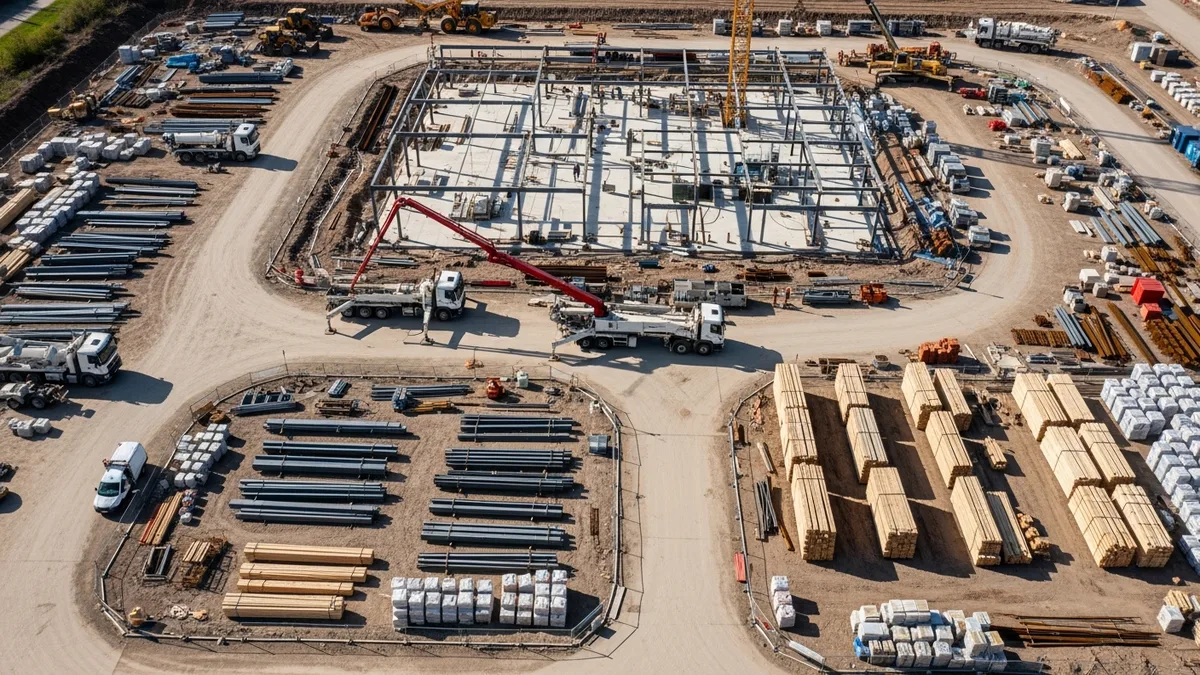
Construction Painting Project Management: Coordinating Interior and Exterior Phases
Painting is one of those trades that touches every other trade on the schedule. Get the sequencing wrong, and you're...
Read More →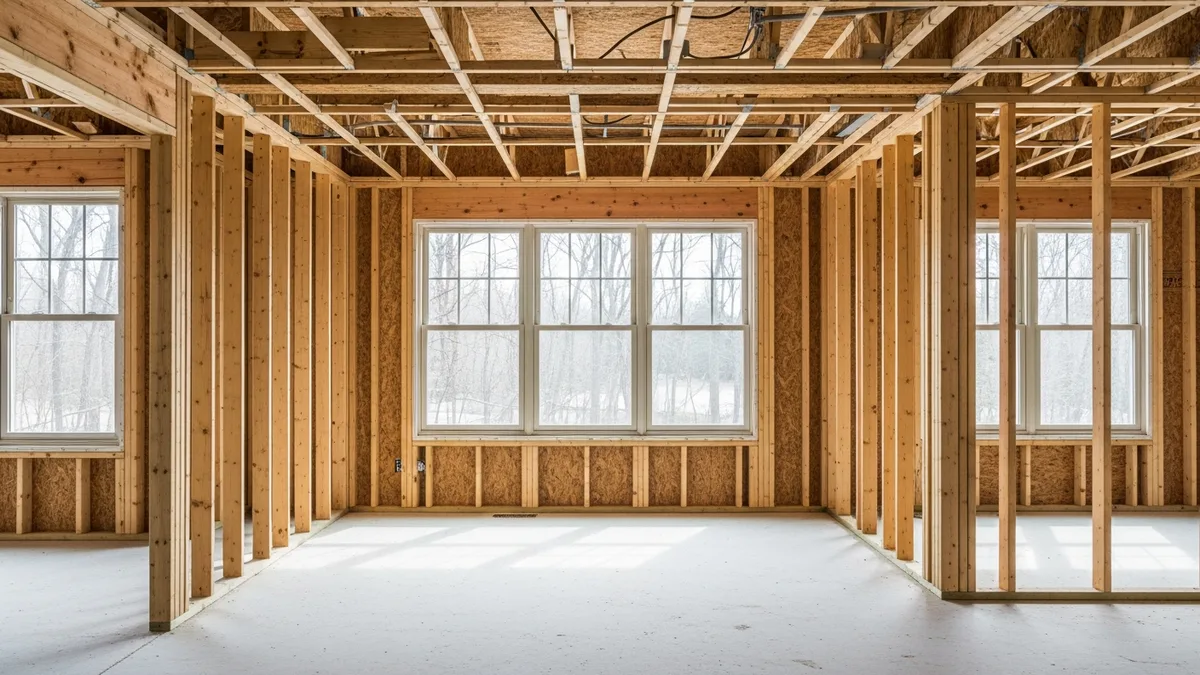
Epoxy Flooring and Industrial Coatings: A Contractor's Complete Guide
Epoxy flooring and industrial coatings are high-margin work when you get the process right and a fast way to lose money...
Read More →