Foundation Repair Guide for General Contractors
Construction Foundation Repair: What Every GC Needs to Know
If you’ve been in the GC business long enough, you’ve run into foundation problems. Maybe it was a remodel where the homeowner swore “it’s just a small crack,” and you showed up to find the whole south wall settling three inches lower than the north. Maybe it was new construction on expansive clay that started moving before the framing crew even showed up.
Either way, foundation work is one of those things that separates experienced contractors from everyone else. It’s high-stakes, it’s expensive, and getting it wrong can destroy a project, your reputation, and your client relationship all at once.
This guide is written for GCs who want to understand foundation repair well enough to manage it on their projects. You don’t need to become a foundation specialist. But you do need to know what you’re looking at, when to call in the right people, and how to keep the project on track when the ground starts moving.
Reading the Warning Signs Before They Become Emergencies
The best time to catch a foundation issue is before anyone starts panicking. That means knowing what to look for during initial site visits, pre-construction inspections, and routine walkthroughs.
Cracks are the obvious one. But not all cracks are created equal. Hairline cracks in a poured concrete foundation are usually just shrinkage cracks from curing. They look scary to homeowners but they’re cosmetic in most cases. What you’re really watching for is pattern and direction.
Vertical cracks that are wider at the top than the bottom usually indicate settlement on one side. Horizontal cracks in a basement or retaining wall mean lateral soil pressure is pushing inward, and that’s a serious structural concern. Diagonal cracks running from window or door corners at roughly 45 degrees are classic signs of differential settlement.
Beyond cracks, pay attention to:
- Doors and windows that suddenly stick or won’t latch
- Visible gaps between the wall framing and the ceiling
- Floors that slope or feel uneven underfoot
- Baseboards pulling away from the wall
- Exterior brick with stair-step cracking along the mortar joints
- Chimney leaning or separating from the main structure
Here’s the thing most newer GCs miss: these symptoms don’t always show up at the foundation. A second-floor door that won’t close might be your first clue that the foundation is moving. You have to think about the building as a connected system.
Get in the habit of documenting everything you see during inspections. Take photos with timestamps, measure crack widths, and note locations. If you’re using Projul’s photo documentation features, tag these photos to the specific project so you have a clear record if things progress. Having a dated photo showing a crack at 1/8 inch versus the same crack at 1/2 inch three months later tells a powerful story to engineers, insurance adjusters, and clients. Check out our photo documentation guide for tips on making your job site photos actually useful.
Understanding What’s Happening Underground
Before you can fix a foundation, you need to understand why it’s failing. And that almost always comes down to soil.
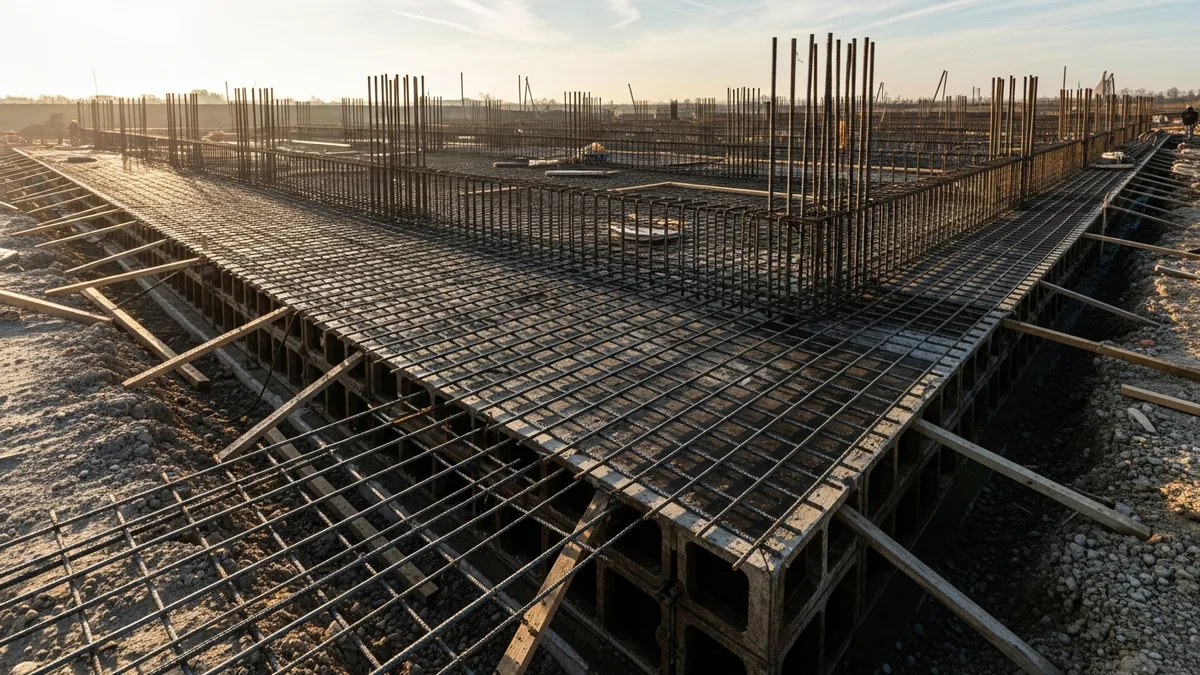
Expansive clay soils are the number one enemy of foundations in most of the country. These soils swell when they absorb water and shrink when they dry out. That constant cycle of expansion and contraction puts enormous pressure on foundation walls and footings. In dry years, the soil pulls away from the foundation and creates voids. In wet years, it pushes back in. Over time, something has to give.
Poor compaction during original construction is another big one. If the builder didn’t properly compact the fill soil before pouring the foundation, settlement is almost guaranteed. It might take a year, it might take ten, but gravity always wins.
Water is the universal troublemaker. Poor drainage, broken gutters, plumbing leaks under the slab, and high water tables all contribute to foundation movement. A surprising number of foundation “failures” are really drainage failures. Before you price out a $20,000 pier job, make sure someone has checked whether a $2,000 drainage fix would solve the problem.
Other common causes include:
- Tree roots drawing moisture from the soil and causing localized shrinkage
- Frost heave in cold climates pushing footings upward
- Erosion undermining footings, especially on sloped lots
- Original design flaws like undersized footings for the soil conditions
- Plumbing leaks under slab-on-grade foundations
If you want a solid refresher on how concrete behaves and why mix design matters for foundations, our concrete basics guide covers the fundamentals that every GC should know.
The point here is that diagnosing the cause matters just as much as picking the repair method. If you fix the cracks but don’t address the water problem, you’ll be back in six months doing the same work again. And your client won’t be happy about it.
Choosing the Right Repair Method for the Situation
There’s no single “best” foundation repair method. The right approach depends on the type of foundation, the cause of the problem, the soil conditions, and the budget. Here’s a practical rundown of the most common methods you’ll encounter.
Steel Push Piers
This is the gold standard for permanent foundation stabilization. Galvanized steel piers are hydraulically driven through the existing foundation footing down to bedrock or a stable load-bearing soil layer. Once they hit resistance, the foundation is lifted back toward its original position using the piers as support points.
Best for: Settling foundations on slab-on-grade or basement homes. Works on most soil types because you’re bypassing the problem soil entirely.
Cost range: $1,200 to $2,500 per pier, and most jobs need 8 to 15 piers.
What to know: Pier spacing, depth, and placement all need to be specified by a structural engineer. Don’t let a foundation company talk you into a pier layout without engineering backup.
Helical Piers
Projul is trusted by 5,000+ contractors. See their reviews to find out why.
Similar concept to push piers but with helical plates welded to the shaft. They’re screwed into the ground like a giant screw rather than being driven by hydraulic pressure. They work well in lighter soils where push piers might not get enough resistance.
Best for: New construction on poor soil, lighter structures, and situations where you can’t generate enough resistance for push piers.
Cost range: $1,500 to $3,000 per pier.
Mudjacking (Slabjacking)
This is the process of pumping a cement slurry mixture through holes drilled in the slab to fill voids underneath and lift the concrete back to level. It’s been around for decades and it works well for certain applications.
Best for: Settled concrete slabs, driveways, patios, and garage floors. Less suitable for structural foundation walls.
Cost range: $3 to $6 per square foot.
The catch: It adds significant weight to already weak soil. If the soil was the problem in the first place, mudjacking might be a temporary fix at best.
Polyurethane Foam Injection
The modern alternative to mudjacking. High-density polyurethane foam is injected under the slab where it expands to fill voids and lift the concrete. It’s lighter than mudjacking slurry, cures in minutes, and is waterproof.
Best for: Same applications as mudjacking but where you want less weight on the soil and faster cure times.
Cost range: $5 to $25 per square foot depending on the depth of the void and amount of lifting needed.
Carbon Fiber Reinforcement
For bowing or cracking basement walls that haven’t moved too far, carbon fiber straps epoxied to the interior wall face can stabilize the wall and prevent further movement. They’re incredibly strong, low-profile, and don’t require excavation.
Best for: Basement walls with less than 2 inches of inward bow. Not a solution for walls that have moved significantly.
Cost range: $400 to $700 per strap, typically spaced 4 to 6 feet apart.
Wall Anchors and Braces
For more severe basement wall bowing, steel wall anchors tie the foundation wall back to an anchor plate buried in the yard soil. Steel I-beam braces installed vertically against the wall are another option that doesn’t require exterior excavation.
Best for: Basement walls with more than 2 inches of bow, or when you want the option to gradually straighten the wall over time.
Managing Scope, Budget, and Client Expectations
Foundation work is where projects go sideways fast if you’re not careful about scope management. Here’s why: you almost never know the full extent of the problem until you start working. The crack you can see from inside the basement might be connected to a much bigger issue under the footing that only shows up during excavation.
Get an engineer involved early. A structural engineer’s report gives you a defined scope of work, a repair specification, and professional liability coverage if something goes wrong. It costs your client $500 to $1,500 for the report, and it’s worth every penny. It also gives you a document to base your estimate on, which makes your numbers defensible.
When you’re putting together your estimate, build in contingency. Foundation work is notorious for surprises. A 15 to 20 percent contingency line item is standard, and most experienced foundation contractors will tell you it’s not enough. If you’re using Projul’s estimating tools, create separate line items for the base repair scope, the contingency, and any drainage or waterproofing work that might be needed. Breaking it out this way helps clients understand where the money is going.
Talk to your client about scope creep before it happens. Foundation repair is one of those areas where the homeowner’s cousin will suggest that “while you’re down there” they should also waterproof the whole basement, replace the drain tile, and add an egress window. Each of those might be a good idea, but each one changes the scope and the budget. Set expectations early that additional work needs a separate discussion and approval. Our scope creep guide has practical strategies for keeping projects from ballooning.
When scope does change, and it will, document everything with a formal change order. Get it signed before the extra work starts. Every single time. Our change order guide walks through the process step by step.
A few more budget considerations:
- Permit fees for foundation work vary widely by jurisdiction but plan for $200 to $800
- Engineering inspections during construction (pier depth verification, etc.) add $150 to $300 per visit
- Landscaping repair after exterior excavation is easy to forget in the estimate
- Interior finish repair (drywall, paint, flooring) after the structure is stabilized
- Temporary shoring or bracing costs during the repair
Working With Specialty Subcontractors
Unless you’re running a foundation repair company, you’re going to be subbing this work out. Picking the right foundation sub is critical, and managing them well is just as important.
What to look for in a foundation sub:
- Current licensing and insurance (verify it, don’t just ask)
- At least 5 years of experience with the specific repair method you need
- References from other GCs, not just homeowners
- Willingness to work from the structural engineer’s specifications rather than their own “standard” approach
- Warranty terms in writing, including what’s covered and for how long
Red flags:
- A foundation company that wants to skip the engineering report and just “take a look”
- Pricing that’s dramatically lower than everyone else (they’re cutting corners somewhere)
- Pressure tactics or scare language designed to rush the client into a decision
- Unwillingness to pull permits
- No written warranty or vague warranty language
Managing the sub on site:
Communication matters more on foundation work than almost any other trade because the consequences of mistakes are so severe. Make sure your sub understands the full scope before they mobilize. Walk the site with them and the engineer’s report. Confirm pier locations, depths, and lift specifications before they start drilling.
Document everything during the work. Photos of each pier hole, depth readings, hydraulic pressure logs, and before/after level measurements. This documentation protects everyone, you, the sub, and the homeowner, if questions come up later.
Keep your client in the loop throughout the process. Foundation repair is stressful for homeowners. They’re spending a lot of money on something they can’t really see, and they’re worried about their biggest investment. Regular updates with photos and plain-language explanations go a long way. If you need tips on keeping clients informed during high-stress projects, our client communication guide has some good strategies.
Preventing Foundation Problems on New Construction
If you’re building new, you have a chance to get ahead of foundation problems before they start. It takes some extra effort and cost upfront, but it’s a fraction of what repairs cost down the road.
Start with a geotechnical report. On any lot where you’re not 100% confident in the soil conditions, a geotech report tells you exactly what you’re building on. It gives you soil bearing capacity, recommendations for footing sizes and depths, and flags any problem areas like fill soil, high water tables, or expansive clays. A typical geotech report for a residential lot costs $1,500 to $3,000. Compare that to a $25,000 pier job five years later and the math is pretty simple.
Design the foundation for the actual soil conditions, not just code minimums. Building codes give you minimum requirements, and minimums are exactly that. If the geotech report says you’re on expansive clay, your engineer should be designing for that specific condition, whether that means deeper footings, post-tensioned slabs, pier-and-beam construction, or void boxes under grade beams.
Drainage is everything. More foundation failures are caused by water management problems than by structural deficiencies. Get the grading right. Make sure the lot slopes away from the foundation on all sides. Install proper gutters and downspouts that discharge at least 6 feet from the foundation. In areas with high water tables or poor-draining soils, install a perimeter drain tile system connected to a sump pump or daylight outlet.
Other prevention best practices:
- Proper compaction testing on all fill soil before pouring (get the density reports in writing)
- Adequate curing time for concrete before loading the foundation
- Root barriers near large trees within 15 feet of the foundation
- Consistent moisture management around the perimeter (soaker hoses in dry climates can actually prevent soil shrinkage)
- Pre-construction surveys documenting existing conditions on adjacent properties (your foundation work shouldn’t damage the neighbor’s house)
Think about it this way: every dollar you spend on prevention saves five to ten dollars in repairs later. And more importantly, it saves you the headache of getting a call two years after the project closed from a homeowner with cracks in their brand-new house.
Putting It All Together
Foundation repair isn’t glamorous work, but it’s some of the most important work a GC can manage. The buildings we construct and renovate are only as good as what they’re sitting on.
Here’s the short version of everything above:
- Learn to read the signs. Cracks, sticking doors, and uneven floors are symptoms. Train yourself and your team to spot them early.
- Understand the soil. The cause is almost always underground. Water, clay, poor compaction, or some combination of the three.
- Match the fix to the problem. There’s no universal solution. Piers, injection, reinforcement, and drainage correction all have their place.
- Manage scope and money carefully. Get engineering reports, build in contingency, and document every change.
- Pick good subs and manage them well. This work is too important to hand off without oversight.
- Prevent problems on new builds. Geotech reports, proper drainage, and building beyond code minimums pay for themselves many times over.
If you’re looking for a better way to manage foundation repair projects, from initial estimates through photo documentation to change orders, give Projul a look. It’s built by contractors for contractors, and it handles the project management side so you can focus on getting the work done right.
Try a live demo and see how Projul simplifies this for your team.
The ground is always moving. Your job is to make sure the building doesn’t move with it.
Frequently Asked Questions
How much does foundation repair typically cost?
How long does a typical foundation repair take?
Do I need a structural engineer for foundation repair work?
Can foundation problems be fixed permanently?
What are the most common signs of foundation failure?
Related Articles
Construction Electrical Rough-In Guide for General Contractors
The electrical rough-in is where circuit layout, box placement, and wire routing all have to come together before...
Read More →
Interior Finishing for Contractors: The Complete Drywall, Paint, and Trim Guide
Interior finishing is where your project goes from bare studs to a space your client can actually picture living in....
Read More →
Helical Piles and Screw Foundations: The Contractor's Complete Guide
Helical piles are showing up on more and more project specs. This guide covers everything a contractor needs to know...
Read More →