Commercial HVAC System Selection Guide
Choosing the right HVAC system for a commercial build is one of the biggest mechanical decisions you’ll make on the project. Pick wrong and you’re looking at budget overruns, schedule delays, and a building owner calling you every July when the system can’t keep up with the heat. Pick right and you’ve got a building that stays comfortable, runs efficiently, and doesn’t eat the owner alive on utility bills.
This guide walks through the major system types, how load calculations work, what energy codes demand from you today, ductwork design basics, how to handle commissioning, and how to set up a maintenance plan that keeps everything running for years after you hand over the keys.
Understanding Commercial HVAC System Types
Not every commercial building needs the same mechanical system. A 5,000-square-foot strip mall tenant space and a 200,000-square-foot hospital have wildly different requirements. Here’s a breakdown of the three most common system types you’ll encounter on commercial projects.
Rooftop Units (RTUs)
Rooftop units are the workhorses of commercial HVAC. You see them on virtually every retail center, restaurant, small office building, and warehouse in the country. They’re packaged systems, meaning the compressor, condenser, evaporator, and air handler all sit in one cabinet on the roof.
Why contractors like them:
- All equipment stays out of the building’s usable floor space
- Installation is straightforward compared to split or chilled water systems
- Maintenance access is easy since everything is in one spot on the roof
- Replacement is simple when units reach end of life (typically 15 to 20 years)
- Lower upfront cost compared to VRF or chilled water
Where they fall short:
- Limited zoning capability without adding multiple units or VAV boxes
- Roof structural capacity needs to support the weight (units range from 400 to 6,000+ pounds)
- Ductwork runs can get long in larger buildings, reducing efficiency
- Noise can be an issue for occupied spaces directly below
RTUs make the most sense for single-story buildings under 50,000 square feet with relatively uniform cooling and heating needs. If you’re working on a restaurant or retail project, chances are you’ll be specifying RTUs. Make sure your construction cost tracking accounts for curb adapters, crane time for rooftop placement, and any structural reinforcement the roof might need.
Variable Refrigerant Flow (VRF)
VRF systems have been standard in Asia and Europe for decades and have gained serious traction in the U.S. over the last ten years. A VRF system uses one or more outdoor condensing units piped with refrigerant lines to multiple indoor units throughout the building. Each indoor unit has its own thermostat and expansion valve, so every zone controls independently.
Why VRF is gaining ground:
- Individual zone control means the conference room can be 68 degrees while the server room runs at 62
- Heat recovery VRF systems can simultaneously heat one zone and cool another, using rejected heat from cooling zones to warm heating zones
- Quiet operation since the compressor sits outside and indoor units are whisper-quiet
- No ductwork required for the indoor units (though ducted indoor units are available)
- Energy savings of 20 to 40 percent over conventional RTU systems in the right applications
The trade-offs:
- Higher upfront cost, typically 30 to 50 percent more than RTUs per ton of capacity
- Requires specialized installation crews trained by the manufacturer (Daikin, Mitsubishi, LG, etc.)
- Refrigerant piping runs need careful design and brazing, with leak detection becoming critical
- Not ideal for buildings with very high ventilation requirements like commercial kitchens
VRF shines in hotels, medical offices, mixed-use buildings, and any project where different spaces need different temperatures at different times. If you’re working on a commercial kitchen build-out, VRF alone won’t cut it for the kitchen space, but it can handle the dining area and back-office zones nicely.
Chilled Water Systems
For large commercial projects, hospitals, universities, and high-rises, chilled water systems are often the only practical choice. These systems use a central chiller (or multiple chillers) to produce cold water, which is then pumped through piping to air handling units (AHUs) throughout the building. The AHUs blow air across cooling coils fed by the chilled water loop.
When chilled water makes sense:
- Buildings over 100,000 square feet where multiple RTUs become impractical
- Campus-style projects where a central plant can serve multiple buildings
- Projects requiring very precise temperature and humidity control
- High-rise buildings where rooftop units aren’t feasible
What you’re signing up for:
- Significantly higher first cost including chillers, cooling towers, pumps, piping, and AHUs
- Dedicated mechanical rooms that take up real floor space
- More complex controls and building automation systems
- Specialized maintenance that requires trained building engineers on staff
On chilled water projects, your cost codes need to be dialed in tight. The mechanical scope alone can run 15 to 25 percent of total construction cost, and change orders in this area get expensive fast.
Running Accurate Load Calculations
Getting the load calculation right is the foundation of the entire HVAC design. Oversize the system and the owner pays too much upfront, the equipment short-cycles (turning on and off too frequently), humidity control suffers, and energy bills run higher than they should. Undersize it and the building can’t maintain temperature on design days, which means callbacks, complaints, and potential legal issues.
What Goes Into a Commercial Load Calculation
Commercial load calculations follow ASHRAE (American Society of Heating, Refrigerating, and Air-Conditioning Engineers) methods, with Manual N from ACCA being the standard for smaller commercial spaces. The calculation accounts for:
- Building envelope: Wall construction, insulation R-values, roof assembly, window U-factors and solar heat gain coefficients
- Orientation: A west-facing glass wall in Phoenix creates a massively different load than the same wall facing north in Seattle
- Internal loads: Occupant count (each person adds roughly 250 BTU/hr sensible and 200 BTU/hr latent), lighting wattage, and equipment heat output
- Ventilation requirements: ASHRAE 62.1 dictates minimum outside air rates, which adds significant load since you’re conditioning unconditioned outdoor air
- Infiltration: Air leakage through the building envelope, especially at doors, loading docks, and older construction
Software and Process
Most mechanical engineers use industry software like Carrier HAP (Hourly Analysis Program), Trane TRACE 700/3D, or Wrightsoft for commercial calculations. These tools run 8,760-hour simulations using local weather data to determine peak heating and cooling loads plus annual energy consumption.
As the general contractor, you won’t typically run these calculations yourself, but you need to understand them well enough to catch errors. I’ve seen projects where the MEP engineer used the wrong climate zone, missed a commercial kitchen exhaust makeup air requirement, or didn’t account for a data center room that runs 24/7. Those mistakes become your problem during commissioning when the system can’t keep up.
Build load calculation review into your project management workflow. If you’re using construction project management software, flag the load calc review as a milestone so it doesn’t slip through the cracks during design development.
Meeting Energy Efficiency Requirements
Energy codes have tightened dramatically over the last decade, and HVAC systems are one of the biggest targets. If you’re pulling permits on commercial work, you need to understand what the code requires and how it affects system selection.
IECC and ASHRAE 90.1
Most jurisdictions adopt some version of the International Energy Conservation Code (IECC) or ASHRAE Standard 90.1 as their energy code. These set minimum efficiency requirements for HVAC equipment, ductwork insulation, and controls. Key requirements include:
- Minimum equipment efficiency: RTUs must meet minimum EER (Energy Efficiency Ratio) and IEER (Integrated Energy Efficiency Ratio) ratings that vary by capacity and climate zone
- Economizer requirements: Most climate zones require air-side economizers on RTUs above 54,000 BTU/hr, allowing the system to use cool outdoor air for free cooling when conditions allow
- Demand-controlled ventilation (DCV): Spaces designed for 25+ people per 1,000 square feet must have CO2-based ventilation control to reduce outside air when the space is partially occupied
- Fan power limitations: Total fan power can’t exceed code-specified watts per CFM, pushing designers toward more efficient fan systems
- Duct insulation and sealing: All supply ductwork in unconditioned spaces must be insulated, and duct leakage testing is required in many jurisdictions
Beyond Code: High-Performance Options
Some owners want to go beyond minimum code, either for LEED certification, utility rebate programs, or simply to reduce operating costs. Options that deliver real payback include:
- Variable speed drives on fans and pumps (often required by code now, but worth upgrading beyond minimums)
- Energy recovery ventilators (ERVs) that capture energy from exhaust air and transfer it to incoming fresh air
- High-efficiency condensing boilers for heating (95%+ AFUE vs. 80% for standard units)
- Building automation systems (BAS) with scheduling, setback, and fault detection
When you’re putting together bids, make sure your estimating process includes line items for code-required efficiency features. Missing an economizer or DCV requirement on your bid can eat into your margin fast when you have to add it during construction.
Ductwork Design Basics Every Contractor Should Know
Even if you’re subcontracting the sheet metal work, understanding ductwork design fundamentals helps you coordinate trades, catch problems early, and avoid costly field changes.
Sizing and Layout
Ductwork is sized to deliver the right amount of air (measured in CFM, cubic feet per minute) to each space while keeping air velocity and static pressure within acceptable ranges. The two main sizing methods are:
- Equal friction method: Maintains the same pressure drop per unit length throughout the system. This is the most common approach for commercial work and produces reasonable duct sizes.
- Static regain method: Sizes ductwork so that the static pressure gain from velocity reduction at each branch takeoff offsets the friction loss. This produces a more balanced system but requires more engineering.
Key Design Considerations
Clearance and coordination: Ductwork competes for ceiling space with plumbing, electrical conduit, fire sprinkler piping, and structural members. On commercial projects, you need a coordinated MEP model (usually in BIM) to catch conflicts before they show up in the field. Nothing kills your schedule faster than finding out the 24-inch duct main won’t fit under the beam after the framing is done.
Turning vanes and fittings: Every elbow, tee, and transition creates pressure drop. Turning vanes in elbows reduce pressure loss and noise. Specify radius elbows instead of square-throat elbows wherever possible.
Access for maintenance: Every fire damper, volume damper, and VAV box needs an access door in the ceiling. Plan these locations during coordination, not as an afterthought. Building inspectors will flag missing access panels, and so will the facilities team during commissioning.
Noise control: Ductwork transmits noise from fans and can generate its own noise from high air velocity. Keep main duct velocities under 1,500 FPM in occupied spaces and branch ducts under 1,000 FPM. Lined ductwork or external duct silencers may be needed near mechanical rooms.
If you’re coordinating multiple trades on the mechanical scope, having solid inspection checklists for ductwork installation helps catch issues like missing hangers, unsealed joints, and crushed flex duct before the ceiling goes in.
HVAC Commissioning: Getting It Right Before Handoff
Not sure if Projul is the right fit? Hear from contractors who use it every day.
Commissioning (often abbreviated Cx) is the process of verifying that every piece of HVAC equipment and every control sequence works as designed before you turn the building over to the owner. On commercial projects, commissioning isn’t optional. Most energy codes and many project specifications require it, and skipping it is a guaranteed path to callbacks and warranty claims.
The Commissioning Process
A proper commissioning process starts during design and runs through the first year of occupancy:
Pre-construction phase:
- Review design documents and specifications for completeness
- Develop a commissioning plan with test procedures for every system
- Review equipment submittals and shop drawings
Construction phase:
- Witness equipment installation to verify it matches approved submittals
- Conduct pre-functional tests (verify power connections, rotation, piping connections, controls wiring)
- Document deficiencies and track corrections
Functional performance testing:
- Start up each piece of equipment per manufacturer procedures
- Test airflow at every supply diffuser and return grille against design CFM
- Verify refrigerant charge on all DX systems
- Test every control sequence: occupied/unoccupied modes, economizer operation, staging, safety interlocks, alarms
- Test heating and cooling capacity at full and part load
- Verify ventilation rates meet ASHRAE 62.1 minimums
Closeout and documentation:
- Compile all test results into a commissioning report
- Provide the building owner with a systems manual that includes operating procedures, maintenance schedules, and warranty information
- Train the owner’s maintenance staff on system operation
Common Commissioning Failures
After years on commercial job sites, here are the issues that show up most often during commissioning:
- Airflow balancing is off because dampers weren’t adjusted or flex duct runs are too long and kinked
- Economizer actuators are disconnected or the control sequence was never programmed
- Thermostats are wired to the wrong zone
- Refrigerant charge is incorrect (too much or too little)
- Condensate drains aren’t trapped properly, causing water damage after move-in
- Building automation system (BAS) graphics don’t match actual point connections
Build commissioning time into your project schedule. For a typical 30,000 to 50,000 square foot commercial build, plan for 2 to 4 weeks of commissioning activity. If you’re managing your project scheduling digitally, create a commissioning phase with specific milestones for each system test.
Maintenance Planning: Setting Up the Owner for Success
Your responsibility doesn’t end when commissioning is complete. A good contractor helps the building owner set up a maintenance program that protects their investment and keeps the HVAC system running at peak performance for its full expected lifespan.
Preventive Maintenance Essentials
Every commercial HVAC system needs regular preventive maintenance. Here’s what should be on the schedule:
Monthly:
- Check and replace air filters (or clean if using washable filters)
- Inspect condensate drain pans and lines for blockage
- Verify thermostat operation and setpoints
Quarterly:
- Inspect and clean evaporator and condenser coils
- Check belt tension and condition on belt-driven fans
- Inspect electrical connections and tighten as needed
- Verify refrigerant pressures (visual check on sight glass for systems that have them)
Semi-annually (spring and fall):
- Full system startup and checkout before heating and cooling seasons
- Test all safety controls and interlocks
- Lubricate bearings on motors, fans, and pumps
- Calibrate thermostats and sensors
- Clean or replace economizer sensors and actuators
Annually:
- Full refrigerant charge verification and leak check
- Duct leakage inspection at accessible joints
- Controls system review including software updates for BAS systems
- Performance trending review to catch efficiency degradation
Building the Maintenance Plan Into Your Deliverables
When you hand over the building, include a maintenance manual specific to the installed HVAC systems. This should contain:
- Equipment schedules with model numbers, serial numbers, capacities, and warranty information
- Manufacturer maintenance requirements (critical for keeping warranties valid)
- Filter sizes and recommended replacement schedule
- Belt sizes for all belt-driven equipment
- Refrigerant type and charge amounts for each system
- Contact information for the installing mechanical contractor and equipment manufacturer reps
- A 12-month maintenance calendar the owner’s team can follow
This documentation package is part of delivering a professional project. It separates the contractors who care about their reputation from those who just chase the next job. And when that building owner needs another project built, guess who they’re calling?
If you’re running your construction business with tools like Projul’s equipment maintenance tracking, you already understand the value of scheduled maintenance. Help your clients adopt the same discipline for their building systems.
Budgeting and Cost Control for Commercial HVAC Scopes
The mechanical scope on a commercial project is almost always one of the top three line items in your budget, right up there with structural steel and the building envelope. Getting your HVAC budget dialed in early and tracking costs throughout construction is the difference between hitting your margin target and watching it evaporate.
Building Your HVAC Budget From the Ground Up
When you’re putting together a budget for a commercial HVAC scope, start with the system type and work outward. Here’s a rough framework based on what I’ve seen across hundreds of commercial projects:
Equipment costs: This is your biggest single bucket. RTUs for a 30,000-square-foot office building might run $120,000 to $180,000 for the units themselves. VRF for the same building could be $200,000 to $300,000. Chilled water for a larger building gets into the millions fast once you add chillers, cooling towers, pumps, and air handlers.
Sheet metal and ductwork: Depending on the complexity of the layout and how much coordination is required, ductwork typically runs $8 to $18 per square foot of building area. A building with lots of small zones, tight ceiling cavities, or specialized exhaust requirements will push toward the high end.
Controls and building automation: A basic thermostat-per-zone setup for an RTU system might be $2 to $4 per square foot. A full building automation system with DDC controls, trending, remote access, and integration with lighting and fire alarm pushes that to $6 to $12 per square foot.
Piping (for VRF and chilled water): Refrigerant piping for VRF or chilled water piping adds a significant cost that doesn’t exist with RTU systems. Budget $5 to $15 per square foot depending on system type and building height.
Electrical connections: Every piece of HVAC equipment needs power. Don’t forget to coordinate with your electrical sub on disconnect switches, variable frequency drives (VFDs), and any panel upgrades needed to handle the mechanical load.
Rigging and crane time: Rooftop units need to get up on the roof somehow. A crane rental for a day to set four or five RTUs might run $3,000 to $8,000 depending on the crane size and your market. If the building is multi-story or access is tight, those numbers climb.
Commissioning costs: Third-party commissioning agents typically charge $0.50 to $1.50 per square foot, depending on system complexity and how thorough the specification requires them to be.
Tracking Costs During Construction
Once construction starts, the mechanical scope is where change orders love to hide. Here are the areas that generate the most cost surprises:
Unforeseen structural conflicts: The duct main that fit perfectly in the BIM model doesn’t fit in the field because the steel fabricator added a gusset plate that wasn’t in the model. Now you’re resizing ductwork, adding offsets, or rerouting around the obstruction. Each of those changes costs time and money.
Specification changes from the owner: The building owner decides mid-construction that they want the server room cooled to 65 degrees instead of 72. That sounds like a small change, but it might mean a larger unit, bigger ductwork, and additional electrical capacity. Make sure you’re tracking these requests through a formal change order process.
Code interpretation differences: The mechanical inspector reads the energy code differently than your engineer. Now you need to add an economizer to a unit that the engineer said was exempt, or you need to add duct leak testing that wasn’t in your original scope. These conversations go better when you have documentation of the design engineer’s code analysis.
Material price escalation: HVAC equipment lead times have been unpredictable over the last few years. If you quoted a project six months ago and equipment prices have gone up 8 percent, that’s coming out of your pocket unless you had an escalation clause in your contract.
Track every dollar against your original budget using detailed cost codes. When you can see that your sheet metal sub is 15 percent over budget at the 60 percent completion mark, you can address it before the final invoice arrives and it’s too late to do anything about it.
Protecting Your Margin on Mechanical Work
A few practical tips that have saved real money on commercial HVAC scopes:
Get equipment quotes early and lock pricing. Equipment manufacturers will hold pricing for 30 to 90 days on a written quote. If your project timeline is longer, negotiate a price lock or include an escalation cap in your subcontract.
Buy equipment direct when it makes sense. On larger projects, purchasing RTUs or VRF equipment directly from the manufacturer rep and having your mechanical sub install it can save 10 to 15 percent compared to having the sub mark up the equipment in their bid.
Pre-fabricate where possible. Sheet metal shops that pre-fabricate ductwork sections in the shop and deliver them to site for installation are faster and produce cleaner work than crews building everything in the field. The labor savings usually outweigh any shipping costs.
Don’t skimp on coordination. An extra week of BIM coordination before construction starts can prevent tens of thousands of dollars in field conflicts. The cost of a clash detection meeting is nothing compared to tearing out and reinstalling ductwork.
Coordinating HVAC Installation With Other Trades
On any commercial project, the HVAC system doesn’t exist in isolation. It shares ceiling space, wall cavities, and mechanical rooms with electrical, plumbing, fire protection, and sometimes low-voltage systems. How well you coordinate these trades directly impacts your schedule, your budget, and the quality of the finished product.
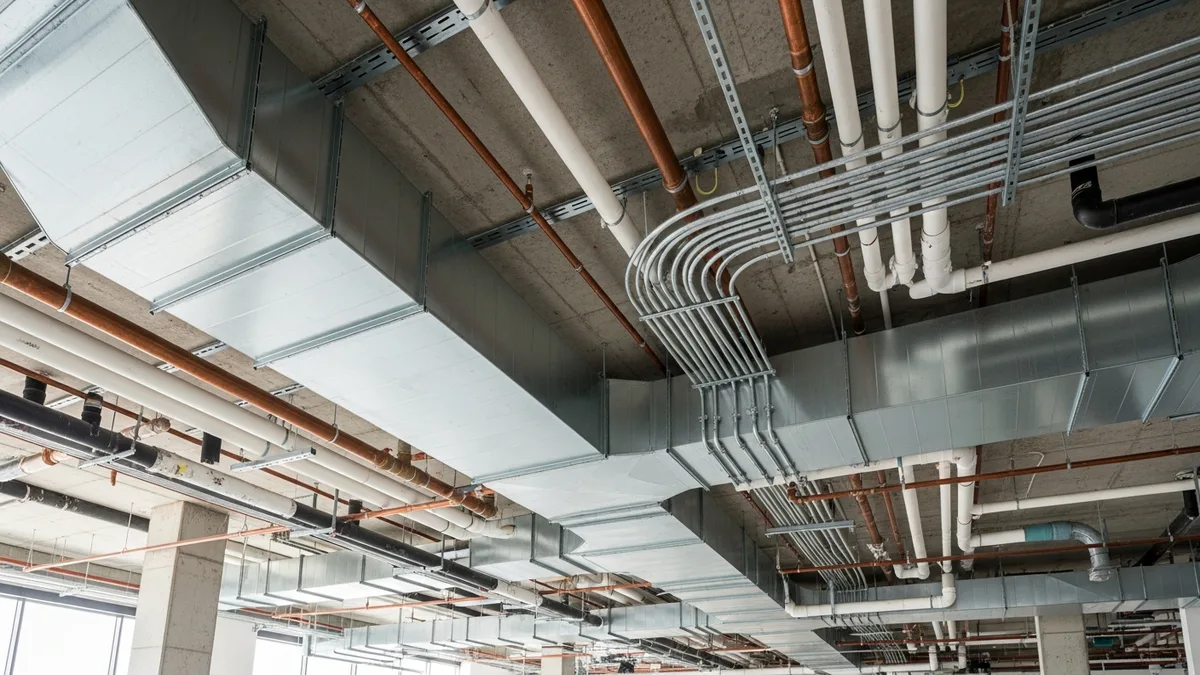
The Ceiling Space Problem
In a typical commercial building with a dropped ceiling, you’ve got 18 to 36 inches of space above the ceiling grid, and everyone wants a piece of it. Here’s what’s fighting for room up there:
- Main duct trunks and branch runs from the HVAC system
- Sprinkler mains, branch lines, and heads from fire protection
- Domestic water piping and waste/vent piping from the plumber
- Electrical conduit runs, cable trays, and junction boxes
- Low-voltage cabling for data, security, and building automation
- Structural beams, joists, and bridging that can’t move
Without coordination, these systems will collide in the field. The plumber routes a 4-inch waste line right where the 20-inch duct trunk needs to go. The electrician runs a cable tray through the middle of the mechanical room, blocking access to the air handler filter section. These conflicts cause delays, rework, and finger-pointing between subs.
BIM Coordination for Mechanical Systems
Building Information Modeling (BIM) has become standard practice for commercial projects over about $5 million, and for good reason. A coordinated 3D model that includes all MEP systems lets you find and resolve conflicts on a computer screen instead of in the field.
For HVAC coordination specifically, here’s what your BIM process should include:
Modeling accuracy: The mechanical sub needs to model ductwork, piping, and equipment at actual sizes with connections, hangers, and clearances. A duct shown as a rectangle in the model needs to include the insulation thickness, hanger rod drop, and any access door clearances.
Clash detection runs: Run automated clash detection weekly during the coordination phase. Sort clashes by severity. A hard clash where a duct intersects a beam is a must-fix. A soft clash where two systems are within 2 inches of each other might be acceptable or might need attention depending on maintenance access requirements.
Coordination meetings: Hold weekly coordination meetings with all MEP subs present. Walk through the model level by level, area by area. Resolve clashes by agreement, not by whoever gets there first in the field. Document every resolution.
Routing priority: Establish a clear hierarchy for who gets routing priority in contested spaces. Typically it goes: structural elements first (they can’t move), then gravity-fed systems (plumbing waste and vent, since they need slope), then fire protection (code-driven locations), then HVAC ductwork, then everything else. Having this hierarchy agreed upon before coordination starts prevents a lot of arguments.
Sequencing Mechanical Installation
Getting the installation sequence right matters as much as getting the design right. Here’s a typical installation sequence for commercial HVAC work:
Rough-in phase (before walls close):
- Set major equipment (air handlers, rooftop units, chillers) since these are the largest items and everything routes to and from them
- Run main duct trunks and risers
- Install refrigerant piping mains (for VRF) or chilled water piping (for chilled water systems)
- Branch ductwork to individual zones
- Install VAV boxes, fan coils, or indoor VRF units
- Run condensate drain piping
- Install duct-mounted accessories (fire dampers, volume dampers, smoke detectors)
After ceiling grid is in (but before tiles): 8. Final duct connections to diffusers and grilles 9. Thermostat and sensor wiring 10. Control valve and damper actuator installation 11. Test and balance preparation
After substantial completion: 12. Test and balance 13. Controls programming and checkout 14. Commissioning
If your mechanical sub gets out of sequence, they’ll either be working over other trades (dangerous and slow) or waiting for access (delays and idle labor). Build the mechanical installation sequence into your overall project schedule and hold everyone to it during weekly coordination meetings.
The Handoff Between Design and Field
One area that causes consistent problems is the transition from what’s on the drawings to what actually gets built. Mechanical drawings are design intent documents, not installation instructions. The sheet metal sub needs to figure out exact routing, hanger locations, fitting types, and coordination with other trades.
This is where shop drawings and submittals come in. Your mechanical sub should produce shop drawings that show:
- Exact duct routing with dimensions from grid lines and finished floor
- Hanger types, spacing, and attachment points
- Transition and fitting details
- Equipment connection details including flexible connections, access clearances, and service space
Review these shop drawings carefully and make sure they match the coordinated BIM model. If the shop drawings show a duct routing that conflicts with the approved coordination model, send them back before fabrication starts. Catching that on paper costs nothing. Catching it in the field costs thousands.
Common Commercial HVAC Mistakes and How to Avoid Them
After working on commercial projects for long enough, you start to see the same mistakes repeat across different jobs, different teams, and different markets. Here are the ones that cost the most money and cause the most headaches, along with how to prevent them.
Mistake 1: Trusting the Load Calculation Without Questioning It
Mechanical engineers are busy. They’re often working on multiple projects simultaneously, and sometimes assumptions get carried over from one project to another. I’ve seen load calculations that used the wrong climate zone, assumed a building was single-story when it was two stories, or missed a commercial kitchen exhaust system entirely.
How to avoid it: Have someone on your team review the load calculation assumptions against the actual building design. You don’t need to run the calculation yourself, but you should verify that the engineer used the correct building dimensions, occupancy type, glazing percentages, and internal load assumptions. If the load calc says the building needs 100 tons and your experience on similar buildings says it should be closer to 80, ask the question. It’s a lot cheaper to fix a load calc than to deal with an oversized system for 20 years.
Mistake 2: Ignoring Acoustics Until the Owner Complains
Sound travels through ductwork. Compressors vibrate. Fan noise transmits through the structure. On commercial projects, especially offices, medical facilities, and churches, acoustics matter. A conference room where people can’t hear each other because the RTU above cycles every three minutes is a failed project, even if the temperature is perfect.
How to avoid it: Include acoustic criteria in the mechanical specification. Reference ASHRAE noise criteria (NC) ratings for each space type. NC-30 to NC-35 is typical for private offices. NC-25 to NC-30 for conference rooms. NC-40 to NC-45 is acceptable for open office areas. Then make sure the equipment and ductwork design actually meets those criteria. Specify vibration isolation on all rotating equipment, flexible duct connections at equipment, and duct silencers where main ducts pass over sensitive spaces.
Mistake 3: Skipping the Startup Witness
Equipment manufacturers require specific startup procedures for warranty coverage. Most require that the installing contractor or a factory-authorized technician perform the initial startup and document it on a startup form. If you skip this step and the compressor fails six months later, the manufacturer can deny the warranty claim.
How to avoid it: Build startup witness into your commissioning schedule. Have the commissioning agent or your project engineer present for equipment startup. Document everything with photos, forms, and the startup technician’s certification. Keep copies of all startup documentation in your project files and include them in the owner’s closeout package.
Mistake 4: Undersizing Electrical Service for Mechanical Loads
HVAC equipment is one of the largest electrical loads in a commercial building. If the electrical engineer doesn’t get accurate equipment data early in design, the electrical service might be undersized. Finding out during construction that you need to upgrade from a 1,200-amp to a 2,000-amp service is a five-figure change order and a schedule hit.
How to avoid it: Get equipment electrical data to the electrical engineer as early as possible. Once equipment selections are made (even preliminary selections), send the voltage, phase, amperage, and minimum circuit ampacity data to the electrical team. If equipment selections change later, immediately update the electrical engineer. This sounds basic, but it gets missed on project after project.
Mistake 5: Forgetting About Future Maintenance Access
Everything works great on day one. But what happens two years later when the fan motor in the air handler needs to be replaced? If there’s no access to pull the motor out, or the ceiling access panel is above a built-in reception desk, the maintenance team has a serious problem.
How to avoid it: During design coordination, walk through every piece of equipment and ask: “How does a technician get to this in five years?” Check that air handler service clearances meet manufacturer requirements. Verify that every fire damper, VAV box, and control valve has a ceiling access door sized to actually reach and work on the device. Make sure rooftop units have adequate working clearance around them for coil cleaning and component replacement. This kind of thinking is what separates a building that works well for decades from one that becomes a maintenance nightmare. Using a tool like Projul’s project management features to create and assign punch list items for access verification can keep these details from falling through the cracks.
Mistake 6: Poor Refrigerant Piping Practices on VRF Systems
VRF systems are sensitive to refrigerant piping installation quality. Unlike a simple split system where the piping run might be 20 feet, VRF systems can have hundreds of feet of refrigerant piping with multiple branch circuits, refnets (distribution headers), and elevation changes. Poor brazing, incorrect pipe sizing, or failure to properly evacuate and leak-test the piping system will cause performance problems and premature equipment failure.
How to avoid it: Require that all VRF piping be installed by technicians who have completed the manufacturer’s installation training program. Specify nitrogen pressure testing at 500+ PSI for 24 hours before charging. Require a deep vacuum (below 500 microns) held for at least 30 minutes before releasing refrigerant. These are manufacturer requirements, not optional extras, and they need to be enforced during construction. Document everything.
Navigating Permits and Inspections for Commercial HVAC Work
Permit requirements and inspection processes for commercial mechanical work vary significantly by jurisdiction, but certain fundamentals apply almost everywhere. Getting caught off-guard by a permit issue or a failed inspection is avoidable if you plan ahead.
What Permits You’ll Need
Commercial HVAC work typically requires a mechanical permit separate from the general building permit. Depending on your jurisdiction and the scope of work, you might also need:
- Mechanical permit: Covers all HVAC equipment installation, ductwork, piping, and controls. The application usually requires mechanical drawings stamped by a licensed professional engineer (PE) in the state where the project is located.
- Electrical permit: For all electrical connections to HVAC equipment. This is usually pulled by the electrical subcontractor, but as the GC, you need to verify it’s in place before equipment wiring starts.
- Plumbing permit: If the HVAC system includes chilled water piping, condensate piping that connects to the building’s plumbing system, or gas piping for heating equipment.
- Roofing permit: Some jurisdictions require a separate permit for roof penetrations when installing RTUs, exhaust fans, or other roof-mounted equipment.
- Fire protection permit: If the HVAC installation includes fire and smoke dampers, smoke detection in ductwork, or any modifications to the fire alarm system.
The Plan Review Process
Before you get a mechanical permit, the jurisdiction will review the plans. For commercial projects, this review is typically more thorough than residential and covers:
- Equipment sizing relative to the load calculation
- Energy code compliance (IECC or ASHRAE 90.1 depending on your jurisdiction)
- Ventilation rates per ASHRAE 62.1
- Fire and smoke damper locations at rated assemblies
- Gas piping sizing (if applicable)
- Refrigerant safety provisions (for VRF and large DX systems)
- Seismic bracing requirements (in seismic zones)
Plan review can take two to eight weeks depending on the jurisdiction and how busy they are. Factor this into your project schedule. If you’re managing your timeline with scheduling software, build the plan review period in as a lead time constraint before mechanical rough-in can start.
Inspection Milestones
Commercial mechanical inspections typically happen at these stages:
Underground/slab rough-in: If any piping runs below grade or within the slab (uncommon for HVAC but happens with some radiant or geothermal systems).
Above-ceiling rough-in: This is the big one. The inspector wants to see all ductwork, piping, fire dampers, hangers, and insulation before the ceiling goes in. Everything needs to be accessible and visible. Make sure your mechanical sub has all their work complete, tested, and labeled before calling for this inspection. A failed rough-in inspection can hold up the ceiling installation for every trade on the project.
Equipment setting: Some jurisdictions want to inspect equipment placement, especially rooftop units, to verify structural support, clearances, and code-required features like earthquake tie-downs or fall protection.
Final mechanical: After commissioning and test-and-balance are complete, the inspector does a final walkthrough. They’ll check equipment labels, verify the test and balance report matches the design, confirm fire damper access, and verify that the controls are functioning.
Duct leak testing: Many jurisdictions now require duct leakage testing per SMACNA standards. The test involves pressurizing sections of ductwork and measuring air leakage. Total leakage typically must be below 4 to 6 percent of design airflow, depending on the duct pressure class. Plan for this test in your schedule and make sure joints are properly sealed before calling for the test.
Tips for Smooth Inspections
Build a relationship with your local mechanical inspector. Ask them what they look for, what common deficiencies they find, and what documentation they want on site. Every inspector has their priorities, and knowing those ahead of time saves failed inspections.
Have documentation ready at the inspection. Keep the approved mechanical plans, equipment submittals, fire damper certifications, duct leak test results, and the commissioning report organized and on site. An inspector who has to ask for paperwork three times is an inspector who’s going to look extra hard at your installation.
Use pre-inspection checklists. Before calling for an inspection, have your superintendent or project engineer walk the area using a checklist that covers every item the inspector will look at. Catch your own deficiencies before the inspector catches them. Create these checklists in your project management tools so they’re standardized across all your projects and everyone on the team knows the standard.
Don’t rush the rough-in inspection. It’s tempting to call for the rough-in inspection before the mechanical work is fully complete, especially when the drywall crew is breathing down your neck. Resist that temptation. A failed inspection delays the project more than waiting an extra day or two for the mechanical sub to finish and clean up their work area.
Wrapping It Up
HVAC system selection for commercial projects comes down to matching the right system type to the building’s needs, running accurate load calculations, meeting (or exceeding) energy code requirements, coordinating ductwork design with other trades, commissioning everything thoroughly, and handing the owner a clear maintenance plan.
None of this happens by accident. It takes coordination between your team, the mechanical engineer, the sheet metal sub, the controls contractor, and the building owner. The general contractor who understands these systems well enough to ask the right questions and catch problems early is the one who delivers projects on time, on budget, and without callbacks.
Want to put this into practice? Book a demo with Projul and see the difference.
Whether you’re just getting into commercial work or you’ve been at it for years, tightening up your HVAC coordination process will pay dividends on every project. And if you’re looking for a better way to manage the moving parts on your commercial projects, Projul’s construction management platform was built by contractors who’ve lived through every one of these challenges.
Frequently Asked Questions
What is the most common HVAC system for commercial buildings?
How do you calculate HVAC load for a commercial building?
What is VRF and when should a contractor recommend it?
What does HVAC commissioning involve on a commercial project?
How much does a commercial HVAC system cost per square foot?
Related Articles

Concrete Tilt-Up Construction: A Contractor's Complete Field Guide
Tilt-up construction accounts for roughly 15 percent of all industrial and commercial buildings in North America. This...
Read More →
How to Implement Construction Software Without Losing Your Mind
Most construction software rollouts fail. Not because the software is bad, but because the rollout was rushed. Here are...
Read More →
How Selections Can Pay for Themselves in Three Easy Steps
Most contractors lose thousands each year on wrong material orders, slow client decisions, and missed upsell chances....
Read More →