Construction Material Tracking Guide (2026)
Materials walk off jobsites every single day. Whether it’s theft, over-ordering, or just plain disorganization, the result is the same: money disappearing from your bottom line. Most contractors know this is happening but don’t have a real system to stop it.
Construction material tracking is the process of knowing what you ordered, what showed up, where it went, and how much you actually used on each job. It sounds simple. In practice, it’s one of the hardest things to get right in the field.
The good news is you don’t need barcodes on every 2x4 or a warehouse management degree. You need a consistent process, the right tools, and a crew that knows the system. Let’s walk through how to build all of that from scratch.
The Real Cost of Material Waste and Theft in Construction
Before you invest time in building a tracking system, it helps to understand how much this problem actually costs. The numbers are ugly.
Theft is rampant. The National Equipment Register and the National Insurance Crime Bureau estimate that construction jobsite theft costs the industry between $300 million and $1 billion per year in the United States alone. That includes everything from copper wire and power tools to lumber and fixtures. And those are just the reported losses. Most contractors eat smaller thefts without ever filing a claim.
Waste adds up fast. Studies from the Construction Industry Institute show that material waste on a typical project runs between 10% and 15% of total material costs. On a $500,000 project where materials account for 40% of the budget, that’s $20,000 to $30,000 walking straight into the dumpster. Multiply that across all your jobs for the year and you’re looking at a serious hit to profitability.
Over-ordering is the silent killer. It’s not always theft or damage. Sometimes you just ordered too much. Your estimator added a 15% waste factor, then your PM ordered an extra 10% just to be safe, and now you’ve got $8,000 worth of specialty tile sitting in a storage unit because the client changed their mind halfway through the project.
The ripple effects. When materials go missing or run short, it’s not just the replacement cost. You’ve got crews standing around waiting for a delivery. You’ve got a superintendent making an emergency run to the supply house. You’ve got schedule delays that push back other trades. One missing pallet of drywall can cost you a full day of labor across multiple crews.
All of these costs eat into your margins. And if you’re not tracking materials closely, they show up as a mystery gap between your estimated costs and your actual costs. That gap is where your profit goes to die. Understanding your construction overhead costs is critical, but material waste is often the bigger and more controllable number.
Manual vs Digital Material Tracking Methods
Let’s be honest about where most contractors start: a clipboard, a notebook, or nothing at all.
The clipboard method. Someone on site has a sheet that lists what was ordered. When a delivery shows up, they check things off. Maybe they note the quantities. Maybe they don’t. The sheet lives on the clipboard until it gets rained on, blown away, or buried under a stack of submittals. Even if it survives, nobody enters that information anywhere useful.
The spreadsheet upgrade. Some companies graduate to Excel or Google Sheets. The PM maintains a material log for each job with columns for item, quantity ordered, quantity received, vendor, cost, and date. This works better than the clipboard, but it depends entirely on one person keeping it updated. When that person gets pulled to another job or takes a week off, the log goes stale.
The whiteboard. You’ve seen it. A big whiteboard in the shop or trailer with columns for pending orders, deliveries this week, and backorders. It works for visibility but has zero connection to your budget, no historical record, and can’t be accessed from anywhere except that trailer.
Going digital. Construction management software replaces all of these with a single system that captures material information as part of your normal workflow. When your crew logs what they used in their daily logs, that data ties directly to the job. When someone snaps a photo of a delivery with damage, it goes straight into your document management system and is linked to that project forever.
The difference between manual and digital isn’t just convenience. It’s whether or not the data actually exists when you need it six months later for a dispute, an audit, or a profitability review.
Here’s the real question: How much time does your team spend tracking materials right now, and how much of that information is actually usable? If the answer is “a lot” and “not much,” it’s time to change the system.
Building a Material Management System for Your Company
You don’t need to overhaul everything overnight. Start with these building blocks and layer in more structure as your team gets comfortable.
Step 1: Standardize your material list. Create a master list of the materials you use most often across your projects. This doesn’t have to cover every specialty item. Focus on the 80/20: the materials that show up on nearly every job and represent the bulk of your spending. Lumber, concrete, drywall, electrical wire, plumbing fittings, fasteners, roofing materials. Give each one a consistent name so “2x4x8 SPF” doesn’t show up as “2x4 studs” on one job and “framing lumber” on another.
Step 2: Define your ordering process. Who is allowed to order materials? Who approves the purchase? Where does the PO get recorded? If every foreman can call the supply house and place an order with no paper trail, you’ve already lost control. Set a threshold. Maybe anything under $500 can be ordered by the foreman with a text to the PM. Anything over $500 needs a written PO approved by the PM or project executive.
Step 3: Create a receiving protocol. Every delivery gets checked against the PO before anything gets signed. Count the quantities. Check for damage. Note any shortages or substitutions. Take photos. This takes five to ten minutes per delivery and saves you thousands in disputed invoices and missing materials.
Step 4: Establish storage and security. Designate a specific area on each jobsite for material storage. Lock up high-value items. Know who has keys. If you’re running a job in a high-theft area, consider cameras, motion-activated lights, or a job box with a heavy-duty lock. The cost of a $300 security camera is nothing compared to losing $5,000 in copper. For larger projects, our yard and laydown area management guide covers how to plan layout, traffic flow, and security for dedicated staging areas.
Step 5: Track usage, not just purchases. This is where most systems break down. You know what you bought. But do you know what you used on which part of the project? When a crew pulls materials from the storage area, there should be a simple log. It doesn’t have to be complicated. Date, crew name, material, quantity, and what phase of the job it went to. This is the data that makes your estimates better on the next project.
Step 6: Review and reconcile. At the end of each week or at key project milestones, compare what you’ve purchased against what you’ve used and what’s still on site. If the numbers don’t add up, you’ve got a problem to investigate while it’s still fresh. Waiting until the end of the job to figure out where $12,000 in materials went is a losing game.
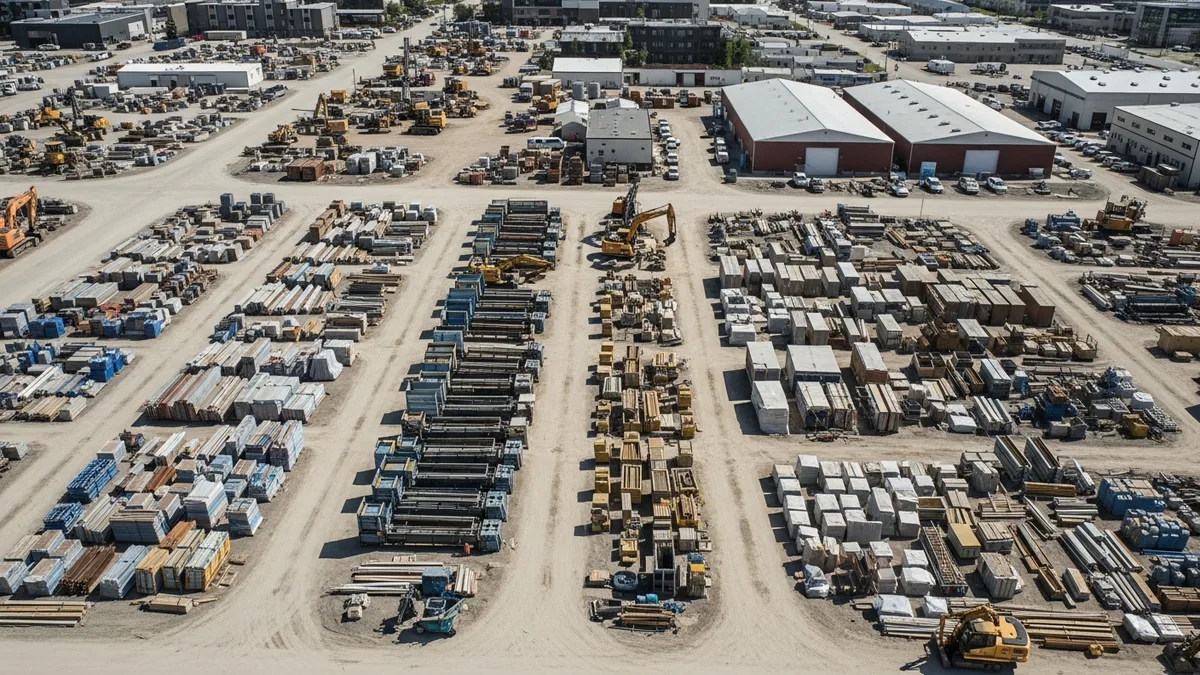
Receiving, Storing, and Issuing Materials on the Jobsite
This is where construction material tracking either works or falls apart. The processes above are only useful if your field team actually follows them. Here’s how to make it practical.
Receiving deliveries.
When a truck shows up, someone needs to own that delivery. Not “whoever is closest.” Assign a specific person on each job as the material receiver. On smaller jobs, that’s the foreman. On larger projects, it might be a dedicated material coordinator or the assistant superintendent.
The receiver checks the delivery ticket against the PO. They count everything. They look for damage. They photograph the delivery, especially if anything is off. They sign the delivery ticket only after confirming everything matches. If there’s a discrepancy, they note it on the ticket before signing and immediately notify the PM.
This might feel like overkill on a routine lumber delivery. But the one time your supplier shorts you 20 sheets of plywood and you signed for the full order? That’s a $600 lesson you only need to learn once.
Storing materials.
Where you put materials matters more than most contractors realize. Lumber left on bare ground warps. Drywall stored outside gets moisture damage. Electrical panels left in an unsecured area grow legs overnight.
Read real contractor reviews and see why Projul carries a 4.9/5 on G2.
Set up your storage areas based on three principles:
- Protection from weather. Cover what needs covering. Store moisture-sensitive materials inside the building envelope as soon as it’s dried in.
- Protection from theft. High-value items go in locked areas. Period. Copper, fixtures, appliances, and specialty items should never sit out in the open overnight.
- Organization by phase. Group materials by when they’ll be needed. Rough-in materials in one area, finish materials in another. This reduces handling, prevents damage, and makes it obvious when something is missing.
Issuing materials to crews.
“Issuing” sounds formal, and it should be. When a crew needs materials for the day, they should pull from the designated storage area and log what they took. A simple sign-out sheet works. A digital log in your project management software works better because it ties directly to the job record.
The goal isn’t to slow your crews down. It’s to create a record that connects material consumption to specific work activities. When you know that your framing crew used 47 sheets of OSB on the second-floor deck, you’ve got real data to compare against your estimate for the next similar project.
Returns and transfers.
Materials left over at the end of a phase or a job need a plan. Can they be returned to the supplier? Should they transfer to another active job? Do they go back to the shop? Whatever the answer, log it. Leftover materials that sit on a finished jobsite until they’re worthless or stolen are pure waste.
Connecting Material Costs to Job Costing
Tracking materials is only half the equation. The other half is connecting those material costs to your job costing system so you can see real-time profitability on every project.
Why this matters. If your material costs live in one system and your job costs live in another (or worse, if material costs only show up when the invoice hits your accounting software weeks later), you’re always looking at stale data. By the time you realize a job is over budget on materials, it’s too late to do anything about it.
Coding materials to cost codes. Every material purchase should be assigned to a specific cost code that ties to a budget line item. Concrete goes to the concrete cost code. Lumber goes to the framing cost code. This sounds obvious, but plenty of contractors dump everything into a generic “materials” line and then wonder why they can’t figure out which phase of the job went sideways.
Tracking committed costs vs actual costs. When you issue a PO, that’s a committed cost. It should show up in your job cost report immediately, even before the invoice arrives. This gives you a forward-looking view of where the budget stands. If your committed material costs are already at 90% of budget and you’re only 60% through the rough-in phase, you need to know that now, not when the final invoice hits.
Variance analysis. At the end of each job (and ideally at key milestones during the job), compare your estimated material costs to your actual material costs by cost code. Where were you over? Where were you under? Was the estimate wrong, or did something go wrong in the field? This analysis is what turns construction material tracking from a chore into a competitive advantage. Your estimates get tighter every time you do this.
The feedback loop. Good material tracking feeds your estimating. When you know that your last five kitchen remodels averaged $4,200 in plumbing materials, your next estimate for a similar kitchen is based on real data instead of a guess. That’s how you stop leaving money on the table or eating costs because your estimate was too low.
How Construction Software Reduces Material Waste
You can run all of the systems described above with paper and spreadsheets. People did it for decades. But construction software makes every step faster, more accurate, and more likely to actually happen consistently.
Real-time visibility. When your material purchases, deliveries, and usage all live in the same system, everyone on the team can see where things stand. The PM doesn’t have to call the foreman to ask if the tile arrived. The estimator doesn’t have to dig through old spreadsheets to find material costs from a similar project. It’s all there.
Photo documentation. Every delivery, every damaged item, every material stored on site can be documented with photos that are automatically tagged to the project and date-stamped. Your photo and document management becomes your proof file. When a supplier claims they delivered 50 bundles and you know it was 42, you’ve got the photos to back it up.
Daily log integration. When your crews log their daily activities, they can include material usage as part of the same entry. No separate system. No extra paperwork. It just becomes part of the daily routine. Daily logs that capture labor, equipment, and material usage in one place give you a complete picture of what happened on the job each day.
Automated cost tracking. Every material entry flows into your job costing automatically. No double entry. No waiting for invoices to post. Your cost reports are current, and you can catch budget overruns while there’s still time to course-correct.
Historical data for better estimates. Over time, your software builds a database of actual material costs by project type, scope, and cost code. This is gold for estimating. Instead of guessing or relying on supplier price sheets, you’re bidding based on what you actually spent on real projects. That kind of accuracy is what separates contractors who grow from contractors who stay stuck.
Accountability across the team. When everyone knows that material usage is being tracked and tied to their name and their job, behavior changes. Not in a Big Brother way. People just tend to be more careful with materials when there’s a record. Less waste. Less “borrowing” between jobs. Less material walking off the site.
If you’re evaluating software options, look for a platform that integrates material tracking with daily logs, job costing, and document management in one place instead of stitching together three or four separate tools. Check out Projul’s pricing to see how an all-in-one platform compares to what you’re spending on disconnected systems and lost materials.
See how Projul makes this easy. Schedule a free demo to get started.
Frequently Asked Questions
What is construction material tracking?
Construction material tracking is the process of monitoring materials from the time they’re ordered through delivery, storage, usage, and final reconciliation on a job. It includes knowing what was purchased, what arrived on site, who used it, and how actual usage compared to the estimate. The goal is to reduce waste, prevent theft, and connect material costs to specific jobs for accurate profitability reporting.
How do I prevent material theft on my construction jobsite?
Start with the basics: locked storage for high-value items, security cameras or motion lights, limited key access, and a sign-out process for materials leaving the storage area. Beyond physical security, the best deterrent is a system that tracks what’s on site. When materials are counted, logged, and reconciled regularly, shortages surface quickly. Theft thrives in chaos. An organized site with consistent tracking makes it much harder for materials to disappear unnoticed.
What’s the difference between material tracking and inventory management?
Inventory management typically refers to tracking materials in a warehouse or shop, while material tracking follows materials all the way to the jobsite and through installation. For most contractors, the bigger challenge is the jobsite side. You need to know not just what’s in stock, but what’s been delivered to each job, what’s been used, and what’s left over. A good construction material tracking system covers the full lifecycle from purchase order to final reconciliation.
How do I connect material costs to my job costing?
Assign every material purchase to a cost code that matches a line item in your job budget. When you issue a PO, log it as a committed cost against that code. When the material is delivered and the invoice is received, it becomes an actual cost. Compare committed and actual costs against your budget at each project milestone. Construction management software handles this automatically by linking POs, deliveries, and invoices to cost codes within each job.
Can small contractors benefit from material tracking systems?
Absolutely. Material waste and theft hurt small contractors proportionally more than large ones because there’s less margin to absorb the losses. You don’t need an enterprise-level system. Even a basic process of checking deliveries, locking up high-value items, logging daily material usage, and reviewing costs weekly will make a noticeable difference. As you grow, construction software makes scaling that process much easier without adding administrative overhead.
Frequently Asked Questions
How much do construction companies lose to material waste and theft each year?
What's the simplest way to start tracking construction materials?
How do I prevent material theft on construction jobsites?
Should I track materials in a spreadsheet or use software?
How does material tracking connect to job costing?
Related Articles

Construction Team Meetings: A Practical Guide to Meetings That Actually Get Results
Most construction team meetings waste time. Here's how to run weekly check-ins, safety meetings, kickoffs, and...
Read More →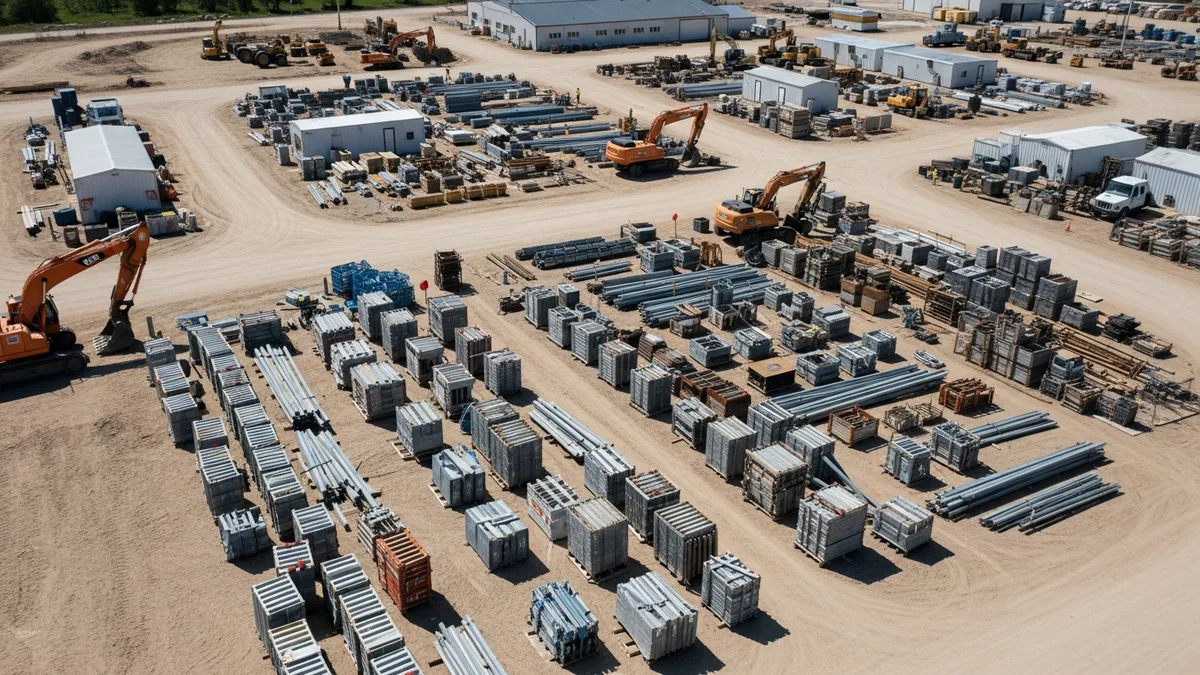
Project Management for Small Contractors: You Don't Need Enterprise Software
You don't need a 50-person company to benefit from project management. Even a 5-person crew loses money without a...
Read More →
Free Construction Schedule Template
A solid construction schedule keeps your jobs on track, your crews busy, and your clients happy. Grab our free...
Read More →