Construction Mobilization: Jobsite Setup Guide
Every experienced contractor has a story about a project that went sideways before a single nail was driven. Maybe the temporary power wasn’t ready when the crew showed up. Maybe the porta-johns were placed right where the concrete truck needed to park. Maybe permits were missing and the inspector shut the site down on day one.
That’s what happens when mobilization gets treated as an afterthought.
Construction mobilization is the process of getting a jobsite fully set up, supplied, and ready for productive work. It covers everything from permits and temporary utilities to equipment staging, crew coordination, and safety setup. It’s the bridge between winning the contract and actually building something.
The best contractors treat mobilization like its own mini-project. They plan it, schedule it, assign responsibilities, and track it just like they would any other phase of construction. Because a jobsite that’s properly mobilized runs smoother from start to finish. Crews hit the ground productive on day one instead of burning their first week figuring out where things are and waiting for utilities to get connected.
This guide walks through every major piece of construction mobilization so you can build a repeatable process that works whether you’re setting up a kitchen remodel or a ground-up commercial build.
Permits, Paperwork, and Legal Requirements
Nothing kills momentum like showing up to start work and finding out your permits aren’t in order. Mobilization starts with paperwork, and getting it wrong can cost you days or weeks before you even break ground.
Pull permits early and verify them. Building permits are the obvious ones, but depending on your jurisdiction and project type, you might also need grading permits, demolition permits, street use permits, utility connection permits, or environmental permits. Every municipality has different requirements and processing times. Some take a week. Others take months. Start the permit process as early as your project timeline allows, and follow up regularly. Don’t assume “submitted” means “approved.”
Insurance and bonding documentation. Make sure your general liability, workers’ comp, and any required bonds are current before mobilization day. Many GCs and property owners require certificates of insurance before you’re allowed on site. Have copies ready to share. If you’re bringing subs onto the project, verify their insurance documentation too. One uninsured sub can put the entire project at risk.
Utility locates are not optional. Call 811 or your local utility locate service well before you plan to dig. In most states, you’re required to request locates at least 48 to 72 hours before excavation, but smart contractors do it a week or more in advance. Hitting an unmarked gas line or fiber optic cable doesn’t just cause delays. It creates safety hazards and potential liability nightmares.
Site access agreements. On some projects, especially urban infill or work near neighboring properties, you’ll need temporary easements, right-of-way permits, or neighbor notification agreements. Handle these during mobilization, not when a neighbor calls the police because your excavator is three feet from their fence.
Keep everything organized digitally. Permits get lost. Paper gets wet. Having a central digital location for all your project documents means anyone on the team can pull up a permit, insurance cert, or site plan in seconds. Using a tool like Projul’s document management system keeps permits, plans, and safety docs accessible to everyone who needs them without digging through a filing cabinet in the trailer.
Site Preparation and Temporary Facilities
Once the paperwork is handled, it’s time to physically prepare the site. This is where mobilization gets tangible. You’re transforming a raw piece of property into a functional workspace.
Site clearing and grading. Depending on the project, this might mean demolishing an existing structure, clearing vegetation, rough grading for drainage, or simply cleaning out the interior of a renovation space. The key is that the site needs to be safe and accessible before you start bringing in equipment and materials.
Temporary fencing and security. On most commercial projects and many residential ones, you need perimeter fencing before work begins. Chain link with privacy screening is standard on commercial sites. Residential projects might use orange construction fencing or temporary barriers. The purpose is two-fold: keeping unauthorized people out for safety reasons and protecting your materials and equipment from theft.
Construction theft is a real problem. The National Equipment Register estimates that construction equipment theft alone costs the industry between $300 million and $1 billion per year in the United States. Add in tool theft and material theft, and the numbers are staggering. Proper fencing, lockable storage, and site lighting during mobilization help you avoid becoming part of that statistic.
Temporary utilities. Your crew needs power, water, and communication from day one. Arrange for temporary electrical service or bring a generator sized for your needs. If municipal water isn’t available, arrange for water delivery or a temporary connection. On larger sites, you might need temporary internet or cell signal boosters so your team can access plans, communicate, and update project tracking in real time.
Plan the location of your temporary power panel carefully. It should be central enough to minimize cord runs but out of the way of heavy equipment paths and delivery zones. Same goes for water access points.
Jobsite trailer and break area. If the project warrants it, set up a job trailer before crews arrive. This is your command center for plans, meetings, and paperwork. Position it where you have good visibility of the site but where it won’t need to be moved as work progresses. Set up a break area with shade, a cooler or water station, and trash cans. It sounds basic, but crews that have a decent place to eat lunch and take breaks are more productive and have higher morale.
Portable sanitation. Place porta-johns on day one. Position them where they’re accessible to crews but not in a delivery zone, equipment path, or highly visible client-facing area. On larger projects, plan for one unit per ten workers as a starting point. Schedule regular servicing before the project starts so you don’t end up with a sanitation problem in week two.
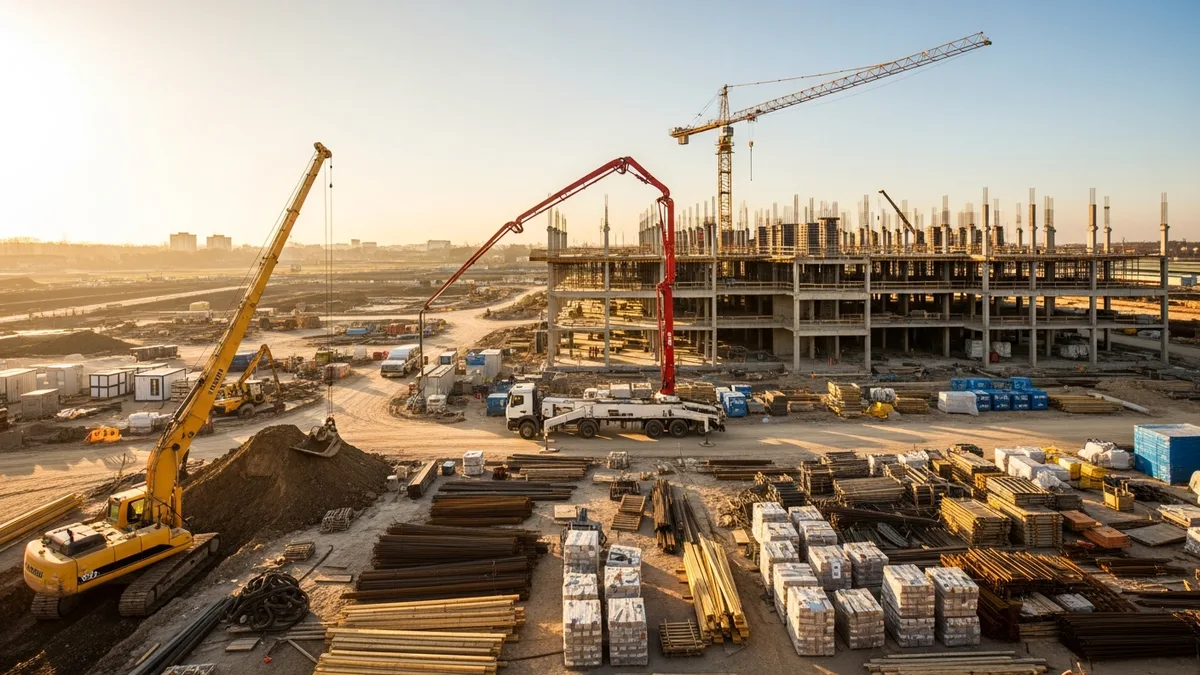
Equipment Staging and Material Logistics
Getting the right equipment and materials to the site at the right time is one of the most important pieces of mobilization. Get it wrong and your crew sits idle. Get it right and work flows from the first hour.
Equipment mobilization planning. List every piece of equipment needed for the first phase of work. For each item, determine whether it’s owned, rented, or provided by a sub. For rentals, schedule delivery so equipment arrives the day before you need it, not the morning of. Rental companies miss delivery windows all the time. Building in a one-day buffer protects your schedule.
For owned equipment, plan transportation logistics. Do you need a lowboy trailer for the excavator? A flatbed for the skid steer? Make sure transport is arranged and the site can physically receive the equipment. Check gate widths, overhead clearances, and ground conditions. An excavator stuck in mud on delivery day is not a great start.
Stage equipment strategically. Position equipment based on how it will be used in the first phase. The excavator goes near the dig area, not in the back corner. The compressor goes centrally. Material handling equipment like telehandlers or forklifts go near the staging areas. Think about fuel access too. If equipment needs diesel, where is the fuel truck going to park?
Initial material deliveries. Coordinate your first round of material deliveries to arrive after the site is set up but before crews need them. There’s a sweet spot between “too early” (materials sitting exposed to weather and theft) and “too late” (crew standing around waiting).
Read real contractor reviews and see why Projul carries a 4.9/5 on G2.
Work with your scheduling system to sequence deliveries with your work plan. If framing starts Monday, lumber should be on site by Thursday or Friday of the week before. That gives you time to inspect the delivery, verify quantities, and stage materials at the point of use.
Receiving and inspection. Assign someone to receive every delivery. Check quantities against the purchase order. Inspect for damage. Note any discrepancies on the delivery ticket before the driver leaves. It’s much easier to resolve a shortage or damage claim when you documented it at the time of delivery than three weeks later when the supplier has no record of the issue.
Storage and protection. Materials need to be stored properly from the moment they hit the site. Lumber gets stickered and raised off the ground. Drywall stays inside and dry. Fixtures and finish materials stay in locked storage until install day. Cover anything exposed to weather. The money you spend on tarps and proper staging saves you multiples in replacement costs and delays.
If you’re looking for a more detailed breakdown of how to keep materials organized throughout the entire project, our construction jobsite organization guide covers storage systems, labeling, and inventory tracking in depth.
Crew Coordination and Subcontractor Mobilization
A perfectly prepared site doesn’t mean much if the people showing up don’t know the plan. Crew coordination during mobilization sets the tone for the entire project.
Pre-mobilization meeting. Before anyone shows up on site, hold a meeting with your foremen, lead hands, and key subcontractors. Walk through the site plan, the mobilization sequence, the schedule for the first two weeks, and any safety concerns specific to the project. This is where you assign mobilization tasks: who’s setting up fencing, who’s handling utility connections, who’s receiving the first deliveries.
This meeting doesn’t need to be long. Thirty minutes with the right people, covering the right topics, prevents hours of confusion later.
Stagger your start. Not every trade needs to show up on day one. Bring in your mobilization crew first: the people setting up fencing, trailers, temporary power, and initial staging. Once the site is physically ready, bring in the first production trades. Staggering arrivals prevents overcrowding and keeps people productive from the moment they step on site.
Subcontractor coordination. If subs are involved in early work, make sure they understand the mobilization plan. Share the site layout. Confirm their start dates, crew sizes, and equipment needs. Verify that their materials will be on site when needed. A sub showing up without materials or to a site that isn’t ready for them wastes everyone’s time and money.
Communication systems. Establish how the team will communicate from day one. Group text chains work for small projects. For larger ones, project management software keeps communication organized and documented. Daily logs are especially valuable during mobilization because there are so many moving pieces. Capturing what happened each day, what arrived, what’s still outstanding, and any issues that came up creates a record you can reference when things inevitably go sideways. Projul’s daily logs feature makes it simple to record progress, flag issues, and keep everyone on the same page without adding administrative burden to your foremen.
Verify crew qualifications. During mobilization, confirm that every worker on site has the required certifications, training, and PPE. This includes OSHA 10 or 30 cards, trade-specific certifications, equipment operator licenses, and site-specific safety orientation. Checking this on day one is a lot easier than finding out a crew member isn’t qualified after an incident.
Safety Setup and Compliance
Safety isn’t a phase of the project. It starts during mobilization and stays active until the last worker leaves the site. But the safety foundation you build during mobilization determines how safe the project will be for its entire duration.
Site-specific safety plan. Every project should have a written safety plan that addresses the specific hazards of that site. Is it near a school or public area? Are there overhead power lines? Is there contaminated soil? Are there confined spaces? Identify the hazards before work begins, document the controls, and share the plan with every worker on site.
Safety orientation. Every person who steps onto the site, whether they’re a full-time employee, a sub’s laborer, or a delivery driver, should receive a basic safety orientation. Cover the site layout, emergency procedures, hazard areas, PPE requirements, and reporting protocols. Keep a sign-in sheet documenting who received orientation and when.
Emergency preparedness. Set up your emergency systems during mobilization. This includes a first aid station stocked with appropriate supplies, posted emergency contact numbers, a designated meeting point for evacuations, fire extinguishers placed per code requirements, and clear access for emergency vehicles. Make sure the site address is clearly posted and that all workers know it. In an emergency, telling a 911 dispatcher “we’re at the new build on Oak Street” is not helpful.
Fall protection and physical safeguards. If work involves heights, excavations, or other serious hazards, install the required protection systems during mobilization before production work begins. Guardrails on improved surfaces, barricades around excavations, and warning signs at hazard areas should be in place on day one, not installed as an afterthought after someone has a close call.
Document everything. Take photos of your safety setup during mobilization. Photograph the posted safety plan, the first aid station, the emergency numbers, the fire extinguishers, and any fall protection or barricades you’ve installed. These photos serve double duty: they prove compliance if an inspector shows up, and they create a baseline you can reference throughout the project. Using a photo documentation system makes it easy to capture and organize these records without adding administrative time to your day.
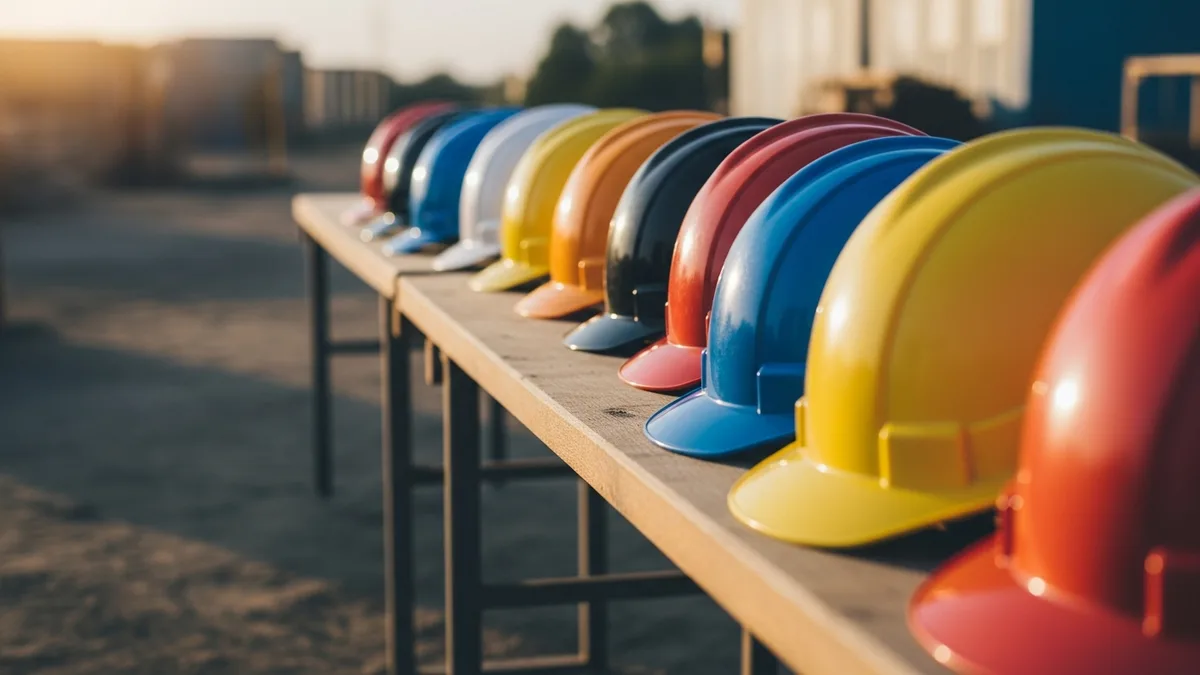
PPE enforcement from hour one. Set the standard during mobilization and hold it. If hard hats and high-vis vests are required on this site, they’re required during setup too. The tone you set during mobilization carries through the entire project. If you let it slide at the start, you’ll fight it every day after.
Mobilization Cost Components Breakdown
One of the biggest mistakes contractors make is treating mobilization as a lump sum afterthought in their bids. When you don’t break mobilization costs into specific line items, you either underestimate and eat the difference or overestimate and lose the bid. Neither outcome is good for business.
Here’s a breakdown of the major cost components you should be tracking and pricing separately.
Equipment transportation. Moving heavy equipment to the jobsite is one of the most significant mobilization expenses, especially for projects that require excavators, cranes, or other machinery that can’t drive on public roads. Lowboy trailer rental and a qualified operator can easily run $500 to $2,000 per load depending on distance. For projects far from your yard, fuel surcharges and driver time add up fast. If you’re renting equipment, the delivery and pickup fees from the rental company are a separate cost that needs to be in your estimate. Don’t forget return trips for demobilization either. That’s a cost many contractors miss entirely.
Temporary facilities. Job trailers, storage containers, and portable sanitation all carry monthly rental fees. A basic job trailer runs $300 to $800 per month depending on your market and the size of the unit. Storage containers are typically $100 to $250 per month. Portable toilets average $150 to $300 per month per unit with weekly servicing. On a twelve-month commercial project, these facilities can easily add up to $15,000 or more. Price them accurately and track them as a separate budget line so you can see the actual cost against your estimate as the project progresses. Projul’s budgeting tools let you set up individual line items for every mobilization cost category so nothing slips through the cracks.
Temporary utilities. Getting power, water, and sometimes internet to the jobsite before permanent utilities are available is a real cost that varies dramatically by location. A temporary electrical service panel and connection can cost $1,000 to $5,000 depending on the utility company and the amperage required. Generator rental for sites without grid access runs $500 to $3,000 per month depending on capacity. Temporary water connections or water truck deliveries, temporary internet service, and cell signal boosters all add incremental cost. Get quotes from your local utility providers during preconstruction so these numbers are based on reality, not assumptions.
Permits, fees, and bonds. Building permits are the obvious cost, but the full picture includes plan review fees, inspection fees, utility connection fees, street use or right-of-way permits, environmental permits, and any required performance or payment bonds. Bond premiums typically run 1% to 3% of the contract value, which on a $500,000 project means $5,000 to $15,000 just for bonding. Some jurisdictions also require cash deposits for erosion control, utility damage, or street repair that you’ll get back after the project but need to front during mobilization. These deposit requirements can tie up significant cash flow if you’re not prepared for them.
Site preparation labor. The crew hours spent on mobilization are billable project costs, not overhead. Setting up fencing, building temporary access roads, grading staging areas, offloading and positioning equipment, installing temporary utilities, setting up the job trailer, and organizing initial material deliveries all require labor. On a mid-size commercial project, mobilization labor can easily consume 40 to 80 crew hours. At loaded labor rates of $50 to $80 per hour, that’s $2,000 to $6,400 in labor alone before any production work happens.
Security and protection. Site security during mobilization and throughout the project includes temporary fencing, padlocks, lighting for after-hours deterrence, and potentially security cameras or alarm systems. On high-theft-risk sites or projects with expensive materials stored on site, a security guard service might be warranted. Temporary erosion control measures like silt fencing, inlet protection, and stabilized construction entrances are also mobilization costs that are often required by permit conditions.
The bottom line on mobilization costs. For most commercial projects, mobilization costs run between 2% and 10% of the total contract value, with larger projects trending toward the lower end of that range due to economies of scale. Residential projects with minimal temporary facilities might fall below 2%, while remote or complex sites can push above 10%. The key is to estimate each component individually rather than guessing at a lump sum. When your mobilization budget is detailed, you can track actual costs against estimates and improve your pricing accuracy on every future project.
Mobilization Timeline Planning for Different Project Sizes
Not every project needs the same mobilization timeline. A bathroom remodel and a new hospital wing have radically different setup requirements. Matching your mobilization timeline to the project scope prevents both wasted time on small jobs and inadequate preparation on large ones.
Small residential projects (under $50,000). For kitchen remodels, bathroom renovations, small additions, and similar residential work, mobilization is typically a same-day or one-day affair. You’re pulling a building permit (often over the counter), setting up dust barriers, laying floor protection, arranging a dumpster delivery, and staging your first round of materials. The risk here isn’t complexity but forgetting the basics. A simple checklist that takes five minutes to review before each job keeps you from showing up without the permit, the dumpster, or the right tools. Even on small jobs, scheduling your material deliveries and dumpster drop using a project scheduling tool prevents the all-too-common scenario of crews waiting around while someone runs to the supply house.
Mid-size residential and light commercial ($50,000 to $500,000). Custom homes, tenant improvements, small retail buildouts, and similar projects need one to two weeks of dedicated mobilization time. The permit process is more involved, temporary utilities are likely required, you’re coordinating multiple subs, and the equipment and material logistics are more complex. Start your mobilization planning at least four weeks before your target start date. This gives you time to pull permits, schedule utility connections, arrange equipment delivery, confirm subcontractor availability, and set up the physical site.
A sample timeline for a mid-size project might look like this. Four weeks out: submit permit applications, order job trailer and portable sanitation, confirm sub schedules. Three weeks out: call for utility locates, arrange temporary power connection, order initial materials. Two weeks out: deliver and set up job trailer, install temporary fencing, verify permits are approved. One week out: receive initial material deliveries, stage equipment, conduct pre-mobilization meeting. Day one: safety orientation, crew assignments, production work begins.
Large commercial and institutional ($500,000 to $5 million). These projects require two to four weeks of on-site mobilization activity, with planning starting two to three months before the target start date. You’re dealing with more complex permitting, potentially including environmental reviews and public hearings. Temporary facilities are more extensive. Equipment logistics involve multiple pieces of heavy machinery. Material procurement has longer lead times. Subcontractor coordination involves dozens of companies.
At this scale, mobilization deserves its own section in the project schedule with individual tasks, durations, dependencies, and milestones. The mobilization phase should be reviewed in your scheduling software just like any other phase, with progress tracked daily.
Major projects (over $5 million). On large-scale projects like hospitals, schools, multi-story commercial buildings, and infrastructure work, mobilization is a full project phase that can take four to eight weeks. You may need to construct temporary access roads, install significant temporary power infrastructure, set up multiple job trailers for different trades, build laydown yards for material staging, and coordinate with local authorities on traffic management plans. At this level, you typically assign a dedicated project engineer or superintendent to manage mobilization as their primary responsibility.
The universal principle. Regardless of project size, the key is working backward from your target start date and building in buffer for every step that involves a third party. Utility companies, permit offices, rental companies, and material suppliers all operate on their own timelines, not yours. The more dependencies you can identify and initiate early, the smoother your mobilization will be.
Common Mobilization Mistakes That Delay Projects and Blow Budgets
Even experienced contractors fall into mobilization traps. Here are the most common mistakes and how to avoid them.
Assuming permits will be approved on time. This is the number one mobilization killer. Contractors submit permits, assume approval within the standard processing window, and plan their mobilization accordingly. Then the plan reviewer has questions, or the application is incomplete, or the jurisdiction is backed up. Suddenly you’re two weeks past your planned start date with a crew that has nothing to do. The fix is simple: submit permits as early as possible, follow up proactively, and don’t commit to a start date until permits are actually in hand.
Underestimating utility lead times. Temporary electrical service, water connections, and other utility work are scheduled on the utility company’s timeline, not yours. In busy construction markets, temporary power connections can take three to six weeks from request to installation. If you call the utility company one week before your start date, you’re going to be running generators far longer than planned and paying premium rates for the privilege. Contact utility providers during preconstruction, not during mobilization.
Not visiting the site before mobilization day. Plans and surveys tell you a lot, but they don’t tell you everything. Is the access road actually wide enough for your equipment trailer? Is the ground firm enough to support a crane? Are there overhead power lines that will limit crane reach? Is there an active bird nest in the tree you planned to remove (which might require an environmental permit)? A pre-mobilization site visit, ideally with your superintendent and key subcontractors, catches problems that are easy to solve in advance but expensive to solve on day one.
Staging materials in the wrong location. This mistake doesn’t stop the project from starting, but it creates inefficiency that compounds throughout the build. Lumber staged on the opposite side of the site from the framing area means every piece gets handled twice. Mechanical equipment stored where the concrete crew needs to work means it gets moved, damaged, or is in the way. Think through the construction sequence and stage materials at or near their point of use. When in doubt, review your project schedule and site plan together to identify optimal staging locations.
Skipping the pre-mobilization meeting. When everyone shows up on day one without a unified plan, confusion takes over. Different subs set up in conflicting areas. Deliveries arrive with nobody to receive them. The safety plan isn’t communicated. A thirty-minute meeting with your key people before mobilization day aligns everyone on the plan and prevents hours of wasted time sorting things out in the field.
Failing to budget mobilization costs. Some contractors bury mobilization costs in overhead or general conditions without tracking them separately. This makes it impossible to know whether your mobilization estimate was accurate, which means you can’t improve it on future bids. Break mobilization into specific line items, track actual costs against your budget, and use that data to sharpen your estimating. Projul’s budgeting features make it straightforward to set up mobilization as a tracked cost category so you always know where your money went.
Ignoring weather in your mobilization plan. Mobilization often involves site grading, equipment positioning, and material staging, all of which are weather-sensitive. Planning mobilization during a week with heavy rain forecasted means muddy conditions, delivery trucks getting stuck, and potential erosion control violations. Check the extended forecast when scheduling mobilization activities and have contingency plans for weather delays.
Overloading day one. Trying to do everything on the first day is a recipe for chaos. Stagger your mobilization activities over several days. Day one might be fencing and trailer setup. Day two is equipment delivery and utility connections. Day three is material deliveries and staging. Day four is the safety orientation and start of production work. Spreading the work out gives you time to address problems as they come up rather than trying to solve five issues simultaneously while also trying to start production.
Demobilization Planning: Closing Out a Jobsite Efficiently
Mobilization gets all the attention, but demobilization, the process of closing out and clearing a jobsite, deserves just as much planning. A sloppy demobilization wastes money, damages client relationships, and can even create legal liability.
Start planning demobilization before the project ends. The biggest demobilization mistake is waiting until the last day to think about it. Two to four weeks before substantial completion, start planning the closeout sequence. Which temporary facilities can be released first? When do equipment rentals need to end to avoid extra billing cycles? What’s the sequence for removing temporary utilities? Which subcontractors need to return for punch list work, and when?
Coordinate equipment and rental returns. Rental equipment that sits on site after you’re done using it is money wasted. Track the last needed date for every rental item and schedule returns accordingly. Most rental companies charge by the four-week cycle, so timing your returns to align with billing periods can save significant money. For owned equipment, schedule transport back to your yard during normal business hours when your operators are available, not as an emergency move on the last day.
Remove temporary facilities in the right order. There’s a logical sequence to demobilization that prevents problems. Temporary fencing stays up until the site is secure without it, meaning the permanent building is lockable or the property is otherwise secured. Portable sanitation stays until the last workers leave the site, not before. The job trailer stays until all administrative closeout is complete. Temporary power stays until you no longer need it for testing, commissioning, or punch list work. Removing any of these too early creates problems that cost more to solve than the rental savings.
Final site cleanup. The condition you leave the site in reflects directly on your company’s reputation. Remove all construction debris, temporary materials, and equipment. Sweep or blow paved areas. Remove any temporary signage. Restore any areas disturbed by your temporary facilities, like filling and seeding the spot where the job trailer sat. If the contract specifies site restoration requirements, review them during your demobilization planning so there are no surprises.
Document everything during demobilization. Take photos of the completed site, the condition of surrounding properties, the removal of temporary facilities, and any areas that were restored. This documentation protects you against claims that your work damaged adjacent property or that you left the site in poor condition. It also gives you a visual record of the completed project for your portfolio and marketing.
Return or reclaim deposits. During mobilization, you may have posted deposits for utility connections, erosion control compliance, street damage, or other permit requirements. Create a checklist of every deposit during mobilization and track the return process during demobilization. Some municipalities require final inspections before releasing deposits. Others require written requests. Don’t let deposits sit unclaimed because you forgot about them. On a large project, unreturned deposits can total thousands of dollars.
Close out with subcontractors. Demobilization is also the time to finalize subcontractor work. Verify that all punch list items are complete, collect final lien waivers, process retainage releases, and document any outstanding warranty items. Having a clean subcontractor closeout prevents the lingering issues that pop up months after the project is “done” and drain your time and profitability.
Hold a post-project review. Once the site is cleared and the project is closed out, gather your team for a brief review. What went well during mobilization? What would you change? Were there demobilization costs you didn’t anticipate? Use this feedback to update your mobilization and demobilization checklists for the next project. Continuous improvement in your setup and closeout processes compounds over time, making every future project smoother and more profitable.
Building a Repeatable Mobilization Process
The contractors who mobilize well don’t reinvent the process every time. They have a system. A checklist. A standard approach that gets refined with every project. That’s what separates a smooth start from a chaotic one.
Create a master mobilization checklist. Start with the categories covered in this guide: permits, site prep, facilities, equipment, materials, crew, and safety. Under each category, list every task that needs to happen. Be specific. “Set up temporary power” is one line item. “Call utility company to schedule temporary service” is the step that actually needs to happen two weeks before mobilization day.
Your checklist will evolve with every project. After each mobilization, do a quick debrief. What went well? What did you forget? What would you do differently? Update the checklist and it gets better every time.
Assign owners and deadlines. A checklist without assignments is just a wish list. Every task needs a person responsible and a completion date. Use your project management software to assign mobilization tasks, set deadlines, and track progress. When mobilization has the same structure as any other phase of the project, it gets the same attention and accountability.
Build in lead times. Most mobilization problems come from underestimating lead times. Permits take longer than expected. Rental equipment isn’t available. The utility company can’t connect power until next week. Build buffer into your mobilization schedule. If something needs to be done by Friday, put it on the schedule for Wednesday. That two-day buffer has saved more project starts than any other single practice.
Budget for mobilization. Mobilization costs money, and it should have its own line item in your estimate. Temporary facilities, equipment transport, initial utility deposits, permit fees, safety equipment, and the labor to set everything up are all real costs. If you bury them in general conditions or overhead, they become invisible. Making mobilization a visible budget item helps you price it accurately and track costs against your estimate. Check out Projul’s pricing page to see how the right software can help you manage mobilization costs alongside every other project expense.
Photo-document the process. Take photos of the site before mobilization, during setup, and when the site is ready for work. This visual record helps you replicate what worked on future projects. It also protects you if there are disputes about site conditions, property damage, or when specific setup tasks were completed.
Learn from every project. The best mobilization processes are the ones that get better over time. Keep notes on what worked, what didn’t, and what you’d change. Talk to your foremen and subs about their experience. Was the site layout effective? Were materials staged in the right spots? Did the schedule work? These conversations take five minutes and produce improvements that save hours on the next project.
Construction mobilization isn’t glamorous. Nobody wins an award for setting up a great jobsite. But the contractors who take it seriously are the ones who start every project on time, under control, and set up for success. They’re the ones whose crews are productive from hour one, whose subs show up to a site that’s ready for them, and whose clients see a professional operation from the very first day.
Try a live demo and see how Projul simplifies this for your team.
Build a mobilization process that works, refine it with every project, and watch the ripple effect it has on everything that comes after.
Frequently Asked Questions
What does mobilization mean in construction?
How long does construction mobilization typically take?
What is included in mobilization costs?
What is the difference between mobilization and preconstruction?
How can software help with construction mobilization?
Related Articles
Construction Team Meetings: A Practical Guide to Meetings That Actually Get Results
Most construction team meetings waste time. Here's how to run weekly check-ins, safety meetings, kickoffs, and...
Read More →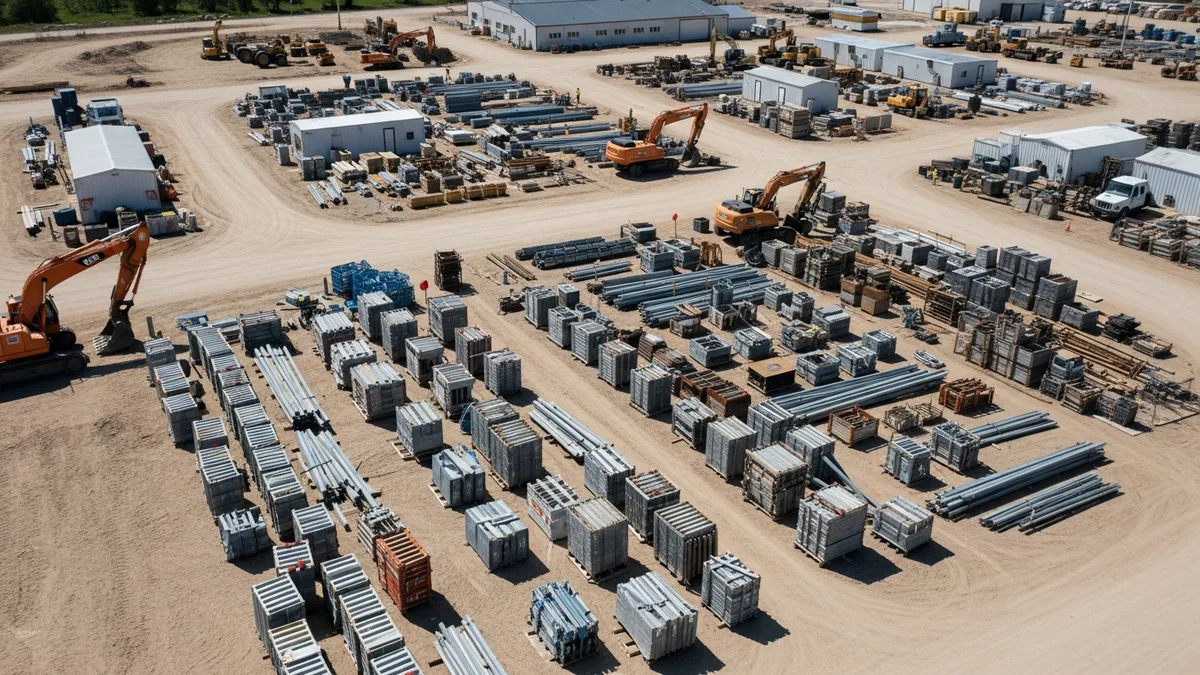
Project Management for Small Contractors: You Don't Need Enterprise Software
You don't need a 50-person company to benefit from project management. Even a 5-person crew loses money without a...
Read More →
Free Construction Schedule Template
A solid construction schedule keeps your jobs on track, your crews busy, and your clients happy. Grab our free...
Read More →