Construction Punch List Best Practices (2026)

Every contractor has lived this nightmare: the job is 99% done, the client is ready to move in, and you’re stuck chasing three different subs about a scratched door, a missing outlet cover, and a paint touch-up that nobody wants to own. The punch list was supposed to take a week. It’s been six.
The punch list phase is where projects go to die a slow, expensive death. Not because the work is hard, but because the process is broken. Items get lost in text threads. Nobody knows who’s responsible for what. The client keeps adding things that weren’t on the original list. And meanwhile, your final payment is sitting in limbo.
It doesn’t have to be this way. Construction punch list best practices aren’t complicated. They just require a system that everyone follows from the start. This guide covers exactly how to build that system so you can close out jobs faster, keep clients happy, and stop leaving money on the table.
Why the Punch List Phase Makes or Breaks Client Relationships
Think about this from your client’s perspective. They’ve watched their project come together over weeks or months. They’re excited. They’re ready to use the space. And then… nothing happens. The punch list drags. Nobody is returning their calls. They see workers show up for an hour and leave. They start wondering if you’re ever going to finish.
That last 2% of the project creates 80% of the client’s impression of your company. You could deliver flawless framing, perfect mechanical systems, and a beautiful finish. But if the closeout takes forever, that’s what they remember. And that’s what they tell their neighbors.
Late punch lists cost you referrals. Word of mouth is everything in construction. When a homeowner or property manager talks about their contractor, they rarely mention the foundation pour. They talk about how the job ended. “They were great, but it took them two months to finish the last few items” is not the kind of review that generates leads.
They also cost you money. Every day a punch list stays open is a day your retainage sits in someone else’s account. If you’re carrying $30,000 or $50,000 in retainage on a job, and the punch list drags for 60 days because you didn’t have a system, that’s real money you could be using on your next project. Multiply that across four or five active jobs and you’re looking at serious cash flow problems.
And they create legal exposure. When punch list items linger, they can escalate. What started as a cosmetic issue becomes a warranty claim. What was a simple fix turns into a dispute about scope. Having a clear, documented punch list process protects you if things ever go sideways.
The contractors who close jobs fast aren’t necessarily better builders. They just have a better process for the last mile. And it starts with how you build the list itself.
Creating a Punch List That Doesn’t Get Ignored
Most punch lists fail before anyone picks up a tool. They fail because they’re vague, disorganized, or so long that nobody knows where to start. A punch list that says “fix paint in bedroom” tells your sub almost nothing. Which bedroom? Which wall? What’s wrong with it? Is it a scratch, a drip, or a color mismatch?
Here’s how to create a punch list that actually gets completed:
Be Specific About Every Item
Each punch list item should include four things: the exact location, a clear description of the deficiency, what the corrected condition should look like, and a deadline. “Master bedroom, east wall, 3ft above baseboard: paint drip approximately 2 inches long. Sand smooth and touch up to match surrounding finish. Complete by March 5th.”
That’s a punch list item your painter can act on without calling you for clarification. The more specific you are up front, the fewer callbacks you deal with later.
Walk the Job With the Client
Never build a punch list in isolation. Walk the entire project with your client (and the architect, if there is one) and document every item together. This does two things: it gives the client a voice in the process, and it locks in the scope. Once you’ve done a joint walkthrough, it’s much harder for new items to creep in later.
Bring your punch list tool with you during the walk. Capture items in real time instead of scribbling on a notepad and transcribing later. Half the items that get “lost” on punch lists were never properly recorded in the first place.
Group Items by Trade
Organize your punch list by trade or subcontractor, not by room. Your electrician doesn’t care about the paint touch-ups in the living room. They need to see every electrical item across the entire project in one place. Grouping by trade makes it easy to hand off sections of the list to the right people and track progress by responsible party.
Set a Realistic but Firm Timeline
“Get to it when you can” is not a deadline. Set a completion date for the entire punch list and work backward to set deadlines for individual items or trade groups. Two weeks is reasonable for most residential punch lists. Commercial jobs with more parties involved might need 30 days. Whatever the timeline, put it in writing and communicate it clearly.
Keep the List Closed After the Walk
This is a big one. After the formal walkthrough, the punch list is closed to new additions unless something was genuinely missed (not visible during the walk) or there’s a legitimate warranty issue. Scope creep during the punch list phase is one of the top reasons closeout takes so long. The client always has “one more thing.” You need a professional but firm boundary.
Who Owns Each Punch List Item? Assigning Responsibility
A punch list with no names attached is just a wish list. Every single item needs an owner, and that owner needs to know they’re responsible. This sounds obvious, but it breaks down constantly on real job sites.
Assign at the Item Level
Don’t just hand a list to your superintendent and say “get it done.” Assign each item to the specific sub or crew member who will complete the work. When everyone is responsible, nobody is responsible. Individual assignment creates individual accountability.
Communicate Directly With Subs
Your subcontractors should receive their portion of the punch list directly, not through a chain of phone calls. Send them their items with photos, locations, and deadlines. If you’re using a punch list feature built for construction, this happens automatically. The sub sees only their items, can update status as they complete work, and you can track progress without playing phone tag.
Handle Disputes Early
Sometimes a sub will push back on a punch list item. “That was like that when we got there.” “That’s not our scope.” “The GC’s crew damaged it after we left.” These disputes are normal. What’s not normal is letting them fester for weeks.
Address responsibility disputes within 48 hours. Review the original scope, check your daily logs and photos, and make a call. If it’s genuinely not the sub’s fault, own it and get it fixed another way. If it is their responsibility, hold firm. Letting disputed items sit unresolved is how punch lists turn into months-long headaches.
Back-Charge Policy
Have a clear back-charge policy communicated before the punch list phase even starts. If a sub doesn’t complete their punch list items by the deadline, you’ll have someone else do the work and deduct the cost from their final payment. This isn’t about being adversarial. It’s about finishing the job. Most subs will take their punch list items seriously when they know there’s a financial consequence for ignoring them.
Photo Documentation: Your Proof That Work Was Done Right
If you didn’t photograph it, it didn’t happen. That’s the reality of construction in 2026. Photo documentation during the punch list phase isn’t optional. It’s your insurance policy against disputes, warranty claims, and clients who conveniently forget that an item was completed.
Photograph Before and After
Contractors across the country trust Projul to run their businesses. Read their reviews.
For every punch list item, take a photo of the deficiency and a photo of the completed repair. This creates an indisputable record that the work was identified and corrected. Before-and-after pairs are especially important for items that might be disputed later, like cosmetic finishes, alignment issues, or anything subjective.
Include Context in Every Photo
A close-up of a patched wall means nothing without context. Include enough of the surrounding area that anyone looking at the photo can identify exactly where it was taken. Room corners, windows, doors, and fixtures all help orient the viewer. Some contractors hold a piece of tape with the item number next to the deficiency before photographing. Simple, effective.
Use a System That Links Photos to Items
Taking photos is only useful if you can find them later. If your punch list photos live in someone’s camera roll mixed in with their kid’s soccer pictures, you’ve got a problem. Your photo documentation system should link each photo directly to the punch list item it belongs to. When the client asks about item #47 six months from now, you should be able to pull up the before-and-after photos in seconds.
Document the Walkthrough Itself
Beyond individual items, photograph the overall condition of the space during your punch list walkthrough. Wide shots of each room or area create a baseline record of the project’s condition at the time of the walk. If the client claims damage after move-in that wasn’t on the punch list, these photos are your evidence.
Time-Stamped and Geotagged
Modern photo tools automatically capture when and where a photo was taken. This metadata matters. If a client disputes whether a repair was made before or after a certain date, the timestamp settles it. If there’s a question about which unit or floor an issue was in, the geotag confirms it. Don’t strip this data. It’s more valuable than the photo itself in a dispute.
Tracking Completion and Getting Final Sign-Off
Building the list and assigning items is only half the battle. The other half is tracking progress and getting that final signature. This is where most contractors lose momentum. Items get completed but nobody updates the list. The client doesn’t know what’s been done. The project manager is juggling three other jobs and loses track.
Daily Status Updates During Punch List Phase
During active punch list work, update the status of every item daily. Completed, in progress, waiting on materials, disputed. Your client should be able to see progress without calling you. If you’re using a customer portal, the client can check status on their own time. This dramatically reduces the “when will this be done?” phone calls that eat up your day.
Batch Completions for Efficiency
Don’t send your sub back to a job site five separate times for five separate items. Batch items by trade and schedule completion visits that knock out multiple items at once. This is more efficient for the sub, less disruptive for the client, and easier for you to verify. One trip, five items done, five items checked off.
Verify Before You Mark Complete
Never mark an item complete based on a sub’s word alone. Verify it yourself or have your superintendent verify it. Take completion photos. This extra step takes minutes but saves you from the embarrassment of telling a client something is done when it isn’t. Nothing destroys trust faster than marking items complete that clearly aren’t.
The Final Walkthrough
Once every item is marked complete on your end, schedule a final walkthrough with the client. This is not a new punch list opportunity. This is a verification walk to confirm that every item from the original list has been addressed to the client’s satisfaction.
Walk through each item with the client. Show them the before-and-after photos if needed. Get their verbal confirmation on each one. At the end of the walk, get a written sign-off. This can be a physical signature on the punch list document or a digital acknowledgment. Either way, get it in writing.
Tie Sign-Off to Final Payment
Your contract should clearly state that punch list completion and client sign-off trigger the release of final payment and retainage. When the client signs off on the punch list, submit your final payment application the same day. Don’t wait. The longer you wait between sign-off and invoice, the more likely something else comes up.
For a complete breakdown of everything that needs to happen during closeout (not just the punch list), check out our construction project closeout checklist.
Digital Punch Lists vs Paper: Why It’s Time to Switch
If you’re still managing punch lists on paper, printed spreadsheets, or email chains, you’re working harder than you need to. Paper punch lists were fine when projects were simpler and clients were more patient. Neither of those things is true anymore.
The Problems With Paper
Paper gets lost. A punch list on a clipboard in the job trailer is one coffee spill away from disaster. Even if it survives, only one person has access to it at a time. Your sub can’t check their items without driving to the site.
Paper can’t carry photos. You can write “scratch on countertop” on a piece of paper, but you can’t attach a photo showing exactly what scratch, how big, and where. Photos turn vague complaints into actionable items.
Paper doesn’t track history. When was an item added? Who marked it complete? When? Paper has no audit trail. If a dispute comes up, you’re relying on memory, and memory is unreliable.
Paper doesn’t notify anyone. When you add an item to a paper list, nobody knows about it until someone physically sees the list. With a digital system, the assigned sub gets notified immediately and can start planning the fix.
What a Digital Punch List Tool Gives You
Real-time visibility. Everyone involved in the project can see the current status of every item from their phone or computer. The client, the PM, the super, the subs. No more “I didn’t know about that” excuses.
Photo integration. Every item can have photos attached directly to it. Before, after, and during. No more trying to match a photo in someone’s camera roll to a line item on a spreadsheet.
Automatic notifications. When an item is assigned, the responsible party gets notified. When it’s marked complete, the PM gets notified. When the client has a question, it goes to the right person. This eliminates the constant follow-up calls.
Reporting and accountability. A digital system tracks who did what and when. If a sub says they completed their items last Tuesday but the system shows no updates, you have the data to have an honest conversation.
Speed. Contractors who switch from paper to digital punch lists consistently report closing out jobs 30 to 50 percent faster. That’s not a small improvement. On a job with $50,000 in retainage, getting paid even two weeks sooner makes a meaningful difference to your cash flow.
If you’re evaluating options, Projul’s punch list feature was built specifically for contractors. It handles item assignment, photo documentation, status tracking, and client sign-off in one place. You can see all the features and check pricing here.
Common Punch List Mistakes That Cost Contractors Time and Money
Even contractors who know the basics still fall into the same traps during closeout. Here are the mistakes that show up on job after job, and how to avoid each one.
Starting the Punch List Too Late
A lot of contractors treat the punch list as something that happens after the work is done. That’s backward. You should be thinking about punch list prevention from the day framing starts. When your superintendent does daily walkthroughs during active construction, they’re catching deficiencies before they pile up at the end. A scratch on a door casing is a five-minute fix during trim week. It’s a scheduling nightmare during punch list week when your trim carpenter has already moved to another job.
Build quality checks into every phase. When drywall is complete, walk it before paint starts. When cabinets go in, inspect them before countertops get templated. When tile is grouted, check it before the plumber installs fixtures. Every deficiency you catch early is one less item on your punch list.
Letting the List Get Too Long
There’s a psychological tipping point with punch lists. A list of 15 items feels manageable. A list of 80 items feels overwhelming, and overwhelmed people procrastinate. If your punch lists routinely hit 50, 60, or 100+ items, the problem isn’t your closeout process. The problem is your quality control during construction.
Track your punch list item counts across projects. If they’re trending up, dig into why. Is it a specific trade that consistently leaves deficiencies? Is your superintendent not catching things during construction? Are your specs unclear, leading to work that doesn’t match expectations? The punch list is a symptom. Treat the disease.
Not Including Subs in the Walkthrough
Some general contractors walk the job with the client, build a massive punch list, and then dump it on their subs after the fact. This creates resentment and disputes. A better approach is to have each sub walk their portion of the work before the client walkthrough. Give your electrician, plumber, HVAC tech, and finish carpenter a chance to self-inspect and fix their own deficiencies first.
This pre-punch walkthrough typically cuts the client-facing punch list in half. Your subs appreciate the professional courtesy, and your client sees a much tighter project during their walk. Everyone wins.
Ignoring Seasonal and Weather Related Items
Exterior punch list items are at the mercy of weather. You can’t touch up exterior paint in freezing rain. You can’t seal a driveway when it’s 20 degrees outside. You can’t grade and seed when the ground is frozen.
Plan for this. If your project is reaching substantial completion in November in a cold climate, identify which exterior items can wait for spring and which need to be done now. Communicate this to the client clearly and in writing. Put a specific date range for seasonal completions (like “exterior paint touch-ups to be completed between April 15 and May 15”) and get that agreement documented. This prevents the client from holding all retainage hostage over items that physically cannot be done until weather permits.
Failing to Separate Warranty Items From Punch List Items
There’s an important distinction between punch list items and warranty items, and a lot of contractors blur the line. Punch list items are deficiencies that exist at substantial completion. Things that should have been done correctly during construction but weren’t. Warranty items are things that fail or degrade after the owner takes possession due to normal wear, settling, or material defects.
A door that won’t latch at substantial completion is a punch list item. A door that won’t latch six months later because the house settled is a warranty item. The difference matters because punch list items affect your final payment and retainage. Warranty items are covered under your warranty terms, which typically have different timelines and processes.
Keep these separate in your tracking system. Don’t let warranty calls get added to a punch list that should have been closed months ago. If you need a system to handle both, Projul’s to-do tracking lets you manage ongoing service items separately from project punch lists.
Managing Punch Lists on Multi-Phase and Commercial Projects
Residential punch lists are straightforward compared to what happens on larger commercial or multi-phase projects. When you’ve got multiple buildings, dozens of subs, and a general contractor managing the whole show, the complexity multiplies fast.
Phase-by-Phase Punch Lists
On multi-phase projects, don’t wait until the entire project is complete to start punch listing. Punch list each phase as it reaches substantial completion. If you’re building a 40-unit apartment complex in four phases of 10 units each, punch list the first 10 units while construction continues on the rest. This spreads the workload over the project timeline instead of creating a massive punch list avalanche at the end.
Phase-by-phase closeout also gets you partial retainage releases sooner, which helps cash flow throughout the project. Talk to your owner or GC about structuring the contract to allow phased retainage release tied to phased punch list completion.
Working With Multiple GCs or CMs
On large commercial projects, you might be a subcontractor working under a GC who is working under a construction manager. Each layer adds communication delays and potential for items to get lost. In this situation, your punch list process needs to account for the chain of command.
Get clear on who has the authority to approve your punch list completions. Is it the GC’s superintendent? The CM’s project manager? The owner’s rep? Know this before the punch list walk, and make sure that person is present during your walkthrough. Nothing is more frustrating than completing every item on your list, only to find out that the person who signed off doesn’t actually have the authority to release your retainage.
Coordinating Shared Spaces
Commercial projects have shared spaces like lobbies, corridors, mechanical rooms, and parking areas where multiple trades have work. Punch list items in these areas often create finger-pointing. The flooring sub says the painter dripped on their floor. The painter says the electrician scratched the wall pulling wire. The electrician says the HVAC crew dented the ceiling grid.
Document the condition of shared spaces before each subsequent trade works in them. A quick set of photos before the painters start in the lobby gives you proof of the lobby’s condition at that point. When the punch list walk happens and there’s a scratch on the wall, you can trace back to which trade was working there when it appeared. This kind of documentation turns disputes into facts. Maintaining solid daily logs throughout the project makes this much easier because you have a record of who was working where and when.
Retainage Strategies for Complex Projects
On commercial jobs, retainage is typically 5 to 10 percent of the contract value. On a $2 million subcontract, that’s $100,000 to $200,000 sitting in someone else’s account until your punch list is complete and accepted. That’s a lot of working capital to have tied up.
Some contractors negotiate reduced retainage once the project reaches 50% completion. Others negotiate for retainage to be held in an interest-bearing escrow account. And some contracts allow for retainage reduction when the punch list is substantially complete, with only a small holdback for the final few items. Know your options and negotiate them before you sign the contract, not during closeout when you have no bargaining power.
The faster you close your punch list, the faster that retainage converts to cash in your account. On large commercial projects, the financial incentive alone should make punch list efficiency a top priority for every project manager on your team.
Training Your Team to Execute Punch Lists Consistently
You can have the best punch list process in the world, but if your team doesn’t follow it, nothing changes. Consistency comes from training, clear expectations, and accountability.
Standardize Your Punch List Template
Every project should use the same punch list format. Same fields, same categories, same process. When your superintendent moves from one project to another, they shouldn’t have to learn a new system. Standardization also makes it easier to track patterns across projects. If you notice that the same sub consistently has the most punch list items, that’s a conversation worth having before the next project starts.
Create a punch list template that includes all the fields discussed in this guide: item number, location, description, expected condition, responsible party, deadline, status, and photo fields. If you’re using Projul, these fields are already built into the to-do and punch list tools, so your team doesn’t have to build templates from scratch.
Hold a Pre-Closeout Meeting
Before the punch list walkthrough, hold a quick meeting with your project team. Review the process. Remind everyone of their roles. Go over the timeline and deadlines. This takes 30 minutes and prevents weeks of confusion.
In the pre-closeout meeting, cover these topics:
- Walkthrough date and who will attend
- How items will be documented and distributed
- Deadline for all punch list completions
- Back-charge policy for missed deadlines
- How disputes will be handled
- Final walkthrough date and sign-off process
This meeting is especially important if you have newer superintendents or project managers who haven’t been through your closeout process before. Don’t assume everyone knows the drill.
Debrief After Every Project
After the punch list is complete and the final payment is collected, take 20 minutes to review what worked and what didn’t. How many items were on the punch list? How long did closeout take? Were there any disputes? Did any subs miss their deadlines?
Track these metrics over time. Your goal is continuous improvement. If your average punch list length is 45 items today, aim for 35 on your next project. If closeout takes three weeks on average, aim for two. Small improvements compound. Over a year, shaving a week off each closeout across 10 projects gives you 10 extra weeks of productivity and faster access to retainage.
Document what you learn in your project files so future teams can benefit. The difference between a good contractor and a great one often comes down to whether they learn from each project or just move on to the next one.
Build a Culture of Ownership
The best punch list teams are the ones where everyone takes personal ownership of quality. Your superintendent should feel responsible for the punch list before it’s even created. Your subs should see completing their punch list items as a reflection of their craftsmanship, not just an obligation.
This kind of culture doesn’t happen by accident. It comes from leadership. When the project manager treats punch list completion as a priority and follows through on deadlines and back-charges, the team responds. When the PM lets things slide and doesn’t hold people accountable, the whole process breaks down.
If you’re a company owner thinking about how to get your project managers to take closeout more seriously, start by measuring it. Track days from substantial completion to final payment for every project. Share those numbers. Celebrate the PMs who close fast. Coach the ones who don’t. What gets measured gets managed, and closeout is no exception. The companies that build a reputation for clean, fast closeouts end up winning more bids because owners and GCs talk to each other. Your punch list track record follows you from project to project, whether you realize it or not.
For contractors looking to tighten up their overall scheduling process alongside punch list management, having both systems in one platform means your team isn’t bouncing between apps trying to figure out what’s due when.
Punch List Prevention: Catching Problems Before They Pile Up
The best punch list is a short one. Every experienced contractor knows this, but few actually build prevention into their daily workflow. The punch list at the end of a project is really just a scoreboard for everything that slipped through during construction. If you want a shorter scoreboard, you need better defense during the game.
Quality Checkpoints at Every Phase Transition
The biggest opportunity to prevent punch list items is at phase transitions. When one trade finishes and another is about to start, that’s your window to catch deficiencies while the responsible crew is still on site and the fix is easy.
Before drywall closes up walls, walk every room and check framing, blocking, electrical rough-in, and plumbing rough-in against the plans. Before paint starts, inspect every drywall surface for dings, bad seams, and missed sanding. Before flooring goes down, make sure the subfloor is clean, flat, and free of debris. Before fixtures get installed, verify that all rough-in locations match the fixture specs.
These checkpoints take 30 to 60 minutes each, depending on the size of the project. Compare that to the days or weeks you spend chasing the same issues during punch list phase when the original crew has moved on and getting them back costs you scheduling headaches and goodwill.
Build these checkpoints into your project schedule as actual calendar items, not something your superintendent does “when they get a chance.” When phase inspections are scheduled, they happen. When they’re informal suggestions, they get skipped the moment things get busy. And things always get busy.
Pre-Punch Walks With Each Trade
Two or three days before your scheduled client walkthrough, have each subcontractor do a self-inspection of their own work. Give them a heads-up: “We’re doing the client walk on Thursday. Walk your work by Tuesday and fix anything you find.”
Most good subs will find and fix 60 to 70 percent of their own deficiencies when given the chance. The painter will spot the drip they missed. The trim carpenter will notice the mitered joint that’s gapped. The tile setter will see the grout line that’s inconsistent. These are craftspeople who take pride in their work. They just need the prompt and the time.
This pre-punch process also changes the dynamic of the client walkthrough. Instead of the client finding 80 items, they find 20. The project looks tighter. The client feels more confident in your team. And your actual punch list is manageable instead of overwhelming.
Using Daily Logs to Prevent Punch List Surprises
Your daily logs are one of the most underused punch list prevention tools. When your superintendent logs what happened each day, including work completed, conditions observed, and any issues noted, they’re creating a running record that helps catch problems early.
Here’s a practical example. Your daily log notes that the HVAC crew installed ductwork in the second floor on Monday. On Tuesday, the drywall crew starts hanging in the same area. If your superintendent reviews the log and realizes nobody inspected the ductwork before it got covered up, they can pause drywall and do the inspection. Without that log, the ductwork gets buried, and any issues become expensive punch list items that require cutting open finished ceilings.
Daily logs also help you trace the origin of damage. When a punch list item shows up and nobody wants to own it, your daily log tells you exactly which crews were working in that area and when. That turns a finger-pointing session into a factual conversation.
Material Inspections on Delivery
A surprising number of punch list items trace back to materials that arrived damaged or defective. A cabinet door with a chip in the finish. A light fixture with a bent shade. A countertop with a flaw in the surface. If these items get installed without inspection, they become punch list items. If they get caught on delivery, they’re just a quick call to the supplier for a replacement.
Make it a standard practice to inspect materials when they arrive on site. Open cabinet boxes and check faces and edges. Inspect countertops before the installer cuts them. Check tile for color consistency across boxes. This takes a few minutes per delivery and prevents headaches that can delay your punch list by weeks while you wait for replacement materials.
Protecting Finished Work
One of the most frustrating categories of punch list items is damage to finished work caused by other trades working after installation. The floor gets scratched by the trim carpenter’s saw horses. The freshly painted wall gets scuffed by the plumber installing a vanity. The new countertop gets chipped by the electrician setting a heavy tool on it.
Protect finished surfaces. Ram board or similar floor protection should go down the moment finished flooring is installed. Corner guards on walls in high-traffic areas. Countertop protection during subsequent work. Yes, this costs a few hundred dollars in materials. But it saves thousands in repairs and punch list time, and it shows your client that you care about the finished product.
Handling Punch Lists on Renovation and Occupied Space Projects
New construction punch lists are challenging enough. Renovations and projects in occupied spaces add a whole different set of complications. The homeowner is living in the space. A business is trying to operate while you’re working. Existing conditions blur the line between what was already there and what your crew caused.
Documenting Pre-Existing Conditions
Before you start any work in an occupied space, document everything. Photograph every surface, every fixture, every piece of trim in and adjacent to your work area. Note existing scratches on floors, dings on walls, stains on ceilings. Create a written and photographic record that both you and the owner agree represents the condition of the space before your crew touched it.
This documentation is your defense during the punch list walk. When the homeowner points to a scratch on the hardwood floor outside the bathroom you remodeled and says “your guys did that,” you can pull up the pre-construction photos showing that scratch was already there. Without that documentation, you’re either eating the cost of a repair you didn’t cause or getting into an argument with your client. Neither option is good.
Get the client to sign off on the pre-existing condition report before work starts. A simple acknowledgment that says “these photos represent the condition of the space as of this date prior to construction” gives you a documented baseline that holds up if things get contentious later.
Managing Client Expectations in Lived-In Spaces
Homeowners living through a renovation have a fundamentally different experience than someone who visits a new construction site occasionally. They see the mess every day. They hear the noise. They lose the use of rooms they’re accustomed to using. By the time you get to the punch list phase, their patience is often thin.
Set expectations early about what the punch list process will look like and how long it will take. Explain that some items may need to wait for specific conditions, like paint touch-ups that can’t happen until all other work is complete because the area keeps getting bumped. Help them understand the sequence so they’re not frustrated when you “skip” an item they think should be simple.
Communication matters more on renovation projects than anywhere else. Regular updates through a client communication system keep the homeowner informed without requiring constant phone calls. When the client can see that 12 of 18 punch list items are done and the remaining 6 are scheduled for next Tuesday, their anxiety drops significantly.
Scope Boundary Issues
Renovation punch lists are notorious for scope creep. The homeowner sees your crew working in their kitchen and figures this is a good time to mention that the bathroom faucet has been dripping for six months. Or they point to a crack in the ceiling in a room you never touched and ask if you can fix it “while you’re here.”
Draw a firm, polite line between your contracted scope and everything else. When you do the initial walkthrough for the punch list, reference the contract scope explicitly. “Our scope covers the kitchen renovation, the new powder room, and the associated electrical and plumbing work. Items outside this scope would need to be quoted separately.”
This is where having a solid change order process pays off. When the client asks about additional work during the punch list walk, you don’t say no. You say “absolutely, let me put together a change order for that so we can get it scheduled and priced for you.” It’s professional, it’s organized, and it keeps your punch list focused on the actual project scope.
Working Around Occupants
Scheduling punch list work in an occupied space requires more coordination than on a vacant site. You need to consider the occupant’s schedule, noise restrictions, access limitations, and the fact that a family with a toddler doesn’t want your painter in their bedroom during nap time.
Batch your punch list visits by area and communicate the schedule clearly. “We’ll be working in the kitchen and living room on Monday from 8 to 3. On Wednesday we’ll need access to the master bedroom and bath from 9 to noon.” Give the occupants enough notice to plan around your visits.
Also consider security and liability. Your crew is in someone’s home, around their belongings. Make sure the same people who did the original work are the ones coming back for punch list items. Don’t send a sub the homeowner has never met into their house without introduction and context. Trust matters in these situations more than on any other type of project.
Using Punch List Data to Improve Your Business
Most contractors complete the punch list, collect the check, and move on. They never look back at the data sitting in their closeout records. That’s a missed opportunity, because your punch list history tells you exactly where your process breaks down and which trades need the most attention.
Tracking Trends Across Projects
If you track punch list items in any organized way, you can start to see patterns. Maybe your painting sub consistently generates the most items. Maybe electrical rough-in locations are frequently wrong, leading to fixture placement issues during finish. Maybe your own crew’s work has a pattern of door hardware items because the doors aren’t getting adjusted properly during installation.
Pull your punch list data from the last five or ten projects and categorize items by trade. Count them. Rank them. The trades with the most items are the ones costing you the most time and money during closeout. That’s either a quality issue with that sub, a specification issue with how you’re communicating expectations, or a sequencing issue where their work gets damaged by subsequent trades.
Once you see the pattern, you can act on it. Have a direct conversation with the sub about quality expectations. Improve your specs or shop drawings. Add protection protocols for their finished work. Or, in some cases, find a better sub.
Calculating the True Cost of Your Punch List
Most contractors have no idea what their punch list phase actually costs them. They think of it as “just finishing up.” But when you add up the superintendent time, the project manager time, the return trips for subs, the truck rolls, the materials for repairs, and the cost of delayed retainage, the number is significant.
Try this exercise on your next project. Track every hour that every person spends on punch list related activities. Include the walkthrough, the documentation, the coordination calls, the repair visits, the verification walks, and the final sign-off process. Multiply those hours by loaded labor rates. Add in any material costs for repairs.
On a typical residential project, contractors are often surprised to find that the punch list phase costs $3,000 to $8,000 in labor and materials. On commercial projects, that number can be $15,000 to $50,000 or more. Now consider that a tighter construction process could cut that by 30 to 50 percent. Those savings go straight to your bottom line.
Understanding this cost also helps you make smarter decisions about prevention investments. Spending $500 on floor protection to avoid $2,000 in scratch repairs is an easy call when you have the data.
Building Your Closeout Reputation
In commercial construction especially, your closeout performance follows you. Owners, construction managers, and GCs talk. If you’re the sub who closes punch lists fast and clean, that reputation gets you invited to bid on the next project. If you’re the sub whose punch list drags for months and requires constant follow-up, word gets around just as fast.
Some GCs and CMs actually track subcontractor closeout performance formally. They record how many punch list items each sub had, how long it took to complete them, and whether there were disputes. This data influences prequalification decisions on future projects. You might be the lowest bidder, but if your closeout history is poor, a smart GC will go with the sub who finishes what they start.
Use your own clean closeout history as a competitive advantage. When you’re interviewing for a project or responding to prequalification questionnaires, mention your average punch list completion time and your process for getting there. In a market where many contractors struggle with closeout, standing out in this area can be the difference between winning and losing the job.
Feeding Lessons Back Into Estimating
Your punch list data should inform your estimates. If you consistently spend 40 hours of superintendent time on punch list phase for projects of a certain size, that’s a real cost that should be in your estimate. If you know from experience that exterior paint touch-ups in cold weather climates add an average of two extra weeks to closeout, you should account for that in your schedule.
Contractors who separate their closeout costs in job costing and budget tracking can estimate more accurately for future projects. You’ll stop underestimating the time and cost of the last phase of the project, which means your margins are more accurate and you’re not absorbing unplanned closeout costs on every job.
The punch list isn’t just a checklist to get through. It’s a data source that tells you how to build better, estimate smarter, and close faster on every future project.
Putting It All Together
Construction punch list best practices come down to a handful of principles: be specific, assign everything, document with photos, track status daily, and get sign-off in writing. None of this is rocket science. But without a deliberate system, every one of these steps breaks down under the pressure of real job sites with real deadlines and real clients.
The contractors who close out jobs in days instead of months have built these practices into their standard operating procedure. The punch list isn’t an afterthought. It’s a defined phase with clear steps, clear ownership, and clear timelines.
Start with your next project. Walk the job with the client. Build a detailed list. Assign every item. Photograph everything. Track daily. Get the sign-off. Collect your check.
It really is that simple when you have the right process.
Book a quick demo to see how Projul handles this for real contractors.
Frequently Asked Questions
What should be included on a construction punch list?
A construction punch list should include every incomplete, deficient, or damaged item identified during the project walkthrough. Each entry needs a specific location, a detailed description of the issue, the expected corrected condition, the responsible party, and a completion deadline. Common items include paint touch-ups, hardware adjustments, trim repairs, cleaning, and minor finish corrections.
When should the punch list walkthrough happen?
The punch list walkthrough should happen at substantial completion, when the project is finished enough for the owner to use it for its intended purpose. Don’t wait until every last detail is done. Walk the job when the major work is complete, document the remaining items, and then execute the punch list as a focused phase with a clear timeline.
How long should a punch list take to complete?
For most residential projects, two weeks is a reasonable timeline from walkthrough to sign-off. Commercial projects with multiple trades and larger scopes may need 30 days. The key is setting a firm deadline and holding all parties to it. Punch lists that don’t have deadlines tend to drag on indefinitely.
How do you handle a client who keeps adding items to the punch list?
Set clear expectations during the walkthrough. Explain that the punch list is a snapshot of outstanding items at substantial completion. After the walkthrough, the list is closed to new additions unless something was genuinely concealed or is a legitimate warranty issue. New requests beyond the original scope should be handled as a separate change order or service call, not added to the punch list.
What is the best way to manage a punch list digitally?
The best digital punch list tools let you create items with photos, assign them to specific subs or crew members, track completion status in real time, and share progress with clients through a portal. Look for a tool built specifically for construction, not a generic project management app. Projul’s punch list feature handles all of this and integrates with photo documentation and a customer portal so everyone stays on the same page.
Frequently Asked Questions
How do I keep a punch list from dragging on for weeks?
Should I walk the job with the client when building the punch list?
How specific should each punch list item be?
Why does a slow punch list hurt my business beyond just that one project?
How do I handle clients who keep adding items after the walkthrough?
Related Articles

Construction Team Meetings: A Practical Guide to Meetings That Actually Get Results
Most construction team meetings waste time. Here's how to run weekly check-ins, safety meetings, kickoffs, and...
Read More →
Project Management for Small Contractors: You Don't Need Enterprise Software
You don't need a 50-person company to benefit from project management. Even a 5-person crew loses money without a...
Read More →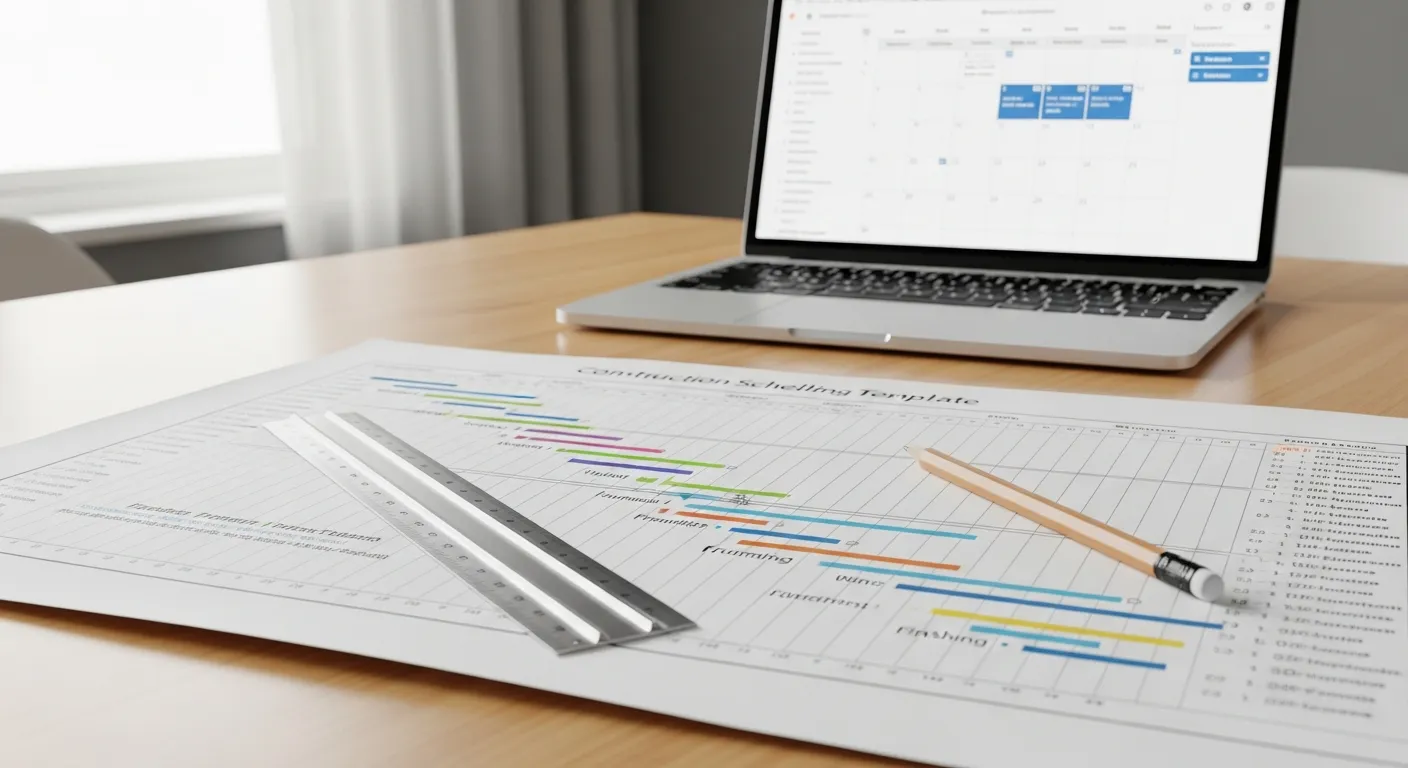
Free Construction Schedule Template
A solid construction schedule keeps your jobs on track, your crews busy, and your clients happy. Grab our free...
Read More →