Rebar Placement & Reinforcement Inspection Guide | Projul
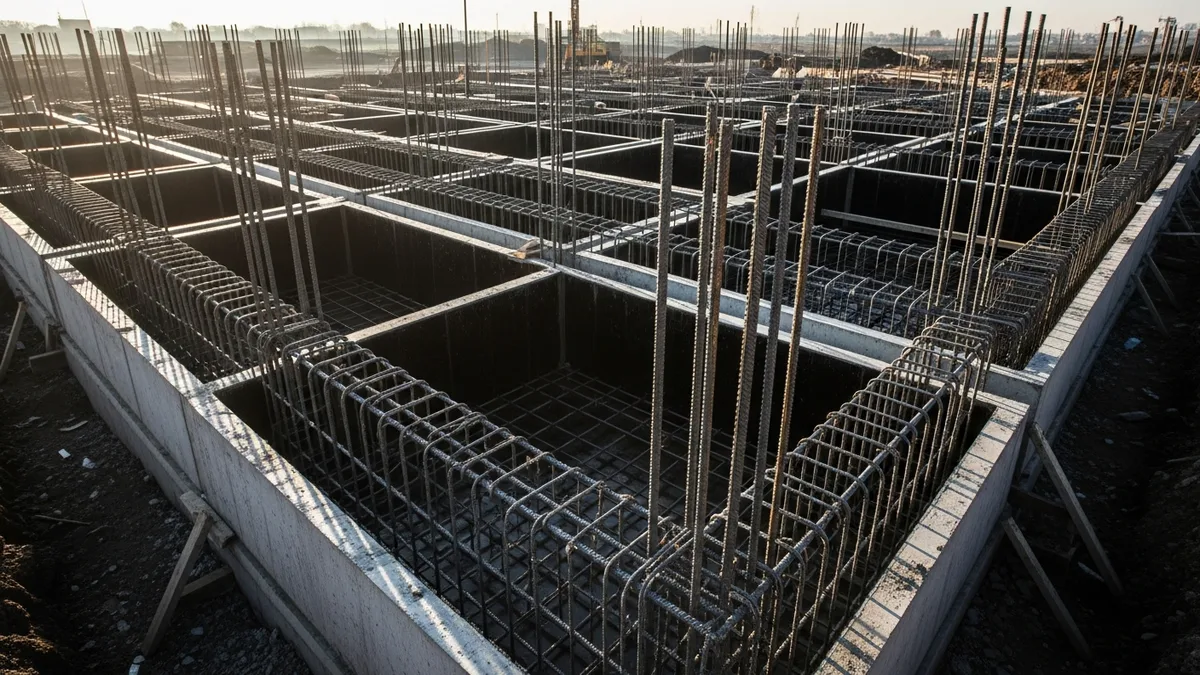
If you have been in the concrete business long enough, you know that rebar placement is one of those things that separates a crew that knows what they are doing from one that is just going through the motions. Getting the steel right before the trucks show up is not optional. It is the structural backbone of every footing, slab, wall, and grade beam you will ever pour.
The problem is that rebar work often gets treated like an afterthought. Guys toss bars into the forms, wire-tie a few intersections, kick in some chairs, and call for inspection. Then the inspector shows up, pulls out a tape measure, and shuts the whole pour down because the cover is wrong, the spacing is off, or half the dowels are missing.
That failed inspection does not just cost you the re-inspection fee. It costs you the concrete delivery you already scheduled. It costs you the pump truck sitting idle. It costs you the finishing crew that was supposed to show up at noon. And it costs you credibility with the GC who trusted you to have your work ready.
This guide covers everything you need to get rebar placement right and pass your reinforcement inspection the first time. Whether you are running a concrete crew yourself or you are the GC managing the process, this is the stuff that matters in the field.
Understanding Rebar Grades, Sizes, and Markings
Before you place a single bar, you need to make sure you have the right material on site. Rebar mix-ups happen more often than anyone likes to admit, and the inspector will catch it every time.
Rebar in the U.S. is commonly available in Grade 40 and Grade 60, with Grade 60 being the standard for most structural work. The grade tells you the yield strength in ksi (thousands of pounds per square inch). Grade 60 steel yields at 60,000 psi. Grade 40 yields at 40,000 psi. Using Grade 40 where the plans call for Grade 60 is a serious structural deficiency, and the inspector will red-tag it on the spot.
Bar sizes are designated by numbers that correspond to eighths of an inch in diameter. A #4 bar is 4/8 inch (or 1/2 inch) in diameter. A #5 bar is 5/8 inch. A #8 bar is 1 inch. The most common sizes you will see in residential and light commercial work are #3 through #6. Heavier structural work calls for #7 through #11.
Every rebar has mill markings rolled into it during manufacturing. These markings tell you the producing mill, bar size, steel type, and grade. The inspector may check these markings to verify you have the correct material, especially on structural elements like grade beams, columns, and shear walls.
If your plans call for epoxy-coated rebar (common in areas with freeze-thaw cycles or marine exposure), that coating needs to be intact. Nicks, scrapes, and bare spots at cut ends need to be touched up with an approved epoxy repair kit before the inspector arrives. Damaged coating defeats the entire purpose of corrosion protection.
Keep your submittals and mill certifications organized and accessible. The inspector may ask for them, and having those documents ready shows that your operation is tight. Your document management system should have these filed where anyone on the team can pull them up in seconds.
Rebar Placement Rules That Actually Matter in the Field
The structural drawings tell you what goes where. But there are placement fundamentals that apply to nearly every job, and knowing them cold will keep you out of trouble.
Cover requirements are the single most common reason for failed reinforcement inspections. Cover is the distance between the surface of the rebar and the nearest face of the concrete. It protects the steel from corrosion and fire exposure. The required cover varies based on where the concrete is going:
- Concrete poured directly against earth (no forms): 3 inches minimum
- Concrete exposed to earth or weather with #6 bars and larger: 2 inches
- Concrete exposed to earth or weather with #5 bars and smaller: 1.5 inches
- Interior concrete not exposed to weather, slabs and walls with #11 bars and smaller: 0.75 inches
- Beams, columns, and primary structural members: typically 1.5 inches
These are ACI 318 minimums. Your project engineer may specify more. The plans always govern over code minimums.
Spacing is the distance between parallel bars, measured center to center. Your drawings will call this out as something like “#5 @ 12” OC EW” which means #5 bars at 12 inches on center, each way. “Each way” means you have a grid pattern with bars running in both directions.
Minimum clear spacing between bars is the larger of: one bar diameter, 1 inch, or 1.33 times the maximum aggregate size in the concrete mix. This ensures the concrete can flow around and fully encase each bar. Bars that are jammed too close together create voids in the concrete, which is a structural problem.
Bar support and chairing is where a lot of crews get sloppy. Rebar that is sitting on the ground when you call for inspection will get you sent home. Steel needs to be held in the correct position and at the correct elevation throughout the pour. That means chairs, bolsters, and supports rated for the load they are carrying.
For slab-on-grade work, use wire bar chairs or precast concrete dobies to maintain proper cover from the bottom of the slab. For raised slabs, you need continuous high chairs or bolsters. The supports need to be spaced close enough that the bars do not sag between them. Sagging steel means variable cover, and the inspector will call it out.
Splice Lengths, Hooks, and Bar Development
Don’t just take our word for it. See what contractors say about Projul.
When your bars are not long enough to run the full length of a member in one piece, you need splices. Splices transfer the force from one bar to the next through the surrounding concrete. The overlap length matters a lot, and getting it wrong is a common inspection failure.
The required lap splice length depends on bar size, concrete compressive strength, bar coating, spacing, and cover conditions. For a Class B tension splice (which covers most field conditions) with uncoated #4 rebar in 4,000 psi concrete, the required lap is roughly 24 inches. Larger bars need longer laps. Epoxy-coated bars need even longer laps because the coating reduces the bond with the concrete.
Your structural drawings should have a rebar schedule or splice length table. If they do not, you can calculate development and splice lengths from ACI 318 Chapter 25, but honestly, that calculation should be coming from the engineer, not the field crew. If the information is not on the plans, request it through an RFI before you start placing steel.
Staggering splices is another detail that matters. You do not want every bar in a mat spliced at the same location. That creates a weak plane in the concrete at that exact cross-section. The general rule is to stagger splices so that no more than 50% of the bars are spliced within the required lap length of each other. The plans will typically show this, but if they do not, stagger them anyway. It is good practice.
Standard hooks come into play at the ends of bars in beams, columns, and footings where you cannot develop the full straight length. A standard 90-degree hook for a #5 bar means a 90-degree bend with a specific tail extension beyond the bend. A 180-degree hook wraps all the way around. The bend diameters and tail lengths are code-defined and vary by bar size. Do not let your guys bend hooks in the field with a hickey bar unless they know the required dimensions. Bad bends equal failed inspections.
When you are tracking all of these details across multiple pours on a project, keeping your scheduling tight makes sure you are not scrambling to fix rebar issues the morning the trucks are booked.
Pre-Inspection Walkthrough: What to Check Before You Call
Calling for a reinforcement inspection before your work is actually ready is one of the most expensive mistakes a concrete contractor can make. You lose a day, you lose your pour schedule, and you lose the inspector’s patience.
Do your own walkthrough first. Here is what to check:
Bar sizes and grades. Walk the forms with a set of plans and verify that every bar matches what is called for. Spot-check mill markings. If the plans call for #5 Grade 60 and someone grabbed a bundle of #4 from the wrong pallet, you want to catch that now.
Spacing. Carry a tape and check bar spacing in multiple locations. Spacing tends to drift as crews work their way across a large pour. A bar at 14 inches on center when the plans call for 12 is going to get flagged. Check the middle of the pour area, not just the edges.
Cover. Measure cover from the nearest concrete face to the bar surface. Check the bottom cover (using chairs), side cover (from the form face), and top cover (subtract bar position and bar diameter from the total member depth). If your cover is tight on the minimum, add a few more chairs to keep things honest during the pour when crews are walking on the steel and vibrating concrete around it.
Splices. Verify lap lengths with a tape. Make sure splices are staggered where required. Look for bars that are just butted together with a tie wire instead of properly overlapped. That is not a splice, and it has zero structural value.
Ties. Every intersection of crossing bars should be tied. The standard is to tie every other intersection in each direction at minimum, though many inspectors and specs require every intersection. Tied bars hold position during the pour. Untied bars shift, roll, and end up in the wrong place when the concrete is vibrated.
Embedments and accessories. Check that anchor bolts, hold-downs, embed plates, and any other hardware are placed per the plans. These items are easy to forget and hard to install after the pour. Your inspection checklists should include every embedded item for each pour.
Cleanliness. The inspector will look at the bottom of the forms. Standing water, mud, debris, sawdust, and loose tie wire do not belong in there. A clean form shows professionalism and tells the inspector that this crew pays attention to details.
Taking progress photos of your rebar placement before the pour is worth the 10 minutes it takes. If questions come up months later about what was installed, those photos are your proof.
Common Rebar Inspection Failures and How to Avoid Them
After years of watching crews go through this process, the same mistakes come up again and again. Here are the ones that cost contractors the most time and money.
Insufficient bottom cover in slabs. This is the number one failure. Chairs get knocked over during steel placement, bars get walked down into the subgrade, and by the time the inspector shows up, half the mat is sitting on dirt. Use enough chairs. Space them close enough that nothing sags. On soft subgrade, use flat-bottom chairs or concrete dobies so they do not punch into the ground.
Wrong bar size. It happens when bundles get mixed on site or when the steel supplier ships the wrong material. A #4 bar and a #5 bar look similar at a glance, but they are not interchangeable. Check markings before you start placing.
Missing bars at openings and edges. Plumbing penetrations, electrical conduit runs, and form edges are common spots where bars get left out. The plans usually show extra reinforcement around openings (typically two extra bars each way within a certain distance of the opening edge). These are easy to forget and common inspection hits.
Splices in prohibited zones. Some structural members have zones where splices are not allowed, typically in areas of maximum stress. Beam midspans and column plastic hinge zones are common examples. The plans should mark these zones, and your crew needs to know them before they start cutting and placing steel.
Dowels not placed or improperly positioned. Footing-to-wall dowels, slab-to-wall dowels, and column starter bars all need to be in the right location, at the right spacing, with the right projection above the concrete surface. A dowel that is 6 inches off from where it should be is not a minor issue. It means either the wall above does not line up or someone is going to be drilling and epoxying dowels after the fact, which is a costly fix and a conversation with the engineer.
No tie wire at intersections. Untied mats shift during the pour. Period. Even if the bars look like they are in the right spot when you call for inspection, the inspector knows they will move when concrete hits them if they are not tied.
The best way to track recurring quality issues across your projects is with a system that lets your team flag problems in the field and track corrections. Good quality control practices start with documentation, and that documentation needs to be accessible to everyone on the team, from the field super to the project manager.
Using Technology to Get Rebar Right the First Time
The days of managing rebar placement with just a set of plans and a tape measure are not over, but the contractors who add the right tools to their process are passing inspections more consistently and spending less time on rework.
Digital plan access in the field is a baseline at this point. Your crew foreman needs to be able to pull up the structural sheets on a tablet or phone right at the pour area. If the only set of plans is back in the trailer, details get missed. When your team can zoom into a rebar schedule or detail section while they are standing in the forms, mistakes drop. The best construction apps for field teams make plan access fast and reliable even with spotty cell service.
Photo documentation is your insurance policy. Take photos of completed rebar work from multiple angles before calling for inspection. Include a measuring tape or ruler in key shots to show cover and spacing. If a dispute comes up after the pour, those photos settle it. Store them linked to the specific pour or project phase so they are easy to find later, not buried in someone’s phone camera roll.
Field reporting apps let your crew document rebar placement as they go. Instead of relying on memory or scratched notes, the foreman can log bar sizes, spacing checks, and cover measurements in real time. That data feeds directly into your project record and gives you a paper trail for every inspection.
Scheduling coordination is where technology has the biggest impact on rebar work. A pour involves the rebar crew, the inspector, the concrete supplier, the pump truck, and the finishing crew. If any one of those is out of sync, the whole day falls apart. Managing that coordination through a construction scheduling tool that everyone on the team can see keeps things moving and reduces the last-minute scrambles that lead to rushed, sloppy steel work.
For contractors running multiple projects at once, keeping all of this organized is the real challenge. Your estimating process should account for the time rebar placement and inspection actually take so you are not building schedules that force your crew to rush the steel work to make the pour date.
Rebar placement is not the most glamorous part of concrete work. Nobody is going to compliment you on how nice your tied mat looks once it is buried under 4,000 psi concrete. But it is the part that keeps buildings standing, slabs from cracking, and walls from failing. Getting it right means knowing the code, following the plans, supporting your steel properly, and doing your own quality check before you ever pick up the phone to call for inspection.
Want to put this into practice? Book a demo with Projul and see the difference.
The contractors who consistently pass rebar inspections on the first call are not lucky. They are organized, they are disciplined, and they treat reinforcement placement like the critical structural work it actually is. That is the standard worth holding yourself to on every pour.
Frequently Asked Questions
What is the minimum concrete cover for rebar?
How far apart should rebar be spaced in a concrete slab?
What is a rebar splice and how long should it be?
What happens if you fail a reinforcement inspection?
Can you pour concrete without a rebar inspection?
Related Articles

Construction Septic System Installation: What Every GC Needs to Know
Septic systems on rural builds bring unique scheduling, permitting, and soil challenges that can wreck your timeline if...
Read More →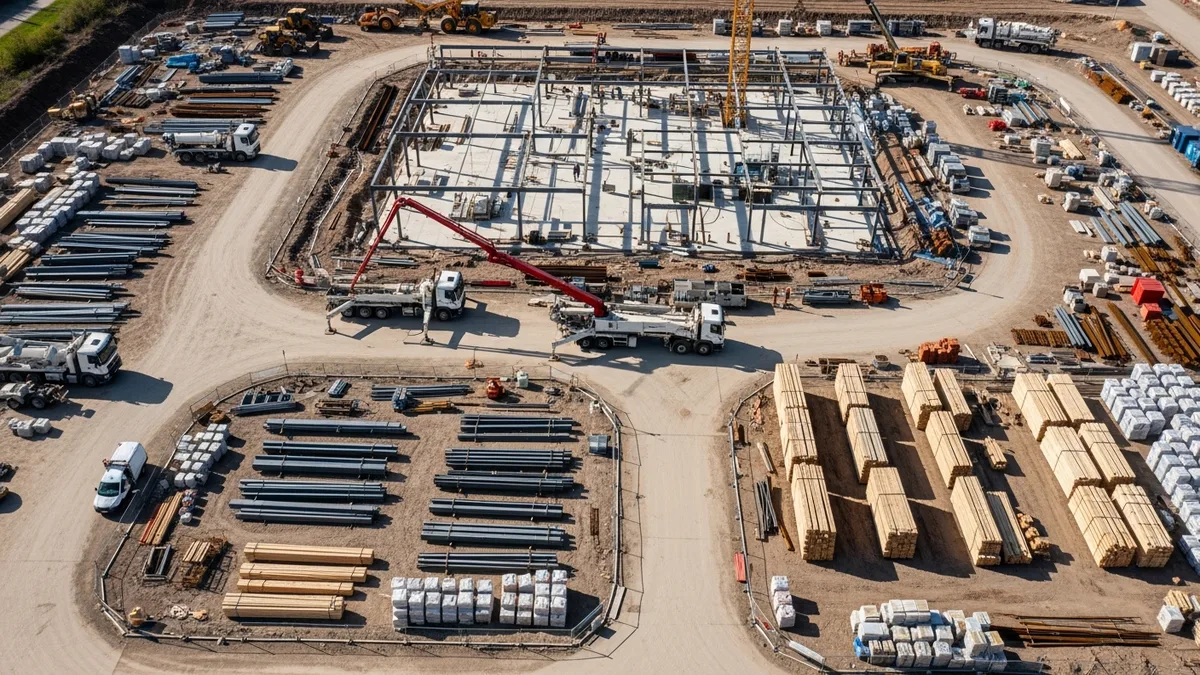
Construction Painting Project Management: Coordinating Interior and Exterior Phases
Painting is one of those trades that touches every other trade on the schedule. Get the sequencing wrong, and you're...
Read More →
Epoxy Flooring and Industrial Coatings: A Contractor's Complete Guide
Epoxy flooring and industrial coatings are high-margin work when you get the process right and a fast way to lose money...
Read More →