Shotcrete Guide: Wet vs Dry Mix for Contractors
If you have ever watched a crew spray concrete onto a wall, tunnel lining, or pool shell at high velocity, you have seen shotcrete in action. This method of placing concrete has been around for over a century, and it remains one of the most versatile tools in a contractor’s toolkit. Whether you are shoring up a hillside, lining a water tank, or building a swimming pool, shotcrete gives you options that traditional formed concrete simply cannot match.
This guide breaks down everything contractors need to know about shotcrete: the two main processes, when to pick one over the other, how to control quality, and the common mistakes that lead to failures in the field.
What Is Shotcrete?
Shotcrete is concrete or morite conveyed through a hose and projected pneumatically at high velocity onto a surface. The force of impact compacts the material, producing a dense, strong concrete layer without the need for traditional formwork. The American Concrete Institute (ACI) defines shotcrete under ACI 506, which covers materials, application, and testing requirements.
The concept is simple: instead of pouring concrete into forms and vibrating it to remove air, you shoot it onto a surface and let the impact energy do the consolidation work. This makes shotcrete ideal for irregular shapes, overhead applications, thin sections, and repairs where formwork would be impractical or impossible.
Wet-Mix vs. Dry-Mix: Understanding the Two Processes
Wet-Mix Shotcrete
In the wet-mix process, all ingredients, including water, are combined before entering the delivery hose. A concrete pump pushes the fully mixed material through the hose to the nozzle, where compressed air is injected to project it onto the surface.
Advantages of wet-mix:
- Higher production rates, often 8 to 15 cubic yards per hour
- Less dust at the nozzle
- More consistent water-to-cement ratio
- Lower rebound rates, typically 5% to 15%
- Easier to maintain quality control
Drawbacks of wet-mix:
- Equipment is larger and harder to move into tight spaces
- Mix must be used within the pot life window
- Cleanup is more involved since wet material is in the entire system
- Less effective for stop-and-start operations
Dry-Mix Shotcrete (Gunite)
In the dry-mix process, dry cement and aggregate are fed into a gun and conveyed by compressed air through the hose. Water is added at the nozzle by the nozzleman, who controls the water content in real time.
Advantages of dry-mix:
- Smaller, more portable equipment
- Can stop and start without wasting material
- Nozzleman can adjust water content on the fly
- Excellent for repair work and small-volume applications
- Material can be conveyed longer distances
Drawbacks of dry-mix:
- Higher rebound rates, often 15% to 30%
- More dust generation at the nozzle
- Lower production rates
- Quality depends heavily on nozzleman skill
- Water-to-cement ratio varies with operator technique
When to Choose Shotcrete Over Conventional Concrete
Shotcrete is not always the right answer, but there are situations where it clearly outperforms traditional placement methods.
Shotcrete Makes Sense When:
Formwork would be expensive or impractical. Curved surfaces, irregular profiles, and overhead applications are natural fits for shotcrete. Building forms for a tunnel lining or a freeform pool shell would cost far more than shooting the concrete directly.
You need thin structural sections. Shotcrete performs well in layers as thin as 2 inches, where traditional concrete placement and vibration would be difficult to execute properly.
Access is limited. A shotcrete hose can reach places that a concrete truck and pump boom cannot. Underground work, confined spaces, and steep slopes are all common shotcrete applications.
Speed matters. On slope stabilization, emergency repairs, and canal lining projects, shotcrete allows rapid placement without waiting for form construction.
Repair and rehabilitation work. Removing deteriorated concrete and shooting new material in its place is one of the most common uses of shotcrete in the industry.
Stick With Conventional Concrete When:
- You have simple, flat geometry with easy form access
- The pour volume is very large and formwork is straightforward
- Finish quality requirements demand a formed surface
- The project does not have access to qualified nozzlemen
Surface Preparation
Good shotcrete starts with good surface prep. The receiving surface needs to be clean, free of loose material, and properly dampened before application begins.
For new construction on soil or rock:
- Remove all loose material, mud, and organic matter
- Roughen smooth rock surfaces to improve bond
- Install drainage as needed behind the shotcrete layer
- Pre-wet the surface to prevent it from pulling water out of the fresh shotcrete
For repair work on existing concrete:
- Remove all deteriorated concrete back to sound material
- Clean exposed rebar and verify it has adequate section remaining
- Roughen the existing concrete surface with chipping or hydrodemolition
- Apply bonding agents if specified, though properly prepared and dampened surfaces usually bond well without them
For reinforced applications:
- Install rebar or welded wire fabric per the design drawings
- Maintain adequate clearance behind reinforcement so shotcrete can fully encase bars
- Tie reinforcement securely so it does not vibrate loose during shooting
- Avoid congested rebar layouts that create shadow areas where material cannot reach
Application Technique
The nozzleman is the single most important factor in shotcrete quality. Even the best mix design will fail if application technique is poor.
Nozzle Distance and Angle
Keep the nozzle 3 to 5 feet from the receiving surface. Too close and you get poor consolidation. Too far and you lose velocity and increase rebound. The nozzle should be held perpendicular to the surface whenever possible. Shooting at an angle increases rebound and can leave voids behind reinforcing bars.
Building Up Layers
Start by filling behind reinforcement first. Build material up from the bottom on vertical surfaces, working in horizontal passes. On overhead surfaces, apply thinner layers and allow each pass to set slightly before adding the next. Do not try to build full thickness in a single pass on overhead work.
Rebound Management
Rebound is the material that bounces off the surface instead of sticking. It is mostly aggregate with very little cement paste, so it is weaker than the placed shotcrete. Never allow rebound to be worked back into the shotcrete layer. Have a laborer continuously remove rebound from the work area, especially on horizontal surfaces where it can accumulate and get buried.
Finishing
Shotcrete can be left with a natural gun finish, which is slightly rough and textured. For a smoother finish, the surface can be screeded, floated, or troweled after shooting. On structural walls that will be exposed, a flash coat or finish coat can be applied over the structural layer.
Mix Design Considerations
Shotcrete mix designs differ from conventional concrete in several important ways.
Aggregate size: Maximum aggregate size for shotcrete is typically 3/8 inch for dry-mix and up to 3/4 inch for wet-mix. Smaller aggregate reduces rebound and improves pumpability.
Cement content: Shotcrete mixes typically have higher cement content than conventional concrete, usually 650 to 800 pounds per cubic yard. This compensates for the loss of cement paste in rebound.
Admixtures: Accelerators are common in shotcrete, especially for overhead and thick applications. They speed up initial set so material does not sag or fall off. Air-entraining agents, water reducers, and silica fume are also used depending on the application.
Fiber reinforcement: Steel fibers, polypropylene fibers, or synthetic macro fibers are increasingly added to shotcrete mixes. Fibers improve crack resistance, toughness, and in some cases can reduce or replace welded wire fabric.
Water-to-cement ratio: For wet-mix, this is controlled at the batch plant, typically between 0.40 and 0.45. For dry-mix, the nozzleman controls it at the nozzle, which requires significant skill and experience.
Quality Control and Testing
Pre-Construction Testing
Most specifications require pre-construction qualification panels. The nozzleman shoots test panels using the approved mix design, and cores are taken from these panels for compressive strength testing. This process verifies both the mix and the nozzleman’s ability before production work begins.
During Production
Core samples: Cores taken from test panels shot alongside the work are the standard method for verifying compressive strength. Panels should be shot under the same conditions as the actual work.
Visual inspection: A trained inspector can identify many problems visually, including dry spots, sagging, rebound inclusions, and voids behind reinforcement.
Sounding: Tapping the shotcrete surface with a hammer can reveal delaminations and voids. A hollow sound indicates a problem area.
Thickness verification: Probe holes or test cores confirm that the specified thickness has been achieved.
Common Defects to Watch For
Sand pockets and lenses: Areas of unreinforced aggregate with little to no cement paste, usually caused by shooting rebound back into the work.
Voids behind reinforcement: Caused by shooting from the wrong angle or having rebar too close to the receiving surface. The rebar creates a shadow where material cannot reach.
Laminations: Weak planes between layers, caused by waiting too long between passes or failing to clean the surface between layers.
Sagging: Material sliding down on vertical surfaces or falling on overhead work. This typically results from applying layers too thick or using insufficient accelerator.
Common Applications
Swimming Pools and Water Features
Pool construction is probably the most visible use of shotcrete. Both wet-mix and dry-mix (gunite) are used extensively. The freeform shapes that are standard in residential pools would be extremely difficult and expensive to form for conventional concrete placement.
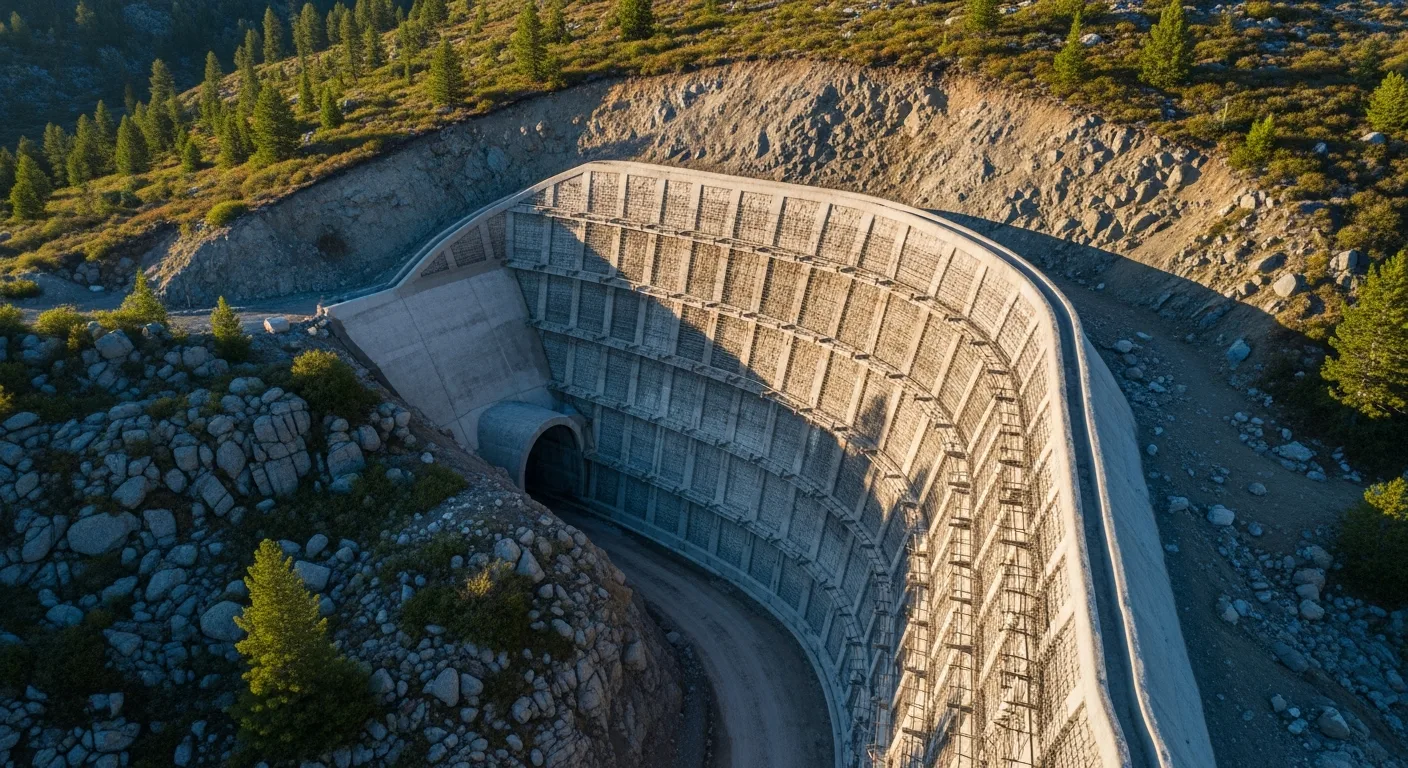
Slope Stabilization and Retaining Structures
Shotcrete combined with soil nails or rock bolts is a standard method for stabilizing cut slopes and excavation walls. The shotcrete provides a structural face while the nails or bolts anchor into stable ground behind the cut.
Tunnel Linings
Shotcrete is the primary lining method in modern tunnel construction. Initial support is provided by shotcrete applied immediately after excavation, often reinforced with steel fibers and combined with rock bolts. Final linings may also be shotcrete or cast-in-place concrete depending on the project.
Structural Repairs
Bridge piers, parking garage decks, building facades, and industrial structures are all commonly repaired with shotcrete. The ability to remove deteriorated material and replace it without building forms makes shotcrete the go-to method for most concrete repair work.
Canal and Channel Lining
Irrigation canals, drainage channels, and spillways are frequently lined with shotcrete. The speed of application and ability to follow irregular ground profiles make it well-suited for this type of linear work.
Safety Considerations
Shotcrete operations involve several hazards that crews need to manage.
Compressed air: High-pressure air lines can cause serious injuries if they fail. Use whip checks at all connections, inspect hoses regularly, and keep personnel clear of the hose line during operation.
Dust: Dry-mix shotcrete generates significant dust. Nozzlemen and nearby workers need respiratory protection. Wet-mix produces less dust but still requires awareness.
Rebound: Material bouncing off the surface at high velocity can cause eye injuries and impact injuries. Safety glasses or goggles are mandatory, and workers should stay clear of the rebound zone.
Chemical accelerators: Many shotcrete accelerators are caustic. Skin and eye protection are required when handling these materials.
Confined spaces: Tunnel and underground work adds confined space hazards including ventilation requirements, emergency egress, and atmospheric monitoring.
Cost Factors
Several factors affect shotcrete cost on a project.
Volume: Like most concrete work, higher volumes bring lower unit costs. Small repair jobs may cost $150 to $300 per cubic yard in place, while large-scale work can run $80 to $150 per cubic yard.
Access: Difficult access, long hose runs, and confined spaces all increase cost. Setup and mobilization for shotcrete equipment is a significant fixed cost.
Rebound: Rebound is wasted material. Higher rebound rates increase material cost per cubic yard of in-place shotcrete. Wet-mix generally has lower rebound and therefore lower material waste.
Nozzleman availability: Qualified, certified nozzlemen command premium wages. In areas with limited availability, labor costs can be a major factor.
Surface preparation: The cost of preparing the receiving surface, especially on repair work, can exceed the cost of the shotcrete placement itself.
How Projul Helps Manage Shotcrete Projects
Shotcrete projects involve coordinating material deliveries, equipment, certified nozzlemen, inspectors, and often tight schedule windows. Projul’s construction project management software helps contractors track all of these moving pieces in one place. From scheduling pump and crew availability to tracking test panel results and inspector reports, Projul keeps your shotcrete operations organized so you can focus on what matters: getting quality material on the wall.
Final Thoughts
Shotcrete is a proven, versatile construction method that belongs in every concrete contractor’s playbook. Whether you are building pools, stabilizing slopes, lining tunnels, or repairing aging structures, understanding the differences between wet-mix and dry-mix, proper application technique, and quality control requirements will help you deliver better results on every project.
The single biggest factor in shotcrete quality is the nozzleman. Invest in certified, experienced operators, give them quality materials to work with, and back them up with proper surface preparation and inspection. Do those things consistently and shotcrete will reward you with strong, durable concrete placed faster and more efficiently than conventional methods can match.
Frequently Asked Questions
What is the difference between shotcrete and gunite?
How thick can you apply shotcrete in a single pass?
What causes rebound in shotcrete and how do you reduce it?
Can shotcrete match the strength of conventional cast-in-place concrete?
Do you need rebar with shotcrete?
How long does shotcrete take to cure?
What certifications do shotcrete nozzlemen need?
Related Articles

Best Glazier Software in 2026: 6 Options Compared for Glass Contractors
Looking for the best glazier software? We compare six top options for glass contractors, covering features, pricing,...
Read More →
Best Roofing Contractor Software in 2026: 6 Options Compared
Looking for the best roofing contractor software? We compare six top options, including pricing, roofing-specific...
Read More →
Fire Sprinkler System Installation: Wet vs Dry Systems, Pipe Sizing, and Code Requirements
Fire sprinkler systems are one of those building components that nobody thinks about until they are needed. But for...
Read More →