Timber Framing and Post-and-Beam Guide (2026)
The Appeal of Heavy Timber
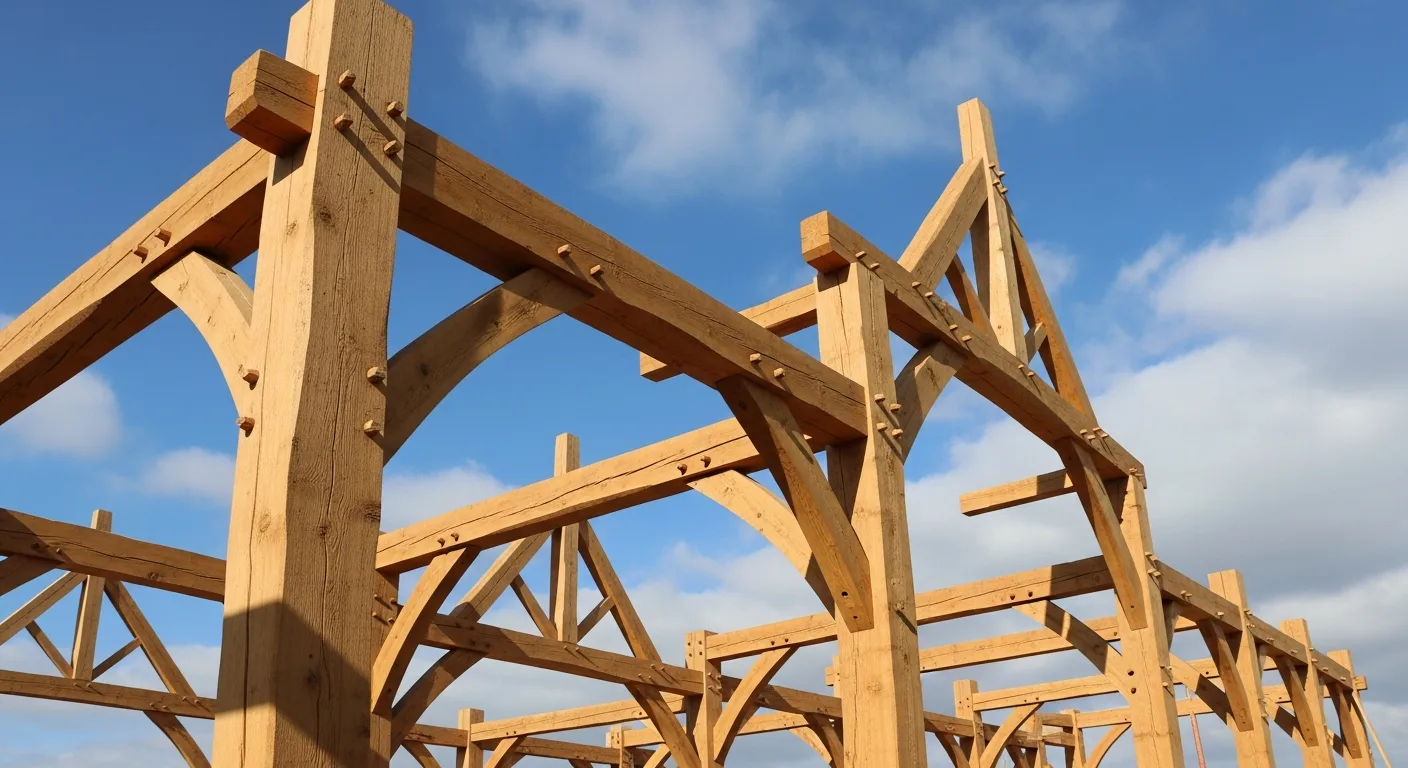
There is something about walking into a building framed with massive wood timbers that hits differently than any other construction method. The exposed beams, the visible joinery, the warmth of the wood grain overhead. It connects people to the building in a way that drywall and steel never will.
Timber framing is one of the oldest construction methods in the world, with examples standing for 800 years or more in Europe and Asia. In North America, the tradition arrived with European settlers and was the dominant building method until balloon framing took over in the mid-1800s. The shift happened because small-dimension lumber from sawmills was cheaper and faster to work with than hand-hewn timbers.
But timber framing never died. It went niche, kept alive by craftspeople and a growing market of clients willing to pay for the aesthetics and quality of heavy timber construction. Today, the industry is experiencing a genuine resurgence, driven by better engineering tools, CNC fabrication technology, and a market that values craftsmanship and natural materials. The rise of mass timber construction with products like CLT and glulam has brought even more attention to wood as a serious structural material for larger buildings.
For builders, timber framing and post-and-beam work is a specialty that commands premium pricing. The skills are specialized, the materials are expensive, and the results are dramatic. This guide covers the fundamentals: wood selection, joinery types, structural principles, enclosure systems, and the growing trend of hybrid timber construction.
Timber Frame vs. Post-and-Beam: Clarifying the Terms
People use these terms interchangeably, but they describe different approaches to heavy timber construction.
Timber Frame
Traditional timber framing connects members using wood-to-wood joinery: mortise and tenon, dovetail, scarf joints, and similar connections. These joints are secured with hardwood pegs (trunnels, short for “tree nails”), not metal fasteners. The frame is a self-supporting structure that relies entirely on the precision of the joinery for its strength.
This is the craft-intensive approach. Every joint is laid out, cut, test-fitted, and numbered in the shop before the frame is disassembled and shipped to the site for raising.
Post-and-Beam
Post-and-beam construction uses heavy timbers as the structural system but connects them with metal hardware: steel brackets, through-bolts, knife plates, and engineered connectors. The joinery is simpler (square cuts rather than complex mortise-and-tenon), and the metal connectors handle the structural loads.
Post-and-beam is faster to fabricate and erect, generally costs less than traditional timber framing, and allows for longer spans and heavier loads through engineered connections. The trade-off is that the metal hardware is visible (though some architects incorporate it as a design feature).
Hybrid Approaches
Most modern timber buildings blend these approaches. You might see traditional mortise-and-tenon joinery on the main bents (cross-frames) with steel connections on secondary members. Or a post-and-beam structure with decorative traditional joinery at key visual locations. The market drives these decisions: clients want the timber look, but budgets and engineering realities favor pragmatic solutions.
Wood Species for Timber Framing
The species you choose affects everything: strength, workability, appearance, durability, cost, and availability. Here are the most common species used in North American timber framing.
Douglas Fir
The go-to species for structural timber framing. Douglas fir has an excellent strength-to-weight ratio, accepts finish well, and is widely available from Western suppliers. The grain is straight, the color ranges from pinkish to reddish-brown, and it looks stunning when finished with a clear coat.
Douglas fir is graded under WCLIB or WWPA rules. For timber framing, you want Select Structural or No. 1 grade. Specify “free of heart center” (FOHC) to avoid the checking and splitting that occurs when timbers dry around the heart (pith).
White Oak
White oak is the premium choice for visible timber framing. It is extremely strong, naturally rot-resistant (the tyloses in white oak make it nearly waterproof), and has a beautiful grain pattern. White oak is traditionally associated with barn frames and high-end residential timber work.
The downsides: white oak is significantly heavier than Douglas fir, harder to work (tougher on tools), and more expensive. Availability can be limited for large timbers.
Eastern White Pine
White pine is the softest and lightest of the common timber framing species. It is easy to work with hand tools (a plus for traditional crafters), readily available in the Northeast, and relatively affordable. The light color and fine grain give it a clean, Scandinavian look.
The trade-off is lower structural strength compared to Douglas fir or oak. White pine frames need to be engineered with this in mind, often requiring larger member sizes.
Western Red Cedar
Cedar is naturally rot-resistant and dimensionally stable, making it a good choice for exposed exterior timbers, pergolas, and covered porches. It is softer and weaker than Douglas fir, so it is typically used for non-structural or lightly loaded applications.
Reclaimed Timber
Reclaimed timbers salvaged from old barns, factories, warehouses, and bridges have become extremely popular. The aged patina, nail holes, and character marks give reclaimed timber an aesthetic that new wood cannot replicate.
Working with reclaimed timber requires careful inspection for hidden metal (old nails, bolts, and spikes that destroy saw blades), insect damage, rot, and structural defects. Have reclaimed timbers graded by a qualified inspector before using them in structural applications.
Traditional Joinery
The joinery is what makes timber framing a craft. Each joint is designed to transfer specific loads (compression, tension, shear) through the geometry of the wood-to-wood connection. Here are the fundamental joints.
Mortise and Tenon
The most basic and most common timber frame joint. A rectangular hole (mortise) is cut into one member, and a matching projection (tenon) is cut on the connecting member. The tenon slides into the mortise and is secured with a hardwood peg.
Variations include:
- Through tenon: The tenon passes completely through the receiving member and is visible on both sides.
- Housed tenon: A shoulder is cut around the tenon so the connecting member seats flush against the receiving member. This provides bearing area for the load.
- Tusk tenon: A through tenon secured with a wedge or tusk on the exit side. Common in floor beam connections.
Dovetail
A flared tenon that resists withdrawal. The dovetail shape locks the joint mechanically. Common uses include connecting tie beams to posts (where the joint is in tension) and braces to beams.
Scarf Joint
When a single timber is not long enough, a scarf joint splices two timbers end-to-end. There are dozens of scarf joint variations, from simple half-laps to complex bladed scarfs with keys. The joint must handle both compression and tension since a spliced beam sees both forces.
Lap Joints
Half-lap and cross-lap joints are used where two members cross at the same elevation. Each member is notched to half its depth so they interlock. Simple but effective for secondary framing and plate connections.
Braces
Braces are the diagonal members that triangulate the frame and provide lateral stability. Typical brace joinery uses a housed mortise-and-tenon at each end, with the brace running at 45 to 60 degrees between a post and beam.
Without braces (or an equivalent lateral system like SIPs or shear panels), a timber frame is a mechanism, not a structure. It will rack and collapse under lateral loads like wind.
Structural Design Principles
Timber frame engineering follows the same principles as any structural design: loads flow through the frame to the foundation, and every member and connection must handle the forces applied to it.
Load Path
The load path in a timber frame is simple and direct:
- Roof loads (dead load, snow, wind) transfer through rafters to purlins to principal rafters or trusses
- Trusses or principal rafters transfer loads to posts through the plate (top beam)
- Floor loads transfer through joists to beams (girts or summer beams) to posts
- Posts carry accumulated loads straight down to the foundation
This direct load path is one of the structural advantages of timber framing. Every member has a clear purpose, and the loads are predictable.
Engineering Heavy Timbers
Heavy timbers are engineered using the National Design Specification (NDS) for Wood Construction, published by the American Wood Council. Design values for each species and grade are tabulated, and members are sized for bending, shear, compression, and deflection.
Key considerations:
- Checking: As green timbers dry, they develop checks (cracks along the grain). Surface checks are cosmetic and do not affect structural capacity. Deep through-checks at connection points can reduce the capacity of pegged joints.
- Shrinkage: Green timbers shrink as they dry, primarily across the grain (tangential and radial). This can affect joint fit, floor levelness, and door/window alignment. Design for it.
- Fire resistance: Heavy timber construction has excellent fire resistance. Large timbers char on the surface, forming an insulating layer that protects the inner wood. This is why the building code recognizes Type IV (Heavy Timber) as a distinct construction type with favorable fire ratings.
Engineered Timber Products
Modern timber construction frequently uses engineered products alongside solid timbers:
- Glulam (glue-laminated timber): Layers of dimension lumber glued together to create beams and columns of virtually any size. Stronger and more dimensionally stable than solid sawn timbers. Available in architectural grades with beautiful exposed finishes.
- SIPs (structural insulated panels): Rigid foam insulation sandwiched between OSB faces. Used as the enclosure system over a timber frame, providing structure, insulation, and air barrier in one step.
- CLT (cross-laminated timber): Layers of lumber glued in alternating directions to create large structural panels. Used for floors, walls, and roofs in mass timber buildings.
The Fabrication Process
A timber frame is built twice: once in the shop and once on site.
Shop Work
The shop is where the craft happens. Each timber is selected, inspected, and laid out on a work surface. The joiner marks every joint location using traditional layout tools (squares, dividers, marking gauges) or, increasingly, CNC-generated templates.
Joints are cut using a combination of tools:
- Chain mortiser: Cuts mortises quickly and accurately
- Circular saw and reciprocating saw: For tenon cheeks, shoulders, and housings
- Chisels and slicks: For fine-tuning joints and cleaning up saw cuts
- CNC machines: Large timber CNC routers can cut entire frames with extraordinary precision. CNC has dramatically increased production speed without sacrificing quality.
After cutting, the frame (or sections of it) is test-assembled in the shop to verify fit. Joints are numbered using a traditional system of Roman numerals and assembly marks so the frame can be disassembled, shipped, and reassembled on site without confusion.
Site Preparation
While the frame is being cut in the shop, site work proceeds: foundation, slab or piers, and any site-specific preparations. The foundation must be level and ready to receive the timber sill before the frame arrives.
Coordinate the crane delivery with the frame delivery. On rural sites, verify that the crane can access the building footprint and has enough reach and capacity for the heaviest timber lifts.
The Raising
Raising day is when everything comes together. The frame arrives on flatbed trucks, and a crane lifts each bent (cross-frame section) into position. The crew guides the timbers, aligns the joints, drives the pegs, and moves to the next bent.
A well-organized raising for a residential timber frame takes 2 to 5 days with a 4 to 8 person crew and a crane. The sequence matters: sills first, then bents, then connecting girts and plates, then roof structure.
Safety during a raising is critical. Workers are operating at height, handling heavy suspended loads, and driving pegs with mallets while standing on beams. Fall protection, hard hats, and a clear communication system between the crane operator and crew are mandatory.
Enclosure Systems
A timber frame is the skeleton. You still need skin, insulation, and weatherproofing. The enclosure system wraps the outside of the frame, leaving the timbers exposed on the interior.
Structural Insulated Panels (SIPs)
SIPs are the most popular enclosure system for timber frame buildings. A SIP panel consists of rigid foam insulation (EPS or polyurethane) bonded between two faces of OSB. The panels span between timbers, providing structure, insulation, and an air barrier in a single installation step.
Advantages: fast installation, high R-value per inch, minimal thermal bridging, and a tight building envelope.
Considerations: SIPs are sensitive to moisture (the OSB skins can rot if exposed to persistent wetness), require careful detailing at joints and penetrations, and can be difficult to modify after installation.
Exterior Rigid Foam and Conventional Framing
Some builders wrap the timber frame exterior with rigid foam board, then install conventional 2x framing outside of that for siding attachment. This hybrid approach gives you insulation and flexibility for running mechanicals in the exterior wall cavity. It also makes it easy to apply exterior finishes like stone veneer, lap siding, or board and batten over the outer framing layer.
Straw Bale and Natural Infill
In the natural building world, timber frames are sometimes infilled with straw bales, cob, or other natural materials. These approaches are niche but growing in the sustainable building market.
Managing Timber Frame Projects
Timber frame construction involves long lead times, specialized subcontractors, and precise coordination between shop fabrication and site work. The frame fabrication alone can take months, and changes after cutting begins are extremely expensive.
Tracking the project timeline from engineering through shop fabrication, delivery logistics, raising, enclosure, and finish work requires a system that handles long-duration, multi-phase projects. Projul gives builders a central platform to manage these timelines, communicate with the timber framing shop, schedule the crane and raising crew, and coordinate follow-on trades.
For custom home builders and timber frame specialists, having your project schedule, client communication, and cost tracking in one place saves hours of phone calls and email threads. Check pricing for your operation size, or request a demo to see how it fits your workflow.
Cost Considerations
Timber frame construction costs more than conventional stick framing, but the premium is not as large as many people assume.
Frame only: The timber frame package (engineering, fabrication, delivery, and raising) typically runs $25 to $50 per square foot of building footprint for a residential structure. Simple frames with fewer connections land at the low end; complex designs with curved members and intricate joinery push toward the high end.
Full project cost: The total cost of a timber frame home (including enclosure, mechanical, and finishes) generally runs 15% to 25% more than a comparable high-end stick-built home. The premium shrinks if you compare against a stick-built home with similar finish quality, since timber frame clients tend to choose high-end finishes regardless.
Where the money goes:
- Engineering: $5,000 to $20,000
- Timber material: Varies hugely by species, grade, and sourcing
- Shop labor (cutting and test assembly): The largest cost component
- Shipping: Heavy loads on flatbed trucks; distance matters
- Crane rental: $1,500 to $5,000+ per day depending on size
- Raising crew labor: 3 to 7 days for a residential frame
- Enclosure (SIPs or other): $8 to $15 per square foot installed
Hybrid Timber Construction
The fastest-growing segment of the timber frame market is hybrid construction. Rather than building the entire structure as a timber frame (which maximizes cost), hybrid projects use timber framing selectively for high-impact spaces and conventional framing for everything else.
Common hybrid approaches:
- Timber frame great room + stick-built bedrooms and utility areas. The dramatic timber ceiling goes where the family spends the most time, and standard framing handles the rest.
- Timber frame entry and porch + conventional interior. A timber frame portico or covered porch makes a strong first impression without the cost of a full timber structure.
- Exposed timber trusses in a conventionally framed building. Individual decorative trusses installed during framing give the timber look without a full timber frame system.
- Glulam beams and posts in an otherwise conventional structure. Exposed glulam ridge beams, headers, and posts provide the heavy timber aesthetic at a fraction of the cost.
Hybrid construction is a good entry point for builders who want to offer timber frame elements without committing to a full timber frame specialty. It also makes timber aesthetics accessible to clients with moderate budgets.
Timber Species Selection for Structural Framing
We touched on common species earlier, but choosing the right timber for a structural frame goes deeper than just picking a name off a list. The species you select drives your engineering, your shop workflow, your budget, and your long-term performance. Here is a closer look at the structural considerations for the most common framing timbers and engineered alternatives.
Douglas Fir: The Workhorse
Douglas fir dominates the timber framing market in North America for good reason. It has one of the highest strength-to-weight ratios of any softwood, it machines well, it takes finishes beautifully, and the supply chain is mature. You can get large timbers (up to 12x12 and beyond) in reasonable lead times from mills in Oregon, Washington, and British Columbia.
From a structural standpoint, Douglas fir offers strong bending values, solid shear resistance, and good compression parallel to grain. When you are designing long-span beams or heavily loaded posts, Douglas fir gives your engineer the numbers to make things work without oversizing every member.
Green Douglas fir is commonly used in timber framing. It is easier to cut and peg when green, and it dries in place after the frame is raised. Expect surface checking as the timber seasons. Specify FOHC (free of heart center) to minimize deep checking through the pith. Kiln-dried Douglas fir is available but costs more and is harder to source in large dimensions.
One thing to watch: Douglas fir heartwood has moderate natural decay resistance, but it is not rated for ground contact or sustained moisture exposure without treatment. Keep your sills off the concrete with a capillary break, and detail your exterior connections to shed water.
Southern Yellow Pine: The Budget Performer
Southern yellow pine (SYP) is the most widely available structural softwood in the eastern United States. It is strong, stiff, and significantly cheaper than Douglas fir in most eastern markets because the supply is local and abundant.
SYP has higher density than Douglas fir, which means higher design values for bending and compression. It is one of the strongest softwoods you can buy. The downside is that SYP tends to check and twist more aggressively as it dries compared to Douglas fir. The grain is coarser, and the appearance is less refined, with prominent growth rings and a yellowish tone that some clients find less attractive than the warm reddish hues of fir.
For structural post-and-beam work where the timbers will be stained or painted, SYP is hard to beat on value. For exposed natural finish timber frames, Douglas fir or white oak usually wins on aesthetics. SYP also treats well with preservatives, making it a solid choice for exterior timber elements, covered porches, and pergolas where decay resistance matters.
Engineered Timber: Glulam Beams and Columns
Glue-laminated timber (glulam) has changed the game for timber construction. By bonding layers of kiln-dried lumber with structural adhesive, manufacturers produce beams and columns that are stronger, more dimensionally stable, and available in sizes that would be impossible to source as solid sawn timber.
A glulam beam will not check, twist, or shrink the way a solid green timber does. The lamination process distributes natural defects (knots, grain deviation) across multiple layers, so no single defect dominates the member’s performance. This consistency makes glulam the go-to choice for long spans, heavy loads, and situations where dimensional stability is critical.
Glulam comes in appearance grades:
- Industrial: Structural only, not intended to be seen. Surface may have knots, voids, and rough patches.
- Architectural: Clean appearance suitable for exposed applications. Knots are tight and small, surfaces are sanded smooth.
- Premium: The highest appearance grade. Minimal visible defects, uniform color, and a furniture-quality finish.
For timber frame projects, architectural or premium grade glulam gives you the exposed beam look with predictable performance. Many modern timber frame companies use glulam for ridge beams, long-span headers, and any member where a single solid timber would be impractical or prohibitively expensive.
The cost premium over solid sawn timber is real, but you recover some of that through faster installation (no waiting for seasoning), more predictable engineering, and fewer callbacks related to checking or movement.
Mixing Species and Products in One Frame
It is common and perfectly acceptable to use multiple species and products in a single timber frame. You might use solid Douglas fir for posts and short beams where the natural wood character is visible, glulam for long-span ridge beams and floor girders where performance matters most, and SYP for secondary framing that will be concealed.
The key is to coordinate with your engineer so that the design values match the species and grade specified for each member. Do not substitute species in the field without rechecking the engineering. A white pine timber does not carry the same load as a Douglas fir timber of the same size, and swapping one for the other can create a structural problem.
Post and Beam Connection Types
How you connect your timbers determines everything about the frame: its strength, its appearance, its cost, and how long it takes to fabricate and raise. There are three broad categories of connections, and most real-world projects use a combination.
Traditional Joinery Connections
Traditional timber frame joinery relies on the geometry of the wood itself to transfer loads. The classic mortise-and-tenon joint, secured with hardwood pegs, has been holding buildings together for centuries. When properly designed and cut, these joints are remarkably strong.
The beauty of traditional joinery is that the connection is invisible or nearly so. You see wood meeting wood with a tight, clean joint line and maybe the end of a peg. There is no metal in sight. For clients who are paying for the craft and artistry of a timber frame, traditional joinery is the whole point.
But traditional joinery has real limitations:
- Tension capacity is limited. Mortise-and-tenon joints excel in compression and shear but are weaker in tension (pulling apart). The peg is the only thing resisting withdrawal, and pegs have finite shear capacity.
- Fabrication time is significant. Every joint must be precisely laid out, cut, and fitted. Complex joints like hammer-beam trusses or curved braces can take hours per connection.
- Modification is difficult. Once a mortise is cut, it is cut. If the layout is wrong, the timber is scrap or needs a creative fix.
- Shrinkage affects fit. Green timber joints that fit perfectly in the shop may loosen as the wood dries and shrinks. Good timber framers account for this with draw-boring (offsetting the peg holes so the peg pulls the joint tight as it is driven).
Traditional joinery is the right choice when the craft itself is the product. High-end residential frames, timber frame homes marketed on craftsmanship, and restoration work on historic structures all call for traditional joinery.
Modern Metal Hardware Connections
Engineered metal connectors have opened up timber construction to a wider market by simplifying fabrication, increasing structural capacity, and reducing labor hours. Common hardware includes:
- Knife plates: Steel plates that slide into a slot (kerf) cut in the timber end. Bolts pass through the timber and plate, creating a strong concealed connection. The knife plate is hidden inside the joint, so the appearance is relatively clean.
- Steel brackets and saddle hangers: Surface-mounted metal connectors that wrap around or support the end of a beam. These are visible but can be finished (powder-coated, painted, or left as raw steel) to complement the design.
- Through-bolts with bearing plates: Simple bolt connections with steel plates to distribute the load and prevent crushing. Common on post-and-beam structures where speed and economy matter more than concealment.
- Moment connectors: Engineered steel assemblies that create rigid connections between timbers, allowing the frame to resist lateral loads without traditional braces. These are specialty items used in open floor plan designs where diagonal braces would interfere with the space.
- Column bases and caps: Steel hardware that connects posts to foundations (bases) and posts to beams (caps). These handle the critical load transfer points and are engineered to specific load requirements.
The advantage of modern hardware is speed and capacity. A knife plate connection can be fabricated in minutes and handles higher loads than a traditional mortise-and-tenon. For commercial timber frame projects, multi-story buildings, or any structure with heavy engineering requirements, metal connectors are often the practical choice.
The trade-off is aesthetics. Some hardware is concealed (knife plates, hidden brackets), but much of it is visible. Many architects and clients have embraced exposed steel as a design element, especially in rustic-industrial or modern farmhouse styles where the contrast of warm wood and raw steel is intentional.
Hybrid Connection Approaches
The most common approach in the current market is a hybrid that uses traditional joinery where it will be seen and appreciated, and engineered hardware where it is concealed or where structural demands exceed what traditional joinery can handle.
A typical hybrid frame might use:
- Traditional mortise-and-tenon with pegs for post-to-beam connections in the main living space where the joinery is visible at eye level
- Knife plates for truss peak connections and other high-load joints overhead where the detail is less visible
- Steel column bases at the foundation where the connection is concealed by finish flooring or trim
- Concealed lag screws or timber bolts for secondary framing connections that are hidden by the enclosure system
This approach gives the client the handcrafted look in the spaces that matter while keeping the project on budget and on schedule. It also satisfies engineers who may not be comfortable relying solely on pegged joinery for critical connections in seismic or high-wind zones.
When you are bidding a timber frame project, the connection method is one of the biggest variables in your fabrication labor estimate. A full traditional joinery frame takes two to three times longer to cut than an equivalent frame with engineered hardware. Make sure your proposal clearly defines the connection approach for each part of the frame, and do not let scope creep turn a hybrid frame into a full traditional frame without adjusting the price.
Timber Frame Inspection Checklist
Building inspectors do not always have deep experience with timber frame construction. Many inspectors are accustomed to conventional stick framing and may not know exactly what to look for in a heavy timber structure. Understanding what the code requires and what inspectors typically focus on helps you prepare for smooth inspections and avoid delays.
Engineering and Plans Review
Before any field inspection, the building department reviews the structural plans. For a timber frame, the plans should include:
- Stamped structural engineering drawings prepared by a licensed professional engineer (PE) experienced in timber design
- Connection details showing every joint type, fastener specification, and hardware callout
- Species and grade specifications for every timber member, with reference to the applicable grading rules (WCLIB, WWPA, NHLA, or in-plant certification)
- Foundation plan with connection details between the timber sill and the concrete or masonry foundation
- Lateral force resisting system clearly identified, whether that is traditional bracing, SIP sheathing acting as a shear diaphragm, or moment-frame connections
- Load calculations for gravity (dead, live, snow) and lateral (wind, seismic) forces
If your plans are incomplete or your engineer is not familiar with timber frame design, expect plan review comments and delays. Get your engineering right the first time.
Foundation and Sill Plate Inspection
The first field inspection covers the foundation and the connection between the foundation and the timber frame:
- Anchor bolt spacing and embedment per the engineering drawings
- Sill seal or capillary break between concrete and wood to prevent moisture wicking
- Sill timber species and grade matching the plans
- Foundation level and plumb within tolerance (timber frames are less forgiving than stick framing because the joinery fit depends on accurate foundation dimensions)
Frame Inspection During or After Raising
This is the critical inspection for the timber structure. The inspector will look at:
- Member sizes match the plans. Are the 8x10 beams actually 8x10, or did someone substitute a 6x10?
- Species and grade marks. Timbers should have grade stamps or mill certificates verifying species and grade. Reclaimed timbers should have a re-grading certificate from a qualified grading agency.
- Connection hardware installation. Bolt sizes, quantities, washer and nut types, and tightness per the engineering specs. Knife plates fully inserted and bolted. Brackets secured with the specified fasteners, not random screws from the job trailer.
- Peg installation (for traditional joinery). Hardwood pegs of the specified diameter, species (typically white oak or locust), and quantity per joint. Pegs should be tight and driven flush or slightly proud.
- Bearing conditions. Posts bearing fully on their supports. Beams seated completely in their connections. No gaps, shims, or improvised bearing conditions unless the engineer has approved them.
- Bracing and lateral system. Diagonal braces installed at the locations shown on the plans. If SIPs are the lateral system, the inspector may defer this check until the SIP installation inspection.
- Notches and modifications. Any field-cut notches, holes, or modifications to timbers that were not on the original plans need engineer approval. Do not notch a beam for a plumber without getting it signed off.
Fire and Code Compliance for Heavy Timber (Type IV)
If the building is classified as Type IV Heavy Timber construction under the IBC, the inspector will verify:
- Minimum member dimensions per IBC Section 602.4. Columns must be at least 8 inches in any dimension. Beams and girders must be at least 6 inches wide and 10 inches deep. Arches must meet specific requirements based on span.
- No concealed spaces in the timber structure. Type IV construction requires that timber members be exposed or protected by approved materials, with no hidden voids where fire could spread undetected.
- Floor decking and roof decking minimums. Type IV requires minimum 3-inch tongue-and-groove or 4-inch laminated decking for floors, and minimum 2-inch tongue-and-groove or 3-inch laminated for roofs (or approved equivalent).
Common Inspection Failures
The most frequent issues that cause failed timber frame inspections include:
- Missing or incomplete engineering documentation. The inspector cannot approve what is not on the plans.
- Substituted species or sizes without engineer approval. This happens when a mill ships a different species than what was ordered, and the crew installs it anyway.
- Incomplete hardware installation. Missing bolts, washers, or nuts. Bracket screws that are the wrong size or type.
- Unapproved field modifications. Notches, holes, or cuts made for mechanical runs without engineering sign-off.
- Foundation anchor bolt issues. Wrong spacing, insufficient embedment, or missing bolts.
Prepare for your inspection by walking the frame with the plans in hand and checking every connection against the details before the inspector arrives. Fix problems on your own time, not the inspector’s.
Estimating Timber Frame Projects
Accurate estimating is what separates profitable timber frame builders from those who lose money on every job. Timber framing has more variables than conventional construction, and getting the estimate wrong can be devastating because the materials are expensive and the labor is specialized. Using dedicated construction estimating software helps you track every line item and avoid the gaps that kill margins on these projects.
Material Costs: Pricing by the Board Foot
Timber is typically priced by the board foot (BF). One board foot equals 144 cubic inches, or the equivalent of a 1-inch by 12-inch by 12-inch piece of lumber.
To calculate the board footage of a timber, use this formula: width (inches) x depth (inches) x length (feet) / 12.
For example, an 8x8 timber that is 16 feet long contains: 8 x 8 x 16 / 12 = 85.3 board feet.
Current market pricing (these fluctuate, so always get current quotes from your suppliers):
- Douglas fir (green, FOHC, Select Structural): $4 to $7 per board foot depending on size, grade, and region
- Douglas fir (kiln-dried): $6 to $10 per board foot
- White oak (green): $6 to $10 per board foot
- Eastern white pine (green): $3 to $5 per board foot
- Southern yellow pine (green): $3 to $5 per board foot
- Reclaimed timber (mixed species): $8 to $20+ per board foot depending on species, character, and availability
- Glulam (architectural grade, Douglas fir): $8 to $14 per board foot
A typical 2,000-square-foot timber frame home might use 3,000 to 6,000 board feet of timber depending on the design complexity and how much of the structure is timber framed. At $5 per BF for green Douglas fir, the raw material cost for the timbers alone runs $15,000 to $30,000. Premium species or reclaimed timber can double or triple that number.
Do not forget to add waste factor. Timber framing generates less waste than stick framing (each piece is individually cut to plan), but you should still budget 5% to 10% for waste, defects, and cutting errors.
Shop Labor: The Biggest Variable
Shop labor for cutting the frame is typically the largest single cost in a timber frame package. The hours vary enormously based on:
- Joinery type. Traditional mortise-and-tenon joinery takes 6 to 12 hours per connection for complex joints. Simple post-and-beam connections with hardware take 1 to 3 hours each including layout, cutting, and hardware prep.
- CNC vs. hand cutting. A CNC timber framing machine can cut joints in a fraction of the time, but the machine itself represents a significant capital investment. Shops with CNC capability typically charge less per connection but may charge higher shop rates to amortize the equipment.
- Frame complexity. A simple rectangular frame with straight members and repetitive bents is much faster to cut than a frame with curved members, decorative details, hammer-beam trusses, or unusual geometry.
- Crew experience. An experienced timber framer works two to three times faster than someone learning the trade. This is a specialized skill set, and you pay for expertise.
As a rough guideline, shop labor (layout, cutting, test assembly, numbering, and disassembly for shipping) runs 40 to 80 hours per 1,000 board feet of timber for traditional joinery, and 20 to 40 hours per 1,000 BF for post-and-beam with hardware. At shop labor rates of $60 to $100 per hour, the labor cost for cutting a 5,000 BF frame ranges from $6,000 (fast post-and-beam) to $40,000 (complex traditional joinery).
Crane and Equipment Costs
Every timber frame raising needs a crane, and crane costs add up fast:
- Small hydraulic crane (25 to 40 ton): $1,500 to $2,500 per day including operator. Suitable for most residential timber frames.
- Medium crane (50 to 80 ton): $2,500 to $4,500 per day. Needed for larger residential or small commercial frames with heavy members or long reaches.
- Large crane (100+ ton): $5,000 to $10,000+ per day. Required for commercial timber frames, large barns, or sites where the crane cannot get close to the building footprint.
Plan for 2 to 5 days of crane time for a typical residential frame raising. Add mobilization and demobilization fees (typically $500 to $2,000 depending on travel distance). On remote or difficult-access sites, you may also need to improve the access road or build a crane pad, which adds cost.
Other equipment costs to include in your estimate:
- Flatbed trucking for frame delivery: $2 to $5 per mile for long-haul, or a flat rate for local delivery
- Forklift or telehandler for unloading and staging timbers on site: $500 to $1,000 per day rental
- Scaffolding and fall protection for the raising crew: $500 to $2,000 depending on frame height and complexity
- Rigging and lifting hardware (slings, shackles, spreader bars): $200 to $500 if not provided by the crane company
Putting the Estimate Together
A complete timber frame estimate should include these line items:
- Engineering: $5,000 to $20,000 depending on complexity
- Timber material: Board footage x price per BF + waste factor
- Hardware and fasteners: Connectors, bolts, pegs, brackets, column bases
- Shop labor: Hours x shop rate
- Shipping: Flatbed trucking from shop to site
- Crane rental: Daily rate x days + mobilization
- Raising crew labor: Daily rate x crew size x days
- Equipment rental: Forklift, scaffolding, rigging
- Enclosure system (SIPs or other): Material + installation labor
- Contingency: 10% to 15% on a timber frame project (higher than conventional framing due to the number of variables)
For a ballpark, the complete timber frame package (engineering through raising, not including enclosure) for a 2,000-square-foot residential frame runs $50,000 to $120,000 depending on species, joinery type, design complexity, and location. That breaks down to roughly $25 to $60 per square foot of building footprint for the frame package alone.
Track all of these costs in your construction estimating software so you can compare estimates against actuals on completed projects. Over time, your historical data becomes your most valuable estimating tool. When you know exactly how many shop hours your crew takes per 1,000 BF of Douglas fir with traditional joinery, your estimates get tighter and your margins get healthier.
Wrapping Up
Timber framing is a craft that connects modern construction to centuries of building tradition. Whether you are building full timber frames, offering hybrid timber elements, or simply appreciate the structural logic of heavy timber construction, understanding the materials, joinery, and processes behind this work makes you a better builder.
The market for timber frame and post-and-beam construction continues to grow as clients seek homes and buildings that feel substantial, natural, and built to last. For builders willing to invest in the skills and relationships this work requires, it is some of the most rewarding construction you will ever do.
Frequently Asked Questions
What is the difference between timber frame and post-and-beam construction?
What wood species are best for timber framing?
How much does a timber frame home cost compared to conventional framing?
Can you insulate a timber frame building?
How long does it take to build a timber frame?
Do timber frame buildings meet building codes?
What is a raising and how does it work?
Can you add timber frame elements to a conventional house?
Related Articles

Concrete Tilt-Up Construction: A Contractor's Complete Field Guide
Tilt-up construction accounts for roughly 15 percent of all industrial and commercial buildings in North America. This...
Read More →
How to Implement Construction Software Without Losing Your Mind
Most construction software rollouts fail. Not because the software is bad, but because the rollout was rushed. Here are...
Read More →
How Selections Can Pay for Themselves in Three Easy Steps
Most contractors lose thousands each year on wrong material orders, slow client decisions, and missed upsell chances....
Read More →