Window and Door Installation Guide for GCs

If you have been running jobs for any length of time, you already know that window and door installations sit right at the intersection of about five different trades, a tight schedule, and zero tolerance for water intrusion. Get it right, and the project moves forward without a hitch. Get it wrong, and you are dealing with callbacks, warranty claims, and angry homeowners for years.
This guide is written for GCs who want a repeatable system for managing window and door installations. Not the “how to install a window” stuff you find on YouTube, but the management side: procurement, scheduling, quality checks, and keeping your subs accountable.
Planning and Procurement: Getting the Right Units on Site at the Right Time
The window and door phase starts long before anyone picks up a caulk gun. It starts in the estimating and procurement stage, and the decisions you make here ripple through the entire project.
First, you need accurate takeoffs. Window and door schedules should list every unit by location, size, type, hardware, finish, and any energy code requirements. If you are working from architect specs, double-check them against the actual rough openings once framing is up. I cannot tell you how many times a spec calls for a 3060 window and the framer built a 2868 opening. Catching that before your order ships saves you weeks.
Lead times are the killer. Standard vinyl or fiberglass residential windows from major manufacturers typically run 4-6 weeks. Step into commercial aluminum, custom shapes, or high-performance units, and you are looking at 10-16 weeks. Impact-rated windows for coastal work can be even longer. Your estimating process needs to account for these lead times from day one, or your framing crew will be standing around waiting on windows while you burn overhead.
Build your procurement management system around three things: confirmed lead times from your supplier (not the “standard” times on their website, but actual confirmed dates for your order), a delivery inspection protocol, and a staging plan for the site. Windows stacked against a wall in the rain are windows you will be replacing on your dime.
When units arrive, inspect every single one before the delivery truck leaves. Check for:
- Broken glass or seals
- Frame damage, dents, or warping
- Correct sizing against your window schedule
- Hardware operation (locks, cranks, slides)
- Screen condition if applicable
Mark each unit with its installation location using painter’s tape or a grease pencil. This sounds basic, but on a house with 30+ openings and six different window sizes, your installers will thank you.
Rough Opening Prep: The Work Before the Work
Here is where most installation failures actually begin, not during the installation itself, but during rough opening prep. A window is only as good as the opening it sits in.
Your framing crew needs to build rough openings to the manufacturer’s spec. Every window manufacturer publishes required rough opening dimensions, and they are not suggestions. Too tight, and you are forcing the window in without room for shims and insulation. Too loose, and you have gaps that are hard to seal properly. The sweet spot is usually 1/2 inch larger than the window frame on each side and the top, with the sill built to the correct height and slope.
The sill is critical. It needs to slope to the exterior so any water that gets past the window drains out instead of pooling against the framing. A flat or back-sloped sill is a moisture problem waiting to happen. Some crews use beveled sill plates, others build the slope with shims or tapered lumber. Whatever method you use, it needs to be consistent across every opening.
After framing, the rough opening gets its weather-resistive barrier and flashing. This is directly tied to your waterproofing strategy, and it is one of the most common failure points on any building envelope. The basic sequence for most peel-and-stick flashing systems goes like this:
- Apply the sill pan flashing first, extending onto the face of the sheathing below
- Apply side flashing up each jamb, overlapping the sill flashing
- The head flashing goes on last and gets integrated with the WRB above
The key principle is shingle-lapping: every upper layer overlaps the layer below it so water always moves down and out. If your flashing laps are reversed, you have created a funnel that directs water into the wall cavity.
This is work that needs to be inspected before the window goes in. Once the window is installed and the exterior trim is on, you cannot see the flashing anymore. If it was done wrong, you will not find out until water damage shows up months or years later.
Scheduling the Installation: Sequencing That Actually Works
Window and door installation is one of those phases that touches everything. It affects your framing completion, your waterproofing, your siding or exterior finish, your insulation, your drywall, and your trim carpentry. Getting the sequence wrong creates cascading delays.
Here is the general sequence that works on most residential and light commercial projects:
- Framing complete and inspected
- Sheathing and WRB applied
- Rough opening flashing installed
- Windows and exterior doors installed
- Exterior trim and flashing integration
- Siding or cladding
- Interior insulation around window frames
- Drywall
- Interior trim and casing
The window installation itself is usually a 1-2 day task on a typical house, depending on the number and complexity of units. But the prep work before and the finish work after each add days to the schedule.
Curious what other contractors think? Check out Projul reviews from real users.
Your scheduling system needs to account for the dependencies between these steps. You cannot start siding until windows are in. You cannot insulate around windows until they are installed and sealed. You cannot hang drywall until insulation inspection passes. Each step is a domino.
Weather is the other scheduling factor. You do not want to install windows during heavy rain for obvious reasons, but wind is actually the bigger concern. A large picture window or sliding door is basically a sail. A strong gust during installation can pull it right out of your installer’s hands, damage the unit, or injure someone. Check the forecast and plan accordingly.
If you are running multiple projects, your subcontractor management system needs to coordinate your window installer’s availability with the readiness of each job site. A good window sub is usually booked 2-3 weeks out. Do not assume they can show up on short notice because your framing finished early.
Installation Day: What the GC Should Be Watching
You are not installing the windows yourself (probably), but you absolutely need to know what good installation looks like. Your job is quality control, and you cannot inspect what you do not understand.
Here is what to watch for during installation:
Shimming and leveling. Every window needs to be shimmed at the manufacturer’s recommended points, typically at each corner and every 12 inches along the jambs. The window should be level, plumb, and square. Check with a level, not just by eye. An out-of-level window will not operate correctly, and it looks terrible from inside.
Fastener placement. Windows get fastened through the nailing fin, the frame, or both, depending on the type. Fasteners need to hit framing members, not just sheathing. Over-driven fasteners can crack the frame or compress the nailing fin, both of which compromise the seal. Under-driven fasteners leave the window loose.
Sealant application. Most installations require a bead of sealant between the nailing fin and the WRB, but not a continuous bead across the bottom. The sill needs to remain open (or have weep gaps) so trapped moisture can drain. A fully sealed sill is one of the most common installation mistakes, and it leads directly to rot.
Insulation. The gap between the window frame and the rough opening framing needs to be insulated. Low-expansion spray foam is the standard for most applications. High-expansion foam can bow the frame and prevent the window from operating. Fiberglass batt stuffed into the gap is better than nothing, but it does not air-seal the joint.
Door threshold and hardware. For exterior doors, check that the threshold sits flat on the sill, the weatherstripping makes full contact around the perimeter, and the lock engages smoothly. A door that does not latch properly is a security and weather issue.
Build a simple checklist for your site supervisors or project managers to run through on each unit. This ties directly into your quality control program, and it is much cheaper to catch a problem during installation than after drywall covers it up.
Common Problems and How to Avoid Them
After years of managing window and door installations, the same problems come up over and over. Here are the ones that cost GCs the most money and how to prevent them.
Wrong sizes ordered. This is a procurement problem, not an installation problem. Verify rough openings against your window schedule after framing is complete and before you place your order. If the architect’s plans and the as-built openings do not match, figure out the fix before ordering.
Lead time surprises. Your supplier says 6 weeks, then calls at week 5 to say it will be 9 weeks. Now your entire schedule shifts. The fix is to confirm lead times in writing at the time of order, build buffer into your schedule, and have a backup supplier relationship for standard units.
Flashing failures. Water behind the window is almost always a flashing problem. It rarely shows up during installation. It shows up six months later when the drywall below a window starts getting soft. Prevention means inspecting every rough opening before windows go in and requiring photo documentation from your waterproofing sub.
Improper foam application. Too much expanding foam bows the frame. Not enough leaves air gaps. Train your crew on the correct product (low-expansion for windows, always) and the correct amount. A few test applications on scrap material can save thousands in remediation.
Missing inspections. Many jurisdictions require a framing or rough-in inspection before windows are installed, and sometimes a separate energy inspection after. Missing an inspection means tearing work out to expose what the inspector needs to see. Know your local inspection requirements and build them into your schedule.
Damage during other trades. Stucco crews splatter on glass. Painters drip on frames. Drywall dust gets into tracks. Protect installed windows with plastic sheeting or purpose-built window film until the project is substantially complete. The cost of protection is a fraction of the cost of replacement.
No documentation for warranty. Window manufacturers require proof of proper installation for warranty claims. If your installer does not document the installation, and you cannot prove it was done correctly, the manufacturer will deny the claim. This connects directly to your warranty management process. Photos of flashing, shimming, fastening, and foam at each opening take five minutes and can save you the full cost of a replacement unit.
Pulling It All Together: Building a Repeatable System
The difference between a GC who constantly fights window and door problems and one who handles them smoothly is not skill or luck. It is having a system.
Here is what that system looks like in practice:
Pre-construction: During estimating, build your window and door schedule with accurate specifications and quantities. Confirm lead times with suppliers. Add delivery dates to your project schedule with appropriate buffer time.
Procurement: Place orders early enough to account for lead times plus a buffer. Get written confirmation of delivery dates. Set up your delivery inspection protocol so the crew knows to check every unit on arrival.
Rough opening prep: After framing, verify every opening against the window schedule. Correct any sizing issues before moving forward. Have your waterproofing sub or framing crew install flashing per manufacturer specs. Inspect and photograph every opening before windows arrive.
Installation: Schedule your window sub with enough lead time for their availability. Make sure the site is ready (openings prepped, units staged at their locations, clear access). Run your quality checklist on each installed unit before the sub leaves.
Post-installation: Protect installed units from other trades. Complete exterior integration (trim, siding, flashing tie-ins). Insulate and air-seal interior gaps. Collect installation documentation for warranty files.
Closeout: Include window and door operation in your homeowner walkthrough. Hand over warranty information, maintenance guides, and manufacturer contact details. File your installation photos and documentation.
None of this is complicated. The hard part is doing it consistently across every project, every opening, and every crew. That is where project management tools earn their keep. When your scheduling, documentation, and communication all live in one place, nothing falls through the cracks.
If you are still tracking window orders on spreadsheets, chasing subs with text messages, and relying on memory for quality checks, it might be time to look at how a purpose-built construction management tool handles this. You can see how Projul works with a quick demo and decide if it fits how your company runs.
Book a quick demo to see how Projul handles this for real contractors.
Energy Code Compliance and Performance Ratings
Energy codes keep getting stricter, and windows are one of the biggest factors in whether a building meets the requirements. As the GC, you need to understand the basics of window performance ratings so you can verify that the units you ordered actually meet code.
Every window has a performance label from the National Fenestration Rating Council (NFRC). The key numbers are:
U-factor. This measures how well the window insulates. Lower is better. Most current energy codes require U-factors between 0.25 and 0.32 for residential windows, depending on your climate zone. If you are building in a cold climate, you need lower U-factors (more insulation). Hot climates can get away with slightly higher values.
Solar Heat Gain Coefficient (SHGC). This measures how much solar radiation passes through the glass. In hot climates, you want a low SHGC to keep cooling costs down. In cold climates, a higher SHGC can actually help by letting the sun warm the building.
Air leakage. This is how much air passes through the closed window assembly. Lower numbers mean a tighter window. Most codes require an air leakage rating of 0.30 CFM per square foot or less.
Visible transmittance (VT). This is how much light comes through. It does not affect code compliance in most jurisdictions, but it matters for the homeowner’s comfort and satisfaction.
Here is where GCs get tripped up: the specs say one thing, and the delivered product says another. Manufacturers offer the same window model in multiple glass packages. A builder-grade double-pane unit might have a U-factor of 0.30, while the same frame with a triple-pane low-E glass package drops to 0.20. If your energy report was based on the triple-pane spec and you installed the double-pane version, you will fail your energy inspection.
Check the NFRC label on every window that arrives on site. Compare it to the energy report for the project. If the numbers do not match, stop and figure out why before installation. Replacing a window after drywall is up costs five times what it costs to catch the error at delivery.
For projects in jurisdictions that follow the 2021 IECC or later, you may also need to document the total window-to-wall ratio. Too many windows on one elevation can push the building out of compliance even if every individual unit meets the U-factor requirement. This is something to coordinate with your architect during design, but as the GC, you are the last line of defense before the inspector shows up.
Managing Specialty Installations: Oversized Units, Storefronts, and Impact Windows
Not every window installation follows the standard playbook. Some projects include oversized picture windows, storefront systems, or impact-rated units that require different handling, different crews, and different inspection protocols.
Oversized and custom units. Any window over about 6 feet in either dimension needs special attention. These units are heavy, fragile, and awkward to handle. You may need a crane, a boom lift, or at minimum a dedicated crew of four or more people to set them safely. The rough opening prep is more critical because a larger window puts more stress on the surrounding framing. Headers need to be sized correctly, and the support structure needs to handle the weight without deflection over time.
Plan the installation sequence around access. If an oversized window goes on the second floor, it may need to go in before the scaffolding comes down or before a wall section closes off access. Missing that window in the schedule can mean tearing out work to create access later.
Storefront and curtain wall systems. Commercial projects often include aluminum storefront framing with large glass panels. These are typically installed by a specialty glazing contractor, not a general window installer. The GC’s role here is coordination: making sure the opening is prepped to the glazier’s specs, the structural steel or framing can support the system, and the waterproofing details at the head, jamb, and sill are properly integrated.
Storefront installations often require structural engineering review. The wind load calculations, dead load from the glass weight, and thermal movement all need to be accounted for. Do not assume your framing crew knows the requirements. Get the shop drawings reviewed and approved before fabrication starts.
Impact-rated windows. In hurricane-prone regions, building codes require windows that can withstand wind-borne debris impact. These units are heavier, more expensive, and have longer lead times than standard windows. They also require specific installation methods per the manufacturer’s tested assembly. You cannot substitute a different flashing system or fastener pattern and still maintain the impact rating.
Impact window installations typically require a separate inspection and may need a product approval number filed with the building department. Your window sub needs to provide documentation showing that the installed assembly matches the tested and approved configuration. Any deviation, even using a different sealant brand, can void the approval and force you to start over.
For all specialty installations, the key is planning. These are not items you can figure out on the fly. Order early, coordinate with the right specialty contractors, and build the extra inspection and documentation steps into your project schedule. Your scheduling tools should flag these items as long-lead and high-coordination so nothing slips through.
Post-Installation Maintenance and Warranty Management
Your responsibility as the GC does not end when the last window is installed. How you handle the warranty handoff and educate the building owner on maintenance directly affects your callback rate and your reputation.
Warranty documentation. Collect warranty certificates from the window manufacturer for every unit installed on the project. Most major manufacturers offer warranties ranging from 10 years to lifetime on various components (glass seal, hardware, frame). File these with your project closeout documents, and provide copies to the owner.
Make sure the installation documentation supports the warranty. As mentioned earlier, manufacturers can deny claims if installation does not meet their published requirements. Your photo documentation of flashing, shimming, and sealing at each opening is your insurance policy.
Owner education. During the final walkthrough, show the owner how to operate every type of window and door in the building. This sounds obvious, but casement cranks, sliding door locks, tilt-in sash mechanisms, and multi-point locking systems are not intuitive to everyone. Five minutes of instruction prevents a warranty call six months later.
Provide basic maintenance guidance:
- Clean tracks and weep holes annually to prevent drainage blockage
- Lubricate hardware (hinges, locks, rollers) with silicone spray once a year
- Inspect weatherstripping for compression or damage and replace as needed
- Check caulking at exterior trim joints annually and reseal any cracked or missing sections
- Never use a pressure washer directly on window seals or glazing, as it can break seals and force water into the frame
Common warranty callbacks. The most frequent warranty calls on windows are failed glass seals (fogging between panes), hardware failures (locks or cranks that stop working), and water leaks. Failed glass seals are almost always a manufacturer defect covered under warranty. Hardware failures depend on the cause. Water leaks are usually an installation or flashing issue, not a window defect, which is why your installation documentation matters so much.
Build a simple post-installation follow-up into your process. A quick check-in call to the owner 30 and 90 days after move-in catches small problems before they become big complaints. It also builds the kind of client relationship that generates referrals. Managing this follow-up through your CRM keeps it from falling through the cracks, especially when you are juggling multiple completed projects.
At the end of the day, windows and doors are not the most glamorous part of a build. But they are one of the most visible to your client, one of the most critical for building performance, and one of the most expensive to fix when something goes wrong. Getting your management process dialed in pays dividends on every single project.
Frequently Asked Questions
How far in advance should a GC order windows and doors?
Who is responsible for window flashing on a construction project?
What are the most common window installation defects GCs should watch for?
Should windows be installed before or after exterior sheathing?
How do you handle damaged windows that arrive on site?
Related Articles

Construction Septic System Installation: What Every GC Needs to Know
Septic systems on rural builds bring unique scheduling, permitting, and soil challenges that can wreck your timeline if...
Read More →
Construction Painting Project Management: Coordinating Interior and Exterior Phases
Painting is one of those trades that touches every other trade on the schedule. Get the sequencing wrong, and you're...
Read More →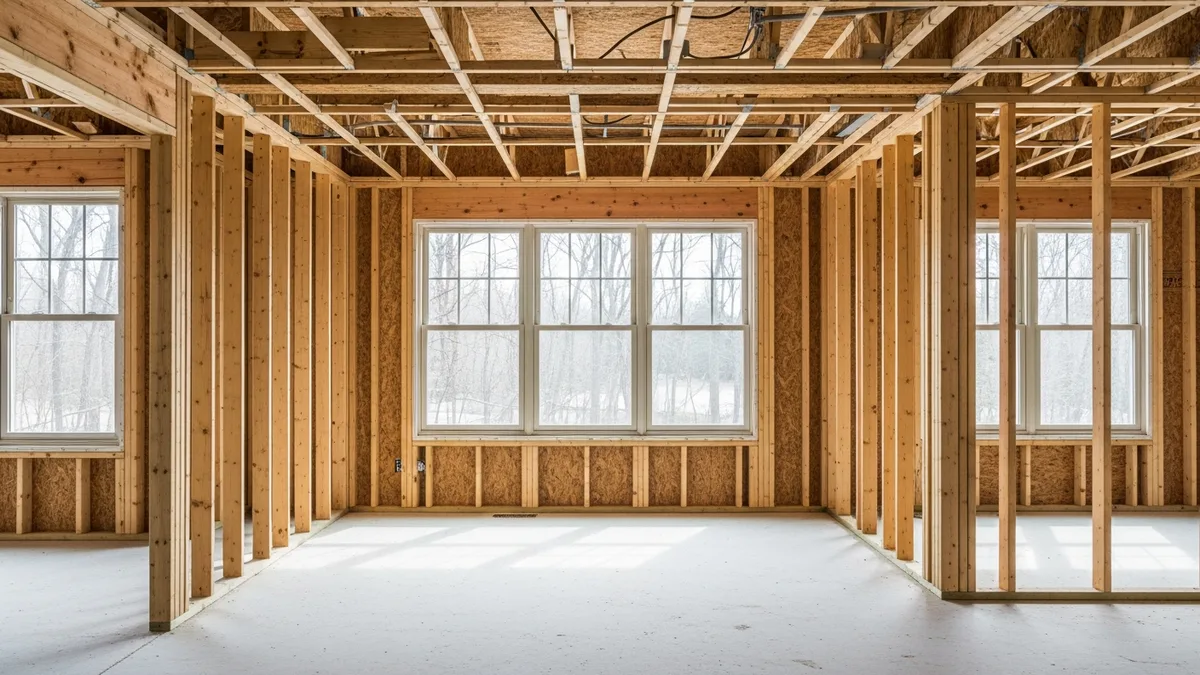
Epoxy Flooring and Industrial Coatings: A Contractor's Complete Guide
Epoxy flooring and industrial coatings are high-margin work when you get the process right and a fast way to lose money...
Read More →