Basement Excavation and Foundation Wall Guide
Basement excavation and foundation wall construction is one of those phases that sets the tone for the entire project. Get it right, and everything that comes after sits on solid ground. Get it wrong, and you will be chasing water intrusion, cracked walls, and structural callbacks for years. This guide walks through the full process from initial site assessment through finished foundation walls, written for contractors who want to do it once and do it right.
Planning and Site Assessment
Before any equipment rolls onto the site, you need to do your homework. Skipping the planning phase is the fastest way to blow your budget and your schedule.
Start with a geotechnical investigation. A geotech engineer will drill test borings across the site and give you a soil report that covers bearing capacity, soil classification, groundwater levels, and any problem layers like organic material or expansive clay. This report is not optional. It drives your entire foundation design, your excavation approach, and your dewatering plan.
Next, get a full utility locate done. Call 811 and get every underground utility marked. Gas lines, water mains, sewer laterals, electrical conduits, and telecom cables all need to be identified and mapped before you start digging. Hitting an unmarked gas line is the kind of surprise that shuts down a project and puts people in danger.
Review the structural plans and confirm the excavation dimensions. You need enough room for the footings, the foundation walls, the waterproofing system, and working space for your crew. Most residential basements need at least 2 to 3 feet of extra width on all sides for access and drainage installation. On commercial projects, that number goes up.
Pull your permits early. Foundation permits can take time depending on your jurisdiction, and you do not want your excavator sitting idle because the permit office is backed up. If your project involves work near property lines, you may also need shoring permits and agreements with neighboring property owners.
Finally, build a realistic schedule. Foundation work is weather-dependent, and concrete does not care about your deadline. Build in buffer days for rain delays and inspection holds. If you are using construction scheduling software, block out the full sequence from excavation through backfill so your subs and suppliers know exactly when they need to show up.
Excavation Methods and Equipment
The excavation phase is where the project gets physical. Your method and equipment choices depend on the site conditions, the depth of the dig, and how tight the access is.
For most residential basement excavations, a standard hydraulic excavator in the 20 to 30 ton range handles the job well. You will pair it with articulated dump trucks or end dumps to haul the spoil off-site or to a stockpile area if you plan to reuse some of the material for backfill later. On tighter lots or urban infill sites, you might need a compact excavator and smaller hauling equipment.
Open cut excavation is the most common approach for new construction basements. You dig a wide hole with sloped sides, which gives you room to work and eliminates the need for shoring on most residential sites. The slope angle depends on your soil type. OSHA has specific requirements for excavation slopes based on soil classification: Type A soil can go as steep as 3/4 to 1 (horizontal to vertical), Type B needs 1 to 1, and Type C requires 1.5 to 1.
When you do not have room to slope the sides, you need shoring or bracing. Sheet piling, soldier pile and lagging systems, or hydraulic shoring boxes all keep the excavation walls from caving in. Your geotech report will help determine the lateral earth pressures, and your shoring engineer will design the system accordingly. Never skip this step. Trench collapses are one of the leading causes of construction fatalities.
If the water table is high, you will need a dewatering plan before you can excavate to full depth. Common approaches include wellpoint systems, sump pumps in the excavation, or deep well dewatering for larger projects. The goal is to keep the water level at least 2 feet below your working elevation at all times. Standing water in the excavation makes it impossible to compact soil, place footings properly, or get clean concrete pours.
Track your excavation quantities carefully. Over-excavation means more backfill material and more labor to place and compact it. Under-excavation means rework. If you are managing your project with construction budget tracking tools, log the actual haul-off quantities against your estimate so you can catch overruns early.
One more thing: protect the bottom of your excavation. Once you reach the design elevation, avoid driving equipment across the bearing surface. Track marks and rutting disturb the undisturbed soil that your footings need to bear on. If you need to move equipment across the base, lay down a sacrificial layer of crushed stone first.
Footing Design and Placement
Footings are the base of the entire foundation system. They spread the building loads across a wider area of soil so the structure does not settle unevenly or punch through weak spots.
For most residential basements, you are looking at continuous strip footings under the foundation walls and isolated spread footings under any interior columns or posts. The footing width and thickness come from the structural engineer’s design, which factors in the soil bearing capacity from the geotech report and the building loads from the architectural plans.
Don’t just take our word for it. See what contractors say about Projul.
Here is the typical sequence for footing placement:
1. Verify the bearing surface. Before you place any formwork, the building inspector and often the geotech engineer need to verify that the soil at the bottom of the excavation matches what the design assumes. If you hit soft spots, organic material, or unexpected groundwater, stop and get direction from the engineer. You may need to over-excavate and replace the material with compacted structural fill.
2. Set the forms. Footing forms are usually built from dimensional lumber or prefabricated steel forms. The key dimensions to verify are width, depth, and elevation. Use a laser level to set the top of the footing forms to the correct elevation, and double-check the dimensions against the structural drawings. Footings that are too narrow or too shallow will not pass inspection.
3. Place the reinforcing steel. Most footings require rebar, typically #4 or #5 bars running longitudinally with transverse bars at regular spacing. The rebar needs to be supported on chairs or dobies to maintain the correct cover from the bottom and sides of the footing. Dowels projecting up from the footing will tie into the foundation wall rebar, so get the spacing and projection height right.
4. Pour and finish. Footing concrete is usually a standard 3,000 to 4,000 PSI mix. Place it in a continuous pour when possible to avoid cold joints. Screed the top to the correct elevation and insert any required anchor bolts or dowels before the concrete sets. The top surface of the footing should be roughened slightly to improve the bond with the foundation wall that goes on top.
5. Cure and inspect. Allow the footings to cure for at least 24 to 48 hours before loading them with wall forms. The inspector will want to see the footings before you cover them up with the next phase of work.
Getting footings right is not glamorous work, but it is critical. A footing that is 2 inches off in elevation or 3 inches out of square will compound into bigger problems when you start building walls and framing the structure above. Use a detailed construction estimating process to make sure your footing quantities and rebar counts are dialed in from the start.
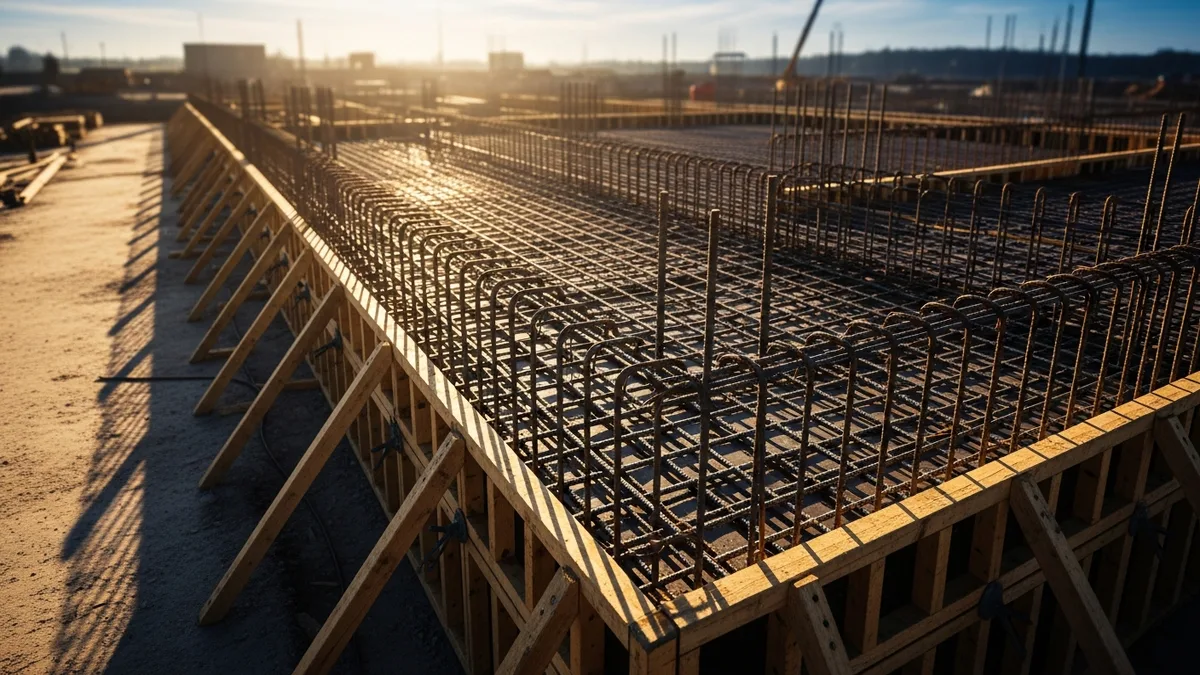
Foundation Wall Construction
With the footings cured and inspected, it is time to build the foundation walls. You have two main options: poured concrete walls and concrete masonry unit (CMU) block walls. Each has its strengths, and the right choice depends on your project, your local market, and your crew’s experience.
Poured concrete walls are the more common choice in most markets. They are faster to install, provide better waterproofing performance, and offer higher lateral strength against soil pressure. The process goes like this:
Set the wall forms on the cured footings, aligned with the layout lines. Most contractors use prefabricated aluminum or steel forming systems that lock together and can be set and stripped quickly. Brace the forms well because wet concrete exerts significant lateral pressure, especially if you are placing it fast. A form blowout is expensive and dangerous.
Install the wall reinforcing steel inside the forms. Horizontal bars run along the length of the wall, and vertical bars tie into the footing dowels. The engineer’s drawings will specify bar sizes, spacing, and lap splice lengths. Do not skip or short the rebar. Foundation walls resist lateral soil pressure, and the steel is what gives them the tensile capacity to do that.
Embed any required items in the wall before the pour: sleeve pipes for utilities, anchor bolts for the sill plate, and snap ties to hold the form panels at the correct width. Double-check all sleeve locations against the MEP plans. Moving a utility penetration after the wall is poured means core drilling, which is slow and expensive.
Pour the walls in a continuous operation whenever possible. Use a concrete pump for larger pours or direct chute placement from the truck for smaller ones. Vibrate the concrete thoroughly to consolidate it and eliminate honeycombing, especially around rebar congestion and at the base of the wall. Screed the top of the wall to the correct elevation and set anchor bolts while the concrete is still workable.
CMU block walls are still used in some regions, especially where block labor is readily available and cost-competitive. Block walls go up course by course, with rebar grouted into the cells at the spacing required by the structural design. They take longer to build than poured walls but do not require the investment in forming equipment. The tradeoff is that block walls have more joints that can potentially allow water infiltration, so waterproofing becomes even more important.
Regardless of which wall type you choose, maintain tight quality control on dimensions and alignment. Foundation walls that are out of plumb or out of square create headaches for every trade that follows. Use string lines and levels frequently, and verify the wall dimensions against the plans before you strip forms or start the next phase.
For managing the material orders, labor scheduling, and sub coordination involved in foundation wall work, having a solid subcontractor management system keeps everyone aligned and reduces the back-and-forth that eats up your day.
Waterproofing and Drainage Systems
A dry basement starts with what you do on the outside of the foundation walls before you backfill. Waterproofing is not an afterthought or a value-engineering target. It is a core part of the foundation system.
Exterior waterproofing membranes are the first line of defense. Options include:
- Fluid-applied membranes: Spray-on or roller-applied rubberized asphalt that cures into a smooth, flexible coating. These conform well to irregular surfaces and bridge small cracks.
- Sheet membranes: Self-adhering rubberized asphalt sheets that provide a consistent thickness and reliable performance. They require a smooth substrate and careful detailing at seams and penetrations.
- Cementitious coatings: Brush-applied cement-based products that bond directly to the concrete. These are more of a dampproofing solution than true waterproofing and are best suited for drier soil conditions.
For most basement projects, a fluid-applied or sheet membrane system is the right call. Apply the membrane from the top of the wall down to the footing, and extend it over the footing-to-wall joint where water commonly infiltrates.
Drainage board goes over the waterproofing membrane. This dimpled plastic sheet serves double duty: it protects the membrane from damage during backfill, and its channels direct water downward to the perimeter drain system. Do not skip the drainage board. Backfill material, especially if it contains rocks or debris, will puncture an unprotected membrane.
Perimeter drain tile runs along the exterior base of the footing. Use 4-inch perforated pipe, either rigid PVC or flexible corrugated, wrapped in filter fabric to keep soil fines from clogging the perforations. Slope the pipe at least 1/8 inch per foot toward the discharge point, whether that is a sump pit, daylight outlet, or storm sewer connection. Surround the pipe with clean washed stone to promote water flow into the drains.
Interior drainage systems provide a second layer of protection. A perimeter channel drain cast into the basement slab, connected to a sump pit with a submersible pump, catches any water that makes it past the exterior system. This is standard practice in areas with high water tables or heavy clay soils.
Grading and surface drainage are the final pieces. The finished grade around the foundation should slope away from the building at a minimum of 6 inches of fall over the first 10 feet. Gutters and downspouts should discharge at least 4 feet from the foundation, or better yet, connect to an underground drainage system that carries roof water well away from the building. If you want to dig deeper into waterproofing strategy, check out our guide to below-grade waterproofing for more detail.
Backfill, Compaction, and Project Closeout
Backfilling is the last major step in the foundation phase, and rushing it is a common mistake. Improper backfill causes settlement, drainage problems, and lateral pressure issues that show up months or years later.
Wait for the walls to cure. Poured concrete walls need at least 7 days of curing before you backfill against them, and some engineers specify longer. The wall needs to reach sufficient strength to resist the lateral pressure from the backfill material and the compaction equipment. If the first-floor deck is in place before backfill, even better, because it braces the top of the wall.
Choose the right backfill material. The ideal backfill for the zone immediately against the foundation wall is clean granular material: crushed stone, gravel, or coarse sand. These materials drain freely and do not exert the kind of lateral pressure that wet clay does. If you are reusing the excavated soil for the upper portion of the backfill, make sure it is free of organic material, large rocks, and frozen chunks. Your geotech report may specify the backfill requirements.
Compact in lifts. Place backfill in 6 to 12 inch lifts and compact each lift before placing the next one. Use a plate compactor or jumping jack near the foundation wall rather than heavy roller equipment, which can damage the wall or the waterproofing system. Proper compaction prevents settlement that creates negative drainage toward the foundation. For a detailed look at density requirements and field testing procedures, see our backfill and compaction testing methods guide.
Protect the waterproofing. Be careful with equipment and material near the walls during backfill. Dropping large rocks or driving equipment too close to the wall can damage the membrane and drainage board you just installed. It is worth stationing someone to watch the operation and catch problems before they get buried.
Final inspections and documentation. Before you consider the foundation phase complete, verify that all required inspections have been signed off, all utility penetrations are sealed, and the as-built dimensions match the plans. Take photos of the waterproofing, drainage systems, and rebar placement before they get covered up. These photos are invaluable if warranty issues come up later.
Close out the foundation phase in your project management system so downstream trades know the site is ready for framing. Update your budget actuals against the estimate, note any change orders or scope adjustments, and capture lessons learned while they are fresh. If you had soil surprises, weather delays, or design changes, document them. That information makes your next basement project estimate more accurate.
If you are looking at the broader picture of keeping your earthwork and excavation projects organized, our earthwork and excavation guide covers additional ground on grading, trenching, and site logistics that apply to basement projects as well. And for the concrete side of things, our concrete basics guide is a solid refresher on mix design, placement, and curing best practices.
See how Projul makes this easy. Schedule a free demo to get started.
Building basements is demanding work that requires coordination across multiple trades, careful attention to soil and water conditions, and a process that does not cut corners on the stuff that gets buried. When you invest the time in proper planning, quality materials, and disciplined execution, you end up with a foundation that performs for decades without callbacks. That is the kind of work that builds your reputation and keeps clients coming back.
Frequently Asked Questions
How deep do you need to excavate for a basement?
What type of soil is best for basement construction?
How long does basement excavation and foundation construction take?
Do you need a geotechnical report before excavating?
How do you keep water out of a basement foundation?
Related Articles

Curtain Wall vs Storefront Glazing Systems: A Contractor's Complete Guide
Curtain wall and storefront glazing are two of the most common exterior envelope systems on commercial projects. This...
Read More →
Construction Exterior Sheathing and Weather Barrier Guide
A contractor's complete guide to exterior sheathing and weather barriers. Covers material types, installation...
Read More →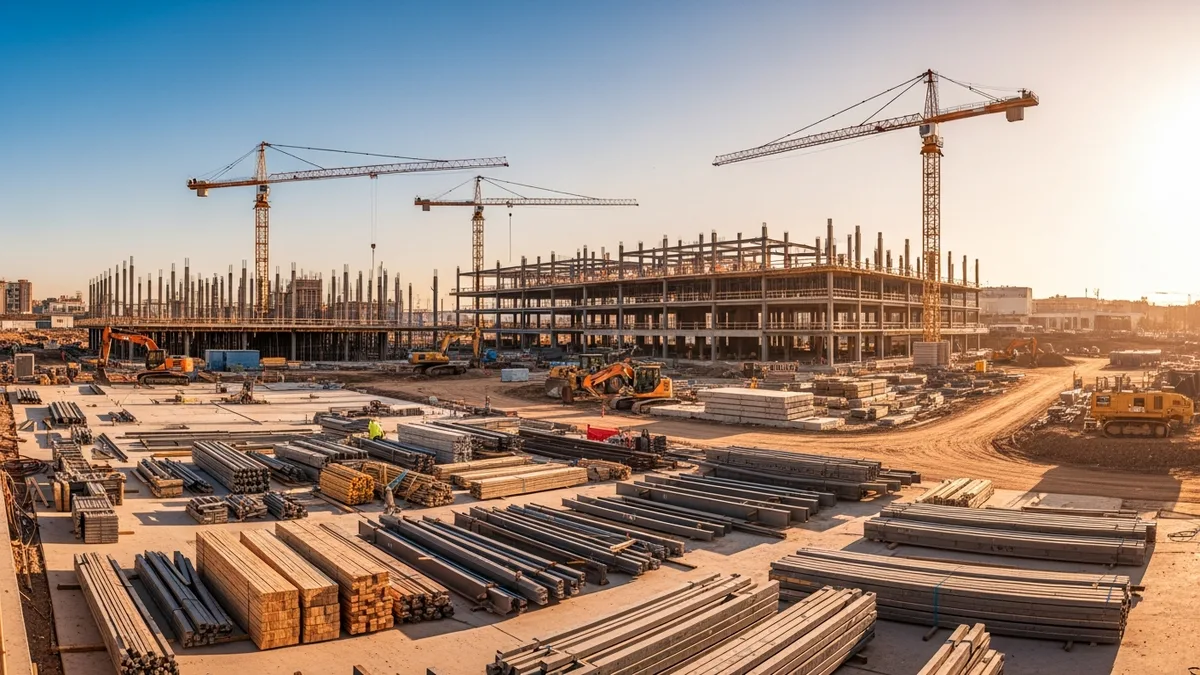
Construction Acoustical Ceiling and Wall Installation Guide
Acoustical ceiling and wall work is one of those trades where small mistakes create big problems. This guide covers...
Read More →