Drywall Management for General Contractors
Construction Drywall Installation Management: What Every GC Needs to Know
If you have been running jobs for any amount of time, you know that drywall is where things either come together or fall apart. It is the phase that every trade before it affects, and every finish trade after it depends on. Get it right, and your project hums along. Get it wrong, and you are looking at blown schedules, angry subs, and callbacks that eat your margin.
This is not a guide about how to hang and tape. Your drywall crew knows how to do their job. This is about what you, the GC, need to manage so that drywall goes smoothly from delivery to final sand. We are talking scheduling, coordination, inspections, and all the stuff that separates a clean drywall phase from a disaster.
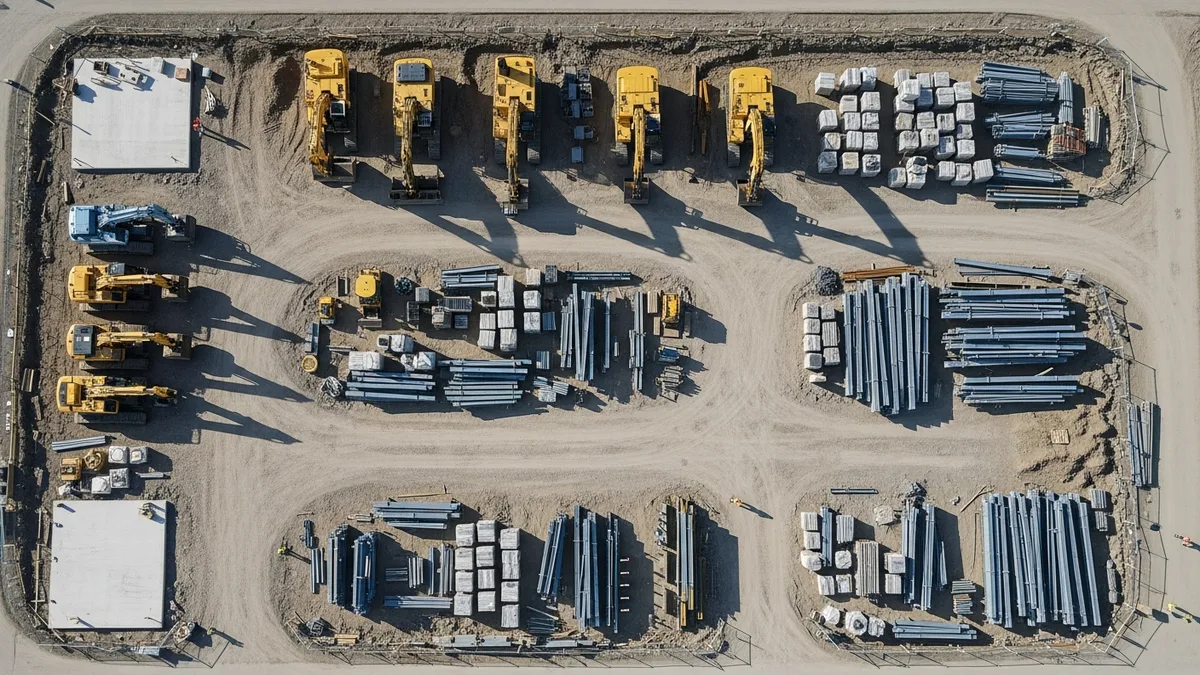
Pre-Drywall Coordination: Setting the Stage
The drywall phase does not actually start when sheets show up on site. It starts weeks earlier when you are scheduling your rough-in trades and lining up inspections. If you treat drywall as something that just happens after framing, you are already behind.
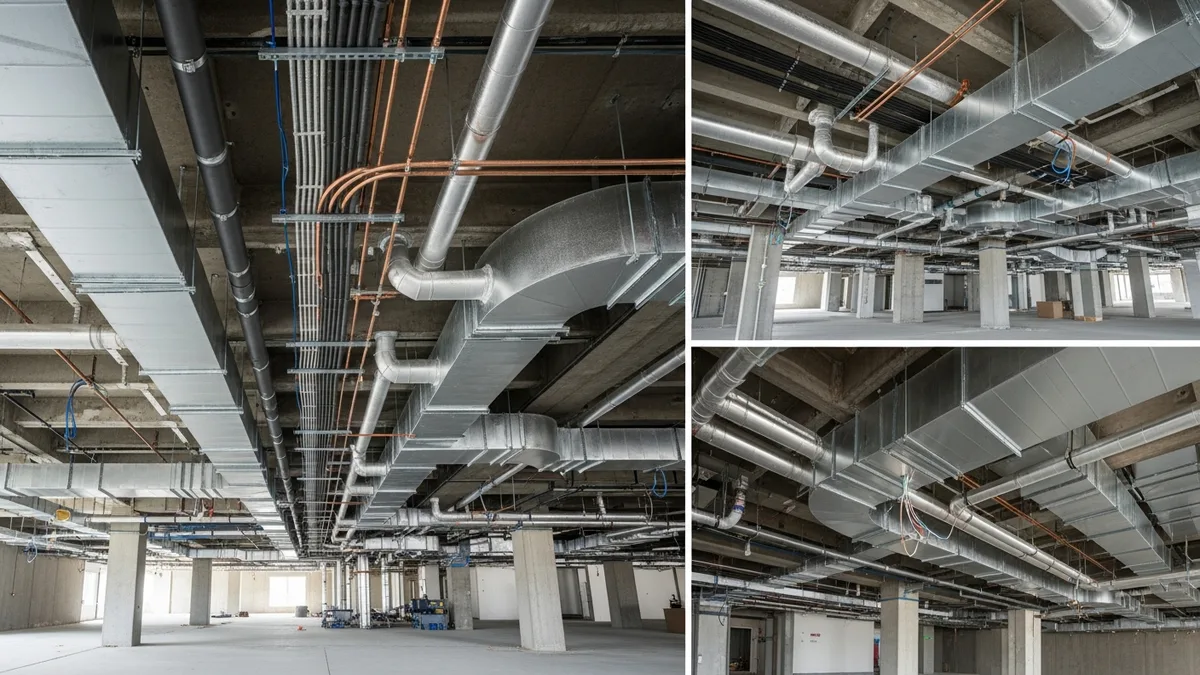
Here is the reality: drywall is the gatekeeper between rough construction and finish work. Everything that goes inside walls, ceilings, and floors needs to be done, inspected, and signed off before a single sheet gets hung. That means electrical, plumbing, HVAC, insulation, fire blocking, low-voltage, and whatever else your plans call for.
The biggest coordination challenge is getting all those trades through their rough-ins without stepping on each other. Your HVAC crew needs duct runs in before insulation. Your electrician needs to finish pulling wire before the insulation crew blows walls. And your plumber needs test results documented before the inspector shows up.
As a GC, your job is to sequence all of this so that there is a clean handoff to drywall. That means:
- Building your schedule backwards from drywall delivery. Know how many days each rough-in trade needs, add buffer, and work backwards from your target hang date. A good scheduling tool makes this a lot easier than a whiteboard or spreadsheet.
- Holding a pre-drywall meeting. Get your drywall sub, framer, and key rough-in leads on a quick call or site walk two weeks before hang date. Walk through any problem areas, special details, or things that need backing.
- Creating a pre-drywall checklist. This should cover every item that needs to be complete and inspected before sheets go up. Backing for cabinets, TV mounts, grab bars, and towel bars. Blocking for handrails. Fire caulk at penetrations. Vapor barrier where required. If it goes behind drywall, it goes on this list.
The contractors who run the smoothest drywall phases are the ones who treat pre-drywall coordination like its own mini-project. They do not just assume things will be ready. They verify it.
Scheduling the Drywall Phase: Hang, Tape, and Finish
Drywall is not one task. It is a sequence of tasks with hard dependencies and mandatory wait times built in. If you do not account for this in your schedule, you will either rush it and get bad results, or your finish trades will be sitting around waiting.
Here is how a typical drywall sequence breaks down on a residential project:
Delivery and staging (Day 1). Sheets get delivered and stacked in rooms. Your drywall crew or a stocking company handles placement. Make sure the building is dried in and climate controlled. Drywall and moisture do not mix. If you are in a climate where humidity is a factor, you need HVAC running or at minimum temporary heat and ventilation.
Hanging (Days 2-4). Ceilings first, then walls. A good crew on a standard home will knock out hanging in 2-3 days. Larger or more complex projects obviously take longer. During this phase, keep other trades off the floor. Nothing slows down a hang crew like working around electricians who forgot a junction box.
First coat of tape and mud (Days 4-5). Taping follows immediately after hanging. The taper hits all joints, corners, and fastener heads with the first coat of compound. This coat needs to dry fully before the next application.
Dry time (Days 5-7). This is where GCs get impatient. Mud needs to dry. There is no shortcut that does not come back to bite you. Temperature, humidity, and ventilation all affect dry time. In ideal conditions, 24 hours per coat. In cold or humid conditions, plan on 48 hours.
Second and third coats (Days 7-10). Each coat gets wider, smoother, and thinner. Each one needs dry time. Do not let anyone tell you two coats is fine on a Level 4 or 5 finish. It is not.
Sanding and touch-up (Days 11-13). Final sand, inspection for imperfections, and any spot repairs. After sanding, the dust needs to be cleaned up before primer.
The total elapsed time for drywall on a typical home is 10-14 days. That is not 10-14 days of labor. That is calendar days including dry time. When you are building your project schedule, you need to block out the full calendar window, not just the labor days. This is one of the most common scheduling mistakes I see GCs make.
Managing Your Drywall Subcontractor
Your drywall sub is one of the most important relationships on a residential or light commercial project. They touch every room, every wall, every ceiling. The quality of their work is visible on every surface your client sees. So managing this relationship well matters a lot. If you are a drywall contractor looking for software built for your trade, we have a dedicated page for that.
Start with clear scope documentation. Your drywall contract should spell out:
- Finish levels by room (Level 4 for painted surfaces, Level 5 for areas with critical lighting, Level 2 for garage, etc.)
- Who supplies material vs. labor only
- Whether they are responsible for delivery and stocking
- Cleanup expectations after sanding
- Warranty terms for cracking, nail pops, and joint failure
- How change orders get handled (because there will be changes)
If you are running multiple projects, having a solid subcontractor management process is not optional. You need to know who is available, what their current workload looks like, and whether they have the crew size to hit your timeline.
Communication during the drywall phase is critical. Your drywall sub needs to know about:
- Any framing issues that affect their work (out-of-plumb walls, twisted studs, missing backing)
- Changes to the plan that add or remove walls, soffits, or ceiling details
- Access limitations (if other trades need to get in during hang or tape)
- Your expected finish level and any special texture requirements
Not sure if Projul is the right fit? Hear from contractors who use it every day.
One thing I have learned over the years: the drywall crews that do the best work are the ones you treat as partners, not just subs. Walk the job with them before they start. Point out the areas where finish quality matters most. Ask them what they need from you to do their best work. You will be surprised how much better the results are when the crew feels respected and informed.
Inspections and Quality Checkpoints
Drywall involves inspections at both ends of the phase, and skipping either one leads to problems.
Pre-drywall inspection. This is your AHJ (Authority Having Jurisdiction) verifying that all rough-in work is complete and code compliant before it gets covered up. Most jurisdictions require passing inspections for:
- Electrical rough-in
- Plumbing rough-in (including pressure tests)
- HVAC rough-in
- Framing (structural connections, bearing points, fire blocking)
- Insulation and vapor barrier
- Energy code compliance
Do not schedule your drywall crew until you have all green tags. Period. I have seen GCs try to get a head start by hanging non-inspection walls while waiting for sign-off on others. This sometimes works, but it is risky. If the inspector finds an issue that requires opening up a wall you already hung, you just paid twice.
Post-hang quality check. Before taping starts, walk the job and check:
- Proper fastener spacing and depth (not breaking paper, not proud of surface)
- Correct sheet orientation (long edge perpendicular to framing on ceilings)
- Tight joints with no gaps larger than 1/8 inch
- Proper cutouts around outlets, switches, and fixtures
- No damaged or wet sheets
- Backing visible and accessible for all items that will mount to walls
Pre-paint quality check. After sanding and before primer, this is your last chance to catch imperfections. Use a strong side light (a work light held at a low angle against the wall) to reveal any ridges, crowns, or tool marks. This technique shows everything. Do this in every room, on every wall, on every ceiling. It takes time but saves a fortune in paint callbacks.
Document all quality checks with photos. Take pictures of problem areas before and after they are fixed. This protects you, your sub, and your client. If a crack shows up six months after close, having documentation of proper installation makes warranty conversations a lot simpler.
For a deeper look at quality processes, check out our quality control guide. The principles apply directly to drywall management.
Common Drywall Problems and How to Avoid Them
After years of managing drywall phases, certain problems come up again and again. Most of them are preventable if you know what to watch for.
Nail pops. These show up weeks or months after the house is finished. The most common cause is lumber shrinkage. As framing members dry and shift, fasteners get pushed out. The fix starts with using screws instead of nails (most crews have switched, but verify), proper screw depth, and allowing framing lumber to acclimate before hanging. If you are building with green lumber, expect more nail pops and plan for a warranty touch-up visit.
Cracking at corners and seams. This usually comes from one of three things: framing movement, improper taping technique, or rushing dry times. For framing movement, make sure your framer is using proper drywall clips or floating corners at ceiling-to-wall intersections. For taping, make sure your crew is embedding tape fully in mud (dry tape is the number one cause of seam cracking). For dry times, just wait. An extra day of drying beats a callback every time.
Moisture damage before painting. Drywall is essentially paper and gypsum. It absorbs water fast. If your building is not dried in, if there is a plumbing leak during the tape phase, or if humidity is through the roof without ventilation, you will see sagging, mold, and failed joints. Keep the building sealed and climate controlled throughout the drywall phase. If sheets get wet, replace them. Do not try to dry them out and mud over the damage.
Wavy walls and uneven surfaces. This is almost always a framing problem, not a drywall problem. Twisted studs, bowed plates, and inconsistent spacing create surfaces that no amount of mudding can fix. This is especially important to get right with metal stud framing on commercial jobs. The time to catch this is during your framing walk, before drywall shows up. Check walls with a long straightedge. Pull and replace twisted studs. It is cheaper to fix framing than to float walls with extra mud.
Texture inconsistency. If your project calls for textured walls or ceilings, make sure you get a sample approved by the client before the full application. Have the crew do a test patch in a closet or low-visibility area. Spray texture looks different depending on pressure, distance, material mix, and application speed. Get it approved, then have the same person apply texture throughout the project for consistency.
Missing backing and blocking. This one drives me crazy because it is 100% preventable. Before drywall goes up, walk every room with your plans and verify that there is backing for everything that will mount to a wall: upper cabinets, towel bars, grab bars, TV mounts, heavy mirrors, handrails, and anything else the plans call for. If you miss it, someone is cutting open a finished wall later to add a 2x4. That is a waste of time and money that should never happen.
Technology and Documentation for Drywall Management
Running a tight drywall phase requires good documentation and communication tools. The days of tracking everything on paper tickets and phone calls are over, at least for GCs who want to stay competitive.
Here is what good drywall phase management looks like from a technology standpoint:
Scheduling visibility. Your drywall sub needs to see when their window opens and closes. Your other trades need to see when drywall starts so they know their deadline. And you need to see all of it in one place. A shared scheduling system that everyone can access eliminates the “I did not know” excuse that causes half of all scheduling conflicts.
Photo documentation. Before, during, and after. Take photos of all pre-drywall conditions (rough-in work, backing, insulation). Take photos during hanging if there are any concerns. Take photos of the finished product under side lighting before paint. Store them in a system that ties them to the specific project and phase, not scattered across phones and text threads. Projul’s photo and document management is built for exactly this.
Daily logs and notes. Track what happened each day during the drywall phase. Which rooms were hung. How many sheets went up. Any issues found. Weather conditions (temperature and humidity affect dry times). This information is gold when disputes arise or when you need to improve your process for the next project.
Change order tracking. Drywall changes happen. The client wants to add a niche in the shower wall. The architect forgot to show a soffit on the plans. An HVAC run conflicts with a bulkhead. Every change that affects drywall scope needs to be documented, priced, and approved before the work happens. Not after. Not verbally. In writing.
Punchlist management. After sanding and before paint, create a formal punchlist for any drywall deficiencies. Mark each item on the wall with blue tape and in your project management system. Track completion and verify each repair. This is not micromanaging. This is protecting your quality standards.
If you are still running drywall phases with text messages and memory, you are leaving money on the table and taking on unnecessary risk. The right project management tools pay for themselves on the first job by catching problems before they become expensive. See how Projul handles this for construction teams.
Coordinating Drywall With Adjacent Trades
The drywall phase sits at a critical junction in every construction project. Getting the coordination right with adjacent trades is what separates smooth projects from chaotic ones.
Before drywall: the rough-in trades. Your electricians, plumbers, and HVAC techs all need to be completely done and inspected before drywall starts. But “done” does not just mean their rough-in is in place. It means:
- All inspection tags are posted and green
- No open items or red tags remaining
- Low-voltage wiring (security, audio, network, TV) is pulled and terminated
- Any pre-wire for smart home systems is complete
- Spray foam or batt insulation is installed and inspected
- Fire blocking and draft stopping is in place
- All penetrations are sealed per code
Build your schedule so that rough-in trades finish at least 3-5 days before drywall delivery. This gives you buffer for inspection delays, minor fixes, and the inevitable “one more thing” that every trade seems to discover at the last minute.
During drywall: keep everyone else out. Once hanging starts, the drywall crew owns the building. Other trades walking through create safety hazards (sheets leaning against walls, stilts, scaffolding) and quality problems (dust contamination of tape and mud). If another trade absolutely must access the building during drywall, coordinate specific times and areas. Never let two trades work the same room at the same time during hang or tape.
After drywall: the finish trade parade. Once drywall is sanded and primed, the finish trades start arriving. Painters, trim carpenters, cabinet installers, tile setters, and flooring crews all depend on quality drywall. The handoff needs to be clean:
- All punchlist items resolved before paint
- Dust cleaned up (sanding dust ruins paint adhesion and gets into everything)
- Any areas that need special treatment (moisture-resistant board in wet areas, fire-rated assemblies) are verified and documented
- Corner bead is secure and straight (trim carpenters will thank you)
The key to all of this coordination is communication. Not just between you and your subs, but between the subs themselves. When your drywall crew knows what the painter needs, they deliver better results. When your trim carpenter knows the drywall finish level, they set expectations correctly. Make sure information flows in every direction, not just from you outward.
Drywall management is not glamorous. Nobody walks a finished house and compliments the joint compound. But every GC knows that a bad drywall phase can tank a project timeline and blow a budget faster than almost any other trade. The contractors who master this phase, who plan it carefully, manage their subs well, document everything, and coordinate ruthlessly with adjacent trades, are the ones who deliver consistent results and keep their clients coming back.
Ready to stop guessing and start managing? Schedule a demo to see Projul in action.
Get your drywall coordination dialed in, and the rest of the finish phase gets a whole lot easier.
Frequently Asked Questions
When should drywall installation start after framing?
How long does drywall installation take on a typical residential project?
What inspections are required before drywall can go up?
How do you prevent drywall cracks at seams and corners?
What is the biggest scheduling mistake GCs make with drywall?
Related Articles
Construction Electrical Rough-In Guide for General Contractors
The electrical rough-in is where circuit layout, box placement, and wire routing all have to come together before...
Read More →
Interior Finishing for Contractors: The Complete Drywall, Paint, and Trim Guide
Interior finishing is where your project goes from bare studs to a space your client can actually picture living in....
Read More →
Helical Piles and Screw Foundations: The Contractor's Complete Guide
Helical piles are showing up on more and more project specs. This guide covers everything a contractor needs to know...
Read More →