Generator Sizing and Temporary Power for Jobsites
If you have ever shown up to a jobsite only to realize you do not have enough power to run your tools, you know the sinking feeling. The crew is standing around, the schedule is slipping, and you are burning money by the minute. Temporary power planning is one of those things that separates contractors who run tight operations from those who are constantly putting out fires.
Whether you are running a residential remodel or managing a ground-up commercial build, getting your generator sizing and temporary electrical setup right from day one saves you time, money, and a whole lot of headaches. In this guide, we will break down everything you need to know about sizing generators, setting up temporary power, and keeping your site running smoothly from demo through final inspection.
Understanding Your Jobsite Power Needs
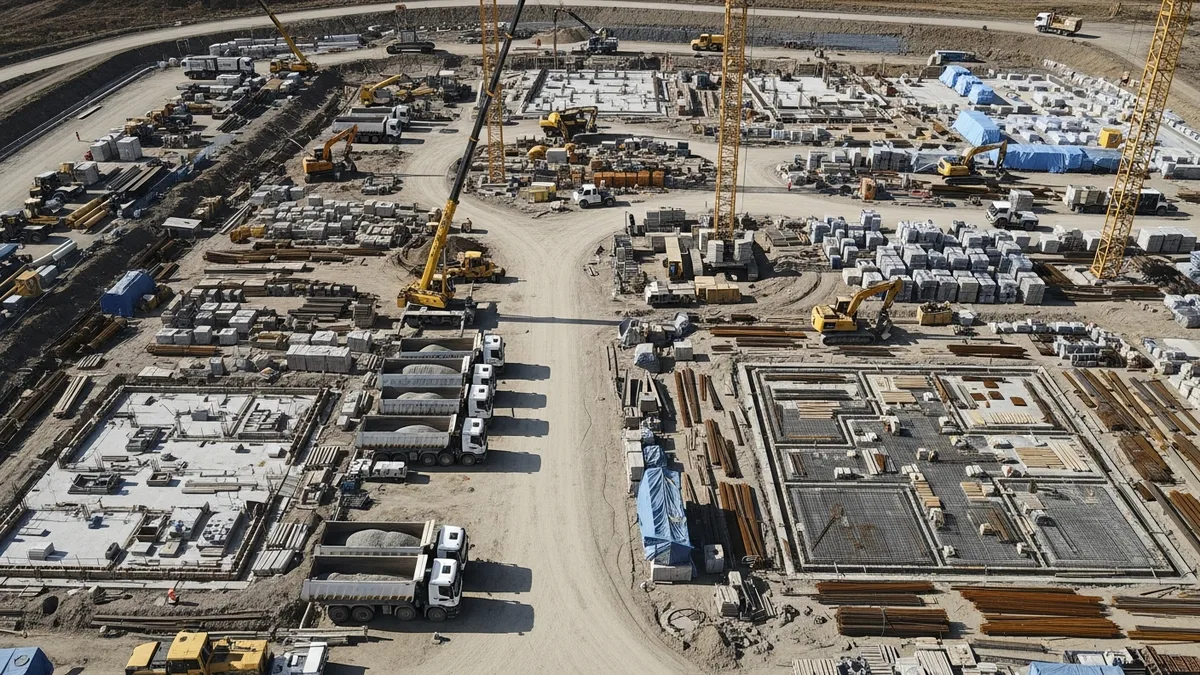
Before you rent or buy a single piece of equipment, you need to understand what your jobsite actually demands in terms of electrical power. This starts with a simple inventory of every tool, piece of equipment, and system that will need electricity on site. If your project involves tower cranes or mobile cranes, factor in their power requirements early since crane lift planning and rigging decisions directly affect your temporary power needs.
Walk through your project scope and list out the major power consumers. On a typical residential build, you are looking at circular saws, miter saws, table saws, air compressors, drills, a concrete vibrator or two, and temporary lighting. On commercial projects, add in welders, concrete pumps, tower crane systems, temporary HVAC, and possibly temporary office trailers with computers, printers, and climate control.
Here is where a lot of contractors get tripped up: they only think about what is running right now instead of what could be running at the same time. If your framing crew is running three nail guns off a compressor while your trim guy is using a miter saw and someone else is cutting plywood on the table saw, all of that load hits the generator simultaneously. Miss that calculation and your generator bogs down, voltage drops, and you risk damaging expensive tools.
The basic formula is straightforward:
- List every tool and its running wattage
- Identify motor-driven tools that have a starting surge (usually 2 to 3 times the running watts)
- Add up total running watts for everything that could operate simultaneously
- Add the single highest starting surge on top of that total
- Multiply by 1.25 for a safety margin
That final number is your minimum generator size. If you are tracking equipment across multiple projects, a tool like Projul’s equipment tracking features can help you know exactly what is on each site and plan power needs accordingly.
Generator Sizing: Matching the Machine to the Job
Now that you know your load requirements, it is time to pick the right generator. Generators are rated in watts (W) or kilowatts (kW), and they come in a huge range of sizes. Here is a practical breakdown by project type:
Small residential projects (remodels, additions, decks):
- Typical load: 3,000 to 7,000 watts
- Generator size: 7,500W portable generator
- Good for: running a miter saw, compressor, a couple of drills, and work lights simultaneously
Mid-size residential (new home construction):
- Typical load: 7,000 to 15,000 watts
- Generator size: 12,000 to 17,500W portable or towable generator
- Good for: full framing crew tools, temporary lighting throughout the structure, and a small concrete vibrator
Commercial construction:
- Typical load: 25,000 to 100,000+ watts
- Generator size: 25kW to 100kW+ towable generator
- Good for: welders, temporary HVAC, office trailers, heavy-duty lighting, and multiple crews running power tools
A common mistake: buying or renting a generator based on “peak” wattage instead of “rated” or “continuous” wattage. That 10,000W generator on the spec sheet might only deliver 8,000W continuously. Always size based on the continuous rating, not the peak number that the manufacturer puts in the big font on the box.
Also, think about fuel type. Gasoline generators are the most common for smaller jobsites, but diesel is the standard for anything above 10kW. Diesel generators are more fuel-efficient, last longer under continuous load, and the fuel is safer to store on a construction site. Propane is another option for sites where emissions or noise are a concern.
One more thing to consider: single-phase versus three-phase power. Most residential tools run on single-phase 120V or 240V. But commercial and industrial equipment, including large air compressors, concrete batch plants, and certain welders, often requires three-phase power. Make sure your generator matches the phase requirements of your equipment, because plugging three-phase equipment into a single-phase generator will not end well.
Setting Up Temporary Power Systems
There is more to temporary power than dropping a generator on site and running extension cords everywhere. A well-planned temporary power system keeps your crews productive and your jobsite safe.
Option 1: Generator-based temporary power
Thousands of contractors have made the switch. See what they have to say.
This is the go-to for sites without utility access or for the early phases of a project before the permanent electrical service is installed. Your setup should include:
- The correctly sized generator (see above)
- A temporary power distribution panel or spider box
- Proper grounding per NEC and local codes
- GFCI protection on all 120V receptacles
- Appropriately rated extension cords (12 AWG minimum for most tools, 10 AWG for longer runs)
Spider boxes are worth their weight in gold on construction sites. They take the generator’s output and distribute it to multiple GFCI-protected outlets, so you are not daisy-chaining extension cords or using sketchy power strips in the rain. They also give you circuit breaker protection, which means one bad tool does not kill power to the entire site.
Option 2: Temporary utility service (temp power pole)
For projects lasting more than a few weeks, a temporary power pole connected to the local utility grid is often the smarter financial play. Yes, there is an upfront cost for the pole installation, meter setup, and utility connection fees (typically $500 to $2,000 depending on your area), but you avoid daily fuel costs, generator maintenance, and the noise that comes with running a diesel engine all day.
To get a temp power pole, you will need to:
- Apply to your local utility company (lead times vary from 1 to 6 weeks)
- Have a licensed electrician install the pole, meter base, and panel to code
- Pass an electrical inspection
- Coordinate with the utility for the final hookup
Option 3: Hybrid approach
On many projects, the best approach is a combination. Use a generator during the early site work and foundation phase when utility power is not available, then transition to a temp power pole once the utility service is connected. This is especially common on new construction projects where scheduling matters.
No matter which option you choose, plan your temporary power layout before breaking ground. Map out where the generator or power pole will sit, where distribution panels go, and how cords will be routed to avoid trip hazards and keep them out of traffic areas. For a broader look at distribution panels, task lighting, and site-wide electrical planning, see our construction temporary power and lighting guide. Temporary power should be on the agenda at your pre-construction meetings so everyone knows the plan before mobilization. This kind of upfront planning is part of running a well-organized jobsite, and it ties directly into overall jobsite organization.
Budgeting and Cost Planning for Temporary Power
Temporary power is a real line item, and too many contractors bury it in general conditions or forget about it entirely until the bills start stacking up. If you are serious about keeping your projects profitable, you need to budget for temporary power just like you budget for materials and labor.
Here is what to account for:
Generator costs:
- Rental: $50 to $150/day for portable units, $500 to $2,000/month for towable units
- Fuel: $20 to $100+ per day depending on load and generator size
- Maintenance: oil changes, filter replacements, and general wear items
- Delivery and pickup fees if renting a towable unit
Temp power pole costs:
- Pole and panel installation: $800 to $3,000
- Utility connection fees: $200 to $1,500
- Monthly electricity: varies by usage, but typically $100 to $500/month on residential projects
- Removal and site restoration at project end
Hidden costs people forget:
- Extension cords and distribution equipment (spider boxes, panels)
- GFCI devices and replacement breakers
- Fuel delivery charges for remote sites
- Downtime costs when generators fail or run out of fuel
If your projects involve significant electrical work, our free electrical estimate template can help you build out that scope with the right line items.
When you are putting together your estimate, break temporary power out as its own cost code. This makes it visible in your job costing reports and lets you track actual spend against your budget in real time. If you have been estimating temporary power as a flat percentage of the job, start tracking actuals and you will be surprised at how much it varies between projects.
For a deeper look at keeping your project finances on track, check out our guide on construction budget management. Getting granular with cost tracking is how you stop leaving money on the table.
Safety and Code Compliance
Temporary electrical systems on construction sites are one of the top sources of OSHA citations, and for good reason. Electrical hazards cause roughly 8% of all construction fatalities each year. This is not something you can afford to get sloppy with.
OSHA requirements you need to know:
- GFCI protection is mandatory on all 120V, single-phase, 15- and 20-amp receptacle outlets that are not part of the permanent wiring of the building. No exceptions. You can use GFCI receptacles, GFCI breakers, or a portable GFCI device, but the protection must be there.
- Assured Equipment Grounding Conductor Program (AEGCP) is the alternative to GFCI protection, but it requires a written program, regular testing, and detailed records. Most contractors just go with GFCIs because it is simpler.
- Temporary wiring must be protected from physical damage. Do not run extension cords through doorways where they get crushed, across driveways where trucks roll over them, or through standing water. Use cord covers, overhead runs, or buried conduit where needed.
- All temporary wiring must be properly grounded. This includes the generator frame, distribution panels, and every cord and tool on site.
- Regular inspections of temporary electrical equipment should be part of your safety inspection program.
NEC (National Electrical Code) requirements:
The NEC has specific provisions for temporary power installations in Article 590. Key points include:
- Temporary wiring is allowed during construction for up to 90 days for holiday lighting and similar, but construction-related temporary wiring can remain for the duration of the project
- All branch circuits must have overcurrent protection
- Receptacles must be of the grounding type
- Temporary power feeders must be supported and routed to prevent damage
Practical safety tips from the field:
- Assign one person on the crew to check generators and temporary electrical at the start of each shift
- Keep spare GFCIs on site because they trip and fail more often than you think
- Never use damaged extension cords. Cut them in half and throw them away so nobody tries to tape them up and reuse them
- Post the generator location and temporary panel locations on your site safety plan
- Make temporary power a topic in your weekly safety meetings
The bottom line: temporary power is not something you set up once and forget about. It needs ongoing attention throughout the project. Build that into your safety management approach and document everything.
Planning Temporary Power Into Your Project Schedule
The best time to plan temporary power is before you break ground, not the day your framing crew shows up and asks where to plug in. Temporary power should be a line item on your project schedule, with clear milestones and responsibilities assigned.
Here is a practical timeline for most residential and light commercial projects:
Pre-construction (2 to 6 weeks before start):
- Calculate power requirements based on your scope and crew plan
- Decide between generator, temp power pole, or hybrid approach
- If going with a temp pole, submit the utility application now (lead times can be long)
- Order or reserve generator rental equipment
- Include temporary power costs in your project estimate
Site mobilization (week 1):
- Generator arrives and is positioned on a stable, level surface away from excavations and high-traffic areas
- Spider box or temporary panel is connected and tested
- Extension cord routes are planned and communicated to all crews
- GFCI protection is verified on every outlet
- Fuel supply schedule is established
Foundation through framing:
- Monitor fuel consumption and adjust delivery schedule as needed
- Coordinate temp power pole installation if transitioning from generator
- Adjust cord routing as the structure takes shape and work areas shift
Rough-in through finishes:
- Transition to permanent electrical panel when available (coordinate with your electrician)
- Reduce generator use as permanent circuits come online
- Remove temporary wiring as areas reach final inspection readiness
Project closeout:
- Remove all temporary power equipment
- Disconnect and remove temp power pole if applicable
- Document final temporary power costs for your job cost records
Building this into your schedule means fewer surprises and less scrambling. If you are looking for better ways to manage your overall project timeline, take a look at how construction scheduling software can help you keep every trade and milestone organized.
And here is one more thing worth mentioning: if you are still tracking all of this with spreadsheets and phone calls, you are working harder than you need to. Construction management software like Projul gives you a single place to manage your schedules, budgets, equipment, and communication so nothing falls through the cracks. When your temporary power setup is tied to your project schedule and your budget tracking, you catch problems before they become expensive.
Getting temporary power right is not glamorous work. Nobody is going to hand you a trophy for having a well-organized spider box and a full fuel tank. But the contractors who plan this stuff properly are the same ones who finish on time, stay on budget, and keep their crews safe. And at the end of the day, that is what keeps your construction company from becoming a statistic.
Book a quick demo to see how Projul handles this for real contractors.
Plan your power. Size your generators correctly. Stay compliant. And keep building.
Frequently Asked Questions
What size generator do I need for a construction site?
How do I calculate generator wattage for construction tools?
When should I get a temporary power pole instead of a generator?
Can I run a welder and a table saw on the same generator?
What are OSHA requirements for temporary power on construction sites?
Related Articles

How to Implement Construction Software Without Losing Your Mind
Most construction software rollouts fail. Not because the software is bad, but because the rollout was rushed. Here are...
Read More →
How Selections Can Pay for Themselves in Three Easy Steps
Most contractors lose thousands each year on wrong material orders, slow client decisions, and missed upsell chances....
Read More →
3 Free Concrete Estimate Templates for Every Pour Type (2026)
Three ready-to-use concrete estimate templates with realistic line items, material costs, labor rates, and markup...
Read More →