Helical Pile & Micropile Foundation Guide for Contractors | Projul
Construction Helical Pile and Micropile Foundation Guide
Not every job site gives you good soil. Sometimes you show up, the geotech report lands on your desk, and the first thing you see is 30 feet of soft clay sitting on top of anything worth bearing on. Spread footings aren’t going to cut it, and you need a deep foundation solution that actually works within your budget and schedule.
That’s where helical piles and micropiles come in. These two systems have been gaining serious traction in residential, commercial, and infrastructure work over the past decade. They’re not new technology by any stretch, but more contractors are running into them now because engineers are specifying them on projects where traditional driven piles or drilled shafts would be overkill, too expensive, or just not practical.
If you’re a GC who hasn’t worked with these systems before, or if you’ve seen them on plans and weren’t sure what you were looking at, this guide is for you. We’ll cover what each system is, when to pick one over the other, how installation works, what the costs look like, and how to coordinate these specialty subs on your job site.
What Are Helical Piles and How Do They Work?
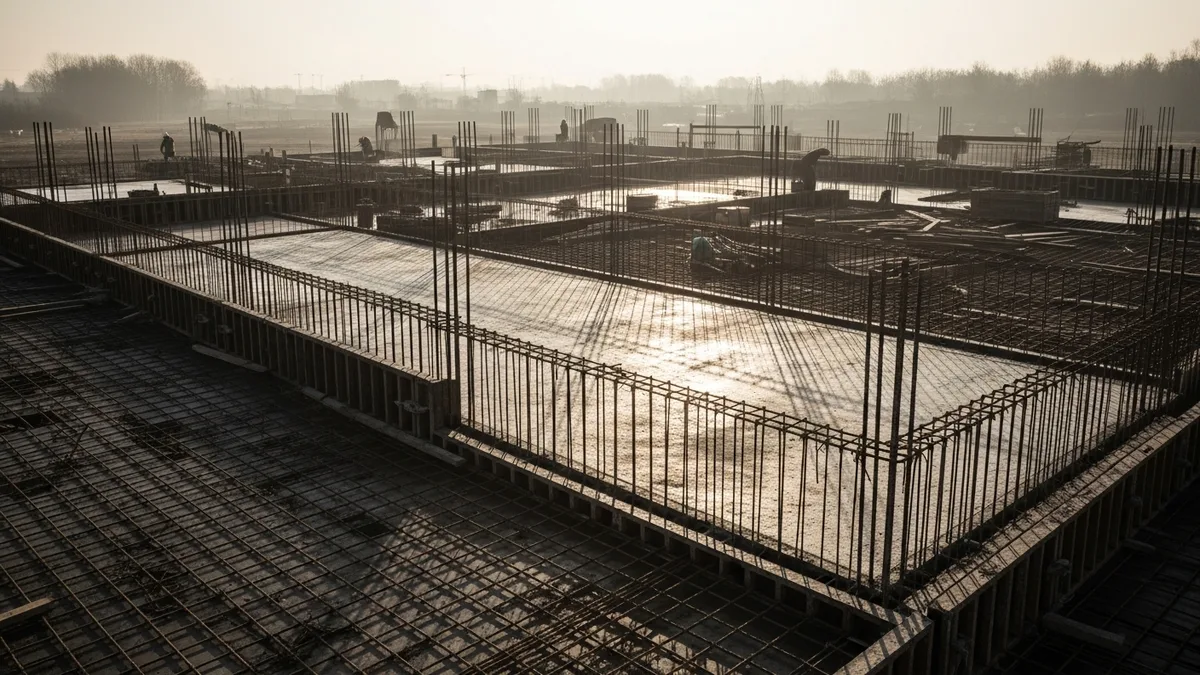
A helical pile is basically a giant steel screw. It’s a round or square steel shaft with one or more helix plates (the spiral-shaped bearing plates) welded along its length. The whole assembly gets driven into the ground by a hydraulic torque motor attached to an excavator or skid steer. As the motor turns the pile, the helix plates pull it down into the soil, kind of like turning a wood screw into a board.
The helix plates are what provide the bearing capacity. Each plate acts like an individual footing bearing against the undisturbed soil below it. The number of plates, their diameter, and the shaft size all get sized by the engineer based on the required load capacity and soil conditions from the geotech report.
Here’s what makes helical piles attractive for a lot of projects:
- No spoils. Unlike drilled shafts or auger cast piles, helical piles don’t bring soil to the surface. There’s no mess, no hauling, and no disposal costs.
- Quiet installation. No impact hammer means no vibration complaints from neighbors or damage to adjacent structures. This is a huge deal on renovation work and urban infill projects.
- Immediate load capacity. You can load a helical pile right after installation. No waiting for concrete to cure like you would with a drilled shaft or micropile.
- All-weather installation. Rain, cold, whatever. You can install helical piles in conditions that would shut down a concrete pour.
Shaft sizes typically range from 2-7/8 inches (for light residential work like deck footings and additions) up to 10 or even 12 inches for heavier commercial applications. Helix plate diameters usually run from 8 inches up to 16 inches. The engineer picks the configuration based on soil strength and required capacity.
One thing to understand about helical piles is the torque-to-capacity relationship. During installation, the installer monitors the torque required to advance the pile. That installation torque correlates directly to the pile’s load capacity. Higher torque means better soil, which means more capacity. This gives you real-time quality control during installation, which is something you don’t get with most other foundation systems.
What Are Micropiles and When Do You Need Them?
Micropiles (sometimes called mini-piles or pin piles) are small-diameter deep foundation elements that combine steel reinforcement with cementitious grout. They’re typically 5 to 12 inches in diameter, though some go larger. Installation involves drilling a hole, placing a high-strength steel casing or rebar cage, and then pumping grout into the hole under pressure.
The load capacity of a micropile comes from the bond between the grout and the surrounding soil or rock. When grout is injected under pressure, it permeates into the pore spaces and fractures in the surrounding ground, creating a grout-to-ground bond zone that develops significant friction. This is why micropiles work so well in rock or dense soils where helical piles might struggle to advance.
Micropiles really shine in a few specific situations:
- Rocky ground. If you’ve got shallow bedrock with variable depth, or boulders scattered through the soil profile, micropiles can drill right through it. Helical piles will refuse on rock.
- Very high loads. Micropiles can handle compression loads of 200 kips, 500 kips, and beyond. Some systems are rated for over 1,000 kips per pile. That’s heavy commercial and infrastructure territory.
- Restricted access. Micropile drilling rigs can be sized small enough to work inside existing buildings, in basements, and in tight urban lots where you can’t fit the equipment needed for driven piles or drilled shafts.
- Underpinning existing structures. When you need to add capacity under a building that’s already standing, micropiles are often the go-to choice. The small diameter and low vibration mean you can work right next to and under existing foundations without causing more damage. If you’ve dealt with foundation repair work before, you know how critical this is.
- Seismic retrofitting. Micropiles handle tension and lateral loads well, which makes them popular for seismic upgrade projects.
The tradeoff? Micropiles cost more, take longer to install, and require a cure time before loading (typically 3 to 7 days for the grout). You also need a specialty drilling contractor with the right equipment and experience. This isn’t something your excavation sub is going to figure out on the fly.
Choosing Between Helical Piles and Micropiles
Read real contractor reviews and see why Projul carries a 9.8/10 on G2.
The decision between these two systems usually comes down to four factors: soil conditions, load requirements, site constraints, and budget.
Soil conditions are the biggest driver. Pull out the geotechnical report and look at the boring logs. If you’ve got cohesive soils (clays and silts) or granular soils (sands and gravels) without significant obstructions, helical piles will probably work fine. If you’ve got cobbles, boulders, cemented layers, or need to socket into bedrock, you’re looking at micropiles.
Load requirements matter a lot. Helical piles in common configurations handle loads from about 25 kips to around 150 kips per pile. That covers most residential work, light commercial, and plenty of mid-range commercial projects. Once you get above 150 to 200 kips per pile, micropiles start making more sense. For heavy industrial or infrastructure loads, micropiles are often the only small-diameter option.
Site constraints can push you one direction or the other. Both systems work well in limited-access conditions, but micropile rigs can be configured for lower headroom situations (as low as 6 feet in some cases). If you’re working inside an existing building or under a bridge deck, that matters. On the other hand, if you’re working on a wide-open site with easy access, helical piles will install faster and cleaner.
Budget is always part of the conversation. Helical piles typically cost one-third to one-half of what micropiles cost on a per-pile basis. If the soil conditions support helical piles and the loads are within range, the cost savings are significant. But don’t let price alone make the decision. If helical piles can’t reach adequate capacity in your soils, the “savings” evaporate fast when you’re dealing with failures, redesigns, and delays.
Here’s a practical rule of thumb I’ve seen work well on many projects: start with helical piles as the default assumption for light to medium loads in cooperative soils. Move to micropiles when the geotech report shows rock, obstructions, or when your structural loads push past what helical piles can handle economically.
Your structural engineer and geotechnical engineer should be making the final call, but as the GC, you need to understand the tradeoffs so you can have informed conversations about schedule, cost, and constructability.
Installation Process and Equipment Requirements
Helical Pile Installation
The installation process for helical piles is straightforward compared to most deep foundation work. Here’s the typical sequence:
-
Layout and survey. Pile locations get staked based on the foundation plan. You need accurate coordinates because the pile caps or brackets connecting to the structure above don’t have much tolerance for misalignment.
-
Equipment mobilization. The installer brings a hydraulic torque motor (also called a drive head) mounted on an excavator, skid steer, or mini excavator. The machine size depends on the required installation torque. Small residential piles might need 5,000 to 10,000 ft-lbs of torque. Larger commercial piles can require 50,000 ft-lbs or more.
-
Pile installation. The lead section (the piece with the helix plates) gets positioned vertically at the stake point, and the motor starts turning. As the pile advances, the installer monitors torque, depth, and plumbness. When the lead section is fully embedded, extensions are added and installation continues until the target depth and torque are reached.
-
Torque monitoring and documentation. The installer records torque readings at regular intervals (usually every foot or every 5 feet). These logs become part of the project documentation and are used to verify capacity. Most installers use digital torque monitoring systems that generate automatic logs.
-
Pile cap or bracket installation. Once the pile is at final depth and elevation, it gets cut to grade and fitted with whatever connection hardware the engineer specified.
A good two-person crew can install anywhere from 10 to 30+ helical piles per day depending on pile size, soil conditions, and depth. That production rate is one of the biggest advantages of the system.
Micropile Installation
Micropile installation is more involved and requires more specialized equipment:
-
Drill rig setup. A micropile drill rig (rotary, percussion, or combination) gets positioned at each pile location. These rigs range from compact track-mounted units to large truck-mounted systems depending on the pile diameter and depth.
-
Drilling. The hole gets drilled to the design depth using the appropriate method for the soil and rock conditions. In soil, a hollow-stem auger or casing advancer is common. In rock, a down-the-hole hammer or rotary percussive bit does the work.
-
Reinforcement placement. A high-strength steel casing, threadbar, or rebar cage gets lowered into the drilled hole. The reinforcement type and size depend on the design loads.
-
Grouting. Neat cement grout (water-to-cement ratio typically around 0.45 to 0.50) gets pumped into the hole from the bottom up. On Type B and higher micropiles, the grout is injected under pressure through a tremie pipe or through ports in the casing to create an enlarged grout zone and better bond.
-
Cure and testing. The grout needs to reach a minimum compressive strength (usually 4,000 psi) before load testing or structural loading. This typically takes 3 to 7 days depending on the mix design and temperature.
Production rates for micropiles are slower than helical piles. A typical crew might install 3 to 8 micropiles per day depending on depth, diameter, soil conditions, and testing requirements. Planning your construction schedule with these production rates in mind is critical.
Cost Factors and Estimating Deep Foundation Work
Estimating deep foundation work is different from estimating conventional foundations. There are more variables, more specialty subs involved, and more potential for conditions to differ from what the geotech report shows. Here’s how to think about costs for both systems.
Helical Pile Costs
The main cost components for helical piles include:
- Mobilization/demobilization. Typically $1,500 to $5,000 depending on distance and equipment size.
- Pile materials. The steel shaft, helix plates, extensions, and pile caps. Material cost varies with steel prices but typically runs $8 to $25 per foot of installed pile.
- Installation labor and equipment. Usually $7 to $15 per foot, covering the operator, helper, and machine time.
- Load testing. If required, budget $2,000 to $10,000 per test depending on the load magnitude and test type.
Total installed cost per helical pile on a typical project runs $1,500 to $5,000 each. A residential project with 15 to 20 piles might have a total helical pile budget of $25,000 to $60,000. For accurate numbers on your specific project, you need to get bids from qualified installers and make sure they’ve reviewed the geotech report.
Micropile Costs
Micropile costs are higher across the board:
- Mobilization/demobilization. $5,000 to $25,000 or more due to larger, heavier equipment.
- Drilling. $30 to $80 per foot depending on soil and rock conditions, diameter, and method.
- Steel and grout materials. $15 to $40 per foot for casing, reinforcement, and grout.
- Load testing. $5,000 to $25,000 per static load test.
Total installed cost per micropile typically ranges from $5,000 to $20,000 or more, depending on diameter, depth, and loading requirements.
When putting together your estimates, make sure you’re accounting for the full scope. Deep foundation work often triggers additional costs that aren’t in the pile installer’s bid: site preparation, access roads, spoils removal (for micropiles), concrete pile caps, grade beams connecting the piles, and the structural engineer’s inspection fees.
Also, build contingency into your numbers. Soil conditions vary, and what the geotech report shows at boring locations may not match what you find at every pile location. A 10 to 15 percent contingency on deep foundation work is common and often necessary. If you want to keep your projects from going sideways financially, good cost tracking practices make all the difference.
Managing Deep Foundation Subs and Project Coordination
Helical pile and micropile installers are specialty subcontractors. Most general contractors don’t self-perform this work, which means you need to know how to find, vet, and manage these subs effectively. If you haven’t already, check out our guide on subcontractor management for the fundamentals.
Finding Qualified Installers
For helical piles, look for installers who are certified by the manufacturer of the pile system being specified. Companies like Hubbell/Chance, Magnum Piering, and Ram Jack all have certified installer networks. Certification means the installer has been trained on that specific system and carries the manufacturer’s warranty backing.
For micropiles, you want contractors who are members of the Deep Foundations Institute (DFI) and have a track record on similar projects. Ask for references on projects with comparable soil conditions, pile sizes, and load requirements. Micropile installation is highly technique-dependent, and experience matters more than it does for almost any other foundation system.
Pre-Construction Coordination
Before your deep foundation sub shows up on site, you need to have these items squared away:
- Geotech report distributed. Make sure the pile installer has the full geotechnical report, not just the summary page. They need to see the boring logs, lab test results, and the geotech’s recommendations.
- Foundation plan review. Sit down with the pile installer and the structural engineer to review pile locations, required capacities, minimum embedment depths, and any special requirements. This meeting prevents a lot of problems.
- Site access plan. How is the equipment getting to each pile location? Are there overhead power lines, underground utilities, or existing structures in the way? Helical pile equipment is relatively compact, but micropile drill rigs can be large and heavy. Plan the installation sequence to minimize repositioning.
- Utility locates. This should be obvious, but it bears repeating. Deep foundation elements go deep into the ground. You need thorough utility locates, including private utilities that may not show up on public locator services.
- Inspection coordination. Know who needs to be on site during installation. The geotechnical engineer of record will typically want to observe installation, review torque logs or drilling records, and witness any load tests. Schedule these inspections in advance so you’re not holding up a $2,000-per-day drill crew waiting for the inspector.
During Installation
Your job during installation is to keep the site running smoothly and make sure the documentation is getting done. Keep an eye on:
- Production rates vs. schedule. Are piles going in at the expected rate? If not, find out why early.
- Torque or drilling logs. The installer should be providing daily logs showing depth, torque (for helical piles), or drilling parameters (for micropiles) at each pile location.
- Field changes. Soil conditions will sometimes differ from the geotech report. Piles may need to go deeper or shallower than planned. These field changes need to be documented and approved by the engineer of record. Don’t let the installer make changes without engineering approval.
- Material documentation. Collect mill certificates for the steel, grout batch tickets, and any other material certifications required by the spec.
Post-Installation
After installation is complete, gather all documentation into a foundation package: as-built pile locations with coordinates, installation logs, load test reports, material certifications, and the geotechnical engineer’s observation report. This package becomes part of your permanent project record and will be needed for inspections, certificate of occupancy, and any future warranty claims.
Good documentation on deep foundation work protects you, your client, and everyone else involved. Don’t skip it, and don’t let your subs skip it either. Staying organized with proper project management tools makes it a lot easier to keep everything in order when you’ve got multiple specialty subs, engineers, and inspectors all involved on the same phase of work.
See how Projul makes this easy. Schedule a free demo to get started.
Deep foundation work doesn’t have to be intimidating. Whether you’re dealing with helical piles on a residential addition or micropiles on a commercial building over questionable soil, the fundamentals are the same: understand the soil, pick the right system, hire qualified installers, coordinate the engineers, and document everything. Get those pieces right, and your deep foundation phase will be one of the smoother parts of your project.
Frequently Asked Questions
What is the difference between a helical pile and a micropile?
How deep do helical piles and micropiles need to go?
How much do helical piles cost compared to micropiles?
Do helical piles and micropiles require load testing?
Can helical piles be used for commercial buildings?
Related Articles

Construction Septic System Installation: What Every GC Needs to Know
Septic systems on rural builds bring unique scheduling, permitting, and soil challenges that can wreck your timeline if...
Read More →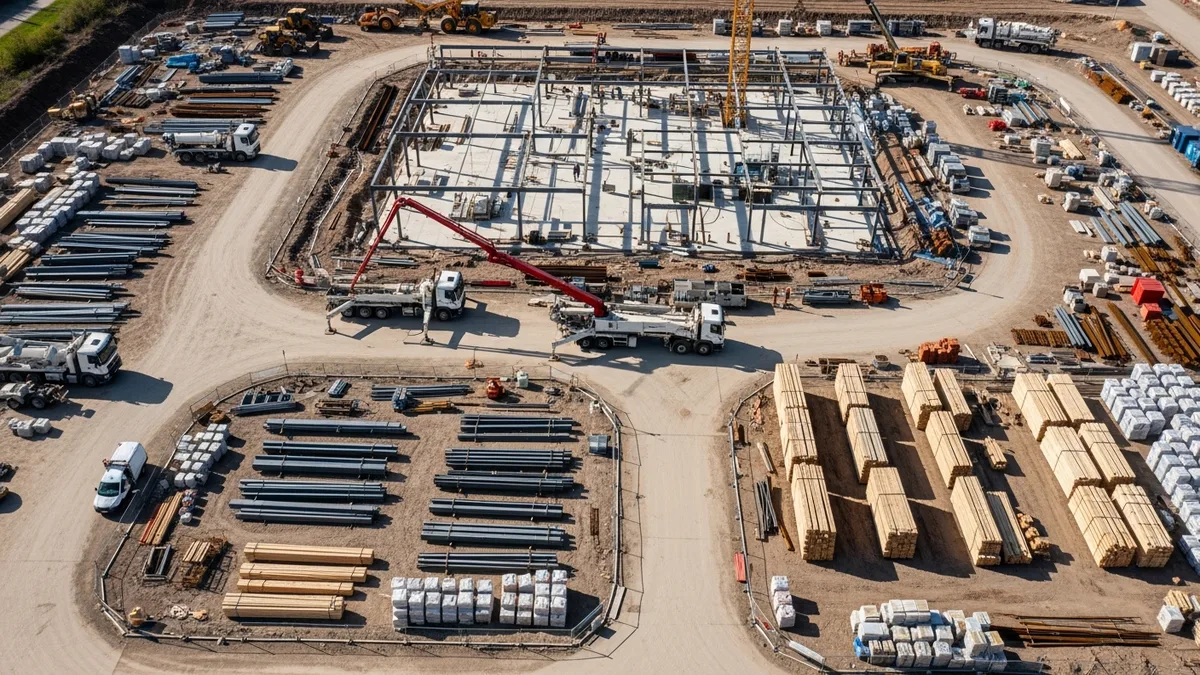
Construction Painting Project Management: Coordinating Interior and Exterior Phases
Painting is one of those trades that touches every other trade on the schedule. Get the sequencing wrong, and you're...
Read More →
Epoxy Flooring and Industrial Coatings: A Contractor's Complete Guide
Epoxy flooring and industrial coatings are high-margin work when you get the process right and a fast way to lose money...
Read More →