Tile and Stone Installation Best Practices
Tile and stone installation is one of those trades where the difference between good work and bad work shows up fast. A bathroom floor that starts cracking six months after move-in. Shower walls that develop water damage behind them. Natural stone countertop edges that chip because nobody sealed them properly. These aren’t cosmetic issues. They’re expensive callbacks that eat your profit and damage your reputation.
Whether you’re a tile sub handling your own crews or a GC coordinating tile and stone phases on a larger build, the fundamentals matter more than anything else. Fancy patterns and imported marble mean nothing if the substrate prep was rushed or the waterproofing was skipped.
This guide covers the practices that actually keep tile and stone installs looking good years after you walk off the job. No shortcuts, no “it’ll be fine” moments. Just the stuff that works.
Substrate Preparation: Where Every Good Install Starts
If you take one thing away from this entire guide, let it be this: substrate prep is everything. You can use the best tile in the world, the most expensive thin-set on the market, and a crew with 30 years of experience. None of it matters if the surface underneath isn’t right.
Flatness Tolerances
The Tile Council of North America (TCNA) sets clear standards here, and they’re not suggestions. For standard tiles under 15 inches on any edge, your substrate needs to be flat within 1/4 inch over a 10-foot span. For large format tiles (anything with an edge longer than 15 inches), that tightens to 1/8 inch over 10 feet.
Miss these tolerances and you’ll fight lippage the entire install. Leveling clips help, but they’re a band-aid, not a fix for a wavy substrate. The real fix is self-leveling compound, grinding high spots, or filling low spots before any tile gets set.
Concrete Substrates
Fresh concrete needs to cure for a minimum of 28 days before tile installation. Even after 28 days, you need to check moisture levels. A calcium chloride test should read below 3 to 5 pounds per 1,000 square feet per 24 hours, depending on the thin-set and tile manufacturer’s requirements.
Concrete also needs to be clean. And I mean actually clean, not “looks clean.” Oil, curing compounds, sealers, paint, drywall mud, and adhesive residue all prevent proper thin-set bond. A good scrub with a concrete degreaser and mechanical preparation (grinding or shot-blasting) goes a long way.
If you’re working with a concrete slab that has radiant heating, make sure the system has been commissioned and cycled before tile goes down. Thermal expansion on an uncycled system can crack tiles and destroy grout joints. Your scheduling process needs to account for this commissioning window.
Plywood and Wood Substrates
Never install tile directly over plywood. Full stop. You need an uncoupling membrane or cement backer board (minimum 1/4 inch) over a minimum 3/4 inch plywood subfloor. The total assembly thickness matters because wood moves with humidity changes and tile does not. That differential movement will crack everything if there’s no decoupling layer.
Screw patterns on backer board matter too. Screws every 8 inches on center in the field and every 6 inches on edges, using backer board screws (not drywall screws). Tape and thin-set all seams. These details take an extra 30 minutes per room and save you a callback that costs 10 times that.
Existing Tile and Other Surfaces
Installing tile over existing tile is possible but risky. The existing tile needs to be fully bonded (no hollow spots), the surface needs to be roughed up with a grinder, and you need a modified thin-set rated for tile-over-tile applications. If more than 5% of the existing tile is loose or hollow, tear it all out. The labor to remove it is cheaper than the callback when your new tile starts popping off.
Waterproofing and Moisture Management
Water is the enemy of every tile installation in a wet area. Not “maybe the enemy” or “sometimes a concern.” The enemy. Period. The number of shower failures I’ve seen that trace back to skipped or poorly done waterproofing would fill a book.
Shower and Tub Surrounds
Every shower needs a waterproof membrane. Cement board is not waterproof. Say it again for the guys in the back: cement board is not waterproof. It’s moisture-resistant, which means it won’t fall apart when it gets wet, but water passes right through it and into the wall cavity behind.
You have two main options for waterproofing:
Liquid-applied membranes like RedGard, Hydroban, or AquaDefense. These roll or brush onto the substrate and create a monolithic waterproof barrier. Two coats minimum, letting the first coat dry completely before applying the second. Check the mil thickness with a wet film gauge. Most products require 25 to 30 mils when dry.
Sheet membranes like Kerdi, GoBoard, or NobleSeal TS. These are installed with thin-set and provide both waterproofing and an uncoupling layer. Sheet membranes are faster to install in large areas but require careful attention at seams, corners, and penetrations.
Whichever system you choose, stay within one manufacturer’s system. Mixing a Schluter drain with a Laticrete membrane and a Custom Building Products thin-set is asking for finger-pointing when something fails. Nobody will honor a warranty on a mixed system.
Floor Drains and Transitions
The connection between your waterproof membrane and the drain is the single most failure-prone detail in any shower. Use a bonding flange drain that integrates with your membrane system. Pre-slope the mud bed (minimum 1/4 inch per foot toward the drain) and make sure your membrane laps over the bonding flange by the manufacturer’s required distance.
At the shower curb, the membrane must wrap over the top of the curb and down the outside face. I’ve pulled apart shower curbs where the membrane stopped at the inside face. Water wicked over the top, soaked the curb framing, and rotted the subfloor on the outside of the shower. That’s a $3,000 to $5,000 repair on a $1,500 shower install.
For tub-to-tile transitions and changes of plane, use preformed corners and bands from your membrane manufacturer. Don’t try to make flat membrane work in a 90-degree corner. It wrinkles, bridges, and eventually leaks.
Thin-Set Selection and Mixing
Thin-set is not all the same. The bag at the big box store for $8 is not the same product as the $30 bag from your tile supply house, and the difference shows up about six months after installation.
Types of Thin-Set
Unmodified (dry-set) mortar is a basic cement and sand mix. It works for standard tiles on concrete substrates where you don’t need flexibility. It’s also what you use with most uncoupling membranes (like Kerdi) because unmodified mortar cures by hydration, and the impermeable membrane traps moisture that allows proper curing.
Modified (polymer-modified) mortar has latex or acrylic polymers added for better adhesion, flexibility, and water resistance. Use modified thin-set for large format tiles, natural stone, tile on plywood assemblies (over backer board), and anywhere you need extra bond strength. Don’t use modified thin-set directly against impermeable membranes unless the manufacturer specifically approves it, because the polymer needs air to cure and an impermeable surface traps moisture.
Rapid-set mortar cures in 2 to 4 hours instead of 24. It costs more but can be worth it on projects where you need to grout the same day or where the space needs to be back in service quickly. A good project schedule often dictates whether rapid-set makes financial sense.
Mixing and Application
Mix thin-set with a 1/2-inch drill and a mixing paddle. Not by hand. Not with a margin trowel in a bucket. By hand mixing leaves lumps and inconsistent polymer distribution. Use clean, cool water (not hot) and mix to the consistency of smooth peanut butter. Then let it slake for 5 to 10 minutes. Slaking lets the polymers fully activate. After slaking, remix briefly without adding more water.
Once mixed, most thin-set has a pot life of 2 to 3 hours and an open time (time before the ridges skin over) of 15 to 30 minutes depending on temperature and humidity. If you press a tile into thin-set and pull it back off and less than 80% of the back is covered, the thin-set has skinned over. Scrape it off and lay fresh.
For the trowel, match the notch size to the tile size:
- Tiles up to 4x4 inches: 1/4 x 1/4 inch square notch
- Tiles 4x4 to 12x12 inches: 1/4 x 3/8 inch or 1/2 x 1/2 inch square notch
- Tiles 12x12 to 18x18 inches: 1/2 x 1/2 inch square notch
- Tiles over 18x18 inches: 1/2 x 1/2 inch or 3/4 x 3/4 inch square notch, plus back-buttering
Trowel the thin-set in straight, parallel lines (not swirls). Straight ridges collapse evenly when the tile is pressed in, giving you full coverage. Swirl patterns create air pockets.
Layout Planning and Tile Setting
The actual tile setting is where craftsmanship meets planning. And it really is about planning. The best setters I’ve worked with spend more time laying out a job than they do actually sticking tiles to the wall.
Dry Layout
Always dry-lay your first few rows before committing any thin-set. Snap chalk lines, set tiles along both axes of the room, and check where your cuts fall. The goal: avoid slivers. A 2-inch cut against a wall looks intentional. A 1/2-inch sliver looks like a mistake and is nearly impossible to cut cleanly.
Adjust your starting point so that cuts are balanced on both sides of the room. If the room is 11 feet 4 inches wide and your tile is 12 inches, you don’t start against one wall and end with a 4-inch cut on the other side. You start with an 8-inch cut on each side. Balanced cuts look professional even when nobody consciously notices why.
For natural stone with color variation (which is most natural stone), open multiple boxes and mix tiles from different boxes as you go. Don’t install three boxes of dark travertine followed by three boxes of light. That gives you a visible color shift across the room. Mixing creates a natural, random pattern that reads as intentional.
Setting Technique
Spread only as much thin-set as you can tile before it skins over. In hot or dry conditions, that might be 3 to 4 square feet at a time. In a climate-controlled interior, you can usually work 8 to 10 square feet comfortably.
Press tiles into the thin-set with a slight twisting motion (about 1/8 turn). Don’t slide tiles into position because that pushes thin-set up into the grout joint. Use spacers or a leveling system (clips and wedges) to maintain consistent grout joints and reduce lippage.
Periodically pull a tile back up and check your coverage. TCNA standards require minimum 80% thin-set coverage in dry areas and 95% coverage in wet areas and on exterior installations. If you’re not hitting those numbers, adjust your trowel size, back-butter, or slow down.
For walls, start from the bottom and work up. Use a ledger board at the second row height so you can set all the full tiles first, then come back and cut the bottom row to fit. This guarantees a straight, level line at eye height where it matters most. The bottom row, often hidden by a vanity or baseboard, can absorb any floor irregularities.
Specialty Installations
Large format tiles (anything over 15 inches) require a leveling system. Period. Human hands cannot consistently set tiles this size without lippage at the edges. Budget for clips and wedges in your estimate and explain to clients why they’re necessary.
Mosaics on mesh backing need to be fully embedded in the thin-set. The mesh needs complete contact with the mortar. If you can see mesh through the grout joints after setting, pull the sheet back up and use more thin-set. Exposed mesh wicks water and causes the mosaic to delaminate.
Natural stone requires a white thin-set (not gray). Gray thin-set can telegraph through light-colored stone and cause shadowing. It can also stain porous stone permanently. Always use white modified thin-set with natural stone and check with the stone supplier about any specific installation requirements.
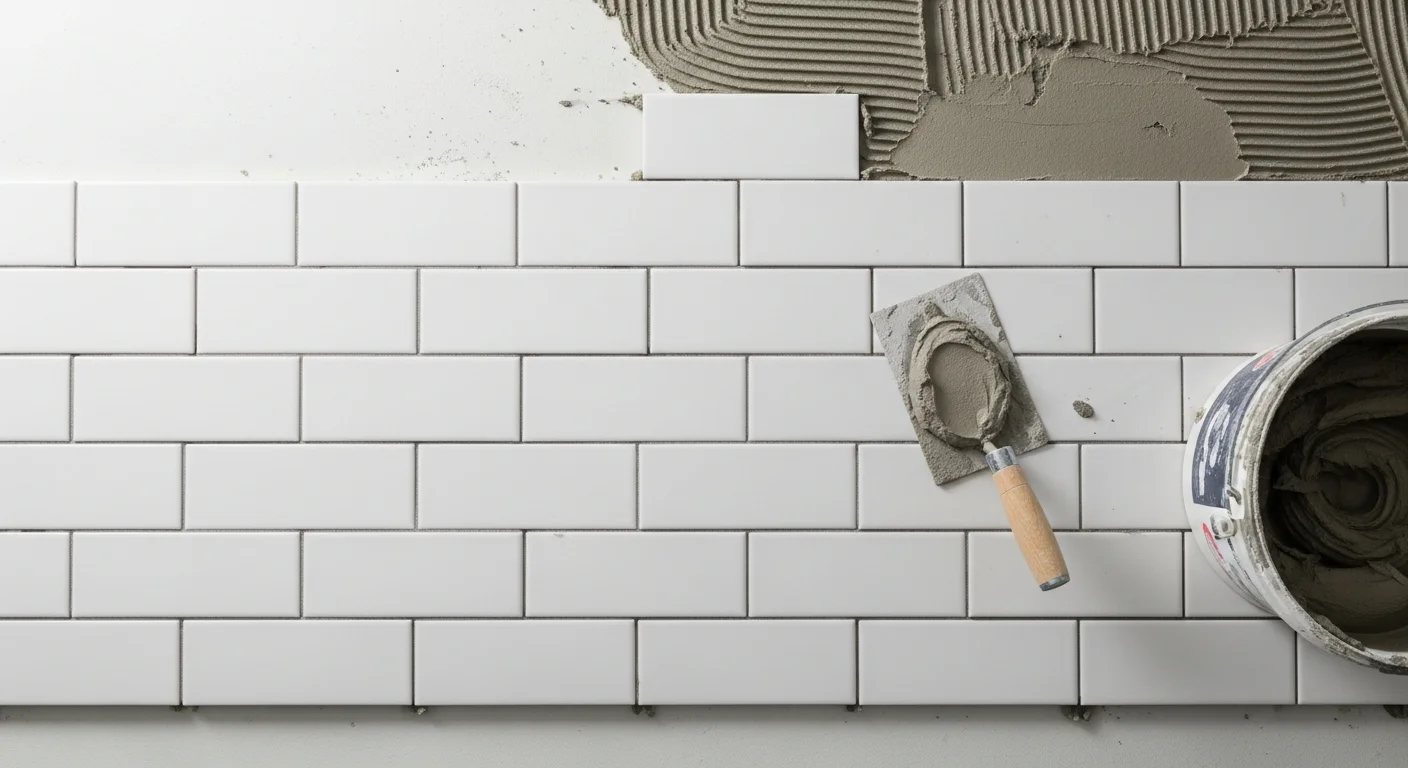
Grouting, Sealing, and Finishing
Thousands of contractors have made the switch. See what they have to say.
Grouting is where a lot of installers get sloppy because they can see the finish line. The tiles are set, the hard part feels done, and it’s tempting to rush through the grout and cleanup. Don’t. Bad grout work ruins an otherwise perfect install.
Grout Selection
Sanded grout for joints 1/8 inch and wider. Unsanded grout for joints narrower than 1/8 inch. Epoxy grout for areas that need maximum stain and water resistance (commercial kitchens, showers, pool surrounds). Epoxy is harder to work with and more expensive, but it doesn’t need sealing and resists mold growth.
For most residential work, a high-performance sanded grout with built-in polymer modification (like Prism, Permacolor Select, or Spectralock) is the best middle ground. These products resist staining better than basic sanded grout without the learning curve of full epoxy.
Color matters more than most contractors think. The grout color can make the same tile installation look completely different. Show clients grout samples against the actual tile before installation, not just a color chart. A grout color that’s too contrasting with the tile will highlight every slight variation in joint width. A grout color close to the tile color is more forgiving and makes the floor read as one continuous surface.
Grout Application
Wait the full cure time on your thin-set before grouting (24 hours minimum, 48 in cool or humid conditions). Remove all spacers and clean any thin-set from the grout joints. Thin-set in a grout joint prevents the grout from bonding to the tile edge and creates a weak point that will crack.
Mix grout to a stiff but workable consistency. Too wet and it will shrink, crack, and be weak. Too dry and it won’t pack into the joints. Work diagonally across the tile with your grout float, pressing the grout into the joints at a 45-degree angle. Then scrape off the excess with the float held nearly vertical, again moving diagonally.
Let the grout set up (usually 15 to 30 minutes depending on conditions) until it’s firm but not hard. Then wipe with a damp (not wet) sponge in circular motions, rinsing the sponge frequently. Two to three passes should clean the tile faces without pulling grout from the joints. A final buff with a dry cloth removes any remaining haze.
Sealing
Cement-based grout needs to be sealed after it has fully cured (typically 28 days, though many sealers allow application after 72 hours). Use a penetrating sealer, not a topical sealer. Penetrating sealers soak into the grout and repel water and stains without changing the appearance. Topical sealers sit on the surface, wear off in traffic areas, and can peel.
Natural stone needs sealing before grouting and again after grouting. The pre-grout seal prevents grout pigment from staining the stone surface. Apply with a foam roller or brush, let it soak in for the manufacturer’s specified time, and wipe off any excess. Test in an inconspicuous area first because some sealers darken certain stones.
Don’t forget expansion joints. Anywhere tile meets a different material, a change of plane, or a fixed object (cabinets, door frames, pipes), you need a movement joint filled with color-matched silicone or urethane sealant, not grout. Grout is rigid. When the building moves (and it will), rigid grout in these locations cracks. Sealant flexes with the movement. TCNA recommends movement joints at least every 20 to 25 feet in each direction for interior installations and every 8 to 12 feet for exterior.
Managing Tile and Stone Projects Profitably
Knowing how to install tile is only half the battle. The other half is managing the business side so you actually make money doing it. Tile work has unique challenges when it comes to estimating, material management, and crew productivity.
Accurate Estimating
Tile bids blow up for three reasons: missed substrate prep, wrong waste factors, and underestimated labor hours.
For substrate prep, always inspect the substrate before pricing the job. Don’t assume the slab is flat or the walls are plumb. Bring a 10-foot straightedge and a level to every site visit. If the substrate needs leveling compound, grinding, or backer board, price it separately as a line item so the client sees exactly what they’re paying for and why.
Waste factors vary by tile type and layout:
- Straight set, standard tile: 10% waste
- Diagonal set: 15% waste
- Large format tile: 10 to 15% waste
- Natural stone with color sorting: 15 to 20% waste
- Mosaic patterns and complex layouts: 15 to 20% waste
- Herringbone or chevron: 15 to 20% waste
Build these into your material quantities from the start. Running short mid-job means a trip to the supplier, possible dye lot variations, and a crew standing around billing time while they wait.
For labor, track your crew’s actual production rates on past jobs. Not the rates from an estimating book published in 2015. If your guys consistently set 150 square feet of 12x24 porcelain per day per installer, use that number, not the “industry average” of 200. Honest labor tracking through your job costing system is what separates contractors who make money from contractors who wonder where it all went.
Material Procurement
Order all tile and stone from the same production lot (dye lot for porcelain, block for natural stone). Different lots can have noticeable color variations that are obvious once installed. Order your full quantity plus waste factor from day one. Coming back for 10 more square feet three weeks later almost guarantees a different lot.
Inspect all materials on delivery. Open every box and check for shade consistency, sizing, and damage. Finding a cracked tile in the box is a minor inconvenience. Finding it set in the floor means a costly replacement.
Store tile and stone flat, on a level surface, in a dry area. Stone especially can warp if stored on edge or in moisture. Acclimate materials to the installation environment for at least 48 hours before installation.
Tracking Production and Managing Costs
Use daily production logs to track square footage installed per crew per day. This data is gold for future estimates and for spotting productivity problems early. If a crew that normally sets 150 square feet per day drops to 80, something is wrong: maybe bad substrate conditions, material issues, or a crew member who needs more training.
Keeping tabs on job costs in real time means you know where you stand on every project before it’s too late to course-correct. Tile and stone projects can get away from you fast when substrate surprises eat up your contingency.
Your subcontractor management process also matters here, especially if you’re a GC coordinating tile subs. Make sure your subs understand the substrate prep expectations, waterproofing requirements, and material handling protocols before they start. A 30-minute pre-install walkthrough prevents thousands in rework.
Want to put this into practice? Book a demo with Projul and see the difference.
Tile and stone installation is a trade where the details really do make the difference. The contractors who follow these best practices don’t just build better tile jobs. They build better businesses, with fewer callbacks, happier clients, and margins that actually hold up from bid day to final invoice.
Frequently Asked Questions
What is the most common cause of tile installation failures?
How flat does a substrate need to be for large format tile?
Do you need a waterproof membrane in every shower installation?
What is back-buttering and when should you do it?
How long should you wait before grouting after tile installation?
Related Articles

Construction Septic System Installation: What Every GC Needs to Know
Septic systems on rural builds bring unique scheduling, permitting, and soil challenges that can wreck your timeline if...
Read More →
Construction Painting Project Management: Coordinating Interior and Exterior Phases
Painting is one of those trades that touches every other trade on the schedule. Get the sequencing wrong, and you're...
Read More →
Epoxy Flooring and Industrial Coatings: A Contractor's Complete Guide
Epoxy flooring and industrial coatings are high-margin work when you get the process right and a fast way to lose money...
Read More →