Construction Insulation Types & Install Guide
If you’ve been running jobs for more than a few years, you already know that insulation is one of those phases everyone ignores until it causes a problem. It sits between the exciting stuff (framing going up, drywall getting hung) and it’s easy to treat it like an afterthought. But get insulation wrong and you’re dealing with failed inspections, energy code violations, callback complaints about hot and cold spots, and HVAC systems that can’t keep up.
This guide is written for GCs who want to understand the major insulation types, know when each one makes sense, and keep the install phase from wrecking the project timeline. We’re not going to pretend this is glamorous work. But it’s work that matters, and managing it well separates the GCs who build tight houses from the ones who build complaints.
Understanding R-Value and Why It Actually Matters on Your Jobs
Before we talk about specific products, let’s get on the same page about R-value. You’ve seen it on every insulation spec sheet, and your energy code references it constantly. R-value measures thermal resistance. Higher number means the material slows heat transfer more effectively. Simple enough.
What trips up a lot of contractors is thinking R-value is the whole story. It’s not. R-value tells you how the insulation performs in a lab, sitting perfectly in a test cavity with no gaps, no compression, and no air movement. On an actual job site, installation quality matters just as much as the number on the bag. A batt rated at R-19 that’s compressed into a 2x4 cavity or cut short around an outlet box isn’t giving you R-19. It might be giving you R-11 or worse.
That’s why your choice of insulation type needs to account for the real conditions on your jobs. What are your wall assemblies? How clean are your framers leaving the cavities? Are your electricians and plumbers running lines where they said they would, or are you finding surprises during rough-in? All of this affects which insulation product will actually perform once it’s in the wall.
Your local building codes spell out minimum R-values by climate zone and assembly type. The 2024 IECC (which most jurisdictions are adopting or have adopted by now) bumped requirements again, so if you’re working off older specs, double-check before you bid. Getting the R-value wrong on a bid means either eating the cost difference or having an awkward conversation with your client.
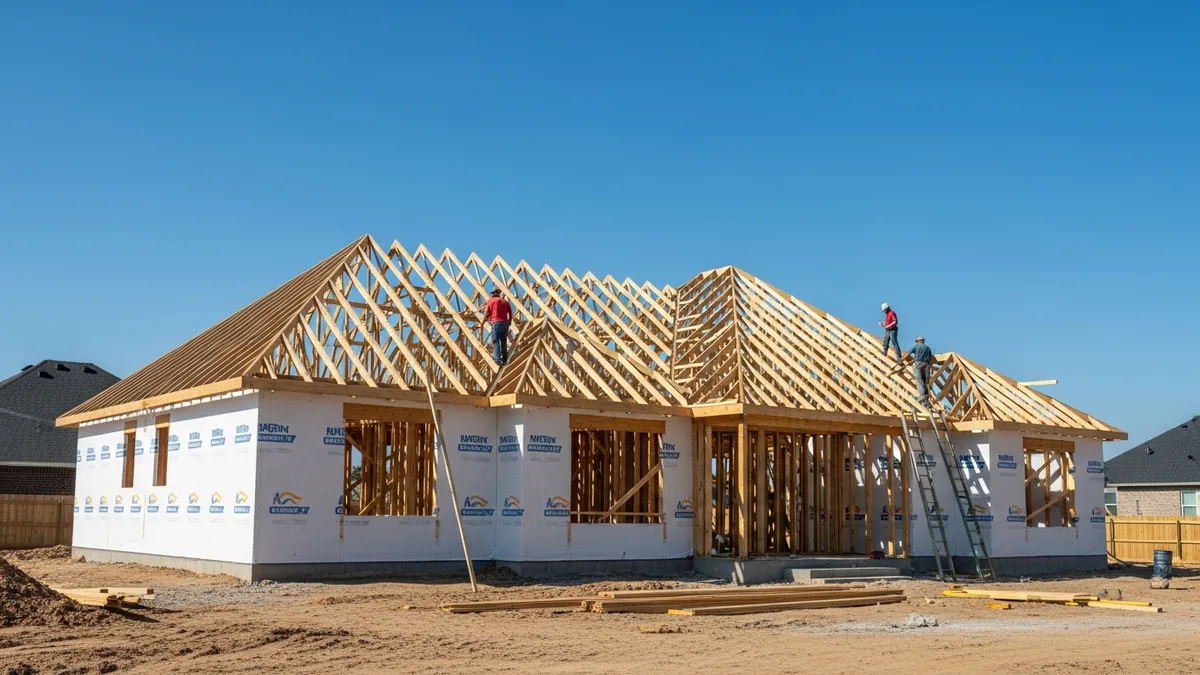
Fiberglass Batts and Blankets: The Workhorse You Already Know
Fiberglass batts are still the most common insulation product in residential construction, and there’s a reason for that. They’re affordable, they’re available everywhere, and just about every insulation sub in the country knows how to install them. For standard 2x4 and 2x6 wall cavities, fiberglass batts are a solid, predictable choice.
The numbers: standard fiberglass batts run about R-3.2 to R-3.8 per inch. A standard R-13 batt fits a 2x4 wall, and R-19 or R-21 fits a 2x6. For attics, you can go with unfaced batts stacked to whatever depth your code requires.
Where fiberglass works well:
- Standard framed walls with consistent cavity depths
- Attic floors with open access
- Projects where budget is tight and the code minimum is the target
- Builds where you have a reliable insulation crew that takes pride in fit and finish
Where fiberglass gets you in trouble:
- Walls with a lot of plumbing and electrical penetrations (batts get hacked up and stuffed back in)
- Cathedral ceilings and complex roof assemblies
- Any cavity where air sealing is critical and you’re relying on the batt alone to stop air movement (it won’t)
The biggest issue I see on job sites with fiberglass is sloppy installation. Gaps around wires, compression behind outlet boxes, batts that are cut too short and left with a visible gap at the top plate. Every one of those gaps is a thermal bypass, and inspectors are catching them more often now that energy codes have tightened up.
If you’re using fiberglass, make sure your insulation sub knows that “good enough” isn’t good enough anymore. Grade I installation (full contact on all six sides of the cavity, no gaps greater than 2% of the cavity area) is what code requires, and inspectors are grading it.
Spray Foam: Open-Cell vs. Closed-Cell and When Each One Makes Sense
Spray foam has gone from a specialty product to a mainstream option over the past decade. It’s more expensive than fiberglass, but it solves problems that batts can’t touch. The key is understanding the difference between open-cell and closed-cell, because they’re very different products with different applications.
Open-cell spray foam (about R-3.5 to R-3.7 per inch) expands to fill cavities completely, which eliminates the gap and compression issues you get with batts. It’s also a good air barrier, which is a big deal for energy code compliance. Open-cell is softer, more flexible, and vapor-permeable, which means it lets moisture pass through. That can be a good thing or a bad thing depending on your wall assembly and climate zone.
Closed-cell spray foam (about R-6 to R-7 per inch) is the premium option. It’s denser, stronger (it actually adds racking strength to your walls), and it’s both an air barrier and a vapor barrier. Two inches of closed-cell on a rim joist or in a crawl space is hard to beat. It’s also the go-to for flood-prone areas because it doesn’t absorb water.
When to spec open-cell:
- Interior walls where you want sound dampening
- Attic rooflines where you’re creating conditioned attic space
- Wall cavities where you want complete fill but don’t need the vapor barrier properties
When to spec closed-cell:
- Rim joists and band boards
- Below-grade walls and crawl spaces
- Any assembly where you need the vapor barrier built in
- Situations where you need high R-value in a thin cavity
The GC’s headache with spray foam is scheduling. Spray foam crews need the space to themselves. Nobody else can be in the area during application and for a curing period after. The off-gassing during application means the building needs to be ventilated, and some jurisdictions require a specific wait time before other trades can re-enter. If you don’t account for this in your schedule, you’ll have trades stacking up waiting to get back in.
Also, spray foam needs to be trimmed flush with the studs before drywall. If your foam sub leaves it proud of the framing, your drywall crew is going to have a fit, and rightfully so. Make this expectation clear in your sub agreement.
Blown-In and Loose-Fill: Cellulose, Fiberglass, and Mineral Wool
Blown-in insulation is a broad category that includes cellulose, loose-fill fiberglass, and mineral wool. Each has its place, and understanding the differences helps you spec the right product for the application.
Cellulose is made from recycled paper treated with fire retardants. It’s been around for decades and it’s a solid performer at roughly R-3.2 to R-3.8 per inch. Blown into attics, it settles into every gap and crevice, which gives you better coverage than batts laid across joists. For walls, dense-pack cellulose (blown into closed cavities through small holes) is a popular retrofit option and works well in new construction too.
Not sure if Projul is the right fit? Hear from contractors who use it every day.
The thing about cellulose is moisture. It absorbs water, and wet cellulose loses its R-value and can cause mold issues. In the right assembly with proper vapor management, cellulose performs great. In the wrong assembly, it’s a liability. Make sure your wall design accounts for drying potential, especially in cold climates.
Loose-fill fiberglass works similarly to cellulose for attic applications. It doesn’t absorb moisture the way cellulose does, which is an advantage in some situations. R-value is comparable. It’s lighter than cellulose, so you need more depth to hit the same R-value, but it doesn’t settle as much over time.
Mineral wool (also called rock wool or stone wool) is gaining ground, and for good reason. It’s fire-resistant up to about 2,000 degrees F, it doesn’t absorb water, and it has good sound-dampening properties. Mineral wool batts (like Rockwool ComfortBatt) are semi-rigid, which means they friction-fit into cavities without sagging. At about R-4.2 per inch, they outperform fiberglass by a bit.
Mineral wool costs more than fiberglass, but the ease of installation and better performance make it worth considering, especially on projects where fire resistance or sound control is a priority. For a deeper look at energy-efficient building practices, our green building guide covers how insulation choices fit into the bigger sustainability picture.
Rigid Foam and Continuous Insulation: Meeting the New Code Requirements
Here’s where things have changed the most in recent code cycles. The push for continuous insulation (CI) on exterior walls is real, and if you haven’t dealt with it yet on your projects, you will soon.
Continuous insulation means an unbroken layer of insulation on the exterior of the building envelope, typically rigid foam board or mineral wool boards installed over the sheathing. The reason codes are pushing CI is simple: wood studs are terrible insulators (and metal stud framing conducts even more heat). A 2x6 stud has an R-value of about R-6.9, while the cavity might be filled with R-21 insulation. That stud is a thermal bridge, and in a typical framed wall, studs make up about 25% of the wall area. CI eliminates those thermal bridges.
Common rigid foam types:
- EPS (Expanded Polystyrene): About R-4 per inch. Least expensive, most vapor-permeable of the foams. Good choice when you need some CI but want to let the wall dry to the exterior.
- XPS (Extruded Polystyrene): About R-5 per inch. The pink or blue boards you see everywhere. More moisture-resistant than EPS but less vapor-permeable. There are environmental concerns about the blowing agents used in XPS, which is worth knowing if your client cares about that.
- Polyiso (Polyisocyanurate): About R-6 to R-6.5 per inch at moderate temperatures. Best R-value per inch of the rigid foams. Performance drops in cold temperatures, though, so in very cold climates you may need to derate the R-value in your calculations.
The installation challenge with CI is that it changes your exterior detailing. Window and door flashing details get more complex. Your siding attachment needs to account for the foam thickness (longer fasteners, furring strips, or both). And your trim details at corners, soffits, and transitions all need to be thought through before you start.
This is where having good coordination with your framing crew pays off. If your framers know CI is part of the wall assembly from the start, they can plan rough openings and blocking accordingly. If they find out after the fact, you’re looking at rework.
For estimating purposes, CI adds material cost and labor time that a lot of GCs underestimate on their first few projects. The foam itself isn’t that expensive, but the additional flashing tape, longer fasteners, furring strips for siding attachment, and the extra labor to detail everything properly adds up. Track your actual costs on your first few CI projects so your future bids are dialed in.
Managing the Insulation Phase: Scheduling, Inspections, and Crew Coordination
Now let’s talk about the part that matters most to you as a GC: actually managing the insulation phase without it becoming a bottleneck.
Sequencing is everything. Insulation goes in after all rough-in inspections pass. That means electrical, plumbing, HVAC, and low-voltage all need to be roughed in, inspected, and approved before your insulation crew shows up. If one trade is late on rough-in, or if an inspection fails and needs a re-inspect, your insulation date moves. And when insulation moves, drywall moves, and everything after drywall moves with it.
The best thing you can do is build buffer into your schedule around the insulation phase. Not a week of dead time, but enough flex that a one-day delay on a rough-in inspection doesn’t cascade into a two-week schedule slip.
Coordinating with HVAC is critical. Duct runs, supply boots, and return air paths all need to be in place and inspected before insulation. If your HVAC sub is still hanging ductwork when the insulation crew shows up, somebody’s going home. Our HVAC coordination guide goes deeper on this, but the short version is: get your HVAC sub on the same page about the insulation date, and hold them to it.
Pre-insulation walkthrough. Before your insulation crew starts, walk the building yourself or have your super do it. You’re looking for:
- Open penetrations that need fire-stopping or air sealing
- Plumbing or electrical that got moved after the rough-in inspection and needs a re-inspect
- Backing and blocking for future fixtures (towel bars, grab bars, TV mounts) that needs to go in before the wall gets filled
- Any framing issues (bowed studs, missing headers, notches that are too deep) that should be addressed now
This walkthrough takes 30 minutes and can save you days of rework later.
Inspection coordination. Most jurisdictions require an insulation inspection before you can close up walls. Some inspectors are picky about grade of installation, vapor barrier placement, and R-value verification. Know what your local inspector looks for and make sure your insulation sub knows too. A failed insulation inspection is almost always a quick fix (stuff a gap here, add a piece there), but the re-inspection scheduling can cost you a day or two if the inspector is booked up.
Tracking it all. This is where a lot of GCs still rely on a whiteboard in the trailer or a group text chain, and it works until it doesn’t. When you’re running multiple jobs with overlapping insulation phases, you need a system that shows you where each project stands in the rough-in-to-drywall sequence. Being able to see that Job A is waiting on its plumbing re-inspect while Job B’s insulation crew is starting tomorrow and Job C needs an insulation inspection scheduled is the kind of visibility that keeps you ahead of problems instead of reacting to them.
If you’re still managing this with spreadsheets and texts, it might be worth looking at how Projul’s scheduling tools can give you that birds-eye view across all your active projects. You can grab a demo and see if it fits how you run your jobs.
Insulation Cost Breakdown: What GCs Actually Pay in 2025
Let’s talk numbers, because you can’t bid work you don’t understand the cost of. Insulation pricing varies by region, by product, and by the complexity of the install. But here are the ballpark ranges most contractors are seeing right now, and the factors that push costs up or down.
Fiberglass batts remain the cheapest option for most residential work. Installed cost typically runs $0.80 to $1.50 per square foot for standard wall cavities. Attic work with blown fiberglass runs a bit higher because of setup time and depth requirements, usually $1.00 to $1.80 per square foot depending on the target R-value. The material itself is cheap. What you’re paying for is labor and, honestly, a crew that cares enough to install it properly.
Cellulose blown-in costs about $1.00 to $1.60 per square foot for attics. Dense-pack cellulose in walls is more expensive because of the installation method (drilling holes, filling under pressure, patching), typically $1.50 to $2.50 per square foot. The material cost is low, but the labor is more skilled work than laying batts.
Open-cell spray foam runs $1.00 to $2.00 per board foot installed. For a 2x6 wall cavity that’s roughly 5.5 inches deep, you’re looking at $5.50 to $11.00 per square foot of wall area. That’s a big jump from fiberglass, and it’s why spray foam still isn’t the default on budget-conscious builds.
Closed-cell spray foam is the premium tier at $1.50 to $3.00 per board foot. You’re usually not filling the entire 2x6 cavity with closed-cell (that would be insanely expensive). A common approach is 2 inches of closed-cell for the vapor barrier and air barrier properties (about R-13), then filling the remaining cavity depth with fiberglass or open-cell. This hybrid approach gives you the best of both worlds without the sticker shock of full-cavity closed-cell.
Rigid foam boards for continuous insulation run $0.50 to $1.50 per square foot for the material alone. Add labor for installation, taping, flashing adjustments, and the longer fasteners needed for cladding attachment, and you’re looking at $2.00 to $4.00 per square foot all-in. On a 2,400-square-foot house with roughly 3,000 square feet of exterior wall area, that’s $6,000 to $12,000 just for the CI layer. It’s a real cost that needs to be in your bid.
Mineral wool batts fall between fiberglass and spray foam. Installed cost is typically $1.20 to $2.20 per square foot for wall cavities. The material costs more than fiberglass but the installation is actually easier because the semi-rigid batts hold their shape and friction-fit without stapling. Some crews find they’re faster with mineral wool than with fiberglass for that reason.
How to Protect Your Margin on Insulation
The biggest margin killer on insulation isn’t the material cost. It’s scope creep and rework. Here’s what eats your profit:
Change orders you didn’t see coming. The architect specs R-21 walls but the framing plan has 2x4 headers and odd cavities everywhere that can’t hit that number without spray foam. Now you’re either upgrading your insulation spec at your cost or writing a change order that makes the client unhappy. Read the plans carefully during the estimating phase and flag these conflicts before you sign the contract.
Inspection failures. A failed insulation inspection means your insulation sub comes back, makes the fix, and then you wait for the re-inspection. That’s usually two to three days of dead time. Your drywall crew was supposed to start and now they’re sitting at home or going to another job. The cascading cost of a failed inspection is almost always more than the fix itself.
Waste. Fiberglass batts come in standard widths for standard framing. But framing is never standard. Corners, odd bays, tubs, shower valves, and duct chases all create non-standard cavities that need custom-cut pieces. Good insulation crews minimize waste by planning their cuts. Bad crews rip open bags, stuff what fits, and leave the scraps on the floor. Track your material usage on a few jobs and you’ll find out quickly which category your sub falls into.
Temperature and weather delays. Spray foam has temperature requirements for application, typically above 40 degrees F for the substrate. If you’re building through winter in a cold climate, spray foam scheduling gets complicated. Cellulose can’t get wet during transport or before the building is dried in. Plan your insulation phase around weather patterns and seasonal conditions to avoid costly delays.
Insulation for Specific Building Types: Residential, Commercial, and Retrofits
Different project types present different insulation challenges. What works on a production home doesn’t necessarily work on a commercial tenant improvement or a gut renovation. Here’s how to think about insulation across the project types most GCs handle.
New Residential Construction
This is where most GCs encounter insulation, and it’s the most straightforward scenario. You’ve got clean, open cavities, consistent framing depths, and a predictable sequence from rough-in through insulation to drywall. The main decisions are:
- What product meets code for each assembly (walls, ceilings, floors over unconditioned space)?
- Is the budget there for spray foam or are we going with batts?
- Does the wall assembly require continuous insulation?
- What’s the air sealing strategy?
On production work where you’re building the same floor plans repeatedly, nail down your insulation scope and cost on the first few units, then lock it in for the rest of the project. Your insulation sub should be able to give you a per-unit price that holds for the full run. If costs are fluctuating unit to unit, something is wrong with either the scope definition or the crew’s efficiency.
Commercial and Light Commercial
Commercial insulation is a different world in several ways. Steel stud framing conducts heat much more readily than wood, which means thermal bridging is a bigger issue. Continuous insulation on the exterior is often required by code for commercial buildings, not just encouraged.
Ceiling assemblies in commercial work often involve insulation above a suspended ceiling grid, which is a different install than residential attic work. You may be dealing with multiple insulation types in the same building: rigid foam on the exterior, fiberglass batts in steel stud walls, and blown insulation above the ceiling.
Fire rating requirements in commercial construction also affect your insulation choices. Mineral wool’s fire resistance (non-combustible, rated to about 2,000 degrees F) makes it the preferred choice in many commercial fire-rated assemblies. Spray foam, while great for air sealing, needs an approved thermal barrier (usually 1/2-inch drywall) covering it in occupied spaces. This is true in residential too, but commercial inspectors tend to be more rigorous about enforcing it.
If you’re newer to commercial work and still building out your processes, our guide on construction project management covers the coordination basics that apply across all project types.
Renovation and Retrofit Work
Retrofit insulation is where things get unpredictable. You’re working with existing structures that may have:
- Unknown or inconsistent existing insulation (could be anything from newspaper to vermiculite to nothing at all)
- Asbestos-containing materials that require testing before you touch them
- Moisture damage behind walls that nobody knew about until you opened things up
- Non-standard framing dimensions that don’t match any current batt size
- Knob-and-tube wiring that can’t be covered with insulation until it’s replaced (this is a code requirement in most jurisdictions, and ignoring it is a fire hazard)
The golden rule on retrofit insulation: open up a test area before you bid the whole project. Cut into one or two walls to see what you’re dealing with. If the client won’t allow exploratory demo before contract signing, make sure your bid includes a clear allowance for unknowns and a mechanism for change orders when the walls come open.
Dense-pack cellulose is often the best retrofit option for walls because it can be blown into closed cavities through small holes. You don’t have to tear out all the existing drywall or plaster to insulate the walls. The holes get patched and painted, and the wall looks untouched from the inside. Just make sure you’re working with a crew that’s experienced with dense-pack. Done wrong, the cellulose doesn’t fill evenly and you end up with cold spots that are impossible to fix without reopening the wall.
For attic retrofits, air sealing the attic floor before adding insulation is absolutely critical. If you just blow new insulation on top of old without sealing the penetrations (plumbing vents, electrical boxes, top plates, dropped soffits, chimney chases), you’re insulating an air sieve. The money spent on insulation won’t perform because warm, moist air from the living space is still leaking into the attic.
Climate Zone Considerations: Matching Insulation Strategy to Geography
The United States is divided into climate zones ranging from Zone 1 (hot-humid, think Miami) to Zone 7 (very cold, think northern Minnesota). Your climate zone dictates your minimum R-values, your vapor management strategy, and which insulation products make the most sense for your builds.
Hot-Humid Climates (Zones 1-3)
In the southern states, your primary concern is keeping heat out and managing moisture from the exterior. The air is humid and warm, and the vapor drive is from outside to inside. This means:
- Vapor barriers on the exterior side of the wall (or no vapor barrier at all, just a vapor retarder)
- Never put a polyethylene vapor barrier on the interior side of a wall in Zone 1-3. You’ll trap moisture inside the wall assembly and cause mold.
- Attic insulation matters enormously because roof assemblies absorb a huge amount of solar heat. Radiant barriers in the attic (reflective foil on the underside of the roof sheathing) can reduce attic temperatures by 20-30 degrees, which reduces the cooling load on the HVAC system.
- Spray foam on the roofline to create a conditioned attic is popular in hot climates because it eliminates the furnace-like unconditioned attic space entirely.
The code minimum R-values in these zones are lower than up north (R-13 walls, R-30 to R-38 ceilings typically), but don’t let that fool you into thinking insulation doesn’t matter in hot climates. A poorly insulated house in Houston will run AC bills through the roof all summer, and the homeowner will be on the phone with you about it.
Mixed Climates (Zones 4-5)
The middle of the country deals with both heating and cooling seasons, which makes wall assembly design trickier. You need insulation that performs well in both directions, and your moisture management strategy has to account for vapor drives that reverse seasonally.
In these zones, the shift toward continuous insulation on exterior walls is happening fast. The 2024 IECC gives you a choice: meet the prescriptive R-value requirements (which now often require CI), or use the performance path where you model the whole building and demonstrate compliance through total energy performance. Most production builders are going prescriptive because it’s simpler, which means CI is becoming a standard part of the wall assembly.
Wall assemblies in Zones 4-5 often use a “split insulation” approach: cavity insulation (fiberglass, mineral wool, or spray foam) plus exterior CI (rigid foam or mineral wool board). The ratio of cavity R-value to CI R-value matters for moisture performance. A common rule of thumb is that at least 30-40% of the total wall R-value should be outboard of the sheathing in Zone 5. This keeps the sheathing warm enough that interior moisture doesn’t condense on it during winter.
Cold Climates (Zones 6-7)
Up north, insulation is a survival necessity, not a nice-to-have. Code-required R-values are significantly higher (R-20+5ci or R-13+10ci for walls, R-49 to R-60 for ceilings), and builders who underinsulate will have frozen pipes, ice dams, and angry homeowners.
Key considerations in cold climates:
- Triple-pane windows may be required or at least expected. Your insulation strategy needs to work with the window installation details, especially at the rough opening where foam-in-place sealant or backer rod and caulk prevents air leaks at the framing-to-window interface.
- Ice dam prevention is directly related to attic insulation and air sealing. Ice dams happen when warm air from the living space reaches the roof deck, melts snow from underneath, and the meltwater refreezes at the cold eave. Proper attic insulation, air sealing, and ventilation prevent this. Homeowners who’ve dealt with ice dam damage will absolutely ask about your insulation approach.
- Basement and foundation insulation is critical. In cold climates, an uninsulated basement wall is a massive energy drain. Closed-cell spray foam or rigid foam on the interior face of the foundation wall is standard practice. Make sure your insulation extends down to at least 2 feet below grade, or to the frost line per your local code.
- Polyiso performance drops in cold temperatures. If you’re using polyiso for exterior CI in Zone 6-7, derate the R-value. Most building scientists recommend using R-5 per inch instead of R-6 for polyiso in cold climates. XPS or mineral wool board may be better choices for CI in these zones because their R-value doesn’t fluctuate with temperature.
Understanding how climate zone affects every aspect of your building envelope is fundamental to bidding and building correctly. If you’re working across multiple climate zones, keep a cheat sheet in your project management system with the code requirements for each zone so you’re not guessing when a new project comes in.
How Technology Is Changing Insulation Management for Contractors
The insulation trade itself hasn’t changed dramatically in the past few years. Fiberglass is still fiberglass. Spray foam is still spray foam. But how GCs manage the insulation phase has changed, and the contractors who’ve adapted are running tighter schedules and catching fewer surprises.
Thermal Imaging and Quality Verification
Infrared cameras used to cost thousands of dollars and were only used by energy auditors. Now you can get a FLIR attachment for your phone for a few hundred bucks, and it’s worth every penny for insulation quality control. After insulation is installed but before drywall goes up, a quick scan with a thermal camera will show you every gap, void, and compressed batt in the building. Cold spots show up as blue or purple against the warmer orange and yellow of properly insulated areas.
Some GCs are now including thermal scans as part of their standard pre-drywall inspection process. It takes 20 minutes to walk a house with a thermal camera, and it catches defects that are invisible to the naked eye. When you find a problem, your insulation sub fixes it on the spot instead of after the drywall is up and the homeowner is complaining about a cold wall.
This also creates documentation you can share with the homeowner. Showing a client thermal images of their perfectly insulated walls builds confidence in your work and gives them something tangible to associate with the money they spent on insulation. It’s a small thing that goes a long way for client satisfaction and referrals.
Digital Scheduling and Trade Coordination
The insulation phase sits at a critical junction in the construction sequence. Every trade that does rough-in work has to be done and inspected before insulation starts, and every finishing trade is waiting on insulation (and the subsequent inspection) before they can begin. This makes the insulation phase a natural pinch point in your schedule.
Paper schedules and whiteboards can’t handle the dynamic nature of this coordination. When the plumber fails his rough-in inspection on Monday and needs a re-inspect on Wednesday, your insulation start date on Thursday is suddenly questionable. If you’re managing this information in your head or through text messages, something gets dropped eventually.
Construction-specific scheduling tools let you set up dependency chains so that when one task moves, the downstream tasks adjust automatically. Your insulation start date is linked to your last rough-in inspection. Your drywall start is linked to your insulation inspection. When one date changes, everything downstream shifts together, and your subs can see the updated schedule without you making 15 phone calls.
This matters even more when you’re running three, five, or ten jobs at once. Your insulation sub is probably working on multiple projects too, and they need to know your real dates, not the dates you put on the schedule two months ago before the plumber got backed up. Keeping your schedule current and visible to your key subs builds trust and makes them more likely to prioritize your jobs when things get tight.
Photo Documentation and Accountability
We mentioned taking photos before walls close up, but let’s dig into why this matters beyond just CYA documentation. Photos of installed insulation, tied to specific rooms and assemblies, create an accountability record that benefits everyone.
For your insulation sub, photos document that they did the work correctly. If there’s a callback a year later about a cold spot, you can pull up the photo from that wall and determine whether it’s an insulation issue or something else (a window seal failure, an HVAC balance problem, etc.).
For your office, photos attached to the project file create a permanent record that lives with the job. When your superintendent who ran that project moves on to another company (it happens), the institutional knowledge doesn’t leave with them. The next person can pull up the project, see exactly what was installed, and handle any warranty issue.
For your client, documentation demonstrates professionalism. Handing over a closeout package that includes photos of every wall cavity properly insulated is a level of transparency that most builders don’t provide. It sets you apart.
Common Insulation Mistakes That Cost GCs Time and Money
Let’s close with the mistakes I see most often on job sites. These aren’t exotic failure modes. They’re the basic stuff that still catches experienced contractors off guard.
1. Not accounting for insulation in the bid. This usually happens on remodels and additions where the existing structure has surprises. You open up a wall expecting standard cavities and find balloon framing, no fire stops, plumbing running diagonally through studs, or existing insulation that’s full of moisture or rodent damage. Always include a contingency line item for insulation scope changes on renovation work.
2. Letting the insulation sub drive the schedule. Your insulation sub has other jobs. If you don’t lock in their date early and confirm it a week out, they’ll bump you for a bigger project. Build the relationship, pay on time, and communicate schedule changes early. Good insulation subs are worth their weight in gold, and they remember which GCs are organized and which ones are chaotic.
3. Ignoring air sealing. Insulation and air sealing are two different things, but they work together. You can have R-40 in your attic, but if the top plates aren’t sealed, if there are gaps around recessed lights, and if the attic hatch is just a loose piece of drywall, you’re losing a huge amount of conditioned air. Many codes now require a blower door test, and air sealing deficiencies show up fast under pressure. Make sure air sealing is clearly assigned in your scope (insulation sub? framing crew? separate air sealing specialist?) and don’t assume someone else is handling it.
4. Wrong vapor barrier placement. Vapor barriers go on the warm side of the insulation. In cold climates, that means the interior side. In hot-humid climates, it can mean the exterior side or no vapor barrier at all (just a vapor retarder). Put the vapor barrier on the wrong side and you’re trapping moisture inside the wall assembly, which leads to mold, rot, and callbacks that will haunt you for years. When in doubt, consult the manufacturer’s installation guide for your specific climate zone.
5. Compressing batts around obstacles. This is the most common installation defect, period. Electricians run a wire through the middle of a stud bay. The insulation installer shoves the batt behind the wire, compressing it on one side and leaving an air gap on the other. The fix is to split the batt, with half behind the wire and half in front. It takes an extra 30 seconds per cavity and most of your insulation crew knows this, but it’s worth reinforcing during your pre-install meeting.
6. Skipping the attic. On a tight schedule, I’ve seen GCs let the drywall crew start hanging ceilings before the attic insulation is blown. The reasoning is usually “we’ll blow it from above after the ceiling is up.” And sure, that can work for the flat sections. But what about the eave baffles? What about air sealing the top plates? What about the areas above soffits where you need insulation dams? If those details don’t get addressed before the ceiling goes up, they usually don’t get addressed at all.
7. Not documenting the install. Take photos of every wall before it gets closed up. Document the insulation type, thickness, and installation quality in each area. This protects you during final inspection, during warranty callbacks, and if there’s ever a dispute about what was installed. A photo takes five seconds. A callback investigation without documentation takes five hours.
Ready to see how Projul can work for your crew? Schedule a free demo and we will walk you through it.
Insulation isn’t the most exciting part of a build, but it’s one of the most consequential. The choices you make during the spec phase and the quality you demand during installation directly affect your client’s comfort, their energy bills, and your reputation as a builder. Get it right, manage it well, and move on to the next phase knowing the envelope is solid.
Frequently Asked Questions
What insulation type has the highest R-value per inch?
When should insulation be installed during a residential build?
Do I need a vapor barrier with every insulation type?
How do I estimate insulation costs accurately for a bid?
Can insulation installs be done in phases on a large project?
Related Articles
Construction Electrical Rough-In Guide for General Contractors
The electrical rough-in is where circuit layout, box placement, and wire routing all have to come together before...
Read More →
Interior Finishing for Contractors: The Complete Drywall, Paint, and Trim Guide
Interior finishing is where your project goes from bare studs to a space your client can actually picture living in....
Read More →
Helical Piles and Screw Foundations: The Contractor's Complete Guide
Helical piles are showing up on more and more project specs. This guide covers everything a contractor needs to know...
Read More →