Soil Nail Walls vs MSE Retaining Structures Guide
If you have spent any time on highway projects, commercial site work, or hillside development, you have run into retaining structures. Sometimes the engineer calls for soil nails. Sometimes they spec an MSE wall. And sometimes the drawings show both on the same job.
These two systems solve the same basic problem, holding back earth, but they work in completely different ways. One goes in from the top down as you dig. The other builds up from the bottom. Choosing the wrong one, or mismanaging either during construction, will cost you time, money, and possibly a failure that makes the evening news.
This guide breaks down both systems from a contractor’s perspective. We will cover when each one makes sense, what the installation actually looks like in the field, what QC and testing you need to stay on top of, and how project management software helps you track this work without drowning in paper.
When to Use Soil Nail Walls vs. MSE Retaining Structures
The single biggest factor in choosing between these two systems is the direction of construction relative to the existing ground.
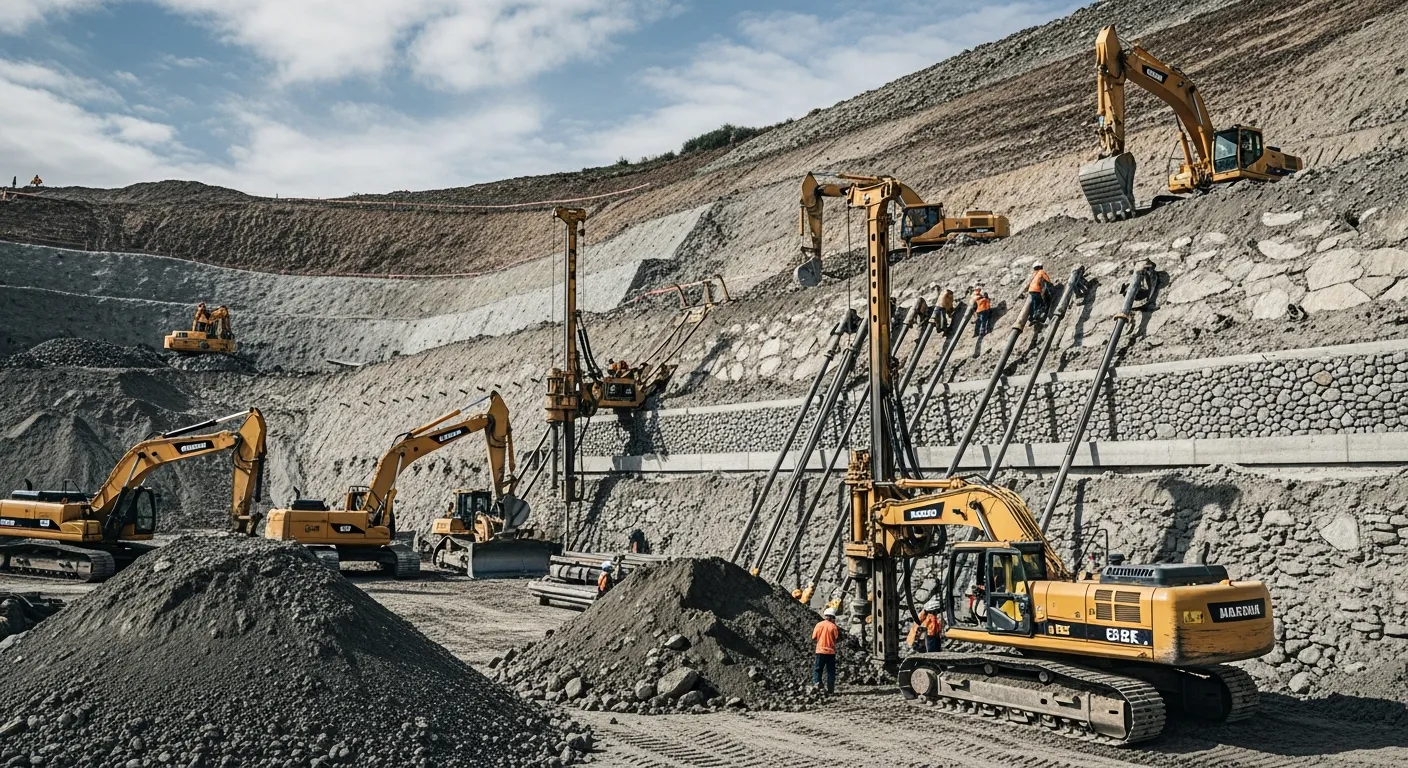
Soil nail walls are a top-down method. You start at the existing grade and excavate downward in lifts, typically four to six feet at a time. After each lift, you drill and grout the nails into the exposed face, then apply shotcrete. This makes soil nails the go-to choice when you are cutting into an existing slope or excavating next to an existing structure. Think highway widening projects where you are cutting into a hillside, or deep urban excavations where you need temporary or permanent earth retention.
MSE walls are a bottom-up method. You build from a prepared foundation upward, placing precast concrete panels or modular block facing while simultaneously backfilling and compacting reinforced soil behind the face. MSE walls work best when you are building up, like bridge abutments, highway embankments, raised roadways, or site retaining walls where you have room to bring in fill material.
Here is a quick decision framework:
- Cutting into existing ground? Soil nails are usually your answer.
- Building up from a lower grade? MSE wall is likely the better fit.
- Tight site with no room for fill placement? Soil nails.
- Long runs of wall at consistent height? MSE tends to be more cost-effective.
- Temporary shoring that becomes permanent? Soil nails can serve double duty.
- Bridge abutment or structure support? MSE walls handle surcharge loads well.
Cost-wise, soil nail walls typically run $25 to $55 per square foot of wall face, depending on nail length and ground conditions. MSE walls range from $20 to $45 per square foot, but you have to factor in the cost of importing, placing, and compacting select backfill material. On jobs where excavation and earthwork quantities are already large, MSE fill placement may blend in with other site work. On tight urban sites, trucking in thousands of yards of fill may not be practical, pushing you toward soil nails.
The geotechnical report drives a lot of this decision. Soil nails need ground that will stand unsupported for the few hours between excavation and nail installation. Loose sands, soft clays, and high water table conditions make soil nailing difficult or impossible. MSE walls need a competent foundation but are less dependent on the in-situ soil quality since you are building with imported material.
Design Considerations That Affect Your Build
Even though the design engineer stamps the drawings, contractors who understand the design basics make fewer mistakes in the field and catch problems before they become expensive.
Soil Nail Wall Design Basics
Soil nails work through friction between the grout and surrounding soil. The nail transfers the load from the potentially unstable soil mass to the stable ground behind the failure plane. Key design parameters include:
- Nail length: Typically 60% to 100% of the wall height. A 30-foot wall might have nails ranging from 18 to 30 feet long.
- Nail spacing: Usually four to six feet on center, both horizontally and vertically.
- Nail inclination: Drilled at 10 to 20 degrees below horizontal.
- Drill hole diameter: Four to eight inches, depending on the grout method.
- Facing thickness: Initial shotcrete is typically four inches, with a final structural facing of eight inches or more for permanent walls.
The design has to account for internal stability (nail pullout and tensile capacity), external stability (sliding, overturning, bearing), and global stability (deep-seated failure). If the geotech report shows weak layers or variable soil conditions, the nail lengths and spacing will change across the wall face. Pay close attention to the foundation and excavation plans because any deviation from assumed soil conditions can require redesign.
MSE Wall Design Basics
MSE walls work by creating a reinforced soil mass that acts as a gravity structure. The reinforcement, whether geogrid or metallic strips, ties the facing panels back into the compacted fill. Key design parameters include:
- Reinforcement length: Typically 70% of the wall height, measured from the face back into the fill. A 20-foot wall needs about 14 feet of reinforcement length.
- Reinforcement spacing: Vertical spacing matches the panel or block height, usually 18 to 30 inches. Closer spacing in lower lifts where loads are highest.
- Backfill specification: Select granular fill meeting strict gradation, plasticity, and electrochemical requirements. This is not negotiable.
- Facing type: Precast concrete panels (segmental or full-height), modular concrete blocks, or wire-faced with geotextile wrap.
- Foundation preparation: Level pad, typically a concrete leveling pad for panel walls.
MSE walls are sensitive to differential settlement. If the foundation settles unevenly, panels can crack, joints open up, and the wall looks terrible even if it is still structurally sound. The design should address foundation conditions, and you need to verify bearing capacity before starting. Check the concrete and foundation requirements early in your planning.
Installation Sequence: Soil Nail Walls Step by Step
Soil nail wall construction follows a repetitive cycle that moves from the top of the wall to the bottom. Each lift typically takes one to three days depending on wall length and crew size.
Step 1: Initial Excavation Excavate the first lift, usually four to six feet deep, to expose a near-vertical face. The soil needs to stand unsupported long enough for the nails to go in and the shotcrete to be applied. If the face is sloughing or caving, you have a problem that needs engineering attention before proceeding.
Step 2: Drill and Install Nails A track-mounted drill rig bores holes at the specified spacing, angle, and depth. A threaded steel bar (typically #8 or #10 rebar, or a dedicated nail bar with a bearing plate on the head) is inserted into the hole. Neat cement grout is then pumped into the hole from the bottom up, filling the annular space around the bar. The grout bond between the bar and soil is what provides pullout resistance.
Step 3: Install Drainage Before applying shotcrete, install geocomposite strip drains between nail rows. These drain strips run vertically from the top of the wall to a collection pipe at the base. Skip this step, and hydrostatic pressure will build behind the wall and compromise the system.
Step 4: Place Reinforcement and Shoot Shotcrete Welded wire mesh (typically 4x4 W2.9xW2.9 or similar) is placed against the exposed soil face and connected to the nail heads with bearing plates and nuts. Shotcrete is then applied to the specified thickness, usually four inches for the initial facing. The shotcrete must cover the mesh and embed the bearing plates.
Step 5: Repeat Move down to the next lift and repeat Steps 1 through 4. Each subsequent lift ties into the one above through the continuous mesh and drain strips.
Step 6: Final Facing (if permanent) After all lifts are complete and the wall has reached its full height, a final structural facing of reinforced shotcrete or cast-in-place concrete is applied. This is where your inspection and quality control processes really matter, because the final facing covers up everything beneath it.
The critical path on soil nail work is usually the drill rig. On a typical wall, one drill rig can install 15 to 25 nails per day. If your wall has 300 nails, you are looking at 12 to 20 drilling days minimum. Plan your crew scheduling around rig availability.
Installation Sequence: MSE Walls Step by Step
Don’t just take our word for it. See what contractors say about Projul.
MSE wall construction is more methodical and repetitive, but the tolerances are tight and the backfill process is where most problems occur.
Step 1: Foundation Preparation Excavate to the design foundation level. Proof-roll or test the subgrade to confirm bearing capacity meets the design requirement. Place and finish the concrete leveling pad, which is typically an unreinforced strip of concrete about six inches thick and one to two feet wide. The leveling pad sets the alignment for the entire wall, so get it right.
Step 2: Set First Course of Panels Place the first row of precast panels on the leveling pad. Panels are set with a slight batter (lean back into the fill) to account for outward deflection during backfilling. Temporary bracing holds panels plumb until enough backfill is placed to hold them in position. Panel alignment tolerances are tight, typically plus or minus three-quarters of an inch.
Step 3: Place and Connect Reinforcement Lay geogrid or metallic reinforcement strips on the compacted fill surface behind the panels. Connect the reinforcement to the panel through cast-in hardware (bodkin joints for geogrid, bolted connections for metallic strips). The reinforcement must extend the full design length perpendicular to the wall face.
Step 4: Backfill and Compact Place select backfill in lifts of eight to twelve inches (loose) and compact to 95% of standard Proctor density (or as specified). This is the most critical step in the entire process. Under-compacted fill will settle and pull the panels out of alignment. Over-compacted fill, especially near the panels, can push the face outward. Keep heavy compaction equipment at least three feet from the wall face and use lighter plate compactors in that zone.
Step 5: Repeat Set the next course of panels, connect reinforcement, backfill and compact. Each lift adds another 18 to 30 inches of wall height. Continue until you reach the design height.
Step 6: Cap and Finish Install coping or cap units along the top of the wall. Complete any required drainage features behind and at the base of the wall. Backfill above the reinforced zone to final grade.
Production on MSE walls is driven by two things: panel setting speed and backfill compaction speed. The panel crew and the fill crew need to stay in sync. If your fill operation gets ahead of your panel crew, you end up with unsupported fill that can slough against the back of the panels. If your panel crew gets too far ahead, they are sitting idle waiting for fill. Coordination here is everything.
QC, Testing, and What Inspectors Will Look For
Both systems have specific testing and QC requirements that you cannot shortcut. Failing a test on a retaining structure is not like failing a concrete cylinder, because the fix is often demolition and reconstruction.
Soil Nail Wall Testing
Proof tests are required on a percentage of production nails, typically 5% of total nails. A proof test loads the nail to 150% of the design load and holds it for a set time (usually 10 minutes), measuring creep. If the nail holds without excessive movement, it passes.
Verification tests are done on sacrificial nails (not production nails) at the start of the project. These are loaded to 200% of design load in incremental steps, measuring deflection at each stage. The verification test confirms the design pullout values match actual field conditions. Fail the verification test, and you may need to redesign the entire wall.
Shotcrete testing includes compressive strength testing (cores or panels), thickness verification, and visual inspection for voids, dry spots, and laminations. The quality control protocols for shotcrete are more demanding than typical cast-in-place concrete because the application method introduces more variability.
Grout testing includes flow cone testing for consistency and compressive strength testing of grout cubes.
What inspectors will flag:
- Nails installed at the wrong angle or spacing
- Incomplete grout return (grout not visible at the drill hole collar)
- Shotcrete thickness less than specified
- Missing or improperly connected drain strips
- Bearing plates not properly seated against the shotcrete
- Corrosion protection missing on permanent wall components
MSE Wall Testing
Backfill testing is the big one. Nuclear density testing (or sand cone tests) at a frequency of one test per 200 to 500 square feet of wall face, per lift. The fill must meet density and moisture requirements. Gradation testing confirms the backfill material meets the specification, typically one sieve analysis per 2,000 to 5,000 cubic yards.
Panel inspection happens at the precast plant and on site. Check for cracks, spalls, proper dimensions, and correct reinforcement and connection hardware. Damaged panels get rejected.
Reinforcement testing includes connection strength verification (usually done by the manufacturer with certified test reports) and visual inspection of reinforcement placement, overlap, and connection to panels.
Survey verification is critical for MSE walls. Panel alignment, batter, and top-of-wall elevation should be surveyed at each course. Catching a misalignment at the third course is fixable. Catching it at the fifteenth course means tearing down twelve courses.
What inspectors will flag:
- Fill density below specification
- Incorrect backfill material (too many fines, oversized particles, or reactive soils)
- Panels out of alignment tolerance
- Reinforcement not extending to full design length
- Heavy equipment compacting within three feet of panels
- Drainage not installed per plans
Tracking Retaining Structure Work With Construction Software
Soil nail walls and MSE structures generate a mountain of documentation. Test results, daily drill logs, grout batch records, compaction reports, survey data, panel delivery tickets, material certifications, and inspection reports all pile up fast. Managing this with clipboards and filing cabinets is a losing battle, especially when the DOT inspector shows up asking for the proof test results from nail number 247.
Construction project management software changes how you handle this work in a few key ways.
Daily logs tied to production. Instead of generic daily reports, you can log production by wall station and lift number. How many nails were drilled today? What station range? What lift? Was shotcrete applied? This gives you a real-time picture of progress against the schedule. Estimating and scheduling tools that let you break a wall into discrete lifts and track completion by section are worth their weight in gold on these jobs.
Document management. Every test report, certification, and inspection record can be attached to the specific wall section it applies to. When the owner’s rep asks for the compaction test results behind panel 47, you pull it up in seconds instead of digging through boxes. This is the kind of job costing and documentation discipline that separates professional operations from outfits that are always scrambling.
Photo documentation. Retaining structures have a lot of work that gets buried. Drain strips behind shotcrete, reinforcement connections behind panels, nail installations before grouting. Timestamped and geotagged photos tied to specific wall sections create a permanent record of what is behind the finished face.
Schedule tracking. Both soil nail and MSE construction are highly sequential, meaning a delay on one lift cascades through every subsequent lift. Software that shows you critical path impacts in real time lets you make decisions about adding resources, adjusting sequences, or notifying the owner before small delays become big ones.
Subcontractor coordination. On most jobs, the retaining wall work is performed by a specialty sub. As the GC, you need visibility into their production, testing, and schedule performance without micromanaging. A shared platform where the sub logs their daily work, uploads test results, and updates their schedule keeps everyone on the same page.
RFIs and design changes. Retaining structures frequently generate RFIs, especially when field conditions do not match the geotechnical assumptions. Tracking RFIs, engineer responses, and resulting change orders in one system prevents the all-too-common situation where the sub builds something based on a verbal direction that nobody documented.
Software does not replace field knowledge on these jobs. You still need experienced crews, competent inspectors, and engineers who understand the difference between textbook soil mechanics and what actually shows up in the drill cuttings. But the right software platform takes the administrative burden off your field staff so they can focus on building the wall correctly.
Practical Lessons From the Field
After watching dozens of soil nail and MSE wall projects go right (and a few go sideways), here are the lessons that keep coming up.
Do not rush the geotech. The geotechnical investigation is the foundation of your retaining wall design. Skimpy borings or borings in the wrong locations lead to surprises during construction. If the geotech report is based on two borings for a 500-foot wall, push back and ask for more. The cost of additional borings is nothing compared to a redesign mid-construction.
Respect the water. Both systems are vulnerable to water. Soil nail walls need drain strips and weep holes installed correctly at every lift. MSE walls need chimney drains and free-draining backfill. Water finds every shortcut, every gap in the drain fabric, every missed connection. Budget time and money for drainage and do not let it become an afterthought.
Material lead times will bite you. Precast MSE panels typically have a 6 to 12 week lead time. Soil nail bars, centralizers, bearing plates, and specialty grout may need 4 to 8 weeks. Get your material orders in early. A crew sitting idle because panels have not arrived is an expensive problem.
Keep the specialty sub in the loop on schedule changes. Soil nail and MSE subcontractors are specialists who move from job to job. If your site work falls behind and the retaining wall start date shifts by three weeks, tell the sub immediately. They may have another commitment and not be available when you are finally ready, which could cost you months.
Verify, then verify again. Nail spacing, panel alignment, reinforcement lengths, backfill gradation. These are all things that are easy to check during installation and nearly impossible to fix after the fact. Build verification checkpoints into your daily routine. Do not wait for the inspector to catch a problem that your crew should have caught first.
Document everything you bury. Ten years from now, somebody is going to want to know what is behind that shotcrete face or inside that reinforced fill mass. Photos, test records, as-built surveys, and material certs all need to be organized and archived. This is where digital project management tools pay for themselves many times over, because paper records from a job a decade ago have a way of disappearing.
See how Projul makes this easy. Schedule a free demo to get started.
Common Failure Modes and How to Prevent Them
Retaining wall failures make headlines, and they always trace back to something that could have been caught during construction. Understanding the most common failure modes helps you know what to watch for before it becomes a warranty call or worse.
Soil Nail Wall Failures
Inadequate grout coverage. When the grout does not fill the full annular space around the nail bar, you lose bond length. This can happen when the drill hole intersects a void, a gravel seam, or a zone where the ground keeps collapsing into the hole. If grout return at the collar is less than expected, or you are pumping far more grout than the theoretical hole volume, something is off. Stop and evaluate before moving on. A nail with 60% grout coverage does not give you 60% of the design capacity. It might give you 30% or less because the load concentrates on the grouted sections.
Face drainage failure. This is the number one killer. Water gets behind the shotcrete, hydrostatic pressure builds, and eventually the facing blows out or the entire soil mass mobilizes. You will see telltale signs before a full failure: wet spots on the shotcrete face, staining below weep holes that suddenly go dry (meaning they are clogged), or bulging in the facing. The fix is almost always to go back and install additional drainage, which means cutting into finished shotcrete, which is expensive and ugly. It is much cheaper to install the drainage correctly the first time.
Excavation overcut. When the excavator operator takes too deep a bite, exposing more face than the soil can support before nails go in, you get localized or full-face failures. On marginal soils, the difference between a five-foot lift and a seven-foot lift can be the difference between a stable face and a collapse. Operators need to understand that retaining wall excavation is precision work, not bulk earthmoving. Mark your lift lines clearly and hold the operator accountable.
Corrosion on permanent walls. Soil nails in permanent applications need corrosion protection, typically epoxy-coated bars or encapsulated double-corrosion-protected (DCP) nails. If the specs call for DCP nails and the sub shows up with bare bar because “it’s the same steel,” that is a rejection. Corrosion protection is a 75-year design life issue, and there is no way to go back and add it after the wall is built.
MSE Wall Failures
Backfill quality problems. The single most common MSE wall issue is using the wrong backfill. The specification exists for a reason. Fill with too many fines holds water. Fill with reactive minerals attacks metallic reinforcement. Fill with oversized particles damages geogrid and creates voids that lead to settlement. Test your fill source before you start hauling, and retest whenever the pit face changes. A few hundred dollars in lab testing saves tens of thousands in wall repairs.
Differential settlement. When one section of the wall settles more than an adjacent section, the panels rack, joints open, and aesthetics suffer. In severe cases, the reinforcement connections can fail. The answer is proper foundation investigation and treatment before wall construction starts. If the geotech shows variable conditions along the wall alignment, talk to the engineer about surcharging, ground improvement, or adjusting the foundation design. Do not just build and hope.
Compaction next to panels. Every MSE wall specification says to keep heavy compaction equipment away from the panels. Every experienced MSE contractor has a story about the general contractor’s fill crew running a big roller right up to the panels and pushing the face out two inches. Use plate compactors within three feet of the face. Use a smaller roller in the three-to-six-foot zone. Full-size rollers stay beyond six feet. Post the compaction zone rules on the wall, and make sure every equipment operator on site understands them.
Poor panel alignment that compounds. A quarter-inch error on the first course becomes a half-inch error on the fifth course and a two-inch error by the fifteenth course. Survey every course. If a course is trending out of tolerance, fix it on the next course rather than hoping it self-corrects. Once panels are buried in fill, there is no adjustment.
Prevention for both wall types comes down to the same principles: follow the specs, test everything the spec says to test, fix small problems before they become big ones, and document what you did. Using construction management software to track these checkpoints in real time means nothing slips through the cracks between shift changes or crew rotations.
Bid Day Considerations: Pricing Retaining Wall Work
Whether you are the GC pricing the full site package or a specialty sub pricing just the wall, retaining structure estimates have some unique characteristics that trip up contractors who do not do this work regularly.
Soil Nail Wall Estimating
Your major cost drivers are drill rig time, nail materials (bar, grout, centralizers, plates), shotcrete, and mobilization. Drill rig day rates vary significantly by region, but expect $3,000 to $8,000 per day for the rig and operator. A two-person support crew adds another $1,500 to $2,500 per day. Grout materials run $8 to $15 per nail depending on hole diameter and length.
Shotcrete is priced by the cubic yard placed, but the real cost driver is the nozzleman and pump setup. Mobilizing a shotcrete pump for a small wall costs nearly as much as for a large one, so unit prices drop significantly as wall area increases. A 2,000 square foot wall might run $50 per square foot while a 10,000 square foot wall might come in at $30.
Do not forget proof testing costs. A hydraulic jack setup and calibrated gauge, plus the technician time, runs $500 to $1,000 per test. If the spec requires testing 5% of 300 nails, that is 15 tests at roughly $750 each, or $11,250.
Verification testing at the start of the job requires sacrificial nails (they are loaded to failure or near-failure and cannot be used as production nails). Budget for 3 to 5 verification nails, fully installed plus tested, at $2,000 to $4,000 each.
MSE Wall Estimating
Panels are typically priced by the square foot of face area, and the manufacturer quotes include the reinforcement. Panel costs range from $10 to $25 per square foot of face depending on panel style, finish, and reinforcement type. Delivery is a significant cost, especially for large segmental panels that require crane offloading.
Backfill is often the wild card in MSE wall pricing. You need to know the reinforced zone volume (wall length times wall height times reinforcement length), plus the retained fill behind the reinforced zone. Calculate the tonnage, get a delivered price from your fill source, and add a 10% to 15% waste factor. Then add compaction costs: equipment, fuel, operator time, and nuclear density testing.
The leveling pad, while small in material terms, takes more time than most estimators expect. Forming, placing, and finishing a narrow concrete strip to the required elevation and alignment tolerance is slow, fussy work. Budget a full day for every 100 to 150 linear feet of leveling pad.
One thing that catches GCs off guard is the panel erection crane. MSE panels weigh 4,000 to 8,000 pounds each. You need a crane or large excavator with a lifting attachment for every day of panel setting. If the wall sub does not include their own crane, you need to provide one.
Your construction estimating process should break retaining walls into these granular line items rather than carrying a single lump sum. When the owner asks for a value engineering comparison between soil nails and MSE, you want to show a clear cost breakdown, not a guess.
Long-Term Maintenance and Monitoring
Retaining walls are not build-and-forget structures. Both soil nail walls and MSE walls require periodic inspection and maintenance, and the owner needs to understand this before you hand over the keys.
Soil Nail Wall Maintenance
Shotcrete facing should be inspected annually for cracking, spalling, staining, or wet spots. Surface cracks less than 1/16 inch wide are typically cosmetic. Cracks wider than that, especially horizontal cracks that correspond to nail rows, need engineering evaluation.
Weep holes and toe drains must remain clear. Sediment buildup, vegetation, and rodent activity can block drainage outlets. A blocked drain means water is building up behind the wall. Include drain maintenance in the owner’s annual checklist.
On permanent walls with architectural finishes, the finish coat protects the structural shotcrete from freeze-thaw damage and UV degradation. If the finish coat cracks or delaminates, water gets to the structural layer and deterioration accelerates. Repair finish coat damage promptly.
Monitoring instruments, if installed, should be read on the schedule the engineer specified. Inclinometers, survey points, and load cells on selected nails provide early warning of movement. If the owner does not have staff to read instruments, recommend a monitoring contract with a geotechnical firm.
MSE Wall Maintenance
Panel joints should be checked annually for opening, closing, or differential movement. Joint filler (typically a foam backer rod and sealant) keeps soil from migrating through joints. Deteriorated joint filler should be replaced.
Surface drainage above the wall is critical. Water flowing over the wall face erodes joint filler and can infiltrate the reinforced fill zone. Maintain ditches, swales, and curbs that direct surface water away from the wall.
Vegetation management matters more than you might think. Tree roots that grow into the reinforced zone can damage geogrid or displace panels. Small shrubs and groundcover on top of the wall are fine. Trees should be kept at least as far from the wall face as their expected mature root spread.
For walls along roadways, impact damage from vehicles is a real concern. Cracked or displaced panels should be assessed promptly, as a damaged section can compromise the reinforcement connection and allow fill to escape.
The best thing you can do for the owner is provide a clear, written maintenance guide as part of your project closeout documentation. Include a recommended inspection schedule, a list of what to look for, and contact information for qualified repair contractors. This is also a good place to reference the as-built records that you carefully organized in your project management system during construction. Those records become invaluable when a repair contractor needs to understand what is behind the wall face 10 or 20 years down the road.
Hybrid Projects: When Both Systems Show Up on the Same Job
On larger civil and site development projects, it is not uncommon to see both soil nail walls and MSE walls specified on the same set of plans. A highway interchange might have soil nail walls where the road cuts into existing hillsides and MSE walls where embankments support approach ramps. A commercial site might use soil nails for a temporary excavation support that stays in place as permanent retention, while an MSE wall provides a landscaped entry feature along the road frontage.
Managing both systems on one project doubles your coordination complexity. You may have two different specialty subcontractors, two different testing programs, two different material supply chains, and two different sets of shop drawings going through review at the same time. This is where a solid scheduling and project tracking workflow becomes essential rather than optional.
A few tips for hybrid projects:
Separate your cost codes. Do not lump both wall types under one cost code. You need to track labor, materials, and testing costs separately for each system. When the owner asks why the MSE wall is over budget but the soil nail wall is under, you want clear numbers.
Coordinate backfill sources early. If you are importing select fill for the MSE wall and the soil nail wall excavation is generating spoils, see if the spoils meet MSE fill specifications. If they do, you just saved significant haul-off and import costs. If they do not, make sure the spoil pile is clearly separated from the MSE fill stockpile so there is no cross-contamination.
Sequence the work to share equipment. If both walls need a crane, schedule panel setting and soil nail wall anchor installation so the crane can move between the two. If both need survey support, batch your survey requests rather than having the surveyor make separate trips.
Hold a pre-construction meeting for each wall type. Even if it is the same GC team managing both, the installation crews, inspectors, and testing firms may be different. Each wall deserves its own pre-con where you walk through the specs, the testing plan, the production schedule, and the documentation requirements. Do not combine them into one meeting where half the room zones out during the part that does not apply to them.
Watch your excavation sequencing. On sites where both systems are present, the soil nail wall excavation may need to proceed before the MSE wall foundation is prepared, or vice versa. Cutting too close to a planned MSE wall foundation before the foundation is ready can undermine the bearing surface. Building an MSE wall too close to an active soil nail excavation can surcharge the cut face. Plan the sequencing with the engineer and stick to it.
Retaining structures are some of the most engineered, most inspected, and most consequential elements on any site. Whether you are drilling nails into a hillside or stacking panels against compacted fill, the margin for error is thin. Understand the systems, follow the sequences, test what needs testing, and keep your records tight. That is how these walls get built right.
Frequently Asked Questions
What is the difference between a soil nail wall and an MSE retaining wall?
How deep can a soil nail wall go?
How long does it take to build an MSE retaining wall?
Do soil nail walls need a drainage system?
Can MSE walls be used in wet or saturated soils?
Related Articles

Construction Bridge Building and Repair: A Contractor's Field Guide
Bridge construction and repair demand a different level of coordination than most commercial or residential projects....
Read More →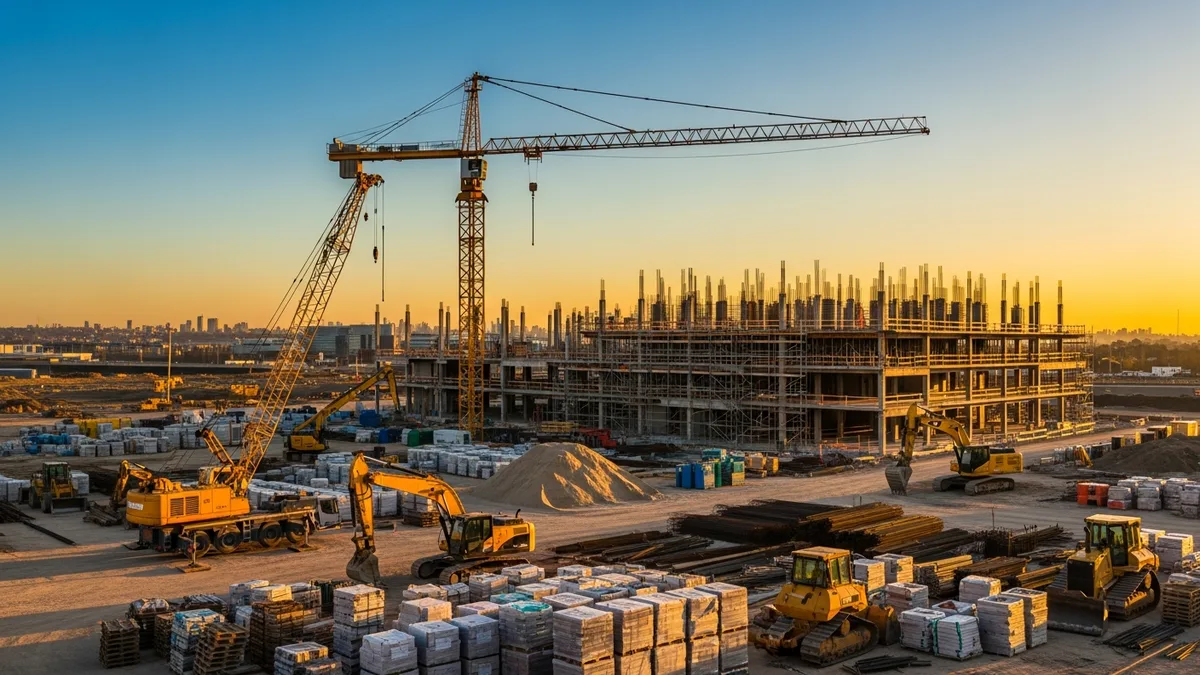
Construction Data Center & Server Room Build-Out Guide
Data center build-outs are some of the most demanding projects in commercial construction. Every system has to work...
Read More →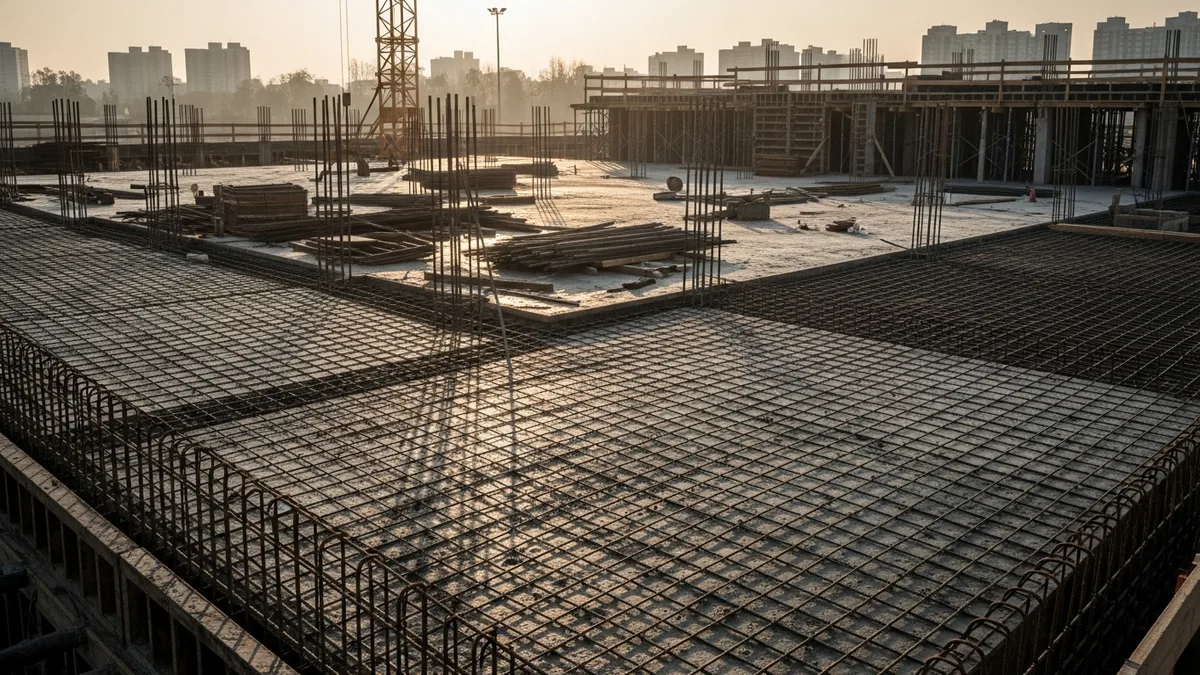
Construction Wastewater Treatment Plant Guide: Concrete Tankage, Process Piping, and SCADA
Building a wastewater treatment plant is one of the most demanding projects a contractor can take on. From massive...
Read More →